manuals.online logo
Brands
  1. Home
  2. •
  3. Brands
  4. •
  5. Hunter Products
  6. •
  7. Motorized Toy Car
  8. •
  9. Hunter Products ZPV119 User manual

Hunter Products ZPV119 User manual

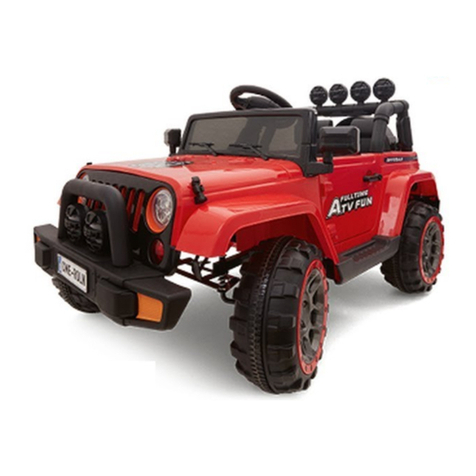
ZPV119 FIRE TRUCK
SUITABLE FOR 3 YEARS+
MAXIMUM USER WEIGHT: 20KG
ADULT ASSEMBLY AND
SUPERVISION REQUIRED
BOX CONTENTS:
TOY FIRE TRUCK WITH BATTERY
DECAL
CHARGER
SPANNER
OWNER’S MANUAL
OWNER’S MANUAL
READ AND UNDERSTAND THIS ENTIRE MANUAL BEFORE USING!
BEFORE FIRST TIME USE, CHARGE THE
BATTERY FOR AT LEAST 8-12 HOURS.
PLEASE KEEP THIS MANUAL FOR FUTURE REFERENCE AS IT CONTAINS
IMPORTANT INFORMATION.
(A) BEFORE USE
(B) SPECIFICATION
DIRECTORY
External dimensions
User’s proper age
Loading limitation
Speed
Battery Spec
Power Mode
Charging Spec
Charging Time
Power life
Fuse Spec
88*42*52cm
suitable for children
around 3-8years old
20 KGS
3 km/hr
6V, 4.5AH
Rechargeable
6V 500mA
8-12 hours
280 times charging
Self-resetting fuse
Please read carefully before using our product manual, which tells you the
detailed installation and correct use, Then can avoid damage and injury caused
by improper operation . Particularly important is that it tells you a lot about safety
precautions, Please memorize these and guide your child with patience. Please
place the instructions in easily accessible place for future reference.
BEFORE USE
SPECIFICATION
PRECAUTIONS
EXPLODED DIAGRAM
PARTS
ASSEMBLY DIAGRAM
USE INFORMATION
FUSE
CHARGING AND BATTERY SAFETY
CARE AND MAINTENANCE
TROUBLESHOOTING GUIDE
1
(A)
(B)
(C)
(D)
(E)
(F)
(G)
(H)
(I)
(J)
(K)
(C) PRECAUTIONS
2
WARNING:
ADULT ASSEMBLY REQUIRED.
Read entire instructions carefully before assembling this product.
To avoid injury to small parts children under 3 years old prohibited.
WARNING: ASSEMBLY
· Keep these instructions for future reference.
· Prior to assembly, this package contains small parts: hardware which is a
choking hazard and may contain sharp edges and sharp points. Keep product
away from children until assembled.
· Ensure working area is free of danger, always dispose packaging material in
such a way that it may not cause any harm.
Plastic bags can be dangerous. To avoid suffocation keep plastic bags away
from babies and children.
· To prevent serious injury, children must not use the equipment until completely
assembled.
· Spare parts exhange should be operated by an adult, because the battery is very
heavy and the internal acidic electrolyte, if any leakage should avoid touch the
liquid, and need a professional disposition. If accidental with the electrolyte, it is
timely at least 15 minutes rinse with cold water and seek medical treatment.
IMPORTANT - MUST READ CAREFULLY
WARNING: USE
TO AVOID SERIOUS INJURY: Continuous adult supervision is required while this
vehicle is in operation.
· To reduce the risk of injury, adult supervision is required. DO NOT leave the
child play vehicle alone to avoid accidents.
· NEVER use in or near roadways, near motor vehicles, on or near steep inclines
or steps, swimming pools or other bodies of water and dangerous place, always
wear shoes, and NEVER allow more than 1 rider.
· NEVER allow children to ride at night.
· Instruct children on proper use of this product and to sit properly when driving.
DO NOT RIDE VEHICLE STANDING UP.
· It is recommended that the rider always wears safety equipment such as fitted
helmet when riding the vehicle.
· Ride-on toys should be used with caution since skill is required to avoid falls or
collisions which may cause injury to the user.
· The vehicle is intended for use on flat, level surfaces.
· DO NOT ride the vehicle indoors. It is intended for outside use ONLY. Interior
floors can be damaged by riding the vehicle indoors.
· DO NOT tow objects behind the vehicle or overload the vehicle as doing so will
cause damage.
3
1
2
2
2
2
6
6
6
6
6
6
6
6
5
7
7
7
7
7
9
10
9
8
8
3
1
3
4
4
4
4
4
5
5
5
Body*1
Wheel*3
Driving wheel*1
Round of hub*4
10mm spacer*7
Steering wheel*1
5*40 Machine screws*1
5MM nut*1
8 MM Nut*4
Motor*1
Charger*1
Spanner*2
(D) EXPLODED DIAGRAM
10
10
2
2
2
6
6
6
6
6
6
6
7
7
7
7
8
1
3
4
4
4
4
(F) ASSEMBLY DIAGRAM
4
Body*1 Wheel*3 Driving wheel*1
Round of hub*4
10mm spacer*7
Steering wheel*1
5*40 Machine screws*1
5MM nut*1
8 MM Nut*4
Motor*1
1
4
8
5
2
6
9
7
3
Charger*1 Spanner*2
(E) PARTS
10
5
55
Attention: Before assembling the
steering wheel, connect the plug on
the steering wheel with the plug on
the car body.
Fire ladder can be up and down.
5
Before using it for the first time, lift up the seat then open the seat plate, unscrew
the screws and connect the main wire to the battery wire (with RED to RED)
any wrong connection may cause short circuit or other faults.
NOTE:
(1) The car has the music function.
(2) Charge the battery if the vehicle runs slower than normal.
Recharge the battery for 8-12hours after each use, DO NOT exceed 15hours.
(3) It is normal that the power charger and the battery become warmer while on
charging
(4) TURN OFF the power switch always when you're not using vehicle
FUNCTION:
(1) START: Press POWER switch(see below diagram) and step on the PEDAL
switch (see below diagram)
(2) FORWARD/BACKWARD function: Press FORWARD switch and step on the
PEDAL switch, the vehicle will go forward; Press BACKWARD switch and step
on the PEDAL switch, the vehicle will go back
(3) SOUND/LAMP function: Press switch(as below diagram)
Pedal Switch
Sound and alarm lamp switch
Sound and
alarm lamp switch
Power
Sound and
alarm lamp switch
Forward Backward Switch
Sound and alarm lamp
switch
(G) USE INFORMATION
6
(H) FUSE
(I) CHARGING AND BATTERY SAFETY
The vechile use self-tapping fuse.
When overloading or improper use,the fuse will be automatically cut off in
10-20 seconds.and then will automatically connect the power.
To avoid the cutting off,please pay attention:
(1) The maximum weight limited of the motorcycle is 20KG.
(2) Not stall the car running or heavy trailer behind.
(3) Do not liquid immersion,it may cause the short circuit.
(4) Do not revise the vehicle’s circuit or the structure.
(5) Do not use the different specification fuse.
As shown in below diagram, put the charger into the vehicle's charging
hole, and the power plug into the matched stable AC power
NOTE:
(1) To assure the safety, battery charging and replaced only done by an
adult.
(2) Insert battery with the correct polarity (+ and -).
(3) First using, fully charger at least 10hours, normal recharging
8~10hours after every using, but NEVER charge over 15hours.
(4) CHECK the charger, battery and plug before every charging,
DO NOT use if it is broken.
DO NOT upside down the battery when charging.
(5) DO NOT open or decompose the battery and charger, ONLY USE the
type battery and charger recommended for the unit.
(6) DO NOT short-circuit battery.
(7) DO NOT recharge non-rechargeable battery.
(8) DO NOT mix old and new or different type of batteries.
(9) DO NOT dispose of battery in fire as it may leak or explode.
(10) Exhausted battery is to be removed from the toy.
(11) When vehicle is not used for an extended time, remove battery to
prevent possible leakage and damage to the unit.
Charge the battery once per three months to extend the lifetime of the
battery.
7
WARNING:
DO NOT allow children to
play with the battery and
charger. IT IS NOT A TOY.
(J) CARE AND MAINTENANCE
(K) TROUBLESHOOTING GUIDE
(1) Adults should check regularly such as wires, plugs, electrical, housing, steering
systems, fastening is normal or not, once every two weeks suggested. If there is
any problem, STOP use until the fully restored.
(2) Clean vehicles with soft and dry cloth, can not use water or fuel cleaning that will
lead to corrosion switch and caused switch failure.
DO NOT wash with soapy water or spray vehicle with a hose.
DO NOT wipe vehicle with car wax or other was-based polish.
(3) DO NOT drive vehicle during wet or snowy weather as moisture can cause
corrosion in the motor or electrical switches.
DO NOT drive vehicle on gravel or sand as doing so may cause motor to jam.
(4) Store vehicle indoors or cover with a protective tarp during inclement weather.
DO NOT store the vehicle in the high-temperature places or near the fire, or in
moist places.
(5) When vehicle is not used on a regular basis, please pull out the battery, the switch
must be "off" position to ensure circuit safety. Charge the battery once per three
months to extend the lifetime of the battery.
(6) DO NOT make modifications to this vehicle.
When maintenance, do not revise the vehicle's circuit and structure.
(7) ONLY use the battery charger which comes with this vehicle. Not doing so may
cause irreparable damage, including fire or explosion which may result in injury to
the user.
(8) In the unstable supply voltage region, we recommended to instal voltage stabilizer
to protext the battery.
8
Problem
The vehicle does not move
The vehicle begins to run slow
The vehicle runs erratically
The charger feels warm when in
use
The gears sound very loud and/or
are making a grinding noise.
Possible Solutions
· Charge the battery. (Charge battery after each use.)
NOTE: vehicle will be cut off electricity during charging.
· Check all electrical connections.
· Check all switch whether "on" position.
· Check foot switch or manual button is stuck down so
that can not press.
· The fuse may have been activated due to excessive
weight or weight or rough driving conditions. Wait at
least 10~20 seconds, and the vehicle will reset itself.
· Check is whether there is debris stuck wheels.
· Charge the battery. (Charge battery after each use.)
· Only allow one rider at a time.
DO NOT exceed child weight limit: 20kg
· Drive on level ground.
· Battery may be old or not accepting a full charge.
The battery will last from 1 to 3 years depending on
care, use and environment.
Replace with 6Volt 4.5 Ah battery only.
· Check is whether there is debris stuck wheels.
· There may be a problem with the fuse, or you may
have a damaged battery.
· This is normal.
· The gears may be broken.
Our goods come with guarantees that cannot be excluded under the Australian Consumer Law.
You are entitled to a replacement or refund for a major failure and for compensation for any other
reasonably foreseeable loss or damage. You are also entitled to have the goods repaired or
replaced if the goods fail to be of acceptable quality and the failure does not amount to a major
failure.
Where a failure does not amount to a major failure, we are entitled to choose between providing
you with a repair, replacement or refund. To obtain compensation, you would need to provide
documentary evidence of the loss or damage suffered, and documentary evidence that such loss
or damage was a reasonably foreseeable consequence of a failure by us to comply with a
consumer guarantee under the Australian Consumer Law. Such evidence may include
photographs, statutory declarations, receipts or reports (e.g. from your doctor), depending on the
loss or damage.
In addition to all rights and remedies to which you may be entitled under the Competition and
Consumer Act 2010 (Commonwealth) and any other relevant legislation, the manufacturer
warrants this product to be free from defects in materials or workmanship for a period as stated
on the packaging from the date of purchase.
In order to claim under this warranty, you will need to bring the product to the store of purchase,
along with proof of purchase (typically this will be a receipt). Any cost incurred by you in bringing
the product to the service desk will be borne by you. We will then, at our option, either repair or
replace the product, or refund your money and take back the product.
Our liability under this manufacturer’s warranty is subject to us being satisfied that a defect was
caused by defective workmanship or materials, and was not caused by or substantially
contributed to by other factors, or circumstances beyond our control, including (but not limited to)
defective installation, maintenance or repair, alteration or modification of the product in any
manner not recommended by the manufacturer or any neglect, misuse or excessive use.
The benefits conferred by this manufacturer’s warranty are in addition to all rights and remedies
conveyed by the Competition and Consumer Act 2010 (Commonwealth), and any other statutory
rights to which you may already be entitled, and this warranty does not exclude, restrict or modify
any such rights or remedies that are implied by law.
HUNTER PRODUCTS
Level 2, 424 Warrigal Road Moorabbin 3189
Ph: 1800 224 094
Email: enquiries@hunterproducts.com.au
9
Our products are suitable for the following standard:
GB6675,GB19865
ASTM-F963,CPSIA
EN71 AND EN62115
060616

Other manuals for ZPV119

1

Other Hunter Products Motorized Toy Car manuals

Hunter Products TR1529 User manual

Hunter Products

Hunter Products TR1529 User manual

Hunter Products Motorized ZP8003 User manual

Hunter Products

Hunter Products Motorized ZP8003 User manual

Hunter Products TR1403 User manual

Hunter Products

Hunter Products TR1403 User manual

Hunter Products TR1701 User manual

Hunter Products

Hunter Products TR1701 User manual

Hunter Products TR118 User manual

Hunter Products

Hunter Products TR118 User manual

Hunter Products TR1701 User manual

Hunter Products

Hunter Products TR1701 User manual

Hunter Products ZP5115 User manual

Hunter Products

Hunter Products ZP5115 User manual

Hunter Products ROLLPLAY PJ MASKS W413PJ User manual

Hunter Products

Hunter Products ROLLPLAY PJ MASKS W413PJ User manual

Hunter Products Rollplay Aria Child W487 User manual

Hunter Products

Hunter Products Rollplay Aria Child W487 User manual

Hunter Products Motorized 8736 User manual

Hunter Products

Hunter Products Motorized 8736 User manual

Hunter Products JS007 User manual

Hunter Products

Hunter Products JS007 User manual

Hunter Products ZP3999B User manual

Hunter Products

Hunter Products ZP3999B User manual

Hunter Products ZP5118 User manual

Hunter Products

Hunter Products ZP5118 User manual

Hunter Products D8010 User manual

Hunter Products

Hunter Products D8010 User manual

Hunter Products JE009 User manual

Hunter Products

Hunter Products JE009 User manual

Hunter Products HL-2588 User manual

Hunter Products

Hunter Products HL-2588 User manual

Hunter Products PAW PATROL ZPV002 User manual

Hunter Products

Hunter Products PAW PATROL ZPV002 User manual

Hunter Products ZPV119 User manual

Hunter Products

Hunter Products ZPV119 User manual

Hunter Products JE128 User manual

Hunter Products

Hunter Products JE128 User manual

Hunter Products 6109-ZP5251 User manual

Hunter Products

Hunter Products 6109-ZP5251 User manual

Hunter Products BBH-1588 User manual

Hunter Products

Hunter Products BBH-1588 User manual

Hunter Products 5752 User manual

Hunter Products

Hunter Products 5752 User manual

Hunter Products Disney Pixar Cars 3 8736 User manual

Hunter Products

Hunter Products Disney Pixar Cars 3 8736 User manual

Hunter Products JE1166 Datasheet

Hunter Products

Hunter Products JE1166 Datasheet

Popular Motorized Toy Car manuals by other brands

Mugen Selki MBX7 manual

Mugen Selki

Mugen Selki MBX7 manual

DF-models DF-4XS Crawler instructions

DF-models

DF-models DF-4XS Crawler instructions

Funtek MT12 user manual

Funtek

Funtek MT12 user manual

MUGEN MRX4-R instruction manual

MUGEN

MUGEN MRX4-R instruction manual

RB E One instruction manual

RB

RB E One instruction manual

REVELL 7202 user manual

REVELL

REVELL 7202 user manual

THUNDER TIGER ZK2 instruction manual

THUNDER TIGER

THUNDER TIGER ZK2 instruction manual

Team Corally Python C-00181 Quick start user guide

Team Corally

Team Corally Python C-00181 Quick start user guide

Kayoba 023907 Original instructions

Kayoba

Kayoba 023907 Original instructions

DANCHEE Ridgerock CRAWLER instruction manual

DANCHEE

DANCHEE Ridgerock CRAWLER instruction manual

LDARC TINY Q instruction manual

LDARC

LDARC TINY Q instruction manual

Jamara Ferrari F1 instructions

Jamara

Jamara Ferrari F1 instructions

BELKITS Ford Fiesta RS WRC 2017 manual

BELKITS

BELKITS Ford Fiesta RS WRC 2017 manual

Traxxas Summit 5607 owner's manual

Traxxas

Traxxas Summit 5607 owner's manual

ACME Air-Ace Ultra instruction manual

ACME

ACME Air-Ace Ultra instruction manual

Contixo SC5 user manual

Contixo

Contixo SC5 user manual

REVELL KIT 1945 Assembly manual

REVELL

REVELL KIT 1945 Assembly manual

Kyosho RAGE VE Maintenance manual

Kyosho

Kyosho RAGE VE Maintenance manual

manuals.online logo
manuals.online logoBrands
  • About & Mission
  • Contact us
  • Privacy Policy
  • Terms and Conditions

Copyright 2025 Manuals.Online. All Rights Reserved.