HWAM I30/55 User manual

I30/55
01.11.2020 / 97-9637
www.hwam.com
AUTOPILOT
User's Manual EN

Table of contents
Drawings ....................................................4-6
Installation manual .............................................8
Mounting and connection .......................................10
Firing manual - wood ..........................................12
Firing in general...............................................14
Cleaning.....................................................15
Maintenance .................................................16
Operational problems..........................................18
Declaration of Performance .....................................18
Product information EcoDesign ..................................19

Page 3 of 20 pages
1 1
1
A1 A2 A3
7
8
5
6
5
4
3
2
a 39,1 cm
b
40,4
cm
1
2

Page 4 of 20 pages
D
C
3
2
1
B
1
1
1
6
5
4

Page 5 of 20 pages
E F
G
1
1
1
2
2
H

Page 6 of 20 pages

Page 7 of 20 pages
InstallatIon manual
In general
Congratulations on your new HWAM insert.We are pleased that you have chosen a HWAM insert and
confident that it will give you much pleasure.To ensure optimum operation and safety, we recommend
that the installation should be carried out by an authorised HWAM retailer or a fitter recommended by
the retailer. For an overview of HWAM retailer, visit www.hwam.com under “Retailer locations”.
Safety
The installation of your HWAM insert must always comply with all European, national and local building
regulations.The installation must be carried out in accordance with the instructions in the installation
and user manuals and subsequently registered with the local authorities. Upon installation, the chimney
sweep must approve the installation before you can start using the insert.All HWAM insert packaging
material must be handled in accordance with local waste management regulations.
Room requirements
Always ensure a supply of fresh combustion air to the room where the insert is to be installed.The insert
uses approx. 9-23 m3of air per hour (depending on the setting of the air control lever).A window that
can be opened or an adjustable air valve will be sufficient. It must not be possible to block the adjustable
air valve/grate. In newly built/airtight dwellings, we recommend that a fresh air system should be installed
for the direct supply of external air to the combustion.This fresh-air system may be bought separately.
Before installing the insert, make sure that the floor can carry the insert, the chimney and any other
parts required for the installation.
Please be aware that not all glass parts are heat-resistant. For this reason, a glass wall should sometimes
be treated as a combustible wall, in which case we ask you to contact your local chimney sweep or glass
producer to hear at what distance the insert should be kept from glass.
Technical measures and data
Test results from nominal test EN 13240
Nominal heating effect 7,0 kW
Flue gas temperature EN 13240 measurement point 275ºC
Flue gas temperature measured in the outlet socket 296ºC
Exhaust gas flow 5,51 g/s
Efficiency 80,7%
Annual efficiency (EcoDesign) 70,7 %
PM 26 mg/m3
OGC 76 mg/m3
NOx 121 mg/m3
CO at 13% O21125 mg/m3
CO at 13% O20,09 %
Energy efficiency index 107
Energy efficiency class A+
Test result based on NS 3058
Particle emissions 3,31 g/kg
The declaration of performance (DoP) can be downloaded from our website, www.hwam.com.

Page 8 of 20 pages
Model Weight Height Width Depth
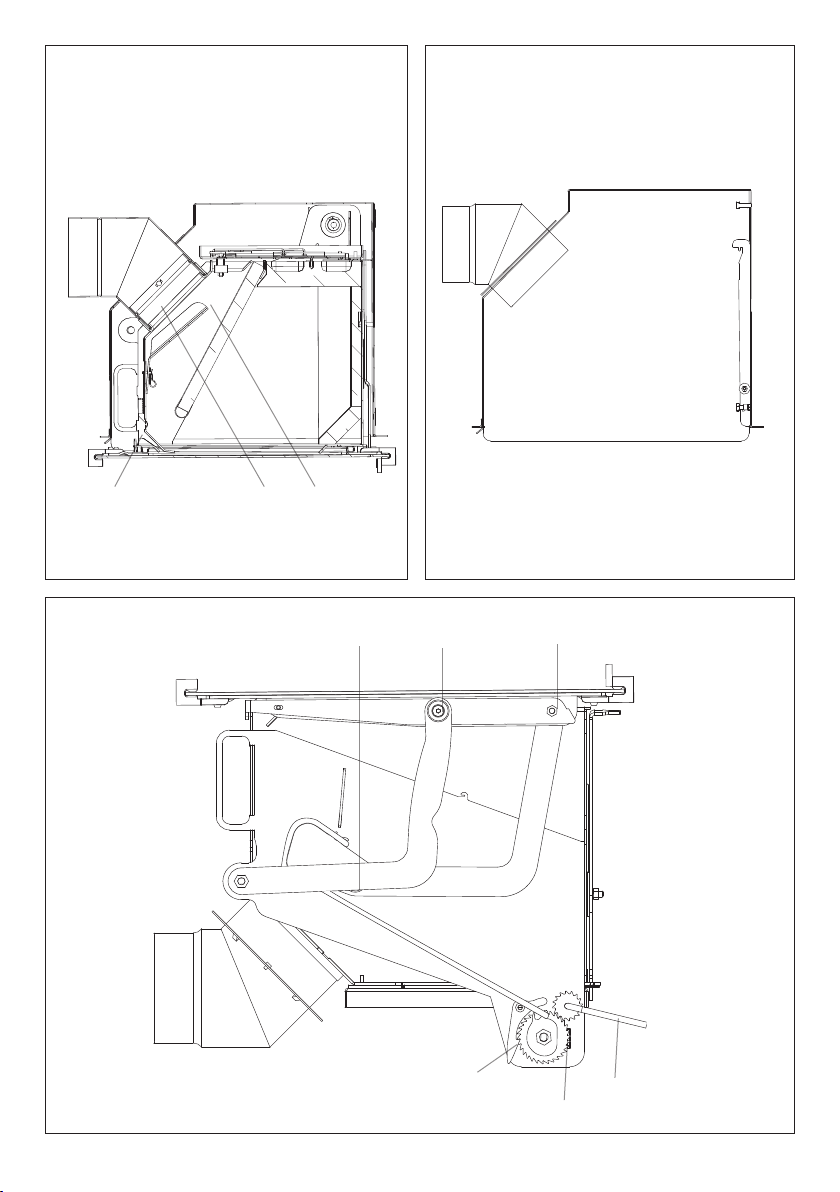
HWAM I30/55 98 kg 53,4cm 73,8 cm 47,0 cm
Floor plate
European, national and local regulations must be observed in terms of the size and thickness of a non-
combustible floor covering the floor in front of the combustion chamber opening. Ask your HWAM
retailer for assistance.The combustion chamber opening is 56.0 cm wide.
Distance to combustible materials
Please refer to local building regulations to determine the size of the fireproof area in front of the fireplace.
The insert must be positioned at least 30 cm above the floor if the floor is made of combustible material.
If there is combustible material around the outer casing,non-combustible insulation (Fire Batts) is required
between the casing and the combustible material.The insulation must be 80 mm thick on both sides of
the casing,120 mm behind the casing and 60 mm thick beneath the bottom of the casing.The requirement
for insulation above the top of the casing is 150 mm.The thermal conductivity of the insulation must be
less than 0.1 W/m x K (as measured at 200 ºC).
Requirements for chimney and smoke pipe
The height of the chimney must ensure sufficient draught and prevent any smoke nuisance.As a general
rule, satisfactory draught conditions are achieved if the chimney is 4 m above the stove and at least 80
cm above the ridge. If the chimney is placed at side walls, the top of the chimney should always be higher
than the ridge or the tallest point of the roof.Always be aware of any national and/or local regulations
applying to thatched roofs and the location of the chimneys.
The woodburning stove requires a minimum draught of 12 Pa (measured at EN 13240 measurement
point). If measured just above the smoke flue socket, the chimney draught must be 18-20 Pa.
The chimney must have a minimum clearing of Ø 150 mm.The chimney must be provided with an eas-
ily accessible cleaning door.The chimney and flue duct must be of flue class T400 and be CE marked.
Furthermore, it must have obtained the classification of G in soot fire testing. The required distance
to combustible material must be complied with in accordance with the brand label.Ask your HWAM
retailer for further information.
Chimney
The chimney is the “engine” of the stove and it is crucial for the functioning of the woodburning stove.
The chimney draft provides a partial vacuum in the stove.This vacuum removes the smoke from the stove,
sucks air through the dampers for the so-called glass pane rinse which keeps the glass free of soot, and
sucks in air through both primary and secondary dampers for the combustion.
The chimney draft is created by the differences in temperature inside and outside the chimney.The higher
the temperature within the chimney,the greater the draft. It is crucial, therefore,that the chimney is warmed
up properly before closing the damper and limiting the combustion in the stove (a brick chimney takes
longer to warm up than a steel chimney).On days where the weather and wind conditions create insufficient
draught inside the chimney, it is even more important to warm up the chimney as quickly as possible.The
trick is to quickly get some flames going. Split the wood into extra fine pieces, use an extra firelighter, etc.
If the stove has not been used for a longer period,it is important to check that the chimney pipe is not blocked.

Page 9 of 20 pages
It is possible to connect several devices to the same chimney. However, it is important to first check the
applicable rules.
Chimney sweeping
To prevent the risk of chimney fires, the chimney must be cleaned every year.The flue duct and the smoke
chamber above the baffle plate must be cleaned together with the chimney. If the chimney is too tall to
be cleaned from above, it must be equipped with a soot door.
In case of a chimney fire, close all dampers and call the firefighters. Before any further use, have the
chimney checked by the chimney sweeper.

Page 10 of 20 pages
mountIng and connectIon
The HWAM I 30/55 consists of a moveable, external brickwork casing, as well as an insert that is pushed
into place and connected once the brickwork casing has been assembled.
The HWAM I 30/55 can be connected in two ways:
1. Mounting and connecting in an existing fireplace.
2. New construction around the insert, possibly including heat ducts to other rooms.
1. Mounting and connecting in an existing fireplace (Drawing A1-A3).
Before mounting the insert in a brick-built fireplace, the regulating damper in the existing chimney must
be removed and the smoke neck, if any, should be widened so that the fire tube from the insert can be
connected directly to the chimney.Any bricks positioned on edge at the bottom of the fireplace should
also be removed.
In advance, decide with a specialist or the chimney sweep where a soot door (1) should be placed, so
that the fire tube can be cleaned from above while the door of the insert remains closed.
Mounting the smoke pipe (Drawing A1)
First mount the joining flange (2) with a suitable length of fire tubing or flexible tubing (3). Push the
inner pipe into the connector.The inner pipe must be turned so that the handle goes as far as possible
into the connector.
Trim approximately 3 fireproof batts of 50 mm each (4) so that they fit tightly into the chimney space
and cut a hole in the centre to fit tightly around the tube.
Place the fire tube in the chimney so that the joining flange corresponds to the given measurements.
a. Distance from front edge of the brick hole, if the insert must be flush with the brickwork.
b. Height over the bottom of the insert.
Now push the three batts up around the fire tube and press them up into the chimney thereby achieving
a compact and tight-fitting seal.
Installing the outer casing (Drawing A2)
If you would like to mount hoses in order to distribute a portion of the convection heat to other rooms,
push the two plates on each side of the smoke outlet hole on the casing outwards (see drawing H).
Push the outer casing (6) into place at the bottom of the fireplace. Carefully ensure that the outer casing
is level and that its front edge is flush with the brickwork.The three adjustment screws in the bottom of
the casing can be used for fine adjustment so that the casing is completely level (drawing F). Screw the
connector to the building-in cassette with the help of the self-tapping screws supplied.
If the gap between the fireplace aperture and the outer casing is to be closed with brickwork,there must
be a minimum distance of 5 mm around the outer casing The brickwork above the outer casing must
therefore be self-supporting.Attach the casing to the masonry with 1-3 screws in the base.

Page 11 of 20 pages
Mounting the insert (Drawing A3)
Remove the smoke shelf (7) from the insert. Remove the smoke deflector plate (8) from the insert.
Attach an Ø6 mm seal to the bottom the smoke outlet bushing.Then push the insert into place in the
brickwork casing. Push the inner pipe all the way into the liner’s smoke outlet connector. Afterwards,
remount the smoke deflector plate (8) and smoke shelf (7).
Seal between fire tube and chimney on top of the batts using heatproof mortar (5).This can be done
through the soot door (1) of the chimney, and should only be done when the insert is assembled.
Connecting external supply of fresh air
The HWAM I 30/55 can be connected to fresh air systems.The fresh air system can be purchased separately.
2. Restructuring of brickwork around insert
During the reconstruction, the outer casing should be carefully levelled off at a suitable height.As the
reconstruction progresses, there should be a gap of min. 5 mm between the brickwork and the outer
casing. The frame of the outer casing has a width of 25 mm, though only 20 mm at the top. Any brick-
work stretching across the outer casing must be self-supporting. Remember the screws between the
outer casing and the wall.
Fire tubes and any convection ducts to other rooms should be fitted to the outer casing during the
reconstruction.
The outer casing is not load-bearing. Therefore, fire tubes exceeding 2 m in length and, possibly, the
chimney, must be secured (using hangers) thus avoiding putting any load on the outer casing.
When the reconstruction has been completed, mount the insert as described in point 1.
Fitting the loose parts (Drawing C)
Before you start using the insert, you must ensure that all loose parts are fitted correctly.
a. Smoke plate (1). Must lie on the rear plate and on the slanting side plates. It must fall into position in
the track on the rear plate.
b. Steel smoke deflector plate (2). Is mounted on two hooks.To mount the plate, lift it up and lead to
the right until it is hanging on the two hooks.

Page 12 of 20 pages
FIrIng manual – wood
Your first heating session
The lacquer will be fully hardened after the stove has been used, and the door and the ashpan should be
opened very carefully as there will otherwise be a risk that the gaskets will stick to the lacquer. In addi-
tion the lacquer may initially give off an unpleasant odour, so make sure that the room is well ventilated.
Tips about fuel:
Approved fuel types
The wood burning stove is EN approved for combustion of wood only. It is recommended to use dried
chopped wood with a water content of a maximum of 18%. Stoking a fire with wet wood results in soot,
environmental problems, and a less efficient fuel economy.
Recommended wood types
All types of wood, for instance birch, beech, oak, elm, ash, conifers, and fruit trees can be used as fuel in
your insert.The great difference is not in the fuel value, but in the weight of the wood types per cubic
metre. Beech weighs more per m3 of wood than common spruce, for instance.This is why more com-
mon spruce is required, in terms of volume, to obtain an amount of heat similar to that of beech. Heavy
types of wood such as ash, beech, oak and elm are generally not that easy to light up. In addition, they
burn more slowly and give off more embers. Light types of wood such as birch, maple, spruce and pine
are more easy to light up.They burn faster and give off fewer ambers.You may therefore take advantage
of the light types of wood for lighting and use the heavier types of wood to ensure a longer burning time..
Banned fuel types
It is not allowed to stoke a fire with the following: printed matter, plywood, plastic, rubber, fluid fuels,
and rubbish such as milk cartons, lacquered wood or impregnated wood and fossil fuels.The reason that
you should not apply any of the above is that during combustion they develop substances that are health
hazardous and harmful to the environment. These substances could also damage your wood burning
stove and chimney, rendering the product warranty void.
Storage of wood
A moisture content of 12-18% is achieved by storing recently felled wood outdoors under a lean-to
for at least one year, preferably 2 years.Wood stored indoors has a tendency to become too dry and
combust too quickly. However, it might be advantageous to store fuel for lighting a fire indoors for a few
days prior to use.
It is recommended to purchase a wood moisture meter to continuously check that the firewood has
the correct moisture content before using it for firing.Split the wood and measure the moisture content
of the split surfaces.
Recommended dimensions
The dimensions of the fuel are important to good combustion.The dimensions should be as follows:
Fuel type Length in cm Diameter in cm
Wood for kindling a fire (finely chopped) 25-35 2-5
Chopped wood 30-40 7-9

Page 13 of 20 pages
Opening and closing the door
Always hold the handle in the middle when opening and closing the door to avoid putting uneven pres-
sure on the door lift mechanism.
Please note that it is important not to let go of the handle when opening and closing the door.The glass
could be damaged if the door is allowed to open or close on its own.
Regulating the insert (Drawing E)
The air control lever (1) is located behind the glass.The HWAM®Autopilot™ is set to maximum when the
air control lever is set to the rightmost position, and minimum when the bar is set to the leftmost position.
Lightning the stove
A successful combustion process requires that the wood is lit in the right way.A cold stove and a cold
chimney challenge the combustion process. Be careful to make a good lighting with suitably dry wood,
using kindling and lighting the fire in the top layers of kindling. It is important to achieve a high flue gas
temperature quickly.
Push the air control lever all the way to the right to set the HWAM®Autopilot™
to maximum effect. Put split kindling, corresponding to two to three pieces of
wood (about 2 kg),into the insert. Put two fire lighters in between the upper layer
of kindling. Light them and allow the flames to spread slowly. Keep the door ajar
until no more condensation forms on the glass (for a maximum of 5 min.). Close
the door.When the kindling is burning well, push the output regulating rod into
middle position. If the fire goes out, this has been done too early. Push the regulating rod to the right
again until the fire is burning properly.Allow the kindling to burn out until flames are no longer visible.
Important! The door may only be opened when lighting the insert, adding fuel to the fire or removing ash.
Stoking
When there are no more visible yellow flames, and a right ember is there, you can fire again.The layer
of embers is suitable when the pieces of wood begin to disintegrate and the bottom of the insert is cov-
ered by embers. Put two or three pieces of wood weighing up to 1 kg each into the insert.The HWAM®
Autopilot™ manages the regulation of air supply.
The temperature can, however, be set up or down by pushing the regulation bar either to the right or
left, respectively. If the air control lever is set farther to the left, combustion is reduced and the burning
time is prolonged. By pushing it to the right, combustion is increased and burning time is shortened. Do
not add new firewood to the fire until the layer of embers is sufficiently low.
When burning is complete
When the stove is not in use, turn the air control lever all the way to the left.
Cleaning the glass
We recommend wiping the glass after a fire.This is best done using a paper towel.
Fuelling with coal or pet coke
The stove is not approved to use coal or pet coke as a fuel.

Page 14 of 20 pages
Ingeneral about FIrIng
Quick or strong heat
Quick or strong heat is obtained by burning many small pieces of wood.
Maximum Firing Amount
Fuel Maximum Amount per Hour
Wood 3.5 kg
Warning:Should these limits be exceeded,the insert will no longer be covered by the factory guarantee,
and it may be damaged due to excessive heat.The stove has been approved for intermittent use.
Normal re-firing interval for nominal firing
Fuel Kg Normal Firing Interval
Wood Ca. 1.5 4 48 min
Prolonged burning time
Prolong the burning time by burning a few (at least 2) very large pieces wood whilst at the same time
regulating the damper down.
Insufficient firing
If the fireproof materials in the combustion chamber are blackened after a heating session, the insert is
polluting, and the HWAM®Autopilot™ is not functioning properly.The bar must therefore be pushed to
the right. Also, it may be necessary to burn more wood.
How to achieve the best combustion
• Use clean and dry wood.
Wet wood results in inefficient combustion, plenty of smoke, and soot. Furthermore, the heat will dry
the wood, not heat up the room.
• The fire should only be stoked with a little wood at a time.
You achieve the best combustion by starting up a fire often and using only a little wood. If you use too
much firewood, it will take some time before the temperature reaches a level where you achieve a
good combustion.
• Make sure there is the right amount of air.
You should also make sure that there is plenty of air – especially in the beginning - so the temperature
in the insert climbs quickly. In this way the gasses and particles released during the combustion will be
consumed by the fire. Otherwise they build up soot in the chimney (constituting a chimney fire risk)
or will be released in a non-combusted state into the environment.The wrong amount of air supply
creates inefficient combustion and a modest effect.
• Don’t savour the fire during night time
We advise against adding fire wood to your stove and reducing the air supply at night in an attempt to
still have some embers left in the morning. If you do so, large amounts of hazardous smoke will be emitted,
and your chimney will be exposed to unnecessarily large amounts of soot with the risk of a chimney fire.

Page 15 of 20 pages
cleanIng
External cleaning
Cleaning of the insert should only be performed when it is not in use/cool. Daily maintenance is limited
to a minimum. It is easiest to vacuum the outside of the insert with a tiny nozzle with soft brushes.
Cleaning the glass (drawing G)
If it becomes necessary to clean the inside of the glass pane, lift the door halfway up and pull out the
two top guide latches (1) on each side of the door in order to loosen them from the screws (2).The
glass scan then be tilted out and cleaned. Once the glass is clean, lift the door again halfway up, pull out
the top guide latches on the sides, ease the glass pane into place, and lead the guide latches back into
place over the screws.
The inside of the glass pane is best cleaned with damp paper towel dipped in ash.Afterwards, dry with
a clean paper towel.
The outside of the glass can be cleaned with ordinary cleaning solvent used to polish surfaces.We recom-
mend wiping down the window pane when the insert is not in use/cool.
Ash
We recommend removing ash from the combustion chamber with an ash suction device.
Ash can be disposed of through daily refuse collection. Be aware that embers in the ash can
remain hot up to 24 hours after the fire in the insert has gone out!

Page 16 of 20 pages
maIntenance
Maintenance
Regularly ensure that the air slit for the pane air rinse function (drawing C, 3) is free of ash and soot
particles. Regularly check to make sure that seals in the door are complete and soft. If not, they should
be replaced. Use only original spare parts.
The insert should be thoroughly cleaned once a year.Ash and soot must be removed from the combus-
tion chamber. If necessary, lubricate the door lift mechanism with copper grease.
Service inspection
At least once every other year, the insert should receive a thorough, preventative service inspection.
Among other things, the service inspection covers:
• A thorough cleaning of the insert.
• Inspection of the door lift mechanism and lubrication with copper grease if necessary (drawing B,1).
• Check the spring in the HWAM®Autopilot™ and replace if necessary.
• Checking gaskets. Replace gaskets if they are not intact or are no longer soft.
• Inspection of springs for chain drive. Inspection to ensure that the chain drive is equal on both sides,
and that the door closes tightly all the way around.
• Inspection/possible replacement of heat insulation material.
The inspection must be performed by a qualified professional. Use only original spare
parts.
Cleaning
Before chimney sweeping can be performed, the air control lever must be set all the way to the left to
prevent soot and ash from entering the HWAM®Autopilot™. Drawing C:
Remove the smoke shelf (1).Push the plate forward and lift it up a bit to the side.Tilt one side downward.
The plate is now free and can be removed from the combustion chamber. Lift the steel smoke deflector
plate (2) off of the hooks so that it can be removed.
Insulation
The efficient,but porous insulation of the combustion chamber may, in time, be worn and damaged.Cracks
in the insulation are irrelevant to the efficiency of the stove. However, it should be replaced, if there are
actual holes due to parts of the lining falling off or when, due to wear and tear, it has been reduced to
less than half its original thickness.
HWAM®Autopilot™
On a cold stove, the starting point of the feeler is controlled.The starting point on a cold stove is about
30° above horizontal. It should feel easy going and bouncy when you push it, no matter if the stove is
cold or hot. By rising or falling temperatures it must not move at a bound.The damper plates must be
dry and clean and slide together unhindered. Control bars and slide gates may have to be smeared with
WD40 (never oil).
Door lift (Drawing B)
The door lift mechanism consists of a chain pull placed on either side of the stove and a spring. If the
door opens with difficulty, you may correct this by greasing the chain wheel boxes and door hinges (1)
with copper grease (we recommend a grease that can withstand temperatures of up to 1,100º C).You
should do this once every year. If the door still opens and closes too stiffly, the spring on the door lift
mechanism can be loosened slightly. If the door slides too easily, the spring has loosened.The spring can

Page 17 of 20 pages
be loosened or tightened as follows:
Remove the liner from the building-in cassette. Make sure the door of the combustion chamber (3)
is closed. Attach the tightening tool (4) supplied with the stove to the toothed wheel (5). To tighten
the spring so that the door closes more slowly (or can remain fully open), turn the toothed wheel (5)
clockwise slightly.This can be done by turning the tightening tool (4) counter-clockwise.To loosen the
spring so that the door closes faster (or can no longer remain fully open), lift the locking pawl (6) and
turn the toothed wheel (5) counter-clockwise slightly.This can be done by turning the tightening tool
(4) clockwise. IMPORTANT! Keep a firm grip on the handle of the tightening tool (4) when lifting the
locking pawl as considerable weight and force are transferred when it is lifted.
After each adjustment, check to see whether the desired effect has been achieved. If not, repeat the
process. If you have loosened the spring, we recommend holding the door handle when checking the
effect for the first time to ensure that the spring has not become so loose that the door closes too fast
with the risk of damaging the glass.
Please Note:You should always have a professional adjust, grease and repair these parts.
Surface
The surface does not normally require any treatment.Any damage to the coating may be remedied using
a Senotherm spray.
Guarantee
The guarantee does not cover damage due to insufficient maintenance!

Page 18 of 20 pages
operatIonal problems
Blackened glass
• The wood is too damp. Only use wood stored for at least 12 months under cover and with a
moisture level not exceeding 12-18% RH.
• Faulty seal in door. Fit new seal.
Smoke in the room when opening door
• The grate in the chimney may be closed. Open the grate.
• Insufficient chimney draft. See section on chimney or contact chimney sweep.
• Soot door leaking or dislodged. Replace or refit.
• Never open the door when there are still flames on the wood.
Uncontrollable combustion
• Faulty seal in door or ash pan. Fit new seal.
• If there is an excessive chimney draft,it may be necessary to set the air control knob to its minimum position.
Also do this all when the stove is not in use.
• If the steel plates in the combustion chamber develop scales or become deformed, this is due to
excessive heat. Stop using the stove and contact the retailer.
At interruptions that you cannot yourself rectify, you should contact the retailer.
declaratIon oF perFormance
The DoP can be downloaded from our website via the following link:
www.hwam.com/dop/i30-55

Page 19 of 20 pages
Model
Direct heat output [kW]
Indirect heating functionality
Indirect heat output [kW]
Type of heat output/room temperature control
Wood logs with moisture content 12-18 % 70,7
Emissions
Particulate matter (PM)
Organic gaseous compounds (OGC)
Carbon monoxide (CO)
Nitrogen oxides (NOₓ)
Specific Precautions during Assembling, Installing & Maintenance:
See installation instructions for more information
Product End-of-Life/Recycling:
To dispose of the stove after the product life has expired, please observe the following information
• Dispose of the items correctly i.e. separate the parts to be disposed of in material groups
• Always dispose of items in a way that is as sustainable as possible and that is in line with the current
environmental protection, reprocessing/recycling and disposal technology
Useful efficiency at nominal heat output [%]
80,7
Energy efficiency index
107
Energy efficiency class
A+
Electric power consumption nominal heat output [kW]
-
Electric power consumption minimum heat output [kW]
-
Electric power consumption standby mode [kW]
-
26
76
1125
121
Characteristics when operating with the prefered fuel only
Nominal heat output [kW]
7,0
Space heating performance at nominal heat output
Fuel Preferred fuel
Seasonal space heating energy efficiency
[%]
Yes
mg/m3(13% O2)
Product information on solid fuel local space heaters
according to Comission regulation (EU) 2015/1185
HWAM I 30/55
7,0
No
-
Two ore more manual stages, no temperature control
HWAM A/S • Nydamsvej 53 • DK-8362 Hørning

www.hwam.com
Table of contents
Other HWAM Wood Stove manuals
Popular Wood Stove manuals by other brands

USSC
USSC 2015 Owner's operation and instruction manual

Vermont Castings
Vermont Castings Dutchwest Small 2460 Service Procedure

Drolet
Drolet AUSTRAL III owner's manual

Mendip Stoves
Mendip Stoves SOMERTON 2 PEDESTAL Operation and installation manual

Bronpi
Bronpi Volga Series manual

J. A. Roby
J. A. Roby ATMOSPHERE owner's manual