IAI CV-M40 User manual

Double Speed Monochrome
Progressive Scan Camera
CV-M40
Operation Manual
Camera: Revision D
Manual: Version 1.1
M40Mandec16.doc
JPT 16-12-03

CV-M40
- 1 -
Table of Contents
1. General ........................................................................................................2
2. Standard Composition ......................................................................................2
3. Main Features ................................................................................................2
4. Locations and Functions ...................................................................................3
5. Pin Assignment...............................................................................................4
5.1. 12-pin Multi-connector (DC-IN/Trigger) ....................................................................... 4
5.2. 6-pin Multi-connector (RS 232C/TRIGGER).................................................................... 4
5.3. Input and Output Circuits........................................................................................ 5
6. Functions and Operations .................................................................................6
6.1. Basic functions .................................................................................................... 6
6.2. Input/Output of Timing Signals ................................................................................. 7
6.2.1. Input of External HD/VD signals ......................................................................... 7
6.2.2. Output of Internal HD/VD signals ....................................................................... 7
6.2.3. Pixel Clock out on pin 9/12 .............................................................................. 7
6.2.4. WEN out on pin 9/12 ...................................................................................... 7
6.2.5. Input of external trigger .................................................................................. 7
6.3. Operation Modes .................................................................................................. 8
6.3.1. Continuous operation ..................................................................................... 9
6.3.2. Edge Pre-select Trigger Mode...........................................................................11
6.3.3. Pulse Width Control Trigger Mode......................................................................13
6.3.4. Frame delay read out Mode. ............................................................................15
6.4. Other Functions. .................................................................................................17
7. Configuring the Camera.................................................................................. 18
7.1. Mode Setting by Switch .........................................................................................18
7.2. Jumper settings ..................................................................................................18
7.2.1. Gamma setting ............................................................................................18
7.2.2. Partial scan setting .......................................................................................19
7.2.3. Pixel clock and WEN output .............................................................................19
7.2.4. HD/VD input or output ...................................................................................19
7.2.5. WEN positive/negative...................................................................................20
7.2.6. Principle diagram for input and output jumpers.....................................................20
7.3. Camera Control Tool for CV-40 ................................................................................21
7.3.1. Default settings at power up............................................................................21
8. External Appearance and Dimensions ................................................................ 22
9. Specifications .............................................................................................. 22
9.1. Spectral sensitivity ..............................................................................................22
9.2. Specification table...............................................................................................23
10. Appendix .................................................................................................. 24
10.1. Precautions ......................................................................................................24
10.2. Typical Sensor Characteristics................................................................................24
10.3. References.......................................................................................................24
11. Users Record.............................................................................................. 25
CV-M40
1. General
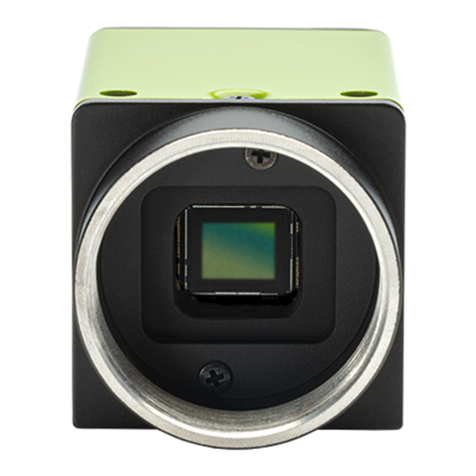
CV-M40 is a compact monochrome progressive scan camera designed for automated imaging
applications. The 1/2" CCD with square pixels offers a superb image quality. The double speed
and partial scanning and vertical binning allow the camera to capture high quality images with a
high frame rate.
The camera can operate in continuous mode and with triggered edge pre-select and pulse width
controlled shutter. Frame delayed read out and vertical binning are also possible modes.
CV-M40 revision D has a new CCD sensor with 6 dB higher sensitivity than revision C.
The latest version of this manual can be downloaded from: www.jai.com
The latest version of Camera Control Tool for CV-M40 can be downloaded from: www.jai.com
Revision D starts with S/N E504301.
For camera revision history, please contact your local JAI distributor.
2. Standard Composition
The standard camera composition consists of the camera main body.
3. Main Features
• 1/2” progressive scan monochrome interline transfer CCD sensor
• 659 (h) x 494 (v) 9.9 µm square pixels compatible with VGA format
• Improved sensitivity and reduced smear
• 60 full progressive frames per second
• 120 frames per second with vertical binning
• 234 frames per second with 1/16 (30H) partial scanning
• Programmable partial scan from 15H to 413H in 1H steps
• Shutter speeds from 1/125 up to 1/12,000 sec in 8 steps
• Programmable shutter 2H to 513H
• Internal, external HD/VD or random trigger synchronization
• 24.5 MHz pixel frequency and 31.468 kHz line frequency
• Pixel clock and WEN output
• Edge pre-select and pulse width external trigger modes
• Edge pre-select shutter with frame delay read out
• H reset and H non-reset trigger mode
• Accepts standard C-mount lenses
• Setup via serial port or switches
• Setup by Windows 98/NT/2000 software via RS 232C
- 2 -

CV-M40
- 3 -
4. Locations and Functions
1 Lens mount of C-mount type. *1)
2 Interline-transfer CCD sensor.
3 Video output BNC connector
4 SW1 switch on the rear panel to set the shutter speed and other function modes.
5 6 pin connector for RS 232C signals, input of external trigger pulse and WEN output.
6 12 pin connector for DC +12V power external sync signals and output of video.
7 GAIN potentiometer for adjusting video level.
8 mounting holes 8 x M3deept5.
*1) Note: Rear protrusion on C-mount lens must be less than 10.0mm (0.4 inch approx.)
When IR cut filter is used, it must be less than 7.0 mm (0.28 inch approx.)
The IR cut filter is placed in the C-mount thread.
The C-mount 25 mm IR cut filter must be ordered separately.
Fig. 1. Locations

CV-M40
- 4 -
5. Pin Assignment
5.1. 12-pin Multi-connector (DC-IN/Trigger)
Type: HR10A-10R-12PB-01(Hirose) male.
(Seen from rear of camera.) Pin no. Signal Remarks
1 GND
2 +12 V DC input
3 GND
4 Video output Parallel with the BNC video output. Avoid
double termination.
5 GND
6 HD in/out/Trig in Trigger in for H reset trigger
HD in for H non-reset trigger. *1)
7 VD in/out/WEN out/Trig in Triggger in for H non-reset. *1)
8 GND
9 NC/PCK/WEN Pixel clk JP7 S. WEN JP18 S. *1)
10 GND
11 +12 V DC input
12 GND
3
4
5
6
7
8
9
10
11 12
1
2
Notes:
Factory settings in bold italic
*1) Signals on pin no. 6, 7 and 9 can be changed by jumper setting.
See “7.2. Jumper Settings” for more information.
Warning! Do not input signals not used for the actual mode!
Fig. 2. 12-pin connector.
5.2. 6-pin Multi-connector (RS 232C/TRIGGER)
Type: HR10A-7R-6PB (Hirose) male.
(Seen from camera rear.)
Pin no. Signal Remarks
1 TXD out
2 RXD in
3 GND
4 NC
5 Ext. Trig input JP 5 short for H reset. JP 20 for H non-reset. *1)
6 WEN out/NC *1) *2)
Notes:
Factory settings in bold italic
*1) Signals on pin no. 5 and 6 can be changed by jumper setting.
*2) WEN is 1 H long and positive going. Negative if JP22 is Short.
See “7.2. Jumper Settings” for more information.
Warning! Do not input signals not used for the actual mode!
1
2
34
5
6
Fig. 3. 6-pin connector

CV-M40
- 5 -
5.3. Input and Output Circuits
In the following schematic diagrams the input and output circuits for video and timing signals
are shown.
Video output
The video output is a 75 ΩDC coupled
circuit. The video DC level for video and
video + sync is shown with 75 Ω
termination.
DC level with
75 Ωtermination
GND
#4/12
75
Video
Output
FL
CXA
1310
300 mV
470 mV
BNC
DC level with
75 Ωtermination
GND
#4/12
75
Video
Output
FL
CXA
1310
300 mV
470 mV
BNC
The vertical composite sync is with
serration and equalize pulses.
Fig. 4. Video output.
HD, VD and Trigger input
GND
+5V
33k
TTL
1k100n
1k
HD VD
Trigger
input
33k 100k
1n
JP
75 GND
+5V
33k
TTL
1k100n
1k
HD VD
Trigger
input
33k 100k
1n
JP
75
The inputs are AC coupled. To allow
longer pulse width, the input circuit is
a flip flop, which is toggled by the
negative or positive differentiated spikes
caused by the falling and rising edge.
The input is TTL as factory setting.
It can be 75Ωterminated by jumper.
As factory setting HD and VD are input.
Warning! In trigger modes, the HD and VD
input circuits are used as trigger inputs.
Do not connect signal not used for the
actual trigger mode.
Fig. 5. HD, VD and Trigger input.
HD, VD, WEN and PCLK output
GND
10
10
10k
10k
67
TTL
220
GND
10
10
10k
10k
67
TTL
220
Output circuit for HD, VD, WEN and pixel clock
is TTL through emitter follower with 75 Ωin series.
Output level ≥4 V from 75Ω. (Non-terminated).
WEN active polarity is positive 1H. It can be changed
to be active low. The WEN timing then depend of
the actual mode. Refer to timing diagrams.
If not used, the pixel clock should be disabled.
Fig. 6. HD, VD, WEN and PCLK output.

CV-M40
- 6 -
6. Functions and Operations
6.1. Basic functions
Apart from the standard continuous operation, the CV-M40 features two external asynchronous
trigger modes Edge Pre-select and Pulse Width Control mode. Edge Pre-select mode can operate
with delayed read out, where the trigger falling edge starts a pre-selected exposure, and the
raising edge starts the read out.
These external trigger modes can operate with either H reset or H non-reset. In H reset, the
internal HD is reset on the falling edge of the trigger and the exposure starts. H non-reset need
external HD input. The exposure will be synchronized to the internal HD. It will start on the first
HD after the trigger negative going edge. In Pulse width control mode, the exposure stops after
the first internal HD
following the trigger rising edge.
H reset or H non-reset trigger mode cannot be selected by switch, jumpers or RS-232C. The
mode is automatic selected depending of the input pin used for trigger, and if external HD is
applied.
Note: In H non-reset trigger modes the exposure start can be delayed up to 1H. In pulse width
control modes jitter in exposure time can be up to 1H. To avoid this <1H jitter, the trigger
pulse should be synchronized to the HD as shown in fig. 8.
Trigger
Trigger
Trigger
Exposure
Exposure
Exposure
shutter time
EDGE
WIDTH
FRAME-DELAY
READ OUT
shutter time Read out
Read out
Read out
Trigger
Exposure
EDGE PRE-SELECT
shutter time Read out
int. HD
H non-reset
Trigger
Exposure
EDGE PRE-SELECT
shutter time Read out
int. HD
H reset
Fig. 7. Trigger modes

CV-M40
- 7 -
6.2. Input/Output of Timing Signals
Some signals can be input or output on different connector pins depending of camera mode and
jumper setting. Please refer to the principle diagram fig. 29. It shows input and output pins and
the jumper positions as it is for factory setting. The diagram can be useful for understanding the
following modes and jumper functions.
For details, please refer to chapter “7.2. Jumper settings”
6.2.1. Input of External HD/VD signals
The factory pre-set is HD/VD input on pin 6/12 and 7/12. The video output is synchronized with
external HD/VD signals if applied. If no ext. HD is connected, the camera will switch to the
internal X-tal controlled HD sync. If no ext. VD is connected, the camera will continue with its
internal VD. The external sync system should always follow the camera sync and scanning
system. The external HD/VD signal should be 4.0 Vp-p ±2.0 V from a 75 Ωsource. The inputs are
factory set to TTL level (2.0 to 5.0 V). The input can be 75 Ωterminated by closing JP8/JP10 on
PK8273B board.
Input of external HD/VD for synchronizing the camera to an external source is possible in normal
continuous mode. Do not input external VD in trigger modes.
6.2.2. Output of Internal HD/VD signals
In order to output internal HD/VD signal 4.0 Vp-p from a 75 Ωsource on pin 6/12 and 7/12, a
jumper setting is required. JP9/JP11on PK8273B board open, and JP12/JP13 short.
In normal continuous mode both the internal HD and VD can be output. In trigger modes the
internal VD will change to a WEN pulse. (Can be output on pin 7/12 by jumper setting).
6.2.3. Pixel Clock out on pin 9/12
Pin 9/12 is used for either pixel clock or WEN output. From factory none is output. Short jumper
JP7 (JP18 open) for pixel clock out. To avoid interference the pixel clock output should be
disabled if not used.
6.2.4. WEN out on pin 9/12
For applications where only the 12 pin connector is used, WEN can be output on pin 9/12 if JP18
is short (JP7 open). WEN active polarity is positive 1H. It can be changed to be active low by
JP22. The timing then depends of the actual mode.
6.2.5. Input of external trigger
The external trigger input use either the HD or the VD input circuit depending of the mode
setting. The external trigger signal should be 4.0 Vp-p ±2.0 V from a 75 Ωsource. The trigger
inputs can be 75 Ωterminated by closing JP8/JP10 on PK8273B board.
Depending of which input circuit is uses for trigger input, the trigger mode will be H-reset or H
non-reset.
For a principle description of how it works, refer to fig. 29. with jumper in factory setting.
1) Trigger input on pin 6/12 will result in H reset mode.
2) Trigger input on pin 7/12 and external HD on pin 6/12 will result in H non-reset mode.
With trigger input on pin5/6:
1a) Trigger input on pin 5/6 will result in H reset mode. (JP5 short).
2a) Trigger input on pin 5/6 and external HD on pin 6/12 will result in H non-reset mode.
(JP5 open and JP20 short).
Please refer to chapter “7.2. Jumper settings” for details in mode settings.

CV-M40
- 8 -
6.3. Operation Modes
This camera can operate in 4 primary modes. 1 non-triggered, 3 external asynchronous trigger
modes. The triggered shutter can be HD synchronous or with H reset.
To avoid <1H time jitter in H non-reset mode, it is recommended to synchronize the trigger to
HD as shown I fig. 8.
1. Normal continuous Mode. Pre-selected exposure and long time exposure.
2. Edge Pre-select Mode. Pre-selected exposure.
3. Pulse Width Control Mode. Pulse width controlled exposure.
4. EPS with delayed read out Pre-selected exposure with delayed read out
For the 3 trigger modes, the shutter exposure can operate in 2 modes.
H reset:
The trigger leading edge will immediately reset the internal H phase and start the exposure.
This mode need no external HD input.
The delay from trigger falling edge to exposure start is 1.5 µsecond.
H non-reset:
The exposure will start synchronous with the first HD after the trigger leading edge.
This mode need external HD input.
To avoid 1 H jitter it is recommended to synchronize the external trigger to the external HD
signal as shown in fig. 8. The trigger falling and rising edge should be within the 4 + 1.5 µs.
Minimum trigger pulse width.
Edge Pre-Select mode H reset: >2µs
Edge Pre-Select mode H non-reset: >1H
Pulse Width Control: >2H
EPS with delayed read out: >3H + shutter time
Maximum trigger pulse width.
There is no fixed value for the maximum trigger pulse width. In pulse width control and frame
delay readout it can be up to about 2 second. Then the dark signal noise will be visible. It is
recommended to keep the trigger pulse short.
Fig. 8. Trigger HD relation
Please refer to chapter “7.2. Jumper settings” for details in mode settings.

CV-M40
- 9 -
6.3.1. Continuous operation
This mode is used for applications not requiring asynchronous external trigger, but should run in
continuous operation.
The shutter time can be selected in 8 steps 8 steps, 1/125 to 1/12,000 sec. Via RS232C in 9 steps
1/60 (Off) to 1/120000. or programmable from 2H to 524H (Off). Binning or partial scan can be
used, but not together.
For settings refer to chapter “7. Configuring the camera.”
Refer to timing charts for details.
To use this mode:
Set: Rear switch SW1-5 OFF, SW1-6 OFF for Normal. For RS-232C select Continuous
trigger mode.
SW1-1 through SW1-3 on rear or RS-232C for shutter speed.
Other functions.
Input: If used, input Ext. HD and Ext. VD to pin 6/12 and 7/12.
[JP10 short for HD 75Ωtermination. JP8 short for VD 75Ωtermination.]
Note: Selection of shutter speed longer than the frame time in binning and partial
scanning will result in an exposure equal the frame time.
In partial scan, the shutter can not be completely off. Exposure is frame time –2H.
Fig. 9. Horizontal timing
Ext. VD
Int. VD
Video out
WEN (pos)
WEN (neg)
Fig. 10. Vertical timing

CV-M40
- 10 -
Ext. VD
Int. VD
Video out
WEN (pos)
WEN (neg)
Fig. 11. Vertical timing with binning
Programmable partial scanning is not supported with timing details.
Fig. 12. Vertical timing with partial scan

CV-M40
- 11 -
6.3.2. Edge Pre-select Trigger Mode
This trigger mode can operate in H reset mode or H non-reset mode.
In H reset mode the falling edge of the trigger will immediately reset the internal HD and start
the exposure. In H non-reset mode, where an external HD should be input, the exposure will
start at the first HD after the trigger. The shutter time can be selected in 8 steps, 1/125 to
1/12,000 sec. Via RS232C in 9 steps, 1/60 (Off) to 1/120,000. Programmable shutter from 2H to
524H (Off). Binning or partial scan can be used, but not together.
The resulting video signal will start to be read out after the selected shutter time.
To avoid up to 1H time jitter in H non-reset, it is recommended to synchronize the trigger to HD.
The falling edge of the trigger should be within 4.4 µsec. from the falling edge of the ext. HD.
(See fig. 8.).
The WEN pulse indicates the start of valid video signal. Refer to timing charts for details. A new
trigger pulse must not be applied before the video read out has been finished. (WEN negative
goes high). For partial scanning, refer to fig. 15.
For settings refer to chapter “7. Configuring the camera.”
Refer to timing charts for details.
To use this mode:
Set: Rear switch SW1-5 ON, SW1-6 OFF for Edge. For RS-232C select Edge Pre-Select.
SW1-1 through SW1-3 on rear or RS-232C for shutter speed.
Other functions.
Input: For H reset: External trigger to pin #5/6. >2µs
(JP5 short, JP11 short)
[JP10 short for trigger 75Ωtermination.]
For H non-reset: External trigger to pin #5/6. >2H
External HD to pin #6/12
(JP20 short, JP5 open, JP9 short)
(JP21 short, JP11short)
[JP8 short for trigger 75Ωtermination.]
[JP10 short for HD 75Ωtermination.]
Note: For H non-reset the external HD should be input continuously.
Refer to fig. 29. for correct jumper setting and pin connections.

CV-M40
- 12 -
Fig. 13. EPS vertical timing
Fig. 14. EPS vertical timing with binnig
Programmable partial scanning is not supported with timing details.
Fig. 15. EPS vertical timing with partial scanning

CV-M40
- 13 -
6.3.3. Pulse Width Control Trigger Mode
This trigger mode can operate in H reset mode or H non-reset mode.
In H reset mode the trigger falling edge will immediately reset the internal H and start the
exposure. The exposure will end at the rising edge of the trigger, and the resulting video will be
read out. WEN will indicate the start of video read out.
In H-non-reset mode, where a continuous external HD is input, the exposure will start at the
first HD pulse after the falling edge of the trigger. The exposure stops at the trigger rising edge.
To avoid up to 1H time jitter it is recommended to synchronize the trigger to HD. The falling
edge of the trigger should be within 4.4 µsec. from the falling edge of the ext. HD. (See fig. 8.).
The resulting video signal will start to be read out after the trigger rising edge. The WEN pulse
indicates the start of valid video signal.
The trigger pulse width can be up to 2 second. Here the dark signal noise will be visible.
A new trigger pulse must not be applied before the video read out has been finished. (WEN
negative goes high). For partial scanning, refer to fig. 18.
For settings refer to chapter “7. Configuring the camera.”
Refer to timing charts for details.
To use this mode:
Set: Rear switch SW1-5 OFF, SW1-6 ON for Pulse. For RS-232C select Pulse Width
Control.
Other functions.
Input: For H reset: External trigger to pin #5/6. >2H
(JP5 short, JP11 short)
[JP10 short for trigger 75Ωtermination.]
For H non-reset: External trigger to pin #5/6. >2H
External HD to pin #6/12
(JP20 short, JP5 open, JP9 short)
(JP21 short, JP11short)
[JP8 short for trigger 75Ωtermination.]
[JP10 short for HD 75Ωtermination.]
Note: For H non-reset the external HD should be input continuously.
Refer to fig. 29. for correct jumper setting and pin connections.

CV-M40
- 14 -
Fig. 16. PWC vertical timing
Fig. 17. PWC vertical timing with binning
Programmable partial scanning is not supported with timing details.
Fig. 18. PWC vertical timing with partial scanning

CV-M40
- 15 -
6.3.4. Frame delay read out Mode.
The trigger falling edge will start the selected exposure as for edge pre-select. The trigger
raising edge will start the resulting frame to be read out.
This mode allows simultaneous capture of multiple cameras using a common external trigger
pulse and sequential multiplexed read out to a single input frame grabber.
This trigger mode can operate in H reset mode or H non-reset mode.
In H reset mode the falling edge of the trigger will immediately reset the internal HD and start
the exposure. In H non-reset mode, where an external HD should be input, the exposure will
start at the first HD after the trigger. The shutter time can be selected in 8 steps, 1/125 to
1/12,000 sec. Via RS232C in 9 steps, 1/60 (Off) to 1/120,000. Programmable shutter from 2H to
524H (Off). Binning or partial scan can be used, but not together.
To avoid up to 1H time jitter in H non-reset, it is recommended to synchronize the trigger to HD.
The falling edge of the trigger should be within 4.4 µsec. from the falling edge of the ext. HD.
(See fig. 8.).
When the trigger signal rise, the resulting video signal will be read out.
The WEN pulse indicates the start of valid video signal. Refer to timing charts for details. A new
trigger pulse must not be applied before the video read out has been finished. (WEN negative
goes high). For partial scanning, refer to fig. 21.
The trigger pulse width should be >3H longer than the pre-selected exposure time.
The maxim trigger pulse width (or delay) should be <2 seconds. Here the dark signal noise will
be visible.
For settings refer to chapter “7. Configuring the camera.”
Refer to timing charts for details.
To use this mode
Set: Rear switch SW1-5 ON, SW1-6 ON for Frame. For RS-232C select Frame delay
readout.
SW1-1 through SW1-3 on rear or RS-232C for shutter speed.
Other functions.
Input: For H reset: External trigger to pin #5/6. >3H
(JP5 short, JP11 short)
[JP10 short for trigger 75Ωtermination.]
For H non-reset: External trigger to pin #5/6. >3H
External HD to pin #6/12
(JP20 short, JP5 open, JP9 short)
(JP21 short, JP11short)
[JP8 short for trigger 75Ωtermination.]
[JP10 short for HD 75Ωtermination.]
Note: For H non-reset the external HD should be input continuously.
Refer to fig. 29. for correct jumper setting and pin connections.
Avoid highlighted scene areas during the delay period.

CV-M40
- 16 -
Fig. 19. Frame delay vertical timing
Fig. 20. Frame delay vertical timing with binning
Programmable partial scanning is not supported with timing details.
Fig. 21. Frame delay vertical timing with partial scanning

CV-M40
- 17 -
6.4. Other Functions.
Shutter speed.
The shutter speed can be set by the rear switch SW1-1 through 1-3 in 8 fixed steps from 1/125 to
1/12,000 second.
Via RS-232C it can be set to 9 fixed steps from 1/60 (Off) to 1/12,000 sec. Further it can be
programmed with 1H step from 2H to 524H (Off).
Readout mode.
Normal full frame readout or binning can be selected by SW1-4. The binning is vertical 2:1,
where the pixel values from 2 adjacent lines are added and read out as a single line. The frame
rate is 120. Binning will not work together with partial scanning.
With RS-232C the binning function is found in the “Frames Mode” menu.
Trigger modes.
The 4 modes can be selected by SW1-5 and SW1-6, or via RS-232C in ”Trigger Modes” menu.
Format.
Full or partial scanning can be selected by rear SW1-7. With partial selected, the scanning
format are set by internal jumpers JP14 through JP17. (1/2, 1/4, 1/8 or 1/16 partial). Factory
setting 1/4.
With RS-232C the partial scanning is found in the menu “Frame Modes”. Here it is also possible
to program the partial scanning with 1line steps from 15H to 413H.
(Note: Programmable partial scan is not supported with timing diagrams.)
Control.
Switch SW1-8 selects if the camera is controlled locally by switch and jumpers or via RS-232C.
Gamma.
Gamma can be set to 1.0 (linear) or 0.45 by internal jumpers JP1 and JP2. Factory setting 1.0.
If JP1 and JP2 is open, the gamma selection can be done via RS-232C.
WEN polarity.
The WEN output pulse is positive going 1H wide as factory setting. It indicates that the resulting
video signal is read out. With the internal jumper JP22, the WEN pulse can be changed so it is
low during video readout. Refer to timing diagrams for details.
Gain settings.
As factory setting the video gain can be controlled by the rear potentiometer.
Via RS-232C the video gain function has 3 modes.
1. Automatic Gain Control. AGC. Here the gain is automatic controlled to keep the video
level constant within a 12 dB range. The level is given by the AGC reference value.
2. Manual Gain Control. Here the gain level is set by Manual Gain Level via RS-232C.
3. Hardware (Rear potentiometer) where the gain can be set by the rear potentiometer.
AGC reference level.
The AGC reference level can be set by RS-232C only. The level is adjusted so the automatic gain
control circuit AGC will keep the video level constant. Normal video output 700 mVpp ±30 mV.
Black level.
RS-232C only. Black level (or set-up) can set the video level for black. Normal 20 mV ±2 mV.
White clip level.
RS-232C only. Is set to clip highlighted video signal peaks. Normal clip level is 800 mVpp ±30 mV.

CV-M40
- 18 -
7. Configuring the Camera
Note: Before making any mode or jumper settings switch the power off.
Factory settings are shown in “italic bold”.
7.1. Mode Setting by Switch
<
<
<
<
<
>
<
>
<
<
>
>
>
<
<
>
<
>
>
>
<
>
>
>
1/125
1/250
1/500
1/1000
1/2000
1/4000
1/8000
1/12,000
OFF ON
1
2
3
4
5
6
7
8
CONTROL
READ OUT
SHUTTER
< > < >
Normal < > Binning
< >
< >
< < > >
RS 232CLocal
TRIGGER
MODE
Normal
Edge
Pulse
Frame
Full Partial
FORMAT
Note: The shown switch settings are the factory setting.
Fig. 22. Switch on camera rear.
7.2. Jumper settings
The inside jumper settings are done as solder bridges. Jumpers are found on the following
boards: PK8201C, PK8273B and PK8202C.
PK8201C
PK8273B
PK8202C
C-Mount
Fig. 23. PCB boards positions
7.2.1. Gamma setting
Jumpers are placed on PK8201C.
Set by jumper
Jumper 0.45 1.0
Select
by RS-232C
JP1 Short Open Open
JP2 Open Short Open
Fig. 24. Gamma setting

CV-M40
- 19 -
7.2.2. Partial scan setting
Jumpers are placed on PK8273B.
Format set by the jumpers are selected as partial by the rear switch SW1-7.
Fig. 25. Partial scan setting
7.2.3. Pixel clock and WEN output
Jumpers are placed on PK8202B.
Note: Do not output pixel clock when not used.
Fig. 26. Pck/WEN output on pin#9/12. WEN on #6/6.
7.2.4. HD/VD input or output
Jumpers are placed on PK8273B and PK8202B.
Note: The HD/VD input circuit are also used as trigger and HD input in trigger modes. The
jumper settings and pin connections should be carefully checked to avoid problems.
*) JP21 and JP19 on rear board PK8202B.
Scanning
Jumper 1/16
30 lines
1/8
60 lines
1/4
120 lines
1/2
240 lines
JP14 Short Open Open Open
JP15 Open Short Open Open
JP16 Open Open Short Open
JP17 Open Open Open Short
Output on pin #9/12
Jumper N C PC
K
WEN
JP7 Open Short Open
JP18 Open Open Short
Output on pin #6/6
Jumper N C WEN out
JP6 Open Short
Jumpe
r
VD in TTL VD in 75 ΩVD out
JP8 Open Short x
JP9 Short Short Open
JP12 Open Open Short
JP19 *) Short Short Short
Jumpe
r
HD in TTL HD in 75 ΩHD out
JP10 Open Short x
JP11 Short Short Open
JP13 Open Open Short
JP21 *) Short Short Short
Fig 27. HD and VD input/output jumpers
Table of contents
Other IAI Digital Camera manuals

IAI
IAI GOX-2402M-USB User manual

IAI
IAI cm-140ge User manual

IAI
IAI SW-4000M-PMCL User manual

IAI
IAI SW-8000M-PMCL User manual

IAI
IAI cm-040ge User manual

IAI
IAI AP-1600T-PMCL User manual

IAI
IAI GOX-5105M-5GE User manual

IAI
IAI SW-4000TL-10GE User manual

IAI
IAI GOX-5105M-PGE User manual

IAI
IAI WA-1000D-CL User manual