idp Smart-30 User manual

2014-03-24
Color ID Card Printer
-Technical Manual

2014-03-24
Copyright Notice
Users must respect the copyright laws applicable in their country.
This manual must not be photocopied, translated, reproduced or transmitted in whole
or in part for any reason and by the means that might be, albeit electronic or mechanical,
without the express, written authorization of IDP Corporation.
All information contained herein may be subject to modification without prior notice.
IDP Corporation accepts no liability for any possible errors herein, nor for any
accidental damage or damage caused through the dissemination or the use of this manual.
Trademarks
SMART is a trademark and IDP Card Printer is a registered trademark of IDP Corporation.
Windows is registered trademarks of Microsoft Corp. All other trademarks or
registered trademarks are marks of their respective holders. Smart Design is a trademark of
IDP Corporation.

2014-03-24 3
1. Introduction
1.1 Printer Basic Information
◦1.1.1 Printer Outside Features
◦1.1.2 Printer Inside Features
◦1.1.3 Ribbon Cartridge Feature
◦1.1.4 LED Status and Button Operation
1.2 Printer Installation and Instructions
◦1.2.1 Ribbon Installation
◦1.2.2 Card Thickness Adjustment
◦1.2.3 Cards Load
1.3 Printer Specifications
2. Main Parts
2.1 Sensors
2.2 Thermal Head and Rollers
2.3 Motors
2.4 PCBs
2.5 Wired Diagram

2014-03-24 4
3. Parts Replacement
3.1 Covers
◦3.1.1 Side Cover Right / Left
◦3.1.2 LED-Button Unit
◦3.1.3 Stacker Unit
◦3.1.4 Front Cover
◦3.1.5 Rear Cover
3.2 Top Cover Unit
◦3.2.1 Thermal Print Head
◦3.2.2 Top Cover
◦3.2.3 Cooling Fan
◦3.2.4 Top Cover Frame
3.3 Main PCBs
◦3.3.1 Main Board
◦3.3.2 PCB Ribbon RF

2014-03-24 5
3.4 Drive Unit
◦3.4.1 Main Drive
◦3.4.2 Belt Tension Setting
◦3.4.3 Ribbon, Head Down_Up Drive
3.5 Rollers
◦3.5.1 Cleaning Roller / Cleaning Roller Fixed
4 Administration
4.1 Setup
◦4.1.1 Overview
4.1.1.1 Function
4.1.1.2 Start
◦4.1.2 Printer Setup
4.1.2.1 Basic Setup
4.1.2.2 Expansion Setup
◦4.1.3 Printer Setup Adjustment
4.1.3.1 Printing Location
4.1.3.2 Printing Density
4.1.3.3 Ribbon Operation
4.1.3.4 Flipper

2014-03-24 6
4.1.3.5 Magnetic Stripe
4.1.3.6 Thermal Print Head Replacement
4.1.3.7 Security
4.1.3.8 Etc.
4.2 Test
◦4.2.1 Overview
◦4.2.2 Basic Operation
4.2.2.1 Select
4.2.2.2 Control
4.2.2.3 Print
4.2.2.4 Allocation
4.2.2.5 Status
4.2.2.6 Message
◦4.2.3 Encoding
4.2.3.1 Magnetic Stripe
4.2.3.2 Contact SMART Card
4.2.3.3 Contactless (PC/SC) SMART Card

2014-03-24 7
◦4.2.4 Status
4.2.4.1 Printer Status Code
4.2.4.2 Printer Error Code
4.3 Firmware
◦4.3.1 Overview
◦4.3.2 Automatic Update
◦4.3.3 Manual Update
5. Trouble Shooting
6.Appendix
A. Service Parts List
B. Expanded View
C. Option Unit Placement & Wiring

2014-03-24 8
1.1 Printer Basic Information
1.1.1 Printer Outside Features
This SMART-30 Card Printer takes a power via the adaptor provided with the printer. Using USB port, it
communicates with user’s PC. For the user’s convenience, the printer working status can be seen by LED and most of
the operations can be controlled by buttons.
The following shows the external functional features found on your Smart Printer
1.1 Printer Basic Information
Fig.1-1 Printer Front/Side Features
No. Name Function
①TOP COVER OPEN
BUTTON Open Top Cover.
②HOPPER COVER Load the cards for
printing.
③LED & BUTTON Display printer status and
control printer
④SIDE COVER
⑤STACKER Enable to remove Stacker
①
③
②
④
⑤

2014-03-24
⑧⑨⑩
Fig.1-2 Printer Read Features
No. Name Function
⑥REAR CARD
OUTLET Eject Error Card
⑦POWER SWITCH Printer On/Off
⑧DC POWER
CONNECTOR Connect DC power (Adapter)
⑨USB PORT Communicate with PC using
USB cable
⑩ETHERNET PORT
(OPTION)
Use it after removing the
ethernet port protector
9
⑥
⑦
1.1 Printer Basic Information
2014-03-24 10
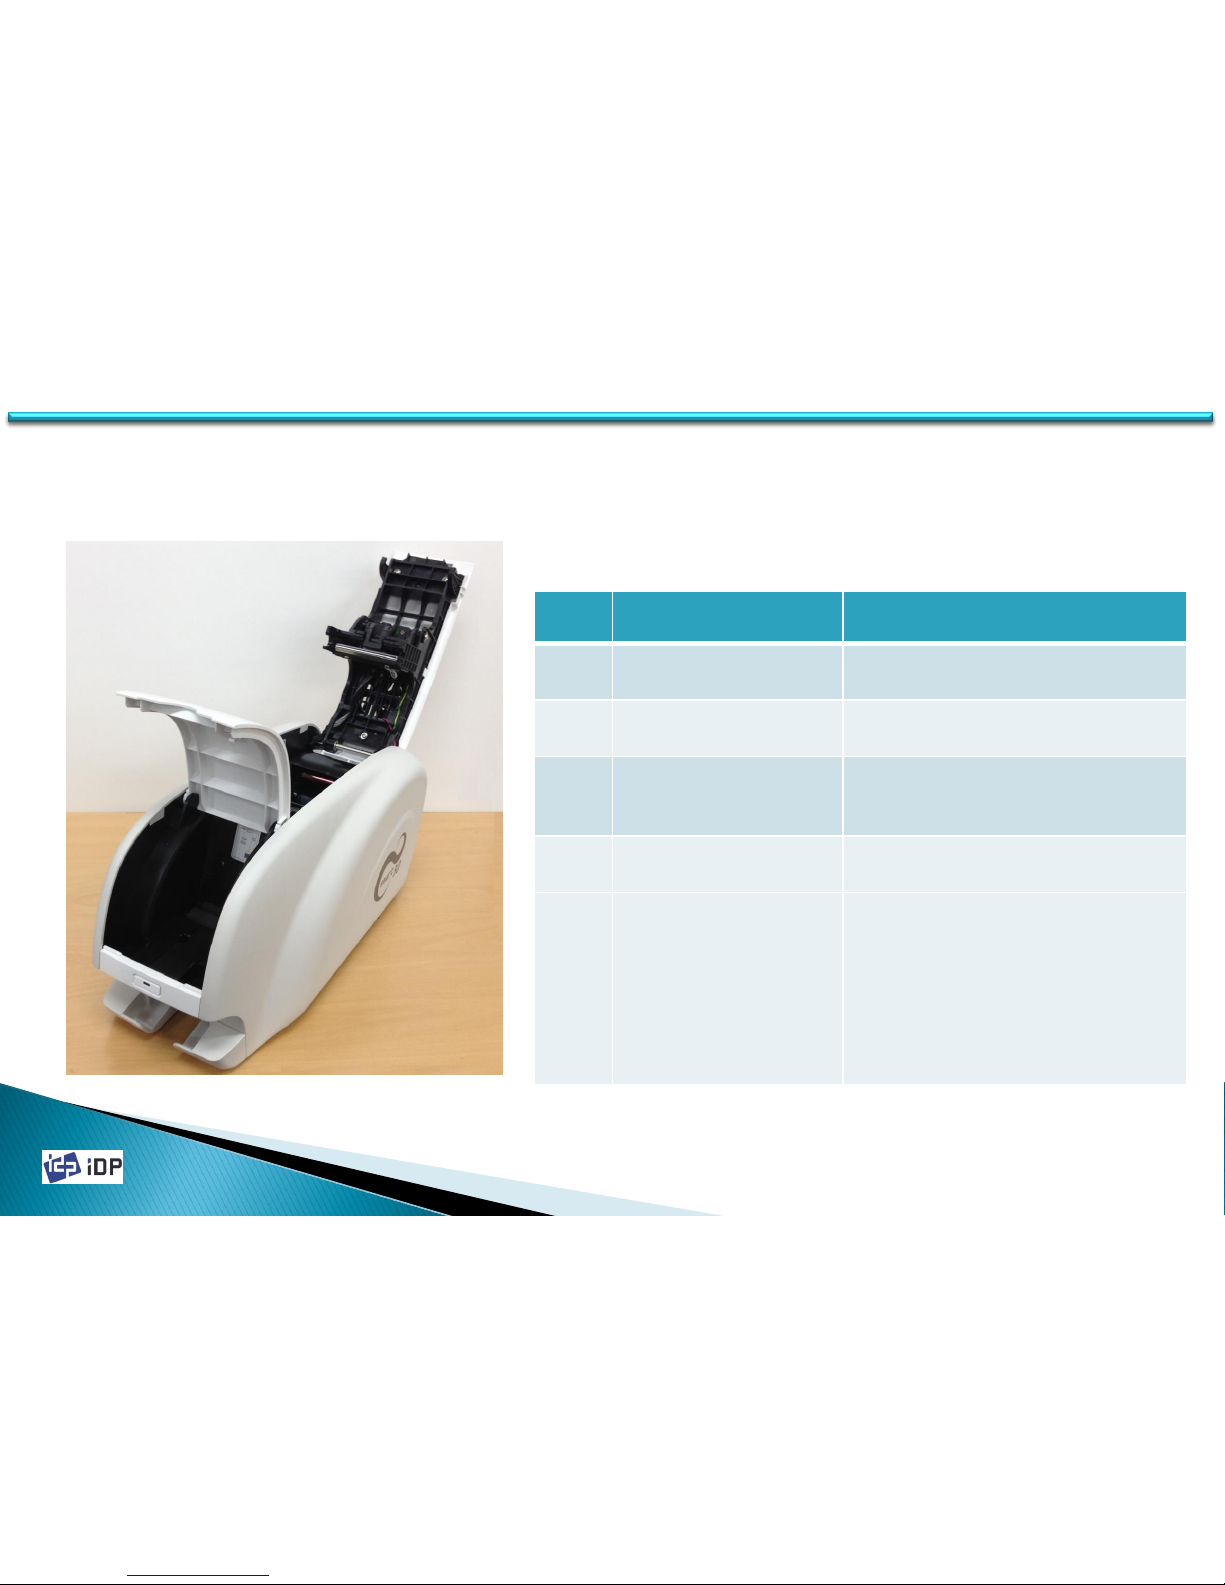
1.1.2 Printer Inside Features
Smart Printer adopts a semi-permanent cartridge to install a Ribbon. The following shows the internal components
and functional features found on your Smart Printer.
No. Name Function
①STACKER Stack printed cards and can be
removed.
②HOPPER Load new cards for printing and
encoding.
③CARD THICKNESS
CONTROL BRACKET
Loosen screws and adjust bracket
according to card thickness.
④RIBBON CARTRIDGE Install ribbon and cleaning roller
⑤THERMAL PRINT HEAD
This enables the Cards to be
printed.
Caution! Do not contact the
surface of the printer head with
fingers or a sharp metal object to
avoid degrading print quality or
damaging printer head
permanently.
⑤
①
Fig.1-3 Printer Inside Features
②③
④
1.1 Printer Basic Information
Table of contents
Other idp Printer manuals


