IFM OGD25 Series User manual

Operating instructions
Photoelectric distance sensor
OGD25x
OGD55x
11426548 / 0003 / 2023
GB

OGD25x OGD55x Photoelectric distance sensor
2
Contents
1 Preliminary note ............................................................. 4
1.1 Symbols used.......................................................... 4
1.2 Warnings used ......................................................... 4
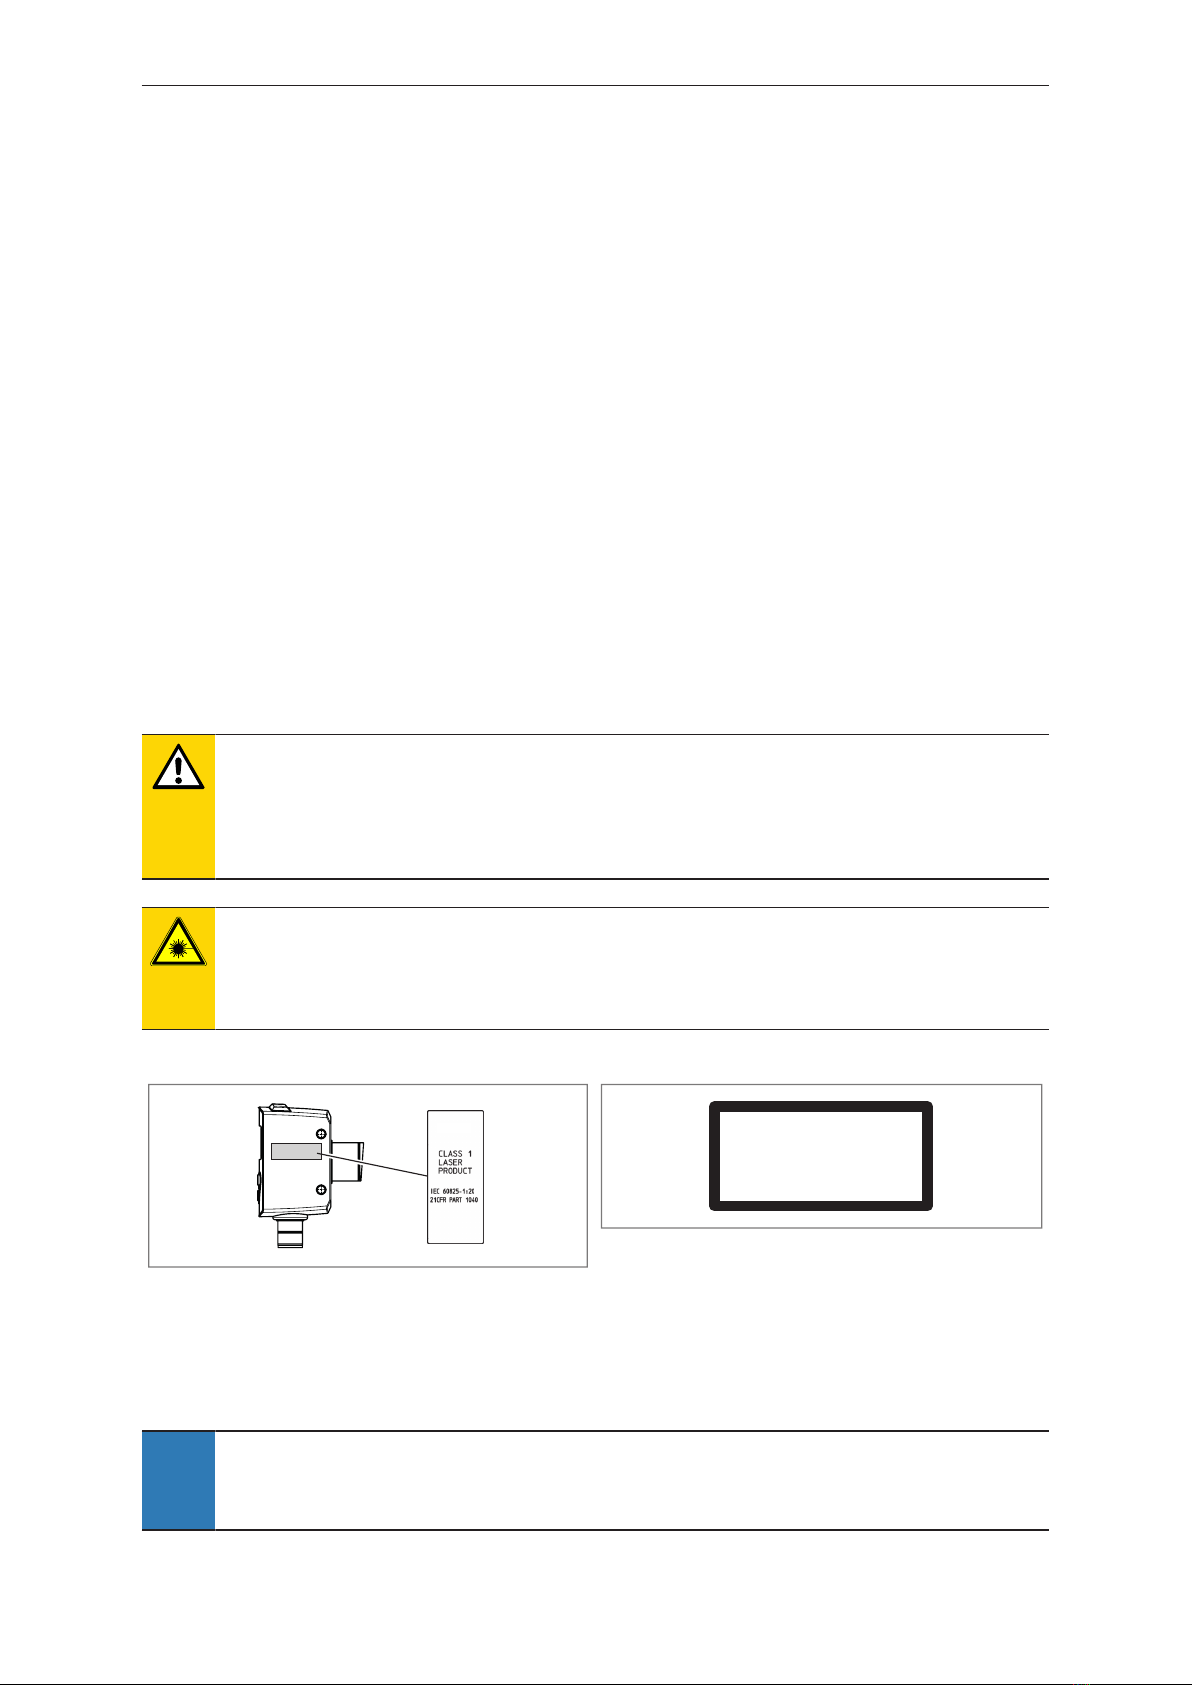
2 Safety instructions............................................................ 5
3 Intended use................................................................ 6
3.1 General notices......................................................... 6
3.2 Applications ........................................................... 6
4 Function ................................................................... 7
4.1 Assigning measurement parameters to a switching output . . . . . . . . . . . . . . . . . . . . . . . . 7
4.2 Output function hysteresis................................................. 7
4.2.1 Hysteresis function – distance.......................................... 7
4.2.2 Hysteresis function – reflectivity . . . . . . . . . . . . . . . . . . . . . . . . . . . . . . . . . . . . . . . . 8
4.2.3 Dynamic hysteresis.................................................. 9
4.3 Output function window................................................... 9
4.3.1 Window function – distance............................................ 9
4.3.2 Window function – reflectivity .......................................... 10
4.4 Analogue output........................................................ 11
4.4.1 Current output 4...20 mA.............................................. 11
4.4.2 Voltage output 0...10 V............................................... 12
4.5 Switching off the laser.................................................... 12
4.6 Operating modes ....................................................... 12
4.6.1 Switching mode..................................................... 12
4.6.2 IO-Link ........................................................... 12
5 Installation.................................................................. 14
5.1 Installation conditions.................................................... 14
5.2 Mounting accessories.................................................... 14
5.3 Installation instructions................................................... 14
5.3.1 Avoidance of soiling and ambient light . . . . . . . . . . . . . . . . . . . . . . . . . . . . . . . . . . . 14
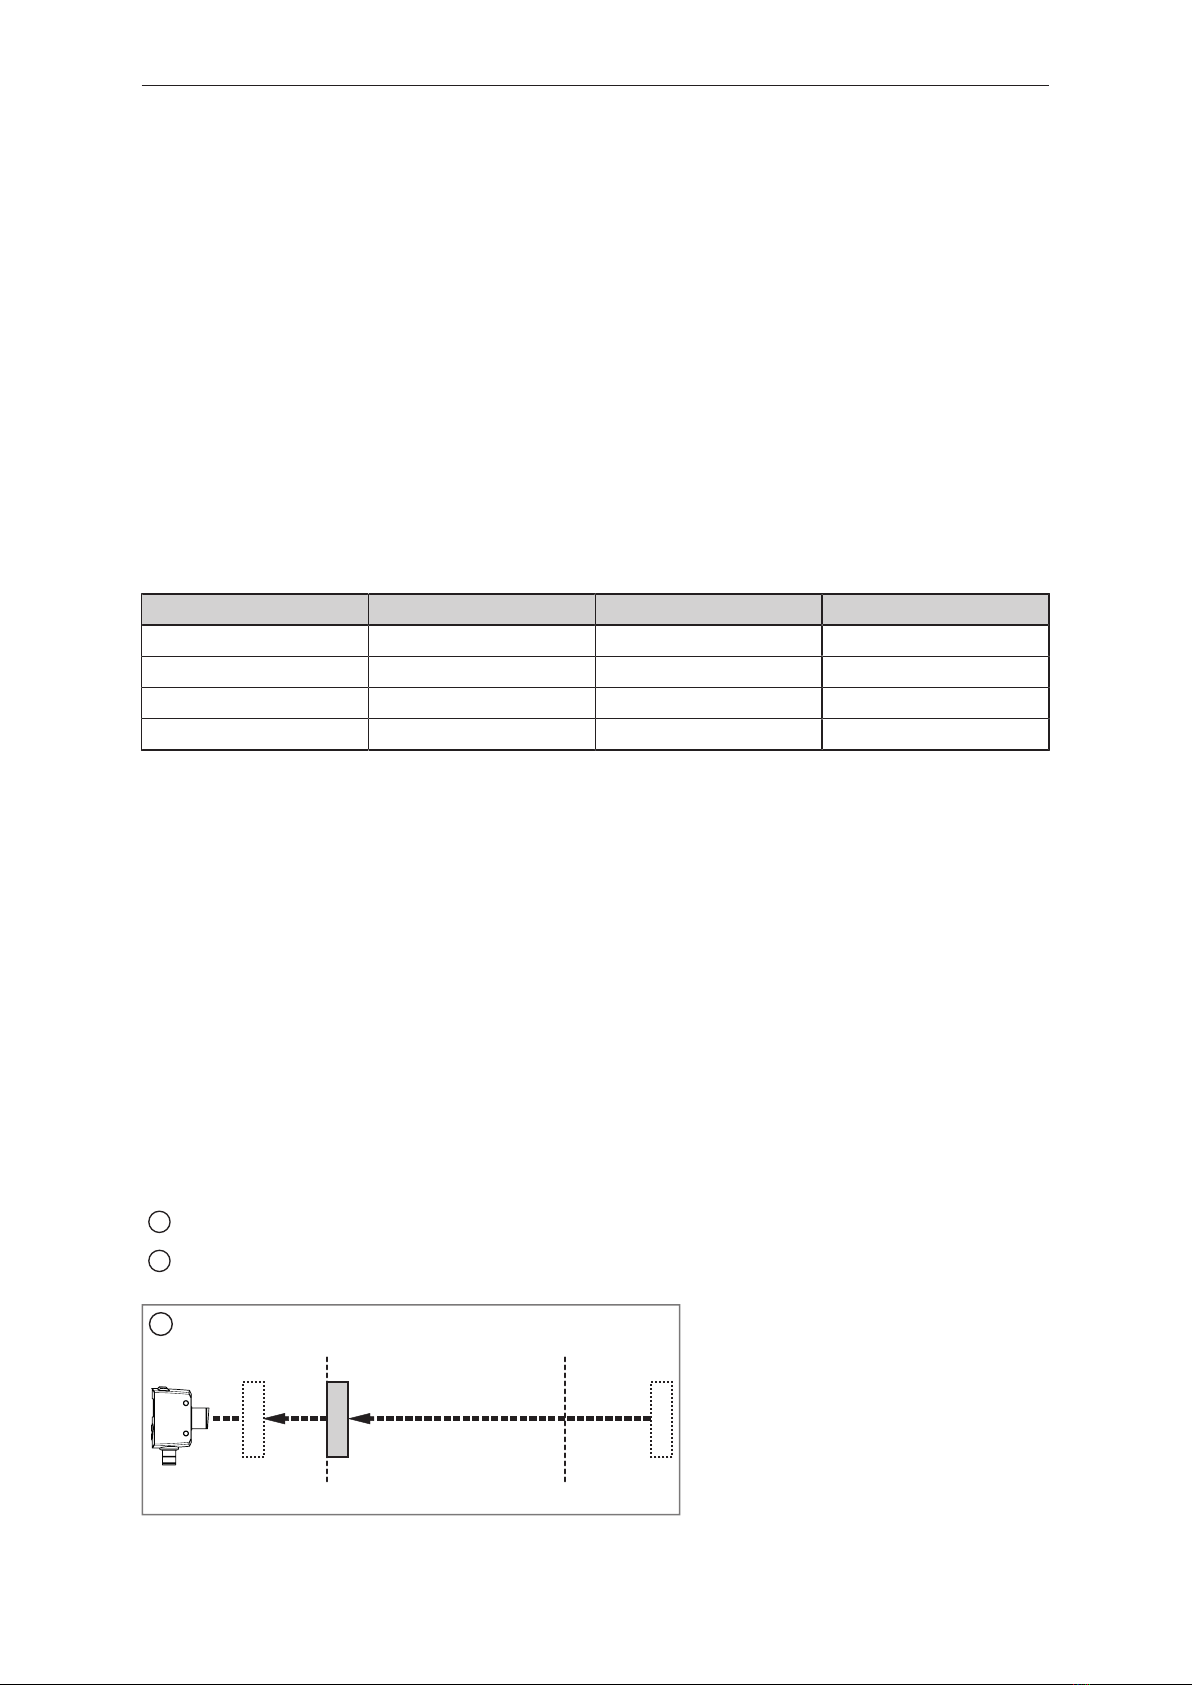
5.3.2 Sensor alignment for a moving object . . . . . . . . . . . . . . . . . . . . . . . . . . . . . . . . . . . . 14
6 Electrical connection.......................................................... 16
6.1 PNP/NPN selection...................................................... 16
6.2 Operation with IO-Link master.............................................. 17
7 Operating and display elements................................................. 18
8 Set-up..................................................................... 19
9 Menu...................................................................... 20
9.1 Hysteresis function (distance and reflectivity) . . . . . . . . . . . . . . . . . . . . . . . . . . . . . . . . . . 20
9.2 Window function (distance and reflectivity) . . . . . . . . . . . . . . . . . . . . . . . . . . . . . . . . . . . . 21
9.3 Analogue output for OUT2 (distance and reflectivity) . . . . . . . . . . . . . . . . . . . . . . . . . . . . 22
9.4 Extended functions – EF.................................................. 23
10 Operating modes ............................................................ 24
10.1 Run mode............................................................. 24
10.2 Display mode .......................................................... 24
10.3 Programming mode...................................................... 24
11 Parameter setting............................................................ 25
11.1 General parameter setting................................................. 25
11.1.1 Setting a parameter value............................................. 25
11.1.2 Changing from menu level 1 to the menu level 2. . . . . . . . . . . . . . . . . . . . . . . . . . . . 25
11.1.3 Locking / unlocking the device ......................................... 25
11.1.3.1 Parameter setting via the device keys. . . . . . . . . . . . . . . . . . . . . . . . . . . . . . . 26
11.1.3.2 Parameter setting via IO-Link . . . . . . . . . . . . . . . . . . . . . . . . . . . . . . . . . . . . . 26
11.2 Configuring the basic settings.............................................. 26
11.2.1 Output configuration................................................. 26
11.2.1.1 Parameter setting via the device keys. . . . . . . . . . . . . . . . . . . . . . . . . . . . . . . 26
11.2.1.2 Parameter setting via IO-Link . . . . . . . . . . . . . . . . . . . . . . . . . . . . . . . . . . . . . 27
11.2.2 Measured parameter................................................. 27

Photoelectric distance sensor OGD25x OGD55x
3
11.2.2.1 Parameter setting via the device keys. . . . . . . . . . . . . . . . . . . . . . . . . . . . . . . 27
11.2.2.2 Parameter setting via IO-Link . . . . . . . . . . . . . . . . . . . . . . . . . . . . . . . . . . . . . 27
11.2.3 Object teach for hysteresis function . . . . . . . . . . . . . . . . . . . . . . . . . . . . . . . . . . . . . 27
11.2.3.1 Teaching via the device keys . . . . . . . . . . . . . . . . . . . . . . . . . . . . . . . . . . . . . 27
11.2.3.2 Teaching via IO-Link............................................ 28
11.2.4 Teach – switch point for window function . . . . . . . . . . . . . . . . . . . . . . . . . . . . . . . . . 28
11.2.4.1 Teaching via the device keys . . . . . . . . . . . . . . . . . . . . . . . . . . . . . . . . . . . . . 28
11.2.4.2 Teaching via IO-Link............................................ 29
11.2.5 Teach – 1-point window function . . . . . . . . . . . . . . . . . . . . . . . . . . . . . . . . . . . . . . . . 29
11.2.5.1 Teaching via the device keys . . . . . . . . . . . . . . . . . . . . . . . . . . . . . . . . . . . . . 29
11.2.5.2 Teaching via IO-Link............................................ 30
11.3 Extended functions...................................................... 30
11.3.1 Operating modes ................................................... 30
11.3.1.1 Parameter setting via the device keys. . . . . . . . . . . . . . . . . . . . . . . . . . . . . . . 31
11.3.1.2 Parameter setting via IO-Link . . . . . . . . . . . . . . . . . . . . . . . . . . . . . . . . . . . . . 31
11.3.2 Setting the delay time for switching outputs . . . . . . . . . . . . . . . . . . . . . . . . . . . . . . . 31
11.3.2.1 Parameter setting via the device keys. . . . . . . . . . . . . . . . . . . . . . . . . . . . . . . 31
11.3.2.2 Parameter setting via IO-Link . . . . . . . . . . . . . . . . . . . . . . . . . . . . . . . . . . . . . 32
11.3.3 Setting a fault suppression time . . . . . . . . . . . . . . . . . . . . . . . . . . . . . . . . . . . . . . . . 32
11.3.3.1 Parameter setting via the device keys. . . . . . . . . . . . . . . . . . . . . . . . . . . . . . . 32
11.3.3.2 Parameter setting via IO-Link . . . . . . . . . . . . . . . . . . . . . . . . . . . . . . . . . . . . . 32
11.3.4 Output logic (PNP/NPN).............................................. 32
11.3.4.1 Parameter setting via the device keys. . . . . . . . . . . . . . . . . . . . . . . . . . . . . . . 32
11.3.4.2 Parameter setting via IO-Link . . . . . . . . . . . . . . . . . . . . . . . . . . . . . . . . . . . . . 33
11.3.5 Sequence modulation – mutual interference . . . . . . . . . . . . . . . . . . . . . . . . . . . . . . . 33
11.3.5.1 Parameter setting via the device keys. . . . . . . . . . . . . . . . . . . . . . . . . . . . . . . 33
11.3.5.2 Parameter setting via IO-Link . . . . . . . . . . . . . . . . . . . . . . . . . . . . . . . . . . . . . 33
11.3.6 Setting the display................................................... 34
11.3.6.1 Parameter setting via the device keys. . . . . . . . . . . . . . . . . . . . . . . . . . . . . . . 34
11.3.6.2 Parameter setting via IO-Link . . . . . . . . . . . . . . . . . . . . . . . . . . . . . . . . . . . . . 34
11.3.7 Setting the display colours ............................................ 34
11.3.7.1 Parameter setting via the device keys. . . . . . . . . . . . . . . . . . . . . . . . . . . . . . . 34
11.3.7.2 Parameter setting via IO-Link . . . . . . . . . . . . . . . . . . . . . . . . . . . . . . . . . . . . . 35
11.3.8 Device information .................................................. 35
11.3.8.1 Display via the device keys . . . . . . . . . . . . . . . . . . . . . . . . . . . . . . . . . . . . . . . 35
11.3.8.2 Display via IO-Link ............................................. 35
11.3.9 Restoring the factory setting........................................... 35
11.3.9.1 Reset via the device keys........................................ 35
11.3.9.2 Reset via IO-Link .............................................. 35
11.4 Additional parameter settings via IO-Link . . . . . . . . . . . . . . . . . . . . . . . . . . . . . . . . . . . . . 36
11.4.1 Transmitter configuration.............................................. 36
11.4.1.1 Parameter setting via IO-Link . . . . . . . . . . . . . . . . . . . . . . . . . . . . . . . . . . . . . 36
11.4.2 Unit locking........................................................ 36
11.4.2.1 Parameter setting via IO-Link . . . . . . . . . . . . . . . . . . . . . . . . . . . . . . . . . . . . . 36
12 Display .................................................................... 37
12.1 Devices with switching output.............................................. 37
12.2 Devices with analogue output.............................................. 37
13 Maintenance, repair and disposal................................................ 39
14 Factory setting .............................................................. 40

OGD25x OGD55x Photoelectric distance sensor
4
1 Preliminary note
You will find instructions, technical data, approvals and further information using the QR code on the
device / packaging or at documentation.ifm.com.
1.1 Symbols used
Requirement
Instructions
Reaction, result
[...] Designation of keys, buttons or indications
Cross-reference
Important note
Non-compliance may result in malfunction or interference.
Information
Supplementary note
1.2 Warnings used
ATTENTION
Warning of damage to property
CAUTION
Warning of personal injury
wSlight reversible injuries may result.

Photoelectric distance sensor OGD25x OGD55x
5
2 Safety instructions
• The device described is a subcomponent for integration into a system.
– The system architect is responsible for the safety of the system.
– The system architect undertakes to perform a risk assessment and to create documentation in
accordance with legal and normative requirements to be provided to the operator and user of
the system. This documentation must contain all necessary information and safety instructions
for the operator, the user and, if applicable, for any service personnel authorised by the
architect of the system.
• Read this document before setting up the product and keep it during the entire service life.
• The product must be suitable for the corresponding applications and environmental conditions
without any restrictions.
• Only use the product for its intended purpose (Ò Intended use).
• If the operating instructions or the technical data are not adhered to, personal injury and/or damage
to property may occur.
• The manufacturer assumes no liability or warranty for any consequences caused by tampering with
the product or incorrect use by the operator.
• Installation, electrical connection, set-up, operation and maintenance of the product must be
carried out by qualified personnel authorised by the machine operator.
• Protect devices and cables against damage.
CAUTION
Exposure to radiation
wInjury due to dangerous exposure to radiation
uOnly use the operating and adjusting devices indicated in the operating instructions.
CAUTION
Visible laser light; LASER CLASS 1.
EN/IEC 60825-1 : 2007 and EN/IEC 60825-1 : 2014 complies with 21 CFR Part 1040 except
for deviations pursuant to Laser Notice No. 50, dated June 2007.
Position of the product label Warning sign
14
LASER KLASSE 1
CLASS 1 LASER PRODUCT
APPAREIL Á LASER CLASSE 1
Max. power < 1.56 mW
Pulse duration 1.25 ns
Average power < 0.39 mW
Wave length 650 nm
ATTENTION
The device may cause radio interference in domestic areas. In this case it can be
necessary for the user to take appropriate measures.

OGD25x OGD55x Photoelectric distance sensor
6
3 Intended use
3.1 General notices
The device is used as a photoelectric distance sensor.
The device continuously detects the distance to the object and the reflectivity of the object and
generates output signals according to the parameter settings.
• 2 switching outputs are available. They can be set separately. Switch points can either be set or
taught.
• The measured values are shown in a 7-segment display and transferred via IO-Link. Two
measured values are generated.
Measured distance value:
Distance from the front pane of the sensor to the target.
Object reflectivity:
Reflective quality of the object.
The reflective quality of an object is angle dependant, e.g. a white Kodak grey card has a reflective
quality of approx. 90% at perpendicular light incidence.
The device uses a laser diode as light source and creates a light spot. This makes it possible to
detect small objects.
The light spot should hit the object or the background. Intermediate states may lead to faulty
measured values.
In the following document, the switching signal channels 1 and 2 are replaced by an “x”.
Example: SP1 / SP2 Ò SPx
3.2 Applications
• The photoelectric distance sensor measures distances from 30...2200 mm and object reflectivities
from 0...999 %.
• It has a background suppression of up to 20m.
The distance between the sensor and the background must be limited to max. 20 m. Otherwise
measured values can be ambiguous.

Photoelectric distance sensor OGD25x OGD55x
7
4 Function
The device shows the currently measured object distance or alternatively the object reflectivity in the
display. It generates output signals according to the parameter setting. Moreover, it provides the
process data via IO-Link.
The device is designed for fully bidirectional communication. So the following options are possible:
• Remote display: reading and displaying the current distance / reflectivity.
• Remote parameter setting: reading and changing the current parameter setting.
4.1 Assigning measurement parameters to a switching output
The device has two switching outputs, OUT1 / OUT2.
Via the parameters [SEL1] / [SEL2], a measurement parameter can be assigned to each switching
output.
e.g.
Parameter Switching output Setting Measured value
[SEL1] OUT1 [dist] Distance
[SEL1] OUT1 [refl] Reflectivity
[SEL2] OUT2 [dist] Distance
[SEL2] OUT2 [refl] Reflectivity
4.2 Output function hysteresis
The hysteresis keeps the switching status of the output stable if the measured value fluctuates around
the switch point. Both outputs (OUT1 and OUT2) can be set and taught as hysteresis function. The
switching output (OUT1 and OUT2) states are derived based on the measurement parameters
“distance” or “reflectivity”. The measurement parameter can be selected individually for each switching
output.
4.2.1 Hysteresis function – distance
The selected switch point [SPx] is the set point. The reset point is automatically set above the selected
switch point [SPx] by the sensor. The nominal distance between set point and reset point is the
hysteresis, it is indicated in the data sheet. The hysteresis depends on the reflectivity of the
background.
Example Hno
1
For the output function [Hno] the output switches when the object approaches and when the set point (A) is reached.
2
When the object is removed again, the output does not switch back before the reset point (B) is exceeded. The reset
point (B) is above the set point (A).
1
BA

OGD25x OGD55x Photoelectric distance sensor
8
2
A B
A: Set point B: Reset point
The object is detected if the switch point (distance) is not reached.
Switching status of the outputs
Output function Object distance (D) Switching status
[Hno] D < [SPx] Closed
D > [SPx] + hysteresis Open
[Hnc] D < [SPx] Open
D > [SPx] + hysteresis Closed
4.2.2 Hysteresis function – reflectivity
The selected switch point [SPx] is the set point. The reset point is automatically set below the selected
switch point [SPx] by the sensor. The nominal reflectivity difference between set and reset point is the
hysteresis which is indicated in the data sheet.
Example Hno
For the output function [Hno] the output switches when the object reflectivity increases and when the
set point (A) is reached.
When the object gets darker, the output does not switch back before the value is below the reset point
(B). The reset point (B) is smaller than the set point (A).
2
1
A
B
1
Laser beam A: Set point
2
Direction of movement of the object B: Reset point
If the output function [Hnc] has been selected, the set and reset points are reversed. The output
switches on if the object reflectivity is decreased. If the object reflectivity is increased, the output
switches off.
The object is detected if the switch point (reflectivity) is exceeded.

Photoelectric distance sensor OGD25x OGD55x
9
Switching status of the outputs
Output function Object reflectivity (R) Switching status
[Hno] R < [SPx] - hysteresis Open
R > [SPx] Closed
[Hnc] R < [SPx] - hysteresis Closed
R > [SPx] Open
4.2.3 Dynamic hysteresis
The measured values detected by the sensor vary depending on the situation. The highest fluctuation
of measured values occurs in case of a small signal to noise ratio. This is the case when very dark
targets are detected and when there is very much ambient light. Therefore, the reset point is
automatically set by the sensor after the switch point has been selected.
Very dark background = high hysteresis is selected.
Very bright background = small hysteresis is selected.
The minimum distance between object and background is reduced if the background is very bright
(e.g. white). A bright background enables the detection of smaller objects.
4.3 Output function window
The window function enables the monitoring of a defined acceptable range. Both outputs (OUT1 and
OUT2) can be set and taught as window function. The switching output (OUT1 and OUT2) states are
derived based on the measurement parameters “distance” or “reflectivity”. The measurement
parameter can be selected individually for each switching output.
Hystereses set automatically by the sensor ensure that the switching status of the output
remains stable at the window limits. Please refer to the data sheets for the hystereses.
4.3.1 Window function – distance
It is possible to define an object detection window for output [OU1] / [OU2].
Switches when the object is detected ([OUx] = [Fno])
[nSPx] [FSPx]
[Fno]
1
[nSPx]: Switch point "near" [FSPx]: Switch point "far"
1
Window
If the measured value is between the switch point "near” [nSPx] and the switch point "far" [FSPx], the
output is switched on (if [OUx] = [Fno]).

OGD25x OGD55x Photoelectric distance sensor
10
Switches off when the object is detected ([OUx] = [Fnc])
[nSPx] [FSPx]
[Fnc]
1
[nSPx]: Switch point "near" [FSPx]: Switch point "far"
1
Window
If the measured value is between the switch point "near” [nSPx] and the switch point "far" [FSPx], the
output is switched off (if [OUx] = [Fnc]).
The parameters [nSPx] and [FSPx] can also be set via the teach function. The reset points are
set dynamically by the sensor.
The minimum distance between [nSPx] and [FSPx] is 1mm.
Condition: [nSPx] < [FSPx]
e.g. the teaching of [nSPx] > [FSPx] will not be adopted by the sensor.
Switching status of the outputs
Output function Object distance (D) Switching status
[Fno] D < [nSPx]
D > [FSPx]
Open
[nSPx] < D < [FSPx] Closed
[Fnc] D < [nSPx]
D > [FSPx]
Closed
[nSPx] < D < [FSPx] Open
4.3.2 Window function – reflectivity
2
3
1
A
B
1
Laser beam A: Switch point “bright” = [bSPx]
2
Direction of movement of the object B: Switch point “dark” = [dSPx]
3
Window
Switches when the object is detected ([OUx] = [Fno])
If the measured value is between the switch point “bright” [bSPx] and the switch point “dark" [dSPx],
the output is switched on (if [OUx] = [Fno]).

Photoelectric distance sensor OGD25x OGD55x
11
Switches off when the object is detected ([OUx] = [Fnc])
If the measured value is between the switch point “bright” [bSPx] and the switch point “dark" [dSPx],
the output is switched off (if [OUx] = [Fnc]).
The parameters [bSPx] and [dSPx] can also be set via the teach function. The reset points are
set dynamically by the sensor.
The minimum distance between [bSPx] and [dSPx] is 1 %.
Condition: [dSPx] < [bSPx]
e.g. the teaching of [dSPx] > [bSPx] will not be adopted by the sensor.
Switching status of the outputs
Output function Object reflectivity (R) Switching status
[Fno] R < [dSPx]
R > [bSPx]
Open
[dSPx] < R < [bSPx] Closed
[Fnc] R < [dSPx ]
R > [bSPx]
Closed
[dSPx] < R < [bSPx] Open
4.4 Analogue output
A current or voltage output can be configured for the output [OU2].
• Current output 4...20 mA
• Voltage output 0...10 V
The analogue function is only available on selected devices. Ò Technical data sheet
4.4.1 Current output 4...20 mA
2
3
1
I [mA] I [mA]
20
4
[mm] [mm/%]
2000[AEP] [AEP][ASP]
00[ASP]
1
I [mA]
20
4
[%]
100[AEP]0[ASP]
20
4
1
Factory setting
2
Measuring range scaled
3
Final value of the measuring range
In the set measuring range the output signal is between 4 and 20 mA.
Faults are also displayed:
• Faults at [SELx] = [dist]:
– Too much light or object too near: 3.5 mA for rising edge ([ASP]]< [AEP]), 20.5 mA for falling
edge ([ASP] > [AEP]).
– Object too far or no object present: 20.5 mA for rising edge; 3.5 mA for falling edge.

OGD25x OGD55x Photoelectric distance sensor
12
• Faults at [SELx] = [refl]:
– Too much light: 20.5 mA for rising edge ([ASP]]< [AEP]), 3.5 mA for falling edge ([ASP] >
[AEP]).
– No object available: 3.5 mA for rising edge; 20.5 mA for falling edge.
4.4.2 Voltage output 0...10 V
2
3
1
U [V] U V]
10
[mm] [mm/%]
2000[AEP] [AEP][ASP]
00[ASP]
1
U [V]
10
[%]
100[AEP]0[ASP]
10
1
Factory setting
2
Measuring range scaled
3
Final value of the measuring range
In the set measuring range the output signal is between 0 and 10V.
4.5 Switching off the laser
The laser can be switched off via the input on pin 5 and via IO-Link.
Input signal on pin 5
Laser
PNP NPN
Low / not used High / not used On
High Low Off
4.6 Operating modes
4.6.1 Switching mode
In switching mode, the sensor is directly connected to the process control unit and transmits the state
via the switching output.
4.6.2 IO-Link
IO-Link is a communication system for connecting intelligent sensors and actuators to automation
systems. IO-Link is standardised in the IEC 61131-9 standard.
General information on IO-Link at io-link.ifm
Input Output Device Description (IODD) with all parameters, process data and detailed
descriptions of the device at documentation.ifm.com
IO-Link offers the following advantages:
• Interference-free transmission of all data and process values

Photoelectric distance sensor OGD25x OGD55x
13
• Parameter setting in the running process or presetting outside the application
• Parameters for identifying the connected devices in the system
• Additional parameters and diagnostic functions
• Automatic backup and restore of parameter sets in case of device replacement (data storage)
• Logging of parameter sets, process values and events
• Device description file (IODD - Input Output Device Description) for easy project planning
• Standardised electrical connection
• Remote maintenance

OGD25x OGD55x Photoelectric distance sensor
14
5 Installation
5.1 Installation conditions
uInstall the device so that the object to be detected is within the sensor’s detection zone.
Reflecting objects in the direct beam path of the sensor – also outside the detection zone – are
to be avoided by the customer (tilt the sensor by 10°). Otherwise the measured values can be
distorted.
Detection zone Ò Data sheet
5.2 Mounting accessories
The device is supplied with mounting accessories.
Device Mounting accessories Part No.
OGD55x 2x metal lock nuts E10027
OGD25x 2x plastic lock nuts E10026
Suitable mounting accessories can be found at www.ifm.com.
5.3 Installation instructions
5.3.1 Avoidance of soiling and ambient light
Preferably align photoelectric sensors with the front lens facing downwards or parallel to the earth’s
surface.
Background:
• Photoelectric sensors are sensitive to direct radiation of light sources. Everyday light sources
(lamps, sun) radiate from above.
• Photoelectric sensors react sensitively to soiling, as it reduces the excess gain.
Dust deposits can be reduced by downwards or sideways orientation. This allows for longer
cleaning intervals.
Make sure that sensors installed with their front lens facing upwards are not oriented towards
roof windows or ceiling lamps.
5.3.2 Sensor alignment for a moving object
The sensor has to be installed in a way to ensure that the object is moved into the detection zone of
the sensor from the side or from the front.

Photoelectric distance sensor OGD25x OGD55x
15

OGD25x OGD55x Photoelectric distance sensor
16
6 Electrical connection
The device must be connected by a qualified electrician.
uObserve the national and international regulations for the installation of electrical equipment.
uEnsure voltage supply according to SELV, PELV.
OGD25x / OGD55x: cULus, Supply Class 2
uDisconnect power.
uConnect the device as follows:
L
1
2
4
5
3
OUT2
OUT1/IO-Link
IN1
L+
4
2 1
3
5
1: L+
2: OUT2: switching output or analogue output
3: L-
4: OUT1: switching output or IO-Link
5: IN1: laser on/ off
6.1 PNP/NPN selection
Pins 2 and 4 can be switched between PNP and NPN logic.
The setting cannot be made for individual pins, but applies to all pins.
PNP NPN
L
1
2
4
5
3
L+
L
1
2
4
5
3
L+
L
1
2
4
5
3
L+
L
1
2
4
5
3
L+
1: L+
2: OUT2: switching output or analogue output
3: L-
4: OUT1: switching output or IO-Link
5: IN1: laser on/ off

Photoelectric distance sensor OGD25x OGD55x
17
6.2 Operation with IO-Link master
The unit is compatible with IO-Link master port class A (type A).
For operation with IO-Link master port class B (type B) observe the following:
As a standard, the unit is not compatible with master port class B (type B). Pin 2 and pin 5 are
used for manufacturer-specific functions. That means that the main supply voltage of the unit
and the additional voltage supply (master port class B on pins 2/5) are not electrically isolated.
With the following configuration, the unit can be used with master port class B:
• Connect unit and IO-Link master via 3 wires: Connect pins 1, 3 and 4 of the unit with the IO-Link
master (do not connect pins 2 and 5).

OGD25x OGD55x Photoelectric distance sensor
18
7 Operating and display elements
2
3
45
6
7
8
9
1
mm
refl
pwr
1: 2x green LED Status LED = set display unit (cm, mm, refl)
2: 1x green LED Status LED = power
3: 1x yellow LED Switching status [OUT1]
4: 1x yellow LED Switching status [OUT2]
5: 1x red LED Status LED = display of faults
6: Programming button [●] Selection of the parameters and acknowledgement of the param-
eter values.
7: Programming button [▲] Setting of the parameter values (scrolling by holding pressed,
incrementally by pressing once).
8: Programming button [▼] Setting of the parameter values (scrolling by holding pressed, in-
crementally by pressing once).
9: 4-digit alphanumeric display Indication of the measured distance or reflectivity, the parame-
ters and parameter values.

Photoelectric distance sensor OGD25x OGD55x
19
8 Set-up
uAfter installation, electrical connection and programming, check whether the device operates
correctly.
wIf the device has been correctly set up, the object distance or the object reflectivity is indicated. The
settings made last are internally stored by the sensor.

OGD25x OGD55x Photoelectric distance sensor
20
9 Menu
Pressing the [▲] + [▼] buttons at the same time will lead to a return in the menu navigation.
9.1 Hysteresis function (distance and reflectivity)
Runmode
1
2
OU1
SEL1
tSP1
255 r25
dist
refl
bAck
bAck
1000 / r10
255 / r25
SP1
bAck
1000 / r10
1001 / r11
SEL2
tSP2
dist
refl
bAck
bAck
2000 / r6
255 / r25
SP2
EF
bAck
bAck
2000 / r6
2001 / r7
OFF
Hno
Fno
bAck
Hnc
Fnc
I
Fno
OFF
bAck
U
Hno Hnc
Fnc
OU2
*
*
Current measured value Setting value
*) Only for analogue devices
This manual suits for next models
1
Table of contents
Other IFM Accessories manuals

IFM
IFM Efector 410 Application guide

IFM
IFM LMT 0 Series User manual

IFM
IFM O3M150 Mounting instructions

IFM
IFM O5H5xA Series User manual

IFM
IFM LK 022 Series User manual

IFM
IFM SBU3 Series User manual

IFM
IFM SB0503 User manual

IFM
IFM OJ51 Series User manual

IFM
IFM PL205 Series User manual

IFM
IFM TS502A User manual