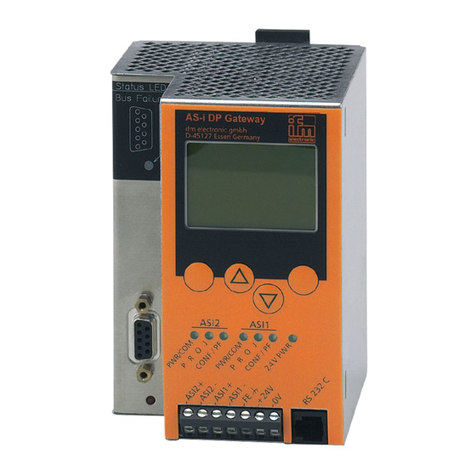
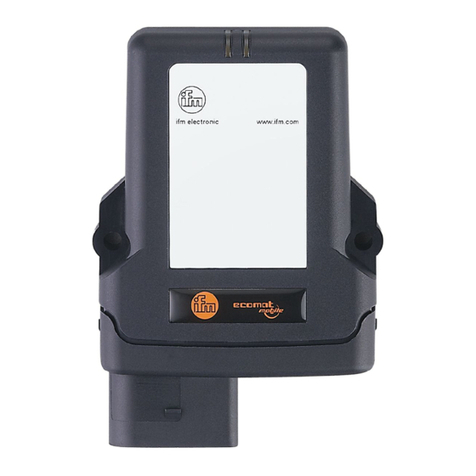
IFM AC422S User manual

Original operating instructions
Fail-safe SmartPLC
SafeLine
with Ethernet/IP slave interface
AC422S
80283446/00 03/2019
UK

2
Contents
1 Preliminary note ...................................................................................................4
1.1 Symbols used ................................................................................................4
2 Safety instructions ...............................................................................................4
2.1 General ..........................................................................................................4
3 Items supplied......................................................................................................5
4 Functions and features ........................................................................................6
4.1 Electrical voltage supply ................................................................................6
4.2 Configuration interfaces X3 and X8 ...............................................................6
4.3 AS-i interfaces ...............................................................................................6
4.4 Local safe inputs and outputs X4 ..................................................................7
4.5 Fieldbus interfaces X6 and X7 .......................................................................7
5 Installation............................................................................................................7
6 Operating, connection and display elements .......................................................8
6.1 Operating and connection elements ..............................................................8
6.2 LED indicators ...............................................................................................9
6.2.1 Device LED H1 .....................................................................................9
6.2.2 Interface LEDs on X6, X7 .....................................................................9
6.2.3 Interface LED on X8 .............................................................................9
7 Electrical connection ..........................................................................................10
7.1 Wiring...........................................................................................................10
7.2 Connect the supply voltage ......................................................................... 11
7.2.1 Standard configuration: 24 V power supply and AS-i power supply/
supplies ........................................................................................................ 11
7.3 Connect sensors / actuators ........................................................................12
8 Operation ...........................................................................................................12
8.1 Notes on the EMC-compliant operation .......................................................12
8.2 Settings ........................................................................................................13
8.2.1 Language selection ............................................................................13
8.3 Navigation ....................................................................................................14
8.3.1 Navigation elements ...........................................................................14
8.3.2 Pictograms and main navigation ........................................................15
8.3.3 OSC (Online Support Center) .............................................................16

3
UK
9 Diagnostics ........................................................................................................17
10 Maintenance, repair and disposal ....................................................................17
11 Approvals / tests ...............................................................................................17
12 Additional documents.......................................................................................17
13 Technical data ..................................................................................................18
13.1 Safety classification ...................................................................................19
14 Scale drawing ..................................................................................................20

4
1 Preliminary note
Technical data, approvals, accessories and further information at www.ifm.com.
This document applies to devices of the type
"Fail-safe SmartPLC with Ethernet/IP slave interface" (art. no.: AC422S).
It is part of the device and contains information about the correct handling of the
product.
This document is intended for qualified electricians. These specialists are people
who are qualified by their training and their experience to see and to avoid
possible hazards that may be caused during operation of the device. Installation
and set-up must be carried out by staff qualified in functional safety.
► Read this document before using the device.
► Keep this document during the service life of the device.
1.1 Symbols used
► Instructions
> Reaction, result
[…] Designation of keys, buttons or indications
→ Cross-reference
Important note
Non-compliance may result in malfunction or interference.
Information
Supplementary note
2 Safety instructions
2.1 General
► Observe these operating instructions.
► Adhere to the warning notes on the product.
• In case of non-observance of notes or standards, especially when tampering
with and/or modifying the unit, any liability and warranty is excluded.
• The safe operation of the device is only ensured when the specified
requirements are complied with.
• The applicable technical standards for the corresponding application must be
complied with.
• For installation the requirements according to EN 60204 must be observed.

5
UK
• In case of malfunction of the device contact the manufacturer. Tampering with
the unit is not allowed.
• Do not insert any objects into the device.
• Prevent metal foreign bodies from penetrating.
• After installation of the system perform a complete function check.
• Only use the unit under the specified operating conditions (→ Technical data).
In case of special operating conditions please contact the manufacturer.
Use of the unit in the vicinity of chemical and biological media as well as
ionising radiation is not permitted.
• In case of any questions please contact the safety authorities in your own
country.
WARNING
In case of improper handling of the product, the safety and physical
integrity of persons and machinery cannot be guaranteed.
Death or serious irreversible injuries may result.
► Note all remarks on installation and handling given in these instructions.
► The device must only be used under the specified operating conditions and in
accordance with use as prescribed below.
3 Items supplied
1 fail-safe SmartPLC AC422S
3 Combicon connection terminals
1 original operating instructions AC422S
1 EU declaration of conformity
• Service address list with ifm contacts
If one of the above-mentioned components is missing or damaged, please contact
one of the ifm branch offices.
Device manual and programming manual are not supplied. These are
available at: www.ifm.com.

6
4 Functions and features
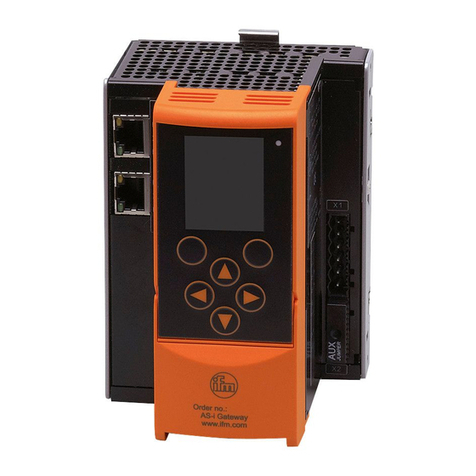
The fail-safe SmartPLC SafeLine AC422S integrates two AS-i masters, a safe
PLC, a non-safe PLC, a WEB server and an Ethernet/IP slave interface with 2-port
switch.
The fail-safe SmartPLC SafeLine
• controls the exchange of data to the sensor / actuator level.
• can be used as a safe and a non-safe controller (PLC).
• communicates with the higher-level control level via Ethernet/IP.
• visualises sensor/actuator data on the integrated WEB server.
• allows device configuration via the WEB server.
4.1 Electrical voltage supply
• Device supply from 24 V (AUX)
4.2 Configuration interfaces X3 and X8
• RJ45, twisted pair (10 Mbps and 100 Mbps)
• TCP / IP - Transport Control Protocol / Internet Protocol
• UDP/IP - User Datagram Protocol
• EtherCAT (Master) including FSoE (Fail Safe over EtherCAT)
• Modbus TCP (master / slave)
• 3S fail-safe network-global variables
• HTTP server
• CODESYS programming interface
• Secure network variables
• OPC UA server
• CODESYS Web visualisation
4.3 AS-i interfaces
• 2 AS-i masters
• AS-i Power24 compatible
• Ground-fault detection

7
UK
4.4 Local safe inputs and outputs X4
In the following they are called Safe-IO.
• 8 connection terminals for
- up to 4 safe inputs according to SIL3 / PL e / category 4
- up to 8 non-safe inputs
Use safe inputs always with two channels.
• 4 connection terminals for
- up to 2 safe semiconductor outputs according to SIL3 / PL e / category 4
- up to 4 non-safe outputs
4.5 Fieldbus interfaces X6 and X7
• Ethernet/IP
• DLR support
• 10 Mbps and 100 Mbps
5 Installation
The device must only be installed, connected and put into operation by a qualified
electrician as the safe function of the device and machinery is only guaranteed
when installation is correctly carried out.
The installation and connection must comply with the applicable national and
international standards. Responsibility lies with the person installing the device.
► Fix the device onto a 35 mm raised rail.
► Vertical installation (upright).
► Adhere to a minimum distance of 30 mm between the ventilation holes
(perforated sheet) and other parts.
► Maximum operating altitude: 2000 m above sea level
► The protection rating of the device is IP 20. The device must be installed at a
protected location (e.g. control cabinet with IP 54).
► In the event of degree of soiling 2 the device has to be installed in a control
cabinet with min. protection rating IP 54.
► Lay the cables in a cable duct.

8
► Keep the installation space of the device free from electrically-conductive
particles.
Ensure a condensation-free environment. Avoid excessive dust, vibration
and shock. The air circulation through the vents must not be impeded.
Avoid installation in direct vicinity of frequency inverters or other interfering
sources.
6 Operating, connection and display elements
6.1 Operating and connection elements
12
0
11
1: Device LEDs H1 green / yellow / red
2: Softkeys

9
UK
3: Navigation buttons
4: AS-i bus und FE connection X1
5: 24V device voltage supply X2
6: Connection for 24V Safe-IO voltage supply and local inputs/outputs X4
7: Front fl ap
8: Slot for SD card
9: Confi guration interface X3
10: Confi guration interface X8
11: Ethernet/IP interface IN X7
12: Ethernet/IP interface OUT X8
6.2 LED indicators
6.2.1 Device LED H1
The LED on the front panel signals the state of the device and the connected
systems.
LED status Description
Green LED on: > Device has been started.
> There is no warning message.
> There is no error message.
Yellow LED flashes slowly (0.5 Hz): > There is a warning message.
> There is no error message.
Red LED flashes quickly (2 Hz): > There is an error message.
6.2.2 Interface LEDs on X6, X7
LED status Description
Green LED on: > Physical connection OK
LED yellow flashes: > Reception of data
6.2.3 Interface LED on X8
LED status Description
Yellow LED on: > Physical connection OK
LED green flashes: > Reception of data

10
7 Electrical connection
The unit must be connected by a qualified electrician.
► Disconnect power before connecting the device.
► Observe the national and international regulations for the installation of
electrical equipment.
► Connect the device as indicated on the terminals.
► Ensure an electrical connection between the fail-safe SmartPLC
SafeLine AC422S (terminal X1, pin 5 FE) and the ground of the
installation.
7.1 Wiring
Terminal X1 Pin Description
AS-i 2 + 1 AS-i + for AS-i line 2
AS-i 2 - 2 AS-i - for AS-i line 2
AS-i 1 + 3 AS-i + for AS-i line 1
AS-i 1 - 4 AS-i - for AS-i line 1
FE 5 Functional earth
6 not connected
Terminal X2 Pin Description
24 V 1 +24 V device supply
GND 2 GND
Terminal X4 Pin Description
1...8 IN1...8
9...12 OUT1...4
13,14 GND
15,16 +24 V power supply Safe-IO module

11
UK
A fixed terminal assignment is mandatory for the fail-safe inputs (IN 1...8)
→ Device manual → Installation → Connect devices to a local I/O interface.
Socket X3, X8 Configuration interface
Socket X6 Ethernet/IP interface 2 (OUT)
Socket X7 Ethernet/IP interface 1 (IN)
7.2 Connect the supply voltage
7.2.1 Standard configuration: 24 V power supply and AS-i power supply/
supplies
► Connect the supply voltage inputs of the device to the power supply intended
for this purpose.
AS-i bus 1
Connect the pins AS-i 1 + and AS-i 1 - of terminal X1 to the AS-i power supply
(e.g. AC1254) of the first AS-i bus.
AS-i bus 2
Connect the pins AS-i 2 + and AS-i 2 - of terminal X1 to the AS-i power supply
(e.g. AC1254) of the second AS-i bus.
Power must be applied simultaneously to the Safe-IO module (terminal X4)
and to the device (terminal X2).
24 V device supply
Connect the pins 24 V and 0 V of terminal X2 to a 24 V DC power supply
(18...32 V SELV/PELV).
24 V Safe-IO power supply
Connect the pins 24 V and GND of terminal X4 to a 24 V DC power supply
(18...32 V SELV/PELV).
Recommendation: Link the voltage supply through from terminal X4 directly
to terminal X2.
► Ensure a low-resistance connection of the symmetry point of the device
(terminal X1, pin 5 FE) to the ground of the installation.
► For the 24 V power supply (device, Safe-IO), select a power supply which
supplies an output current of at least 3 A.
► The cable length of the DC supply between power supply and AC422S is to be
limited to max. 3 m.

12
The power supplies used must meet the standard DIN EN 60950-1 for SELV/
PELV.
7.3 Connect sensors / actuators
The sensors and actuators are connected to all local (safe) inputs and outputs via
terminal X4.
► Connect the switching signals of sensors to the pins IN1...IN8 of terminal X4.
► Connect actuators to the pins OUT1...OUT4 of terminal X4.
► When external sensors / actuators are connected, their supply voltage and/or
reference potential of terminal X4 (Safe-IO module supply) must be tapped.
► When external sensors are connected, observe the max. permitted supply
voltage of the sensor and select the Safe-IO module supply accordingly.
► The signal cable length for external devices (sensors, actuators) is to be limited
to max. 10 m.
► Do not exceed the maximum output current of 0.5 A per output.
► Do not exceed a switching frequency of 25 Hz when connecting the inductive
loads (DC-13).
8 Operation
8.1 Notes on the EMC-compliant operation
► Use voltage supplies for the device that are not simultaneously used for the
supply of known interfering sources (e.g. large inductive loads, motor starters,
frequency converters, etc.).
► If the switching outputs of the device are used to control inductive loads (relays,
contactors etc.), additional means of suppression have to be provided directly
on those loads.
► Lay the cables of the digital inputs and outputs to be connected via the front
connector in separated cable ducts. There should be no other cables in these
ducts that are control or supply cables of known interfering sources.
This is a class A product which is intended for use in industrial applications.
The unit may cause radio interference in domestic areas. In this case it can
be necessary for the user to take appropriate measures.

13
UK
8.2 Settings
During operation the display is switched off after 10 minutes without
operation.
► Activate the display by pressing any button.
8.2.1 Language selection
► Change the user language of the device by pressing the ► button and the ▲
button or ▼ button simultaneously.

14
8.3 Navigation
8.3.1 Navigation elements
xxx xxx
xxx
1: Focus
2: Operating area
3: Softkey labelling (e.g. menu, OSC)
4: Navigation compass
5: Navigation status bar
6: Main navigation bar
7: Info bar

15
UK
8.3.2 Pictograms and main navigation
Quick set-up (summary of the menu points required for a basic
configuration)
• Config all
Projection adaptation for AS-i master 1 and AS-i master 2
• Operating mode
Selection of the operating modes for
- AS-i master 1,
- AS-i master 2,
- Control of the outputs (gateway, manual, PLC)
• QR code
• Fieldbus Ethernet/IP
- Display / modify the parameters of the Ethernet/IP interface
- IP address
- Subnet mask
- Gateway address
• Configuration interfaces 1 and 2
- Display / modify the parameters of the Ethernet configuration interface
- DHCP
- IP address
- Subnet mask
- Gateway address
• Addressing AS-i 1
- Slave overview AS-i line 1 (with the option to change AS-i addresses)
• Addressing AS-i 2
- Slave overview AS-i line 2 (with the option to change AS-i addresses)
AS-i 1
• AS-i master settings
• AS-i diagnostics
• AS-i slaves
AS-i 2
• AS-i master settings
• AS-i diagnostics
• AS-i slaves

16
System
• PLC
- Information
- Settings
- Diagnostics
• Information
• Settings
• Diagnostics
Interfaces
• Settings and information of the configuration interface
• Settings and information of the Ethernet/IP interface
Safety
• Settings, information and diagnostics of the safe controller
Safety
• Safety functions not available
Further details → device manual
8.3.3 OSC (Online Support Center)
It is accessed via the softkey [OSC] on the start screen. Events, warning and error
messages with time stamp are displayed in plain text.
• Current version
• History

17
UK
9 Diagnostics
Any information, warning or error messages are indicated in the display on
the device. The pictogram of the function unit concerned is superposed by an
information, warning or error symbol. If for one function unit a warning and an
error message exist at the same time, only the error symbol is displayed.
Warning message
Information message
Error message
All messages are displayed in plain text in the Online Support Center
(OSC).
10 Maintenance, repair and disposal
► Replace the buffer battery of the real-time clock as required, type CR2032.
► Dispose of the device in accordance with the national environmental
regulations.
11 Approvals / tests
• EMC
• Functional safety / TÜV-Rheinland
• AS-Interface / AS-i Safety at Work
• UL (cULus)
• Ethernet/IP
12 Additional documents
Data sheets, device manual, programming manual and registration documents
→ www.ifm.com

18
13 Technical data
AC422S
Use as an AS-i Ethernet/IP gateway with safe preprocessing
4 safe local inputs (two-channel) and 2 safe local semiconductor outputs
Electrical data
Number of AS-i masters 2
Operating voltage [V] 18...32 DC (AUX)
Current consumption from 24 V DC and
AS-i [mA]
< 750 (24 V) / < 10 from AS-i 1 /
< 10 from AS-i 2
Electrical separation yes
Inputs
Circuits DC PNP (type 2 to IEC 61131-2)
Sensor supply to SELV/PELV
Voltage range [V] 24 DC (18...32 DC)
Input current [mA] 7
Outputs
Output function Transistor PNP (according to IEC 61131-2)
Voltage range [V] 24 DC (18...32 DC)
External supply to SELV/PELV
Max. current load per output [mA] 500
Max. inductance [mH] 400
Max. switching frequency [Hz] 25
Utilisation category DC-13 (according to IEC 60947-5-1)
Electrically isolated yes
Short-circuit protection yes
Interfaces
Programming interface Ethernet
Data interface Ethernet/IP (IP = Industrial Protocol),
100 Mbaud
Environmental conditions
Ambient temperature [°C] 0...50, for UL application: max. 45
Storage temperature [°C] -20...70
Max. perm. relative air humidity [%] 95, non-condensing
Height above sea level [m] < 2000

19
UK
Protection IP 20
AS-i classification
AS-i version 3.0
AS-i profile M4
AS-i certificate 125301
Mechanical data
Housing materials Aluminium powder-coated;
steel sheet galvanised;
Makrolon
Displays / operating elements
Display Full graphic LCD display
LED function display 1 x combined LED (red / green)
13.1 Safety classification
Meets the requirements of
EN ISO 13849-1: 2015 category 4 PL e
IEC 61508: 2010 SIL 3
Mission Time (TM) 20 years
Safety-related reliability PFHd [1/h] 1.21*10
-08
PFD 1.04*10
-04

20
14 Scale drawing
106,293
135,5
128,2
Table of contents
Other IFM Gateway manuals