8 9
Safety instructions
/// General information
›
Read the operating instructions completely before starting up and follow the safety
instructions.
› Keep the operating instructions in a place where it can be accessed by everyone�
› Ensure that only trained staff work with the device�
› Follow the safety instructions, guidelines, occupational health and safety and accident
prevention regulations�
› The device must only be used in a technically perfect condition�
!Notice!
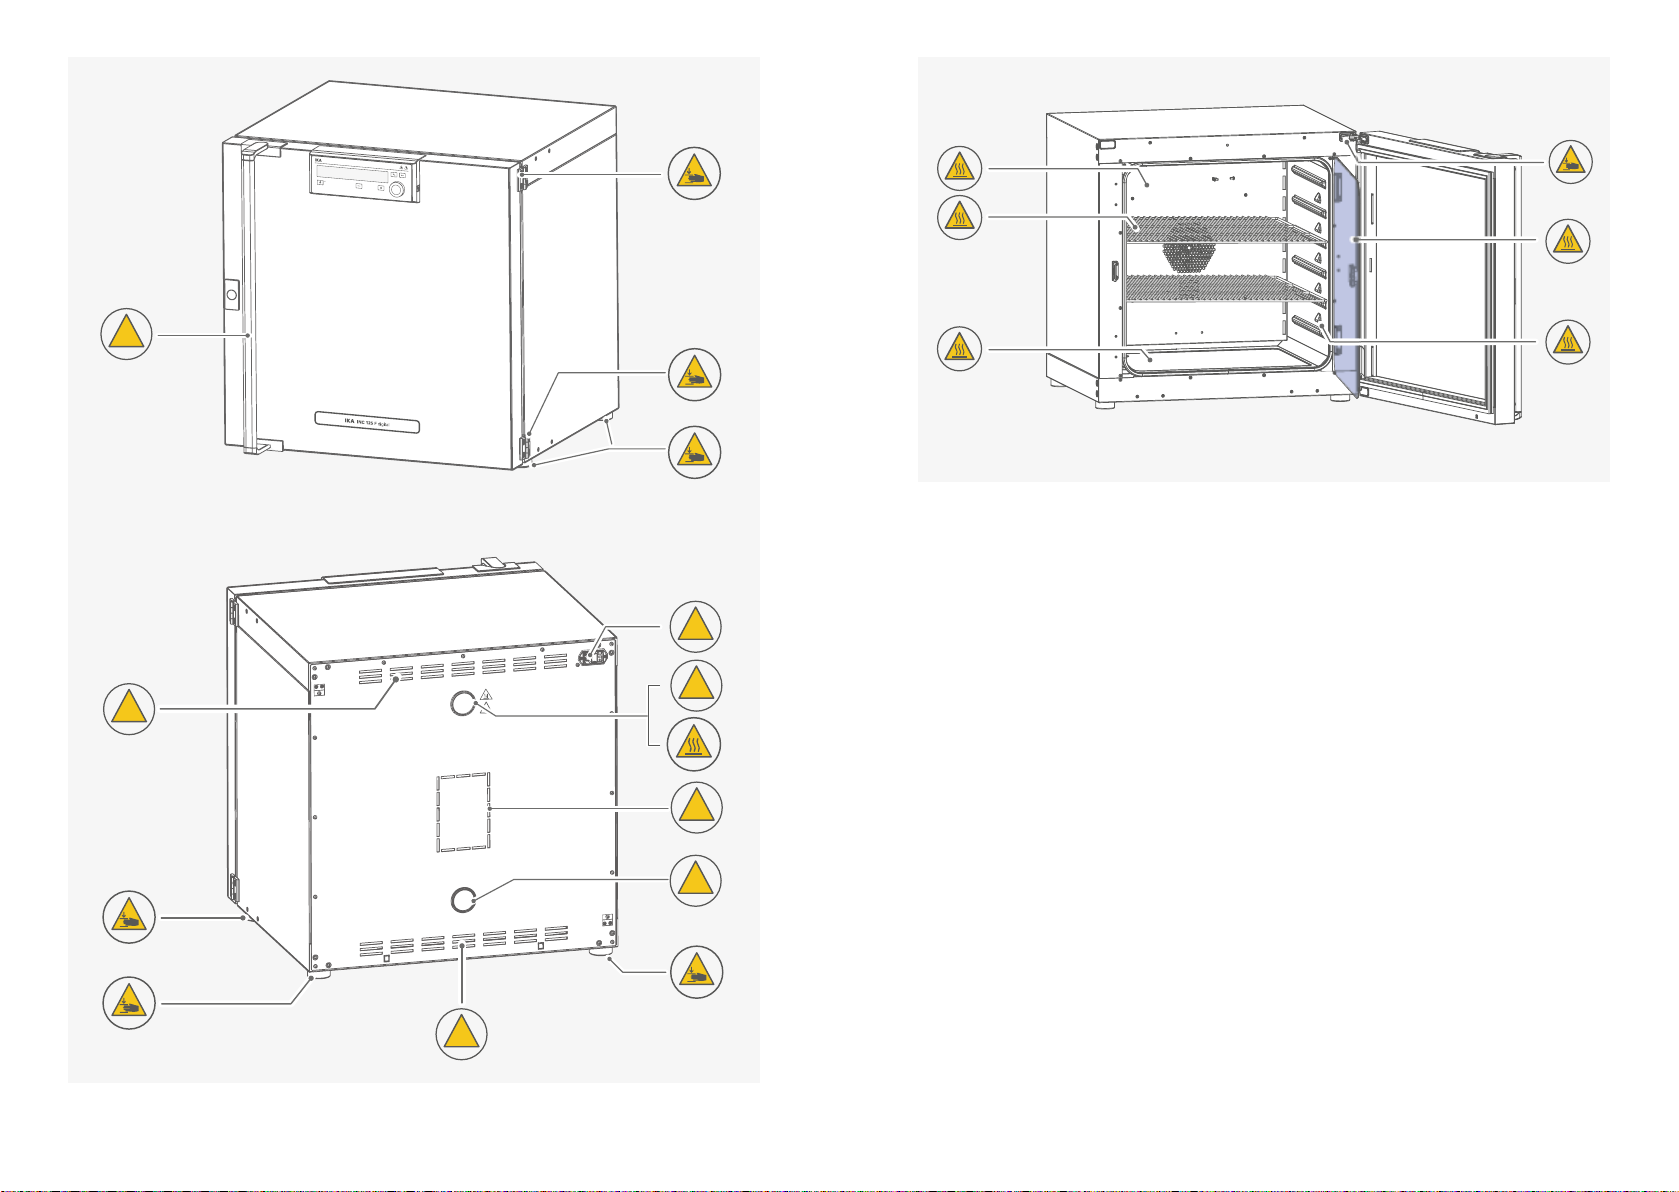
› Pay attention to the marked sites in Fig� 1 and Fig� 2�
!
/// Transportation / Device setup
Danger!
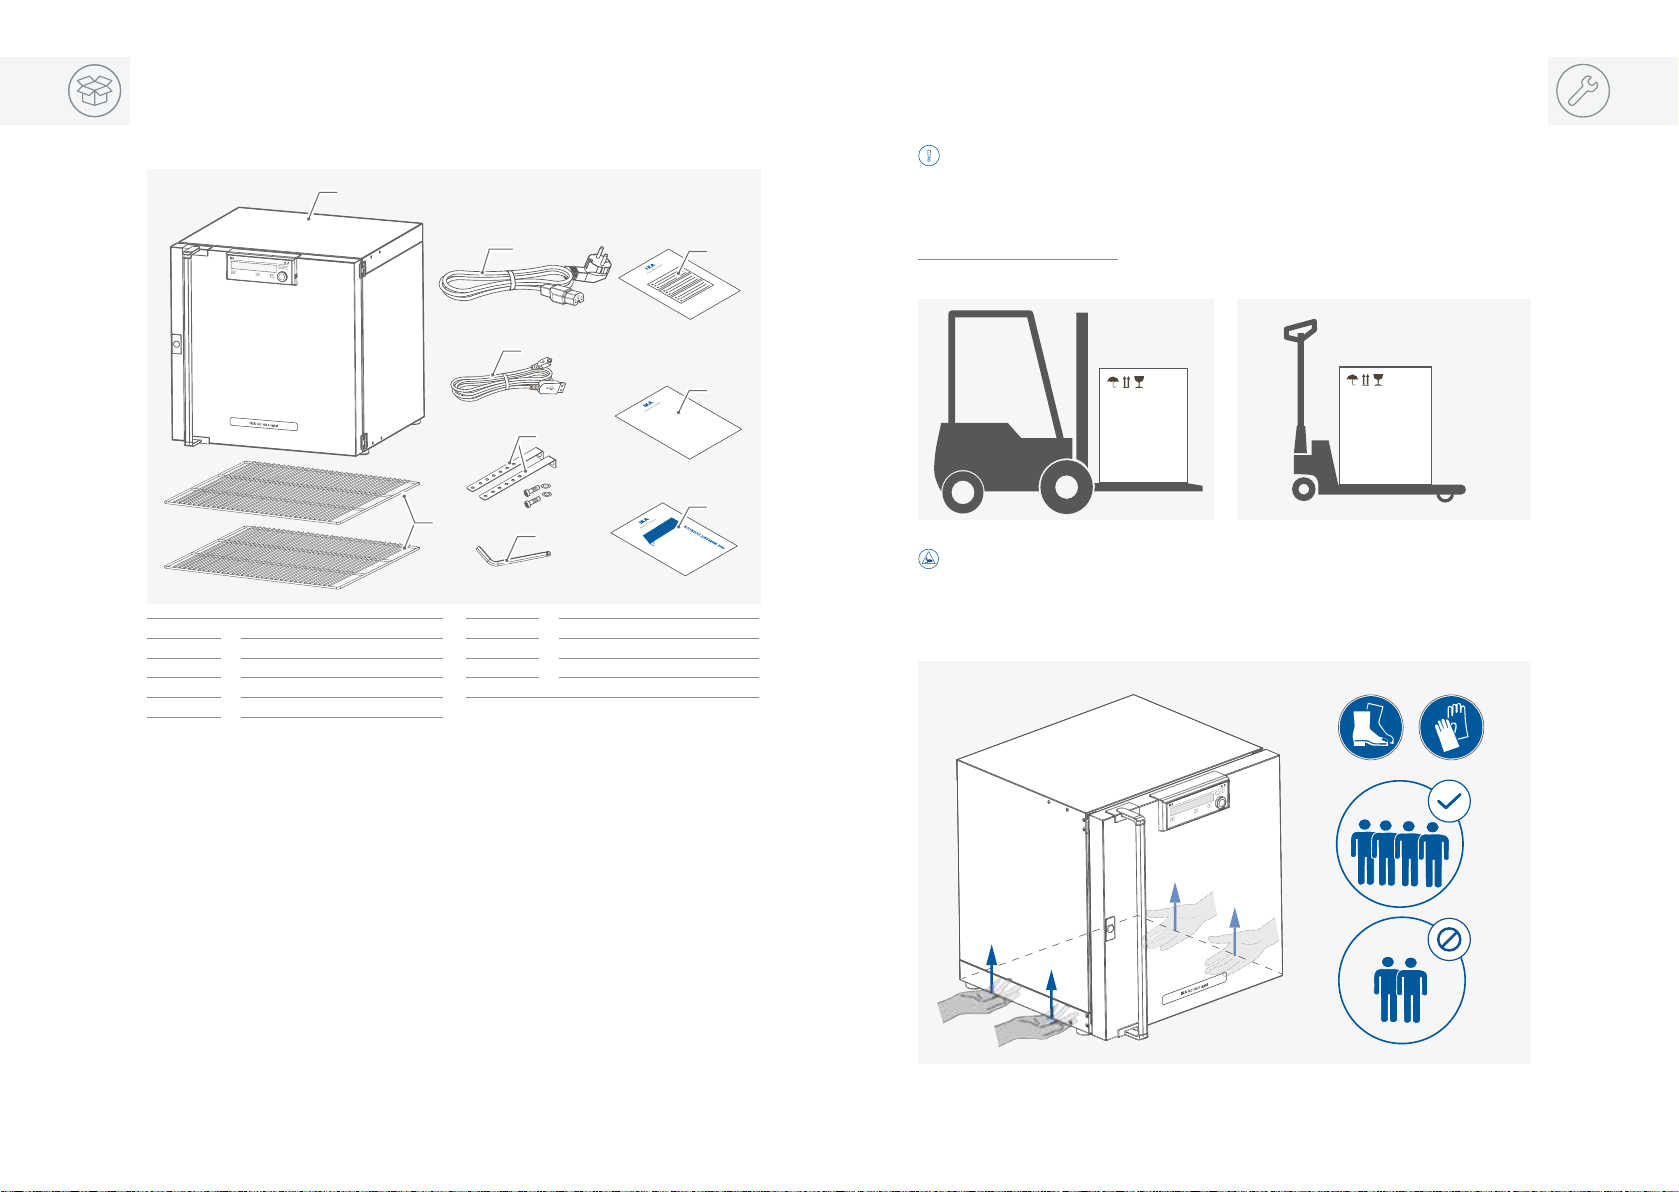
› Beware of the high dead weight of the device when transporting�
Caution!
› Ensure that your fingers do not get crushed when setting down the device�
Caution!
› The power switch of the device must be accessed immediately, directly and without risk at
any time� If access to the power switch cannot be ensured, an additional emergency stop
switch that can be easily accessed must be installed in the work area�
/// Working with the device
Danger!
› Do not use the device in explosive atmospheres, it is not EX-protected�
› To avoid body injury and property damage, observe the relevant safety and accident
prevention measures when processing hazardous materials�
Warning!
› Only process samples that will not react dangerously to the extra energy produced through
processing� This also applies to any extra energy produced in other ways, e�g� through light
irradiation�
› Do not start up the device if:
- it is damaged
- cable is damaged�
Warning!
› Risks may also be posed by biological or microbiological substances�
› Observe the national regulations for handling these substances, the biological security level
of your laboratory, the material safety data sheets and the manufacture's application notes�
›
For complete instructions on handling of germs or biological material in risk group II or higher,
please refer to the "Laboratory Biosafety Manual" (source: World Health Organization)�
Caution!
› There is a crushing risk when opening or closing the door� Keep your hands away from
squeezing edges�
Caution!
› The area around the air outlet nozzle can get very hot at high operating temperatures�
› The inner chamber, the glass door, the glass door handle, and the door gasket may be-
come hot during operation� Do not touch these parts during operation�
› Risk of burns caused by vapour or hot surface� Pay attention to the residual heat after
switching off the device�
Caution!
›
Media may only be processed or heated with this device in safe operation without monitoring
if their flash point lies above the set safety temperature limit� The set safety temperature limit
must be at least 25°C below the flash point of the medium in use (EN 61010-2)�
› The device must have cooled down before loading / unloading�
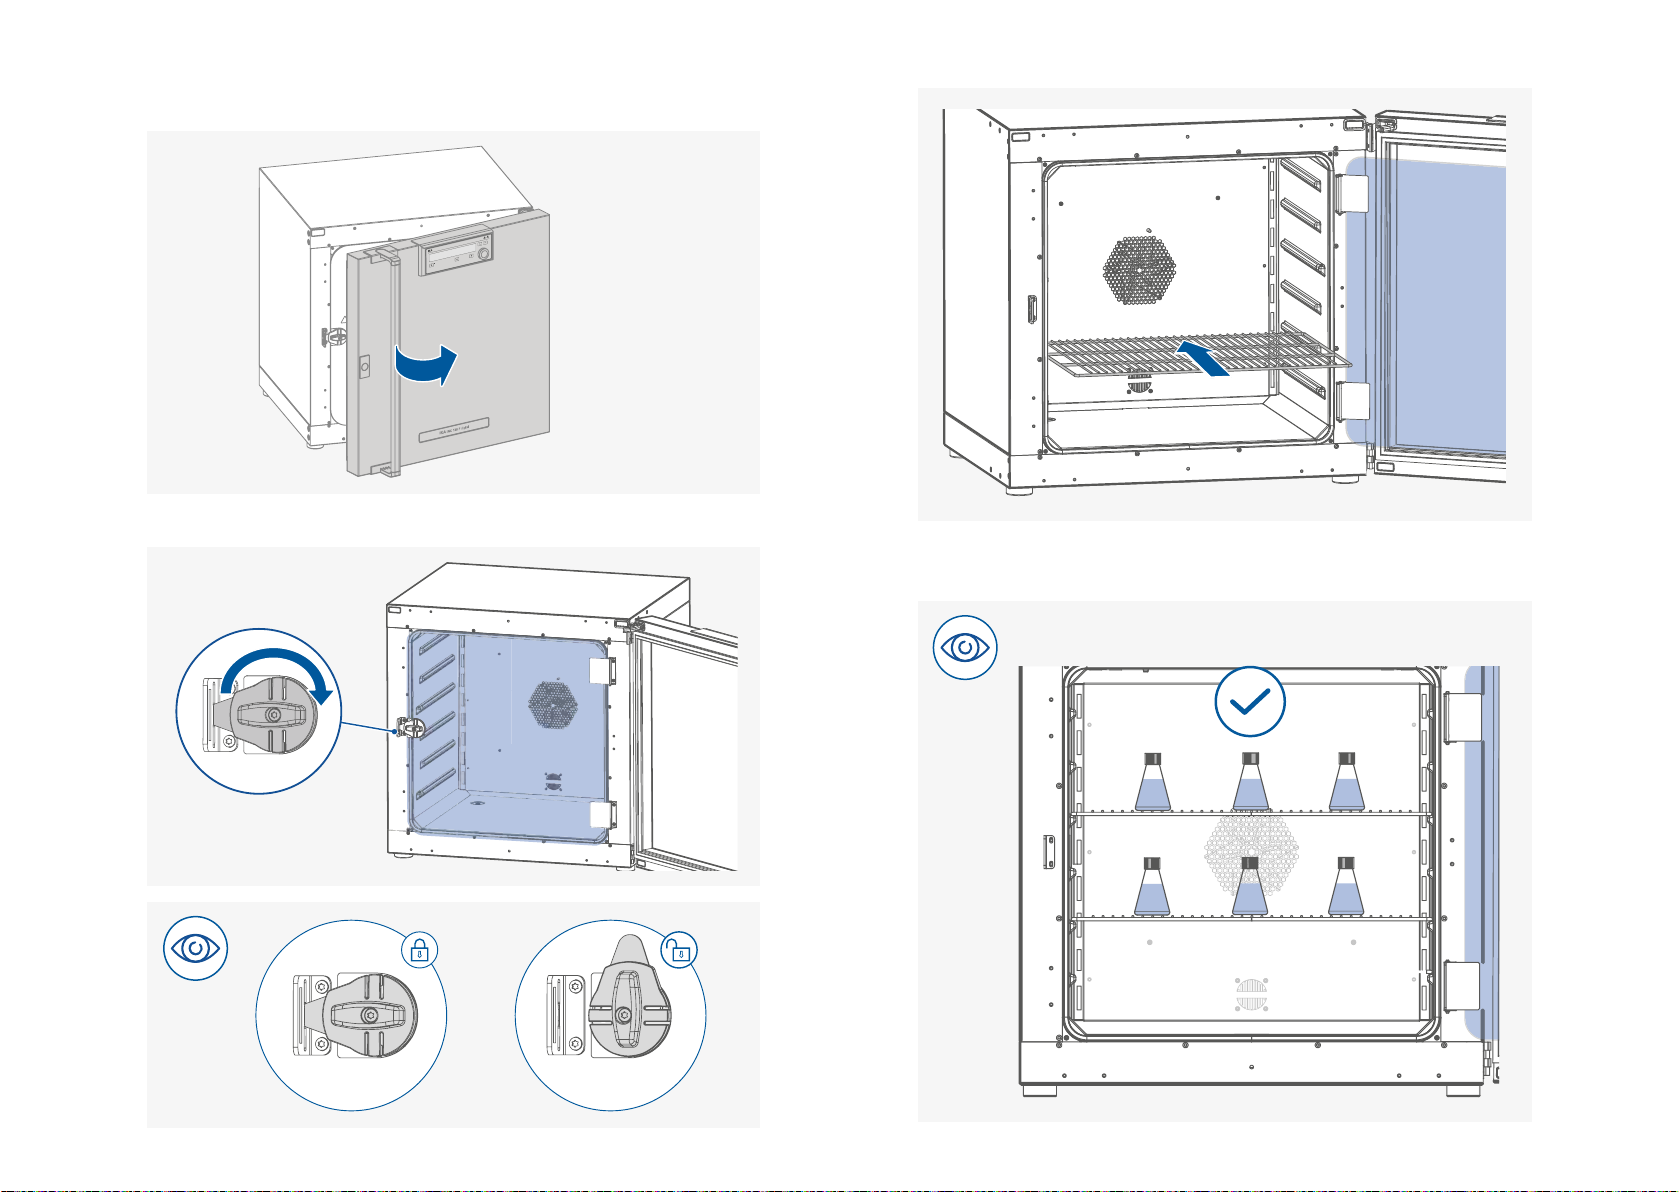
› Heavy loads can lead to tilting of the device� Observe loading recommendations for the
shelves�
› Do not move any loaded racks�
/// General Symbols
Position number
A–––
Correct / Result!
Shows the correct execution or the result of an action step�
Wrong!
Shows the incorrect execution of an action step�
Note!
Displays action steps that require particular attention to detail�
Closed lock
Indicates the status of “locked”�
Open lock
Indicates the status of “Unlocked”�
!Notice!
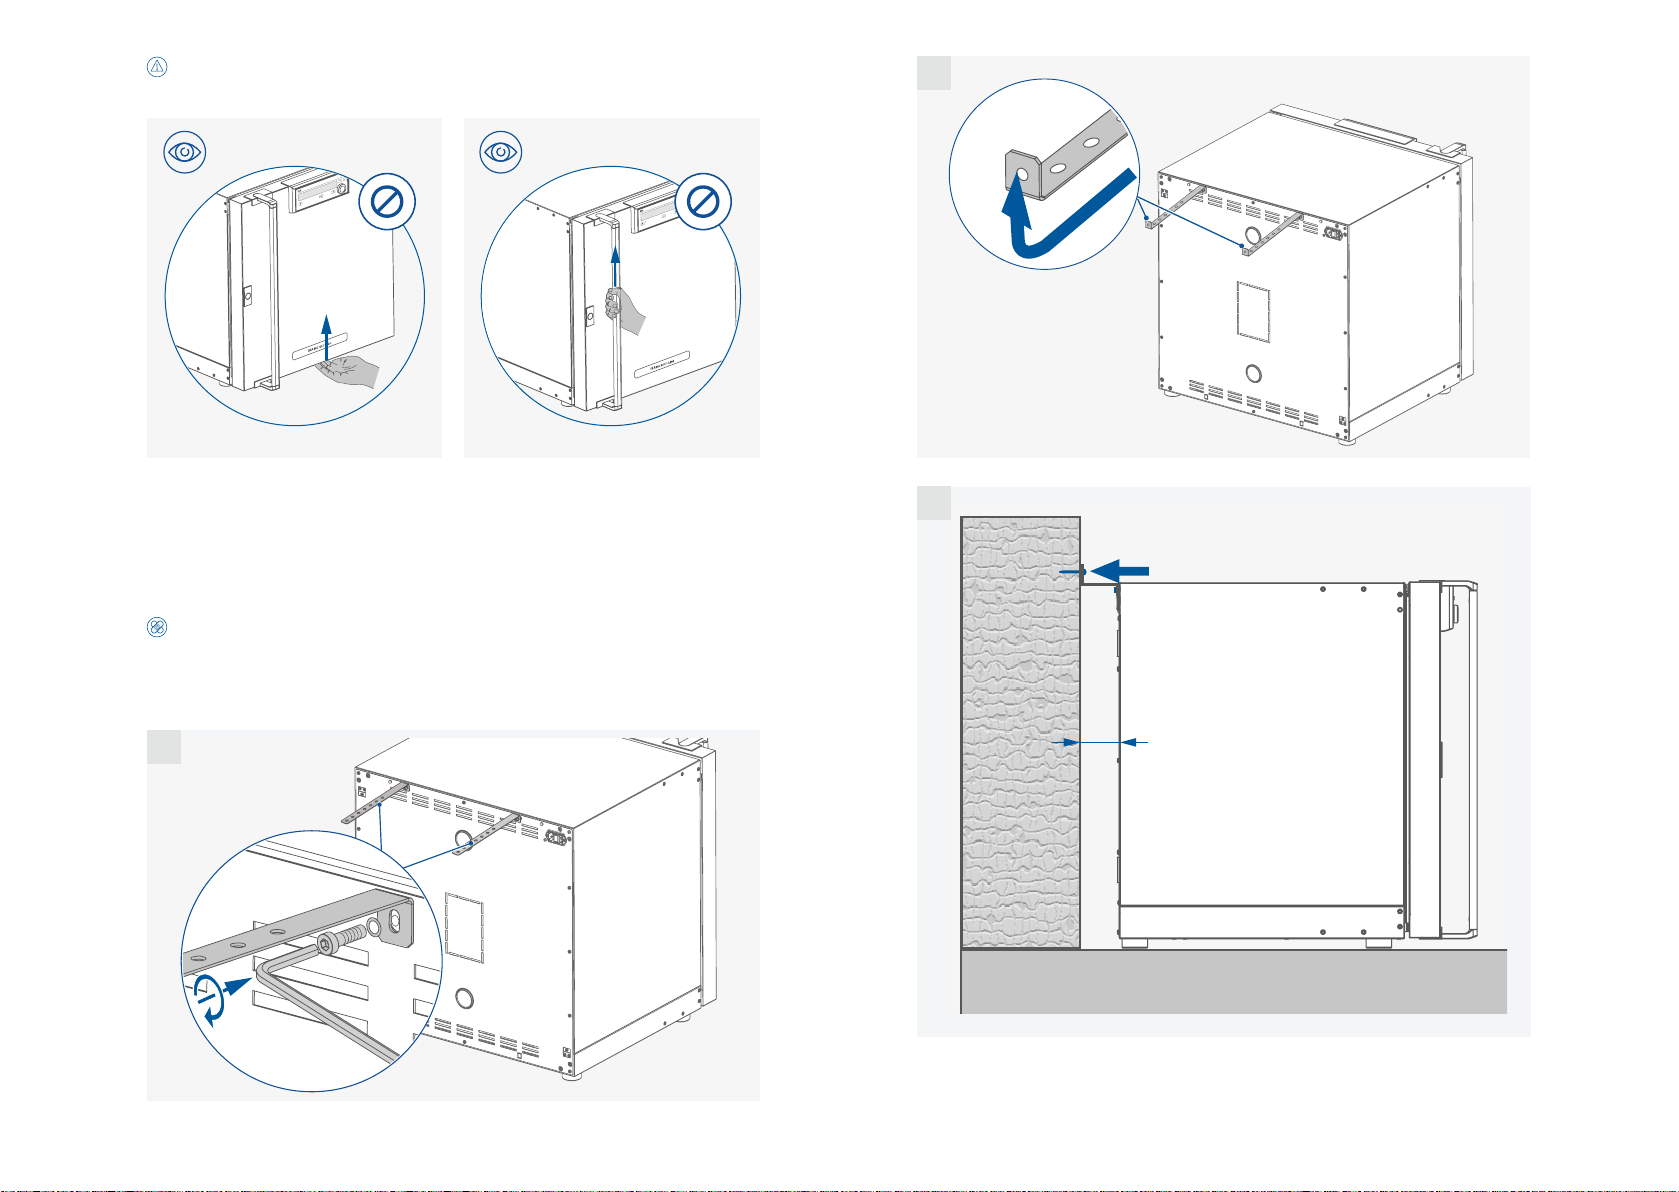
› Set up the device in a spacious area on an even, stable, clean, non-slip, dry and fireproof
surface�
› The feet of the device must be clean and undamaged�
›
Ensure the anti-tilt bracket is properly fixed, in particular when the device is stacked�
›
Make sure that the ventilation slots are not blocked at back of the device�
›
Observe the minimum distances: between devices and wall min� 150 mm�