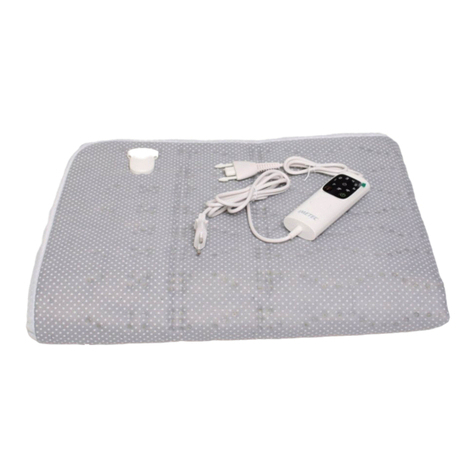
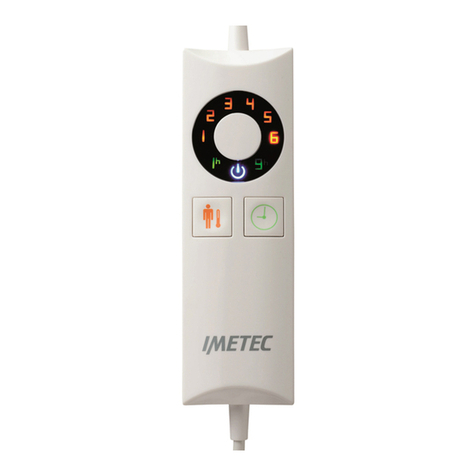
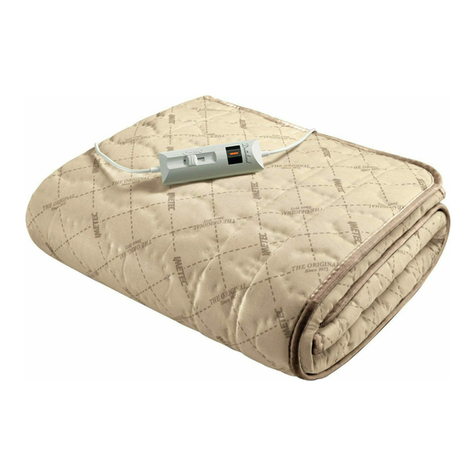
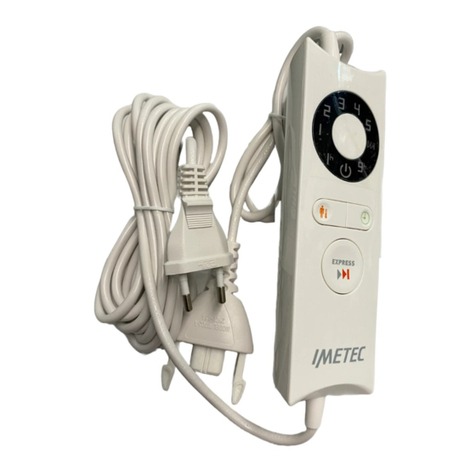
Imetec F2015 User manual

Istruzioni per l’uso
Instructions for use
Instrucciones de uso
Instruções para o uso
Instructions d’utilisation
Οδηγίες χρήσης
Használati útmutató
Инструкции по эксплуатации
PLAID
THROW
MANTA ELÉCTRICA
COBERTA
PLAID
TAKARÓ
pagina 1
page 9
página 17
página 25
page 33
σελίδα 41
oldal 49
cтраница 57
IT
EN
ES
PT
FR
EL
HU
RU
PLAID
TYPE F2015

GUIDA ILLUSTRATIVA / ILLUSTRATIVE GUIDE / GUÍA ILUSTRATIVA / GUIA
I
DATI TECNICI (4) / TECHNICAL DATA (4) / DATOS TÉCNICOS (4) / DADOS TÉC-
12
EXPRESS
[C] 5
3
6
4
7
11
8
10
9
TYPE 220-240 V 50F2015 Hz W
OVERBLANKET

IT
1
Gentile cliente, La ringraziamo per aver scelto il nostro prodotto.Siamo sicuri che Lei apprezzerà la
sua qualità e affidabilità in quanto progettato e prodotto mettendo in primo piano la soddisfazione
del cliente. Le presenti istruzioni per l’uso sono conformi alla norma europea EN 82079.
INDICE

2
IT

IT
3

4
IT
LEGENDA SIMBOLI
Classe di protezione II Divieto
Leggere attentamente il manuale
istruzioni Nota importante
Avvertenza Non adatto a bambini di età
inferiore a 3 anni
Selettore di temperatura Selettore stand by
Posizione spegnimento Posizione accensione
Non inserire spilli o aghi Preriscaldamento rapido
Lavare a massimo 40° C con
programma delicato
Non candeggiare
Asciugatura in asciugatrice con
programma a temperatura moderata Non lavare a secco
Non inserire spilli o aghi
Consultare la guida illustrativa a pag. I per verificare la dotazione del vostro apparecchio.
1. Spina del plaid 5. Display di temperatura 9. Display stand-by
2. Presa del comando 6. Selettore timer 10. Display di autospegnimento
3. Presa di corrente 7.Tasto Express rapido riscaldamento
11.Interrutture on/o
4. Etichetta 8. Selettore di temperatura
• Inserire la presa del comando Fig. [A] (2) nella spina del plaid (1) per collegare il comando al plaid.
• Inserire la spina del comando nella presa di corrente Fig. [B] (3).
• Stendere il plaid sul divano in modo che la presa sia a livello dei piedi.
• Il plaid bi-color può essere utilizzato sia dal lato beige che da quello marrone, secondo il proprio gusto.
• Accomodarsi sul divano sotto al plaid, evitando di avvolgersi o di sedersi sopra di esso, per evitarne
il surriscaldamento.

IT
5
• Accendere il plaid ponendo l’interruttore in posizione accensione (I) (11) dal retro del
comando (Figura [C]).
• PRERISCALDAMENTO RAPIDO - Premere il tasto Express rapido riscaldamento (7) per azionare
la funzione di preriscaldamento rapido del plaid. Il relativo simbolo si illuminerà sul display di
temperatura (5) in colore rosso. Dopo pochi minuti, il plaid sarà piacevolmente caldo.
• Il tempo necessario al riscaldamento del plaid può variare in base alle condizioni di temperatura
dell’ambiente.
Il livello di temperatura del plaid va giudicato accomodandosi sotto di esso. Non giudicare la
temperatura del plaid appoggiandovi semplicemente la mano perché essa non è sufficientemente
sensibile al calore e non consente di giudicare al meglio la necessità di calore del corpo.
• UTILIZZO CONTINUO - Per utilizzo continuo, selezionare l’impostazione di temperatura desiderata
da 1 a 5 premendo il tasto selettore di temperatura (8) fino a quando la temperatura desiderata si
illumina sul display di temperatura (5) con luce arancione. Più alto è il numero selezionato, maggiore
è la temperatura.
• Per spegnere il plaid, premere il selettore timer (6). Il display standby (9) si accenderà con luce blu.
• Per riaccendere il plaid, premere nuovamente il selettore timer (6).
Dopo pochi minuti di utilizzo, il plaid memorizza l’ultima temperatura selezionata, che verrà proposta
automaticamente all’accensione successiva del comando.
Il plaid è dotato di un sistema di spegnimento automatico a 1 ora o a 9 ore. All’accensione il comando
si posiziona automaticamente sul timer di autospegnimento a 1 ora e il numero 1 si illumina sul display
timer (10). Per modificare il timer, premere il tasto selettore timer (6) finchè il numero 9 si illumina sul
display timer.
Quando il tempo sarà trascorso, il plaid si spegnerà e il display stand by (9) si illuminerà con luce blu.
DISCONNESSIONE
• Selezionare la posizione di spegnimento sul retro del comando (11).

6
IT
Il plaid è lavabile.Verificare l’etichetta dei simboli di lavaggio presente sul plaid per un corretto lavaggio.
PRIMA DEL LAVAGGIO
• Scollegare il cavo del comando dalla presa di corrente.
• Premere le leve di tenuta ai lati della presa Fig. [A] (2) per staccare la presa del comando dalla spina del
plaid Fig. [A] (1).
• Prima di lavare il plaid è fondamentale misurarlo per poter confrontare le dimensioni dopo l’asciugatura.
LAVAGGIO IN LAVATRICE
• Il plaid può essere lavato in lavatrice a massimo 40°C con un programma delicato.
• Usare esclusivamente il programma delicato per la centrifuga. NON effettuare un ciclo di centrifuga
supplement
are.
ASCIUGATURA IN ASCIUGATRICE
• Asciugare in asciugatrice a temperatura moderata.
• Togliere il plaid dall’asciugatrice alla fine del ciclo di asciugatura e stenderlo all’aria per renderlo
completamente asciutto.
• Utilizzare il plaid solo quando è perfettamente asciutto.
• I
n fase di asciugatura, il plaid deve essere steso cercando di raggiungere approssimativamente la stessa
dimensione originale. I risultati migliori si ottengono quando è ancora umido, lavorando da un’estremità
laterale all’altra, tirando una fascia per volta.
• Potrebbe essere necessario ripetere questa procedura più volte fino a quando il plaid è perfettamente
asciutto.
• Utilizzare il plaid solo quando è perfettamente asciutto.
Si consiglia di conservare il plaid lasciandolo sul divano o sul letto tutto l’anno.
Se ciò non fosse possibile, quando l’apparecchio non è usato, conservarlo nel modo seguente:

IT
7
• Attendere che il plaid sia completamente asciutto se precedentemente lavato.
• Piegare il plaid come una normale coperta.
• Per una migliore conservazione si consiglia di riporre il plaid nella confezione fornita al momento
dell’acquisto.
• Riporre il plaid in un luogo asciutto.
In questo capitolo sono riportati i problemi più ricorrenti legati all’uso dell’apparecchio. Se non riuscite a
risolvere i problemi con le informazioni seguenti, vi preghiamo di contattare il Centro Assistenza Autorizzato.
Durante l’uso si avverte una sensazione di formicolio.
Disinserire la spina dalla presa di corrente e reinserirla
invertendo la polarità.
Marcare il lato di inserimento per futuri utilizzi.
Il prodotto è stato utilizzato impropriamente o è danneggiato.
Il plaid deve essere controllato esclusivamente da un
centro di assistenza tecnica autorizzato.
Il cavo di alimentazione o qualsiasi altro filo interno è danneggiato.
Il comando è danneggiato.
Il tessuto è sgualcito o spiegazzato.
Ci sono buchi o strappi nel tessuto.
SMALTIMENTO
L’imballaggio del prodotto è composto da materiali riciclabili. Smaltirlo in conformità alle
norme di tutela ambientale.
Ai sensi dell’art. 26 del Decreto Legislativo 14 marzo 2014, n. 49 “Attuazione della direttiva
2012/19/UE sui rifiuti di apparecchiature elettriche ed elettroniche (RAEE)” il simbolo
del cassonetto barrato riportato sull’apparecchiatura o sulla sua confezione indica che
il prodotto alla fine della propria vita utile deve essere raccolto separatamente dagli
altri rifiuti. L’utente dovrà, pertanto, conferire l’apparecchiatura giunta a fine vita agli idonei
centri comunali di raccolta differenziata dei rifiuti elettrotecnici ed elettronici. In alternativa
alla gestione autonoma è possibile consegnare l’apparecchiatura che si desidera smaltire al
rivenditore, al momento dell’acquisto di una nuova apparecchiatura di tipo equivalente. Presso
i rivenditori di prodotti elettronici con superficie di vendita di almeno 400 metri quadrati è inoltre

8
IT
possibile consegnare gratuitamente, senza obbligo di acquisto, i prodotti elettronici da smaltire
con dimensioni inferiori a 25 centimetri. L’adeguata raccolta differenziata per l’avvio successivo
dell’apparecchiatura dismessa al riciclaggio, al trattamento e allo smaltimento ambientalmente
compatibile contribuisce ad evitare possibili effetti negativi sull’ambiente e sulla salute e
favorisce il reimpiego e/o riciclo dei materiali di cui è composta l’apparecchiatura.
L’apparecchio è garantito per un periodo di due anni dalla data di consegna. Fa fede la data riportata
sullo scontrino/fattura (purché chiaramente leggibile), a meno che l’acquirente non provi che la
consegna è successiva. In caso di difetto del prodotto preesistente alla data di consegna, viene
garantita la riparazione o la sostituzione senza spese dell’apparecchio, salvo che uno dei due rimedi
risulti sproporzionato rispetto all’altro. L’acquirente ha l’onere di denunciare a un Centro Assistenza
autorizzato il difetto di conformità entro due mesi dalla scoperta del difetto stesso.
Non sono coperte dalla garanzia tutte le parti che dovessero risultare difettose a causa di:
a. danni da trasporto o da cadute accidentali
b. errata installazione o inadeguatezza impianto elettrico
c. riparazioni o modifiche operate da personale non autorizzato
d. mancata o non corretta manutenzione e pulizia
e. prodotto e/o parti di prodotto soggette a usura e/o consumabili
f. mancata osservanza delle istruzioni per il funzionamento dell’apparecchio, negligenza o
trascuratezza nell’uso
g. cavo attorcigliato e/o piegato in modo eccessivo
h. cavo tirato o strappato
i. pannello riscaldante piegato durante l’uso o piegato quando ancora caldo
j. pannello riscaldante stropicciato o strappato o rovinato da oggetti riposti su di esso
k. lavaggio non conforme alle istruzioni di lavaggio
l. evidenti segni di bruciature da fonti esterne.
L’elenco di cui sopra è a titolo meramente esemplificativo e non esaustivo, in quanto la presente garanzia è
comunque esclusa per tutte quelle
dell’apparecchio. La garanzia è inoltre esclusa in tutti i casi di uso improprio dell’apparecchio ed in caso
di uso professionale. Si declina ogni responsabilità per eventuali danni che possano direttamente o
indirettamente derivare a persone, cose ed animali domestici in conseguenza della mancata osservanza
di tutte le prescrizioni indicate nel presente libretto in tema di installazione, uso e manutenzione
dell’apparecchio. Sono fatte salve le azioni contrattuali di garanzia nei confronti del venditore.
La riparazione dell’ apparecchio deve essere effettuata presso un Centro Assistenza autorizzato.
L’apparecchio difettoso, se in garanzia, dovrà pervenire al Centro Assistenza unitamente ad un
documento fiscale che ne attesti la data di vendita o di consegna.

EN
9
INTRODUCTION
Dear customer, thank you for choosing our product.We feel certain you will appreciate its quality
and reliability as it was designed and manufactured with customer satisfaction in mind.These
instructions for use are compliant with the European Standard EN 82079.
.
INDEX
SAFETY NOTES

10
EN

EN
11

12
EN
SYMBOLS
Protection class II Prohibited
Carefully read the instruction
manual Important note
Warning Not suitable for children under
the age of 3
Temperature selector Standby selector
Off position On position
Do not insert pins or needles Fast heat
Wash at 40°C max with a delicate
cycle
Do not bleach
Drying in tumble dryer with program at
moderate temperature Do not dry-clean
Do not insert pins or needles
DESCRIPTION OF THE APPLIANCE
Refer to the Illustrative guide on page to verify your appliance equipment.
1.Throw connector 5.Temperature display 9. Stand-by display
2. Control connector 6.Timer selector 10. Auto shut off display
3. Mains socket 7. Express fast pre-heat button
11. On/o switch
4. Label 8.Temperature selector
PREPARATION
• Insert the control connector Fig. [A] (2) in the throw connector (1) to connect the control unit to the
throw.
• Plug the control connector in the mains socket Fig. [B] (3).
• Spread the throw over the sofa, ensuring that the throw connector is at the foot position.
• Your bi-colored throw can be used both with the connector facing downwards or upwards at your
choice.
• When using the throw on a chair, sofa or bed, place it over you to keep you warm and cosy, but do
not wrap it tightly or sit on it as this may cause the overheat protection system to activate.
• Do not fold or bend the wired areas, as these actions could result in activating the over heat
protection system
USE

EN
13
• Turn on the throw from the back of the control unit by positioning the switch ON (I) (11).
• EXPRESS FAST PRE-HEAT - Press the Express pre-heat button on the front of the control unit
(7).The Express symbol will be illuminated in red on the temperature display.Your throw will be
lovely and warm in just a few minutes.
• CONTINUOUS USE - For continuous use, select the desired temperature setting between 1 and 5
by pressing the temperature selector switch (8) until the desired temperature lights up in orange on
the temperature display (5). The higher the selected number, the higher the temperature.
• If you wish to switch your throw off, simply press the timer button (6). The standby display (9) will
light up in blue.
• If you wish to switch your throw back on again, press the timer button (6) again.
MEMORY FUNCTION
After using your throw for a few minutes, the control unit will remember your last temperature setting.
AUTO SHUT-OFF FUNCTION
Your throw has an AUTOMATIC SHUT OFF TIMER.
To set the timer, press the timer button (6) and select either 1h or 9h. This will be illuminated in green
on the timer display (10).
When the set time period has elapsed, the throw will automatically switch off and the standby light will
be illuminated in blue on the standby display (9). If you wish to switch your throw back on again, press
the timer button (6) selecting either 1 or 9 hours.
DISCONNECTION
• To disconnect your throw, switch the control to OFF position (O) on the back of your control unit
(11).
CLEANING AND MAINTENANCE
Your throw is suitable for washing. Check the washing instructions on the label of your throw to wash
it correctly.

14
EN
BEFORE WASHING OR STORING YOUR THROW:
1. Disconnect the control unit from the mains socket (3).
2. Disconnect the connector (2) from the throw by pressing the push buttons at the sides of the control
connector (1).
3. Ensure that the controls are not connected and none of the wires have worn through the fabric.
4. It is important to measure the throw before washing and check that the dimensions are approximately the
same before drying.
MACHINE WASHING
• The throw can be machine washed at 40°C on a wool programme.
• Only the gentle spin cycle is to be used. DO NOT use an extra spin cycle.
TUMBLE DRYING
• Tumble dry at a low temperature.
• Remove the thrown from the tumble dryer at the end of the drying cycle and hang it out to dry completely.
• Do not use the throw until it is completely dry.
HANGING THE THROW OUTSIDE TO DRY
• The throw must be stretched back to approximately its original size during the drying process. This is best
done whilst damp, working from side to side, stretching a piece at a time. This procedure may need to be
repeated a few times until fully dry.
• Make sure the wires are not kinked or twisted. It is easier to check the wires by placing the throw against the
light.
STORING THE THROW
When not in use, store as follows:
• Make sure your throw is dry if it has been washed.
• Fold your throw loosely being careful not bend the wires too forcefully
• It is recommeded to store the throw in the bag it was purchased in.
• Store the throw in a dry place

EN
15
The fabric may discolour over time. This does not compromise the safety and/or performance of the
product in any way.
TROUBLESHOOTING
This appliance is built to the very highest of standards. Follow the trouble shooting guide if the unit fails to
operate. If you don’t find any solution, discontinue use and return it to our Service Centre for a Safety
inspection.
You feel a tingling sensation while in use.
This can be quite common and is completely
harmless. Contact the after sales service for
further information.
Damage to the control unit.
Discontinue use and return it to our Service Centre
for a safety inspection.
Fabric rucking or creasing.
Wear or tear on the fabric.
Heat discoloration of fabric.
The product has been misused or accidentally damaged.
DISPOSAL
The product is packaged in recyclable materials. Dispose of packaging in accordance with
the environmental protection standards.
Pursuant to Art. 26 of Italian Legislative Decree no. 49 of 14 March 2014 “Implementation
of Directive 2012/19/EU on waste electrical and electronic equipment (WEEE)”, the
crossed bin symbol on the appliance or its packaging indicates that the product must be
disposed of separately from other waste at the end of its useful life.The user must therefore
take the appliance to an appropriate recycling centre for electrical and electronic equipment.
Alternatively, instead of handling the disposal, the appliance can be handed over to the retailer
when a new, equivalent appliance is purchased. Retailers of electronic products having a sales
area of at least 400 m2can also be handed electronic products that are to be disposed of
measuring less than 25 cm, free of charge and with no obligation to buy. Appropriate separate
collection for the subsequent procedure for the decommissioned appliance for recycling, which
includes treatment and environmentally friendly disposal helps prevent adverse effects on the
environment and health and promotes reusing and/or recycling materials that the appliance
consists of.
ASSISTANCE AND WARRANTY
The appliance is guaranteed for a period of 2 years from the date of purchase. Evidence shall be

16
EN
taken as the date indicated on the receipt/invoice (provided it is legible), unless the buyer can prove
that the delivery occurred later. In the event of a defect in the product which existed prior to the date of
delivery, appliance repair or replacement is guaranteed free of charge, unless one of the two solutions
is disproportionate to the other.The buyer has the obligation to notify an authorised Service Centre of
the non-conformity within two months from discovering the defect.
The warranty does not cover any part that may be defective due to:
a. damage from transport or accidental drops
b. incorrect installation or inadequate electrical system
c. repairs or alterations made by unauthorised personnel
d. poor or incorrect maintenance and cleaning
e. product and/or product parts subject to wear and/or consumables
f. failure to comply with the appliance’s operating instructions, negligent or careless use
g. excessively twisted or bent cord
h. pulled or torn cord
i. heating panel bent during use or bent when still hot
j. heating panel creased or torn or damaged by objects placed on it
k. washing not conforming with washing instructions
l. obvious burn marks from external sources.
The list above is purely indicative and not exhaustive and in any case, this warranty shall not cover all
of the appliance. In addition, the
warranty does not cover any case of improper use of the appliance and professional use.We disclaims any
liability for any damage that may directly or indirectly be caused to persons, property and domestic animals
as a result of failure to comply with all the instructions provided in this installation, use and maintenance
booklet of the appliance.This is without prejudice to any contractual warranty claims against the seller.
Appliance repairs must be carried out by an authorised Service Centre. If the faulty appliance is under
warranty, it must be sent to the Service Centre together with a fiscal document that can confirm the
date of sale or delivery.

ES
17
INTRODUCCIÓN
Apreciado cliente: Gracias por haber elegido nuestro producto. Estamos seguros de que usted
podrá apreciar su calidad y fiabilidad, ya que ha sido diseñado y fabricado considerando la
satisfacción del cliente. Estas instrucciones de uso respetan la norma europea EN 82079.
.
ÍNDICE
NOTAS SOBRE LA SEGURIDAD

18
ES
Other manuals for F2015
1
Table of contents
Languages:
Other Imetec Accessories manuals

Imetec
Imetec F2005 User manual

Imetec
Imetec F2015 User manual

Imetec
Imetec SCALDALETTO Product manual

Imetec
Imetec N1701 User manual

Imetec
Imetec SCALDALETTO User manual

Imetec
Imetec L1601 User manual

Imetec
Imetec H5605 User manual

Imetec
Imetec F2115 User manual

Imetec
Imetec R1501 User manual

Imetec
Imetec 80426 User manual