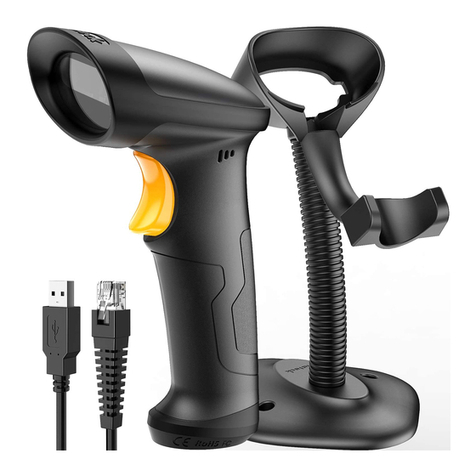
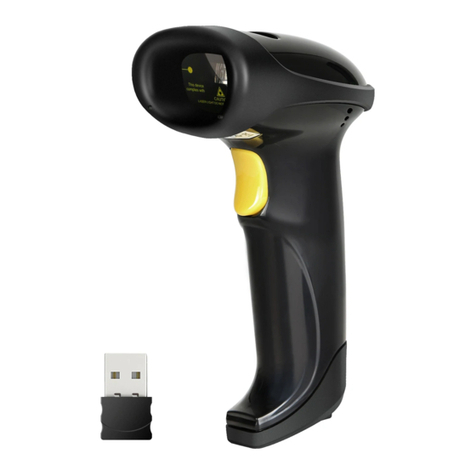
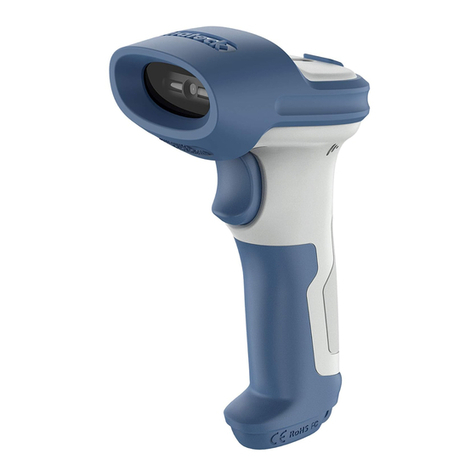
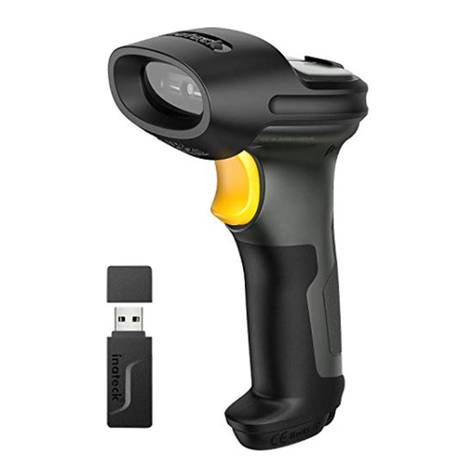
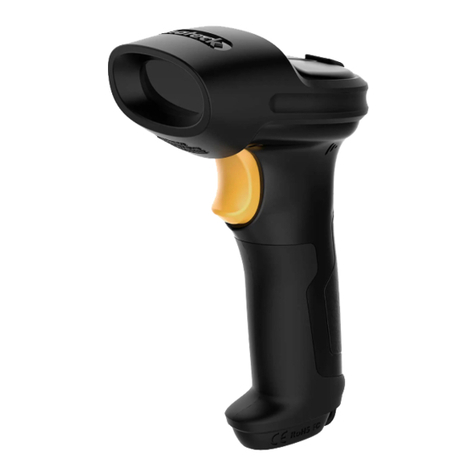
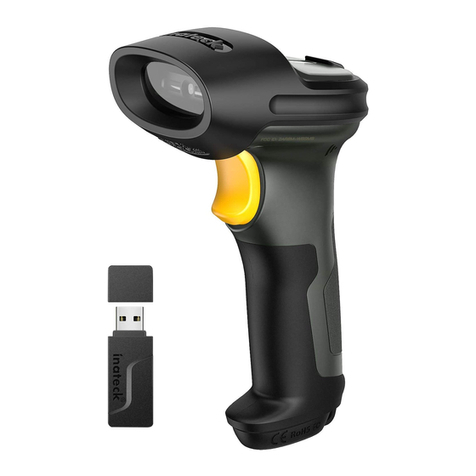
Inateck P7 User manual

1
P7
433MHz+Bluetooth 1D Red Light Barcode Scanner
User Manual

2
Contents
IMPORTANT NOTICE..........................................................................................................................5
Safety Precaution ......................................................................................................................5
Maintenance Precaution...........................................................................................................5
Overview of Inateck P7 barcode Scanner .........................................................................................5
Features of the Scanner ............................................................................................................5
Introduction of Key Function ....................................................................................................6
Product Specification ................................................................................................................6
Correct Scanning Way ...............................................................................................................8
Incorrect Scanning Way.............................................................................................................8
QUICK START .............................................................................................................................8
Enter the Setting Mode.............................................................................................................9
Exit with Save ..........................................................................................................................10
Exit without Save.....................................................................................................................10
To Save Custom Settings..........................................................................................................10
Restore Factory Defaults .........................................................................................................11
Check Software Version ..........................................................................................................11
Chapter 1 Features and Basic Setups ..............................................................................................12
1.1 Battery...............................................................................................................................12
1.1.1 To recharge.............................................................................................................12
1.1.2 Auto Sleep Mode....................................................................................................12
1.1.3 Battery Level Display ..............................................................................................13
1.2 Data Buffer ........................................................................................................................13
1.2.1 Inventory Mode......................................................................................................14
1.3 LED Indicator .....................................................................................................................15
1.4 Beeper...............................................................................................................................16
1.4.1 Beeper Volume.......................................................................................................16
1.5 Vibration Notification........................................................................................................17
1.6 Scanning Modes ................................................................................................................18
1.6.1 Red Light Auto-off Mode........................................................................................18
1.6.2 Continuous Scanning Mode ...................................................................................19
1.6.3 Manual Mode.........................................................................................................21
1.6.4 Hands-free Mode ...................................................................................................21
1.7 Types of Keyboard .............................................................................................................22
1.8 Symbologies Supported ....................................................................................................24
Chapter 2 How to Connect..............................................................................................................25
2.1 433MHz Wireless Mode....................................................................................................25
2.1.1 433MHz Wireless Pairing .......................................................................................25
2.1.1 433MHz Wireless Channel Change ........................................................................27
2.2 Bluetooth HID Mode .........................................................................................................28
2.3 Bluetooth SPP Mode .........................................................................................................29
2.4 USB Mode..........................................................................................................................31
2.5 Transmission Speed...........................................................................................................31

3
2.6 Set the Bluetooth Name....................................................................................................32
Chapter 3 Symbology Settings ........................................................................................................33
3.1 Codabar.............................................................................................................................33
3.1.2. Start/Stop Transmission ........................................................................................34
3.2 Code 11 .............................................................................................................................34
3.2.1. Enable/Disable Code 11 ........................................................................................34
3.2.2 Checksum Verification............................................................................................35
3.3 Code 128 ...........................................................................................................................37
3.3.1 Enable/Disable Code 128 .......................................................................................37
3.3.2 Enable/Disable GS1-128 (UCC/EAN-128) ...............................................................37
3.3.3 Enable/ Disable USPS and FedEx............................................................................38
3.4 Code 39 .............................................................................................................................39
3.4.1 Enable/Disable Code 39 .........................................................................................39
3.4.2 Start/Stop Transmission .........................................................................................39
3.4.3 Checksum Verification............................................................................................40
3.4.4 ASCII Code Recognition Range Setting ...................................................................41
3.4.5 VIN..........................................................................................................................41
3.4.6 Code 32 ..................................................................................................................42
3.5 Code 93 .............................................................................................................................43
3.5.1 Enable/Disable Code 93 .........................................................................................43
3.6 EAN-8.................................................................................................................................44
3.6.1 Enable/Disable EAN-8 ............................................................................................44
3.6.2 Checksum Verification............................................................................................44
3.7 EAN-13...............................................................................................................................45
3.7.1 Enable/Disable EAN-13 ..........................................................................................45
3.7.2 Checksum Verification............................................................................................45
3.7.3 ISBN........................................................................................................................46
3.7.4 ISSN ........................................................................................................................46
3.8 MSI ....................................................................................................................................47
3.8.1 Enable/Disable MSI ................................................................................................47
3.8.2 Checksum Verification............................................................................................48
3.9 UPC-A ................................................................................................................................49
3.9.1 Enable/Disable UPC-A ............................................................................................49
3.9.2 UPC-A output “0” ...................................................................................................50
3.9.3 Checksum Verification............................................................................................50
3.9.4 UPC-A Number System Digit ..................................................................................50
3.10 UPC-E...............................................................................................................................51
3.10.1 Enable/Disable UPC-E...........................................................................................51
3.10.2 Enable/Disable UPC-E1.........................................................................................51
3.10.3 Start Character Transmission ...............................................................................52
3.10.4 Convert UPC-E to UPC-A.......................................................................................52
3.10.5 Checksum Verification..........................................................................................52
3.11 IATA 2 of 5........................................................................................................................53
3.11.1 Enable/ Disable IATA 25........................................................................................53
4
3.11.2 Checksum Verification..........................................................................................53
3.12 Interleaved 2 of 5 ............................................................................................................54
3.12.1 Enable / Disable Interleaved 25 ...........................................................................54
3.13 Matrix 2 of 5....................................................................................................................54
3.13.1 Enable /Disable Matrix 25....................................................................................54
3.13.2 Checksum Verification..........................................................................................55
3.14 Standard 2 of 5 / Industrial 2 of 5 ...................................................................................56
3.14.1 Enable / Disable Standard 25 ...............................................................................56
3.14.2 Checksum Verification..........................................................................................56
3.15 China Postal Code............................................................................................................57
3.15.1 Enable/Disable China Postal Code........................................................................57
3.15.2 Checksum Verification..........................................................................................57
3.16 Plessey.............................................................................................................................58
3.16.1 Enable/Disable Plessey.........................................................................................58
3.16.2 Checksum Verification..........................................................................................58
3.17 Telepen............................................................................................................................59
3.17.1 Enable/Disable Telepen........................................................................................59
3.17.2 Checksum Verification..........................................................................................59
3.17.3 Telepen Alpha.......................................................................................................60
3.18 GS1 DataBar ....................................................................................................................60
3.18.1 Enable/Disable GS1 DataBar ................................................................................60
3.19 GS1 DataBar Expanded....................................................................................................61
3.19.1 Enable/Disable GS1 DataBar Expanded ...............................................................61
3.20 GS1 DataBar Limited .......................................................................................................61
3.20.1 Enable/Disable GS1 DataBar Limited ...................................................................61
Chapter 4 Defining Output Format .................................................................................................62
4.1 Code ID..............................................................................................................................62
4.2 Stop Code of Barcode Setting............................................................................................63
4.3 Customized Settings of Prefix and Suffix Code of Barcode ...............................................64
4.4 Delete Character(s) on Output Result ...............................................................................65
4.5 Letter Case Setting ............................................................................................................67
4.6 Additional Code.................................................................................................................68
4.6.1 Two digits Additional Code.....................................................................................68
4.6.2 Five digits Additional Code.....................................................................................68
4.7 Separator...........................................................................................................................69
4.8 Short Barcode....................................................................................................................69
4.9 Caps Lock Control..............................................................................................................70
4.10 Output the barcodes start with specific characters ........................................................71
4.11 Output Inverse barcode ..................................................................................................72
4.12 Hide specific start characters ..........................................................................................72
4.13 Time Stamp .....................................................................................................................73
4.14 Shortcut Key ....................................................................................................................76
Appendix 1 Prefix/Suffix number and symbol list...........................................................................76

5
IMPORTANT NOTICE
Safety Precaution
DO NOT disassemble the scanner, or place foreign matter into it in case of short circuit or other
circuit damage.
DO NOT expose the scanner or battery to any flammable sources.
Maintenance Precaution
The exterior body of the barcode scanner can be cleaned with a wet cloth.
The power switch should be toggled to OFF mode if the barcode scanner will not be used for a
long time.
Please record the specific scenario and consult the after sales team should you encounter
anything abnormal regarding the barcode scanner.
Overview of Inateck P7 barcode Scanner
Features of the Scanner
There are four types of scanning mode, including Red Light Auto-off Mode, Continuous Scanning
Mode, Manual Mode and Hands-free Mode.
There are four data transmission modes, including 433MHz wireless mode, Bluetooth HID mode,
Bluetooth SPP mode, and USB mode.
Eight types of keyboards are supported: US keyboard, UK keyboard, Canadian keyboard, German
keyboard, French keyboard, Spanish keyboard, Italian keyboard, and Japanese keyboard.
Compatible with Windows, Mac OS, Linux, Android, and iOS.
Feedback mechanism is made by LED indicator, beeper, and vibration motor. The volume can be
well adjusted through barcode settings.
Up to 32 digits prefix and suffix can be customized freely. Up to 99 digits of start & stop
characters in the barcodes can be deleted in the scanning result.
Thanks to the built-in 32 Mb memory, the barcode scanner can store up to 270,000 13-character
barcodes, when it is offline or under inventory mode.

6
The settings of scanning mode, barcode type and data transmitting format are made by scanning
correspondent barcodes.
★Screen barcodes supported
★Numerous decoding types
★Super-fast decoding speed
★Dustproof and anti-drop design
★Completely self-owned intellectual property
★Extremely comfortable operation design
★Up to one million times’ clicking life
★Vibration Notification
★433MHz wireless transmission range up to 400 meters
★Bluetooth transmission range reaches over 40 meters
★2600mAh large capacity lithium ion battery
★Long battery life ensured by low energy consumption technology
Introduction of Key Function
Power Switch: Toggle it to “On” mode to get the barcode scanner started; toggle it to “Off ”
mode to turn off the barcode scanner.
Scanning Trigger:
1. Short press the trigger and a beam of red light emits, and the barcode scanner is ready to
scan barcodes.
2. Double-press the trigger to upload the buffer data.
3. Press and hold the trigger for 1 second to pop up/hide the virtual keyboard (This function is
only available when the barcode scanner is connected to an iOS device in Bluetooth HID
mode, please check Chapter 2.2). Press and hold the trigger for 5 seconds to enter the
Bluetooth pairing state (This function is only available when the Bluetooth is disconnected in
Bluetooth HID mode).
Product Specification
PHYSICAL C
PHYSICAL CHARACTERISTICS
Material
PC+TPU
Product Size
Length*Width*Height = 92mm*69mm*162mm
Weight 197g
Color Dark Grey + Black + Yellow
Indication Buzzer,LED indicator
Interface USB
Voltage DC 5V
Battery Capacity 2600mAh

7
PERFORMANCE CHARACTRISTICS
Light Source Red LED Light
Sensor 2500 pixel CCD
Applicable Barcodes Codabar, Code 11, Code 128, GS1-128, USPS, FedEx, Code 39, Code 32,
Code 93, EAN-8, EAN-13, ISBN, ISSN, MSI, UPC-A, UPC-
E, IATA 25,
Industrial 25 / Standard 25, Interleaved 25, Matrix 25, China Postal
Code, Plessey, Telepen
Resolution 3mil
Decode Rate 220 times/s
Scanning Mode Single Line Scanning
Scanning Method
Automatic/Manual
Nominal Working
Distance
4~50cm
Scan Width 300mm @ 400mm
Minimum Contrast 20%
Decode Angles
Roll 30°, Pitch 75°, Yaw 80°
Cylinder Horizontal
Scan
Diameter 20mm
433MHz CHARACTRISTICS
Radio Frequency 433.05-434.79MHz
Wireless Power
<7dBm
Transmission Range
≥
400m
BLUETOOTH CHARACTRISTICS
Bluetooth Version
Bluetooth 3.0
Radio Frequency 2.402GHz~2.480GHz
Wireless Power <4dBm
Transmission Rate 1Mbps
Transmission Range ≥40m
Certification CE & FCC & RoHS
USER ENVIRONMENT
Operating Temp.
0 to 50°C / 32 to 122°F
Storage Temp.
0 to 50°C / 32 to 122°F
Operating Humidity
20-85%
(
non-condensing
)
Storage Humidity
20-85%
(
non-condensing
)
Accessories
USB Cable, Receiver

8
Correct Scanning Way
Incorrect Scanning Way
QUICK START
The settings of the Inateck P7 Barcode Scanner can be changed by scanning the
setup barcodes included in this manual. This section describes the procedure of setting
the Inateck P7 Barcode Scanner by scanning the setup barcodes. Examples are
demonstrated as below.

9
Step Operation Feedback on successful
operation
1
Toggle the Power Switch to “On” mode to get
the scanner started and press the Trigger.
Inateck P7 will emit a red light.
2
Read the barcode, enter the setting mode
Enter setup
The P7 will respond with three
chord sounds, and the LED
indicator turns blue.
3
Read
certain function setup barcode, such as:
Enable Codabar
The P7 will respond with two
beeps (tone
ascending from low to high).
4
Scan “Exit with save” barcode to finish the
setup
Exit with save
The P7 will respond with three
chord sounds, and the blue LED
indicator will
be off
automatically.
Note: The Inateck P7 Barcode Scanner will respond with a long beep if any setup error occurs.
The flow chart of Setup
Enter the Setting Mode
“Enter setup” barcode exists here and in the following chapters. The Inateck P7 barcode scanner
will enter into setting mode once this barcode is scanned successfully.
When scanning the barcode successfully, the Inateck P7 barcode scanner will respond with three
chord sounds, and the LED indicator turns blue.
Enter setup
Instruction below explains other function settings of the Inateck P7 barcode scanner.
Enter setup
Read a Setup barcode (such as, enable/disable a certain barcode)
Exit with Save

10
Exit with Save
“Exit with Save” barcode exists here and in the following chapters. The Inateck P7 barcode
scanner will exit setting mode once this barcode is scanned successfully.
When scanning the barcode successfully, the Inateck P7 barcode scanner will respond with three
chord sounds, and the LED indicator turns blue.
Exit with Save
Exit without Save
When error setup occurs, please scan the “Exit without save” barcode. The Inateck P7 Barcode
Scanner will respond with three chord sounds, and the blue LED indicator will be off.
Exit without save
To Save Custom Settings
When use the P7 barcode scanner, you may customize some functions and restore them when
needed. To do that, you just need to scan the setting barcode "Enter setup", and then scan the
function barcode needed, e.g. "Enable Code ID", and then scan "Save custom settings".
Afterwards, P7 will exit the setting mode after successful operation.
Enter setup
Save custom settings
Restore custom settings
If you want to return to the custom settings while the barcode scanner has been reset, just scan
the barcode "Enter setup", and then scan "Restore custom settings". The P7 will exit the setting
mode after successful operation.

11
Restore Factory Defaults
Scan the barcodes "Enter setup" and "Restore factory defaults" in sequence. The P7 will respond
with two short beeps (tone ascending from low to high) and three chord sounds after successful
setting. There is no need to scan the "Exit with save" barcode in this case.
Restore Factory Default
Note: Most of the settings have factory default value. The default value for each setting is marked
by an asterisk "*". After restoring to the factory default, the P7 will switch to 433MHz wireless
mode.
“Restore Factory Defaults” barcode can be used under following circumstances:
1. The scanner doesn’t work. For example, it cannot read/ scan any barcodes.
2. You forget what settings you ever make on the scanner, while you don't want to be disturbed
by the forgotten settings when you use the barcode scanner.
3. You are going to use a function that is not frequently used, or you have finished using such a
function.
Check Software Version
If you want to check the software version of Inateck P7, you should scan the “Enter Setup” and
“Output Software Version” barcode, then you will get it on the device connected with the P7.
Enter setup
Output Software Version
“Check Software Version” is done in the enter setup mode, so please scan “Exit without Save”
barcode after the software version outputs.
Exit without Save

12
Chapter 1 Features and Basic Setups
This chapter introduces the features and usage of the P7 barcode scanner.
1.1 Battery
The P7 barcode scanner is powered by 2600mAh chargeable Lithium batteries. If you use the red
light auto-off mode, the barcode scanner can work 107 hours continuously under 433MHz
wireless mode, when it can read 192,600 barcodes (read a barcode Code 128 every 2s).
1.1.1
To recharge
To recharge the barcode scanner, please use the USB cable included, and connect the barcode
scanner to the USB port of a working computer or a 5V charger. When the barcode scanner is
being recharged, the red LED indicator is on. It goes off when the barcode scanner is fully
recharged.
1.1.2
Auto Sleep Mode
In order to save energy, users can specify the time interval for the scanner to automatically turn
off. The default one is 3 minutes.
(*)Enable Auto-sleep mode
Exit Auto-sleep mode
Set 1 min to be auto-off
(*)Set 3 min to be auto-off
Set 5 min to be auto-off
Set 10 min to be auto-off

13
Eg. Steps to set 5 minutes for the scanner to be automatically turn off are as below.
1. Read the "Enter Setup" barcode;
2. Read the “Set 5 min to be auto-off”;
3. Read the "Exit with Save" barcode.
Tips: If you want to keep the scanner being powered on all the time, scan "Exit Auto Sleep
mode" barcode instead of step 2.
Enter setup
Exit with Save
1.1.3 Battery Level Display
Scan the "Battery Level Display" barcode (there is no need to scan "Enter setup" barcode), the
battery level will display on the device connected with the P7.
Battery Level Display
1.2 Data Buffer
P7 adopts 32Mb memory as its data buffer. Upon reading a barcode successfully, the P7 scanner
will upload the data to the computer/phone if the receiver is within the transmission range, then
the scanner will respond with one short beep (high tone) and the green LED indicator will flash
once. If the receiver is out of the transmission range, all the data scanned will be stored in the
buffer, the P7 will respond with two short beeps (tone from high to low) and the blue LED
indicator will flash once. When the buffer is full, the P7 will respond with a long beep (high tone)
to remind that the space of the buffer is not enough and cannot store any more barcodes. The
user should return to the transmission range quickly to upload the scanned data to
computer/phone. Then, the space of buffer can be released.
Note: The 32 Mb memory can store up to 13-character 270,000 barcodes.
You can enable/disable Clear Data in Buffer when turn on the barcode scanner.
Enable Clear Data in Buffer When the
scanner was turned on

14
(*)Disable Clear Data in Buffer When
the scanner was turned on
When the connection is completed, it is necessary to double click the trigger if you want to
upload the data to computer as the data in the buffer won’t be uploaded automatically. You can
also set whether to upload the data automatically by scanning the following barcodes. The
default is “Disable Auto Uploading Buffer Data”.
If you want to upload the data in buffer automatically after successful connection, please set
“Enable Auto Uploading Buffer Data”.
Enable Auto Uploading Buffer Data
(*)Disable Auto Uploading Buffer Data
Enter setup
Exit with save
1.2.1 Inventory Mode
If you want to keep the scanned result in the buffer of the barcode scanner, you can choose
inventory mode. In inventory mode, Inateck P7 will count the number of the barcodes
automatically. Users may use inventory mode to keep scanned barcodes in the buffer of Inateck
P7, and upload them to computer in batches. Under inventory mode, users are not restricted to
the time and location when upload data. Of course, history data can be cleared in buffer after
uploading. More details about inventory mode are as below.
1) Scan the “Enter Inventory Mode” barcode to enter Inventory Mode
Enter Inventory Mode

15
2) Scan the barcode to return to Common Mode
(*)Common Mode
3) Scan the barcode to clear data in buffer (for Inventory Mode only).
Clear Data in Buffer (for Inventory Mode only)
4) Scan the “Data Upload (for Inventory Mode only)” barcode to upload data from buffer (for
Inventory Mode only).
Data Upload (for Inventory Mode only)
5) Scan the barcode to upload the number of scanned barcodes (for Inventory Mode only)
Upload the Number of scanned barcodes (for Inventory Mode only)
Note: For achieve these five functions above, you can just scan the setting barcode. There is no
need to scan “Enter setup” and “Exit with save”.
1.3 LED Indicator
The LED indicators on Inateck P7 can help the user know more about the current operation
status.
LED Status
Meaning
Green LED blinks
Ever paired but not successfully connected this time
Green LED flashes once
Barcode successfully read and uploaded to computer/phone
Blue LED blinks Bluetooth broadcasting and could be found by other devices
Bluetooth LED flashes once Barcode successfully read and saved in buffer
Blue LED stays on On setup status
Yellow LED blinks Low battery
Red LED stays on In Charge ( Red LED off when battery is full )

16
1.4 Beeper
The built-in beeper in the P7 can help the user to know about the current operation status.
Beeping
Meaning
One short high note(100ms)Read barcode successfully
One short high note(20ms
)
Data upload from scanner to host
One long high note(400ms
)
Wrong Setup(on setup status, blue LED stays on)
433MHz Pairing Failure (Occurs only during the pairing
process)
Invalid scanning due to full buffer. (Scanned barcode not
saved)
Two or several long high
notes(800ms)
USB being configured
Three chord sounds (tone
from low to high)
Enter setup mode(Blue LED on)
Exit setup mode(Blue LED off)
Three chord sounds (tone
from high to low)
Bluetooth connected
Two short notes(the same
tone)
Bluetooth disconnected
Two short notes (tone from
low to high)
Correct setup
Two short notes (tone from
high to low)
The connection between Inateck P7 and computer/phone is
disrupted.
1.4.1 Beeper Volume
Mute
Minimum Volume
(*) Medium Volume
Maximum Volume

17
For example: Steps to set Minimum Volume for beeper are as below:
1. Read the "Enter Setup" barcode;
2. Read the "Minimum Volume" barcode;
3. Read the "Exit with Save" barcode.
Note: The factory default value for each setting is marked by an asterisk "*".
Enter setup
Exit with save
Exit without save
1.5 Vibration Notification
The P7 barcode scanner is featured with vibration notification which is turned on by default, to
indicate successful scanning. You can enable/disable this function and adjust the vibration
strength.
Turn off the vibration notification
(*)Turn on the vibration notification (weak)
Turn on the vibration notification (strong)
The steps to turn off the vibration notification are as follows:
1)Read “Enter setup” barcode.
2)Read “Turn off the vibration notification” barcode.
3)Read “Enter with save” barcode.
Enter setup

18
Exit with save
1.6 Scanning Modes
Four kinds of scanning modes are supported by the Inateck P7 Barcode Scanner, including red
light auto-off mode, continuous scanning mode, manual mode, and hands-free mode.
1.6.1 Red Light Auto-off Mode
By default, the scanning mode is set to Red Light Auto-off Mode. If the user presses the Scanning
Trigger, the red light would be turned on. If a barcode is not successfully scanned, the red light
will be off automatically after red light auto-off waiting time, which usually defaults to 2 seconds
and can be set to 1s, 2s, 3s and 5s. Yet the red light will be off soon if Inateck P7 scans a barcode.
(*)Red Light Auto-off Mode
Setup red light auto-off waiting time
1s
(*)2s
3s
5s
50s

19
E.g.: To set the scanning mode to Red Light Auto-off mode and set the Red Light auto-off waiting
time to 1s, you need to:
1. Read the "Enter Setup" barcode;
2. Read the "Red Light Auto-off Mode” barcode;
3. Read the “Setup Auto laser-off waiting time” barcode;
4. Read the “1s” barcode;
5. Read the “Exit with Save” barcode.
1.6.2 Continuous Scanning Mode
There’s no need to press the scanning trigger in this mode, As the red light of the scanner will be
on and the scanner will enter into scanning mode automatically.
The red light of the scanner will not go off until Inateck P7 scans a barcode. And the laser will go
off once the scanner scans barcode successfully. And then the scanner will go into waiting mode,
in which the waiting time (also known as intermittent time of continuous scanning), usually
defaults to 2 seconds, and can be set to 400ms, 800ms,1s,2s,3s,5s, 10s and 15s.
The red light of the scanner will be on again once the waiting time is over. It will only go off when
the scanner scans a barcode successfully. And it will go back and forth like this.
Continuous Scanning Mode
Setup Intermittent time of Continuous scanning
400ms
800ms
1s
(*)2s

20
3s
5s
10s
15s
Example of setting the scanner into Continuous Scanning mode and setting the Intermittent time
to 1s:
1. Read the "Enter Setup" barcode;
2. Read the "Continuous Scanning Mode" barcode;
3. Read the "Setup Intermittent time of Continuous scanning " barcode;
4. Read the “1s” barcode;
5. Read the "Exit with Save" barcode.
Note: The factory default value for each setting is indicated by an asterisk "*".
Enter setup
Exit with save
Exit without save
Other manuals for P7
2
Table of contents
Other Inateck Barcode Reader manuals

Inateck
Inateck BCST-53 User manual
Inateck
Inateck BCST-54 User manual

Inateck
Inateck BCST-54 User manual

Inateck
Inateck BS02001 User manual

Inateck
Inateck BCST-40 User manual

Inateck
Inateck BCST-91 User manual

Inateck
Inateck P6 User manual

Inateck
Inateck BCST-10 User manual

Inateck
Inateck BCST-10 User manual

Inateck
Inateck BCST-33 User manual
Inateck
Inateck BCST-50 User manual

Inateck
Inateck BCST-10 User manual

Inateck
Inateck P6 User manual

Inateck
Inateck BCST-20 User manual

Inateck
Inateck BCST-55 User manual

Inateck
Inateck BCST-33 User manual

Inateck
Inateck BCST-73 User manual

Inateck
Inateck BCST-10 User manual

Inateck
Inateck P6 User manual

Inateck
Inateck P7 User manual