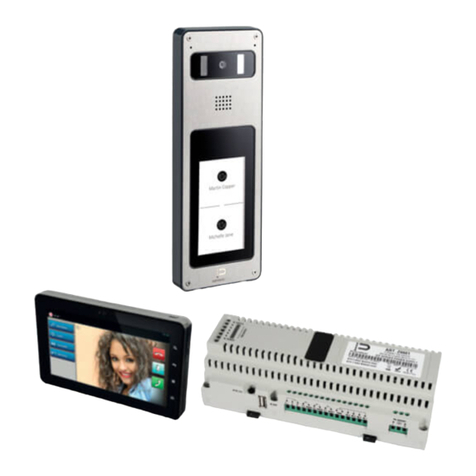
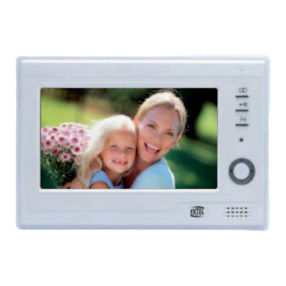
Infinite Play Next Z7000 User manual

Z7000-Z7100!
Installation and operation manual!

2
EN!
next!
H= 145-150 cm!
7”!
VIDEO DOOR PHONE INSTALLATION ART. Z7000 - Z7100!
Installing from semi-surface mounted:!
Install the monitor away from sources light and heat.!
Install the flush-mounted back box type:!
Vimar V71303 - V71318!
ELVOX 6149!
Bticino 503E (horizontal - vertical) – 506E!
on the wall at a height of approximately 1.45 m from the floor to the lower
edge, as indicated in the figure.!
Carry out the wiring according to the wiring diagrams.!
Staying the video in the following way: put the monitor on the attachment
plate holding it slightly raised at this point by holding down the front make
a slight downward pressure!
Remove the protective film from the display.!
Should it be necessary to remove the video you need to lift (from bottom
to top) the video frame by pressing the hook.!
!
Description connection terminal block: !
2 - Line video with RJ45 connector!
PW+ - Input for additional 12V power supply (if required)!
PW- - Mass supplementary feeding!
FP-Connection for door call button with reference to M!
AL - General alarm apartment with reference to M!
P - Panic button user with respect to M!
M - Mass!
CH1 - Relay additional chime!
CH2 – Relay additional chime!
USB !
!
Technical characteristics:!
• Semi-surface mounted of ABS, glass parts are made from ultra-strong,
scratch-proof. !
• Ready for installation by Semi-surface mounted with metal coupling!
• LCD 7 "capacitive touch screen!
• Video Signal WVGA 800X480 Cr 500!
• Camera 2Mpx with Art Z7100!
• PoE alimentation!
• Standby power consumption 7 mA, in conversation: 150mA!
• Operating Temperature: 0 ° to 40 ° C!
• Electronic chime!
• Input for door call.!
• Size: 189x119x21 mm!
!
Maintenance: !
Clean the monitor using a soft cloth, which can be dry or slightly
dampened with water. Do not pour water directly onto the screen and do
not use any type of chemical product. !

3
EN!
next!
!
MATERIAL NEEDED:!
1 skein of CAT5 Ethernet cable!
Connectors RJ45 plug!
1 scissor!
1 crimping tool 8-pin!
Recommended a tester for checking LAN cables!
!
MAKE A STRAIGHT CABLE!
!
!
!
!
!
!
!
!
!
!
!
!
!
!
!
!
PROCEDURE:!
1) SKINNING CABLE (25-30 mm)!
!
2) ORDER cable as shown and line-up , cutting the connectors with
scissors at the same height (about 10mm)!
"!
3) INSERT THE CABLE IN CONNECTOR RJ45 as shown in figure!
!
4) CRIMPING WIRE with clamp!
!
5) FINAL CHECK OPERATION with tester!
Altezza
10mm
!"#$ %&'($)&*&+$,-./0$
1" White"orange"
2" Orange"
3" White"green"
4" Blue"
5" White"blue"
6" Green"
7" White"brown"
8" Brown"

4
EN!
next!
!
SYSTEM PROGRAMMING!
!
There are two types of configurations:!
1) Using an internal video door when you first start is recommended for
small building!
!
2) For systems of higher dimensions can be a system configuration from a
PC by software!
To be connected PC to any RJ45 port of InfinitePlay system by patch
cords.!
"!
IIP SETUP INSTALLER:!
KEY PASSWORD: 000000!
!
Setup by video door phone !
!
VIDEO DOOR PHONE ID ( ten digit code ):!
Building 01!
Floor 103!
Apartment 050!
Internal device 04!
!
PHASES OF CONFIGURATION:!
The configuration steps of the system are divided into only 5 points:!
1. BASIC SETTINGS!
2. ENTRANCE PANEL!
3. POWER SUPPLY!
4. VIDEO DOOR PHONE!
5. MAPPING ENTRANCE PANEL!
!
1. BASIC SETTINGS!
To be programmed the basic parameters for system!
CONCIERGE ( yes / no )!
SOS PANIC BUTTON ( yes / no )!
VIDEO DOOR PHNE VISIBILITY SYSTEM( all video intercom device/ only
master video intercom device )!
SYSTEM SETTING TIME (GMT 00)!
SETUP INFINITEPLAY SYSTEM LANGUAGE !
CHANGE PASSWORD OF SYSTEM ( default 000000 )!
!
2. ENTRANCE PANEL!
To be programmed all parameters of entrance panel in the system!
!
IDENTIFICATION NUMBER (Mac address out door unit )= B4669800F3!
!
CUSTOM ID NUMBER: from 1 to 200 unit!
!
NAME ENTRACE PANEL: Regent St!
!
SUBTYPE: Choose the subtype of call (1-4 touch buttons, list on LCD
display, buttons on LCD display ) !
!
ANSWER TIME (1 to 255 s) !
Default value 30 s!
!
CONVERSATION TIME (1 to 255 s) !
Default value 120 s!
!
SELF-START TIME(1 to 255 s) !
Default value 30 s!
!
AUDIO INDOOR-OUTDOOR (0% to 100%) !
Default value 50%!
!
ENTRANCE PANEL RINGTONE REPETITION ( yes / no )!
Default value is yes!
!
!
!
SAVE SETTINGS BEFORE YOU GET OUT OF SETUP!
BACK SAVE

5
EN!
next!
!
3. POWER SUPPLY!
A video door phone INFINITEPLAY system can contain only one server
SIP Z6001 and several distributors Z60DT!
!
IDENTIFICATION NUMBER = 0000000000!
!
DEVICE NAME: es: Z6001 Main elettrical panel!
!
OUTPUT!
!
FUNCTION:!
To be assign one of the following functions that appear in the video
intercom. If you have an “X” the function is disabled.!
!
CODE:!
You can assign an identification number to each OUTPUT activated by
outdoor unit with display. code set preceded by # symbol (eg. # 123)!
!
TIMEOUT:!
The time of OUTPUT can be programmed!
!
TIME LOCK: ( from 1 to 30s ) default value 1s!
TIME AUX1: ( from 1 to 30s ) default value 1s!
TIME AUX2: ( from 1 to 30s ) default value 1s!
TIME AUX3: ( from 1 to 30s ) default value 1s!
!
ENTRANCE PANEL:!
Through ”entrance panel" binds the selected function to one or more
entrance panel present in the system.!
!
To a call from entrance panel will be displayed one priority function.!
!
LINK:!
This parameter enables indirect opening of the lock, at the same time as
the opening of the lock of another entrance panel, at the command of an
interphone/monitor interphone. Indirect opening can be associated with
different entrance panels. !
!
For example: LOCK type Z6001 (1) with LOCK type Z60DT (2).!
!
When you press lock push button, will operate both entrance panel at
same time by their respective power supplies.!
!
INPUTS!
Module type Z6001 receives the command from four N/O push button
and when closing, they send the messages to output.!
( ex. Light stair push button )!
!
INPUT CALL allows you to make a call from an entrance panel to an
indoor video door phone.!
!
!
!
!
!
!
!
!
!
!
!
!
!
!
!
!
!
!
!
SAVE SETTINGS BEFORE YOU GET OUT OF SETUP!

6
EN!
next!
!
4. VIDEO DOOR PHONE!
At the first installation is requested the physical position of the device:!
!
PROGRAMMING ID IDENTIFICATION CODE!
!
Building 01!
Floor 103!
Apartment 050!
Internal device 04!
!
In the INFINITELAY kits the monitor ID CODE : !
01 000 001 00!
!
USER NAME: (ex. Famili Briyan )!
The name will appear in the display entrance panel Art.Z100D – Z200D!
The name will appear in the intercom contacts!
!
VISIBILITY ENTRANCE PANEL:!
You can select the list of entrance panels that can call this device.!
Default all entrance panels call everyone users!
!
FILTER FUNCTIONS AVAILABLE:!
At the request of a end user, you can disable an auxiliary function that is
also used by other residents!
!
VISIBILITY VIDEO DOOR PHONE:!
With this function you can define the visibility of the indoor unit intercom!
1) INTERNAL INTERCOM CALLS!
Select the list of all internal devices apartment that you can call!
2) EXTERNAL INTERCOM CALLS!
Select the list of the internal intercom of the building that you can call!
!
DOCTOR MODE: (yes/no)!
When a call comes in this monitor sends the command lock automatically
on power supply.!
!
AUTO ANSWER: (yes / no)!
By activating this function, the indoor unit will enter into conversation with
the outdoor unit automatically after a few seconds!
!
INTERCOM GROUPS:!
With this function you can define a group of calls by choosing the origin of
the call. (Eg. To join an indoor unit slave with his master)!
1) TO CALL FROM EXTERNAL UNIT!
2) TO CALL FROM INDOOR UNIT INTERNAL TO THE APARTMENT!
3) TO CALL FROM INDOOR UNIT EXTERNAL TO THE APARTMENT!
!
ECHO CANCELLATION:!
With this function you can choose the degree of noise cancellation of your
INDOOR UNIT device InfinitePlay.!
1) !Normal (recommended by the factory)!
2) !hard!
3) !strong!
!
!
!
!
!
!
!
!
!
!
!
!
!
!
!
!
SAVE SETTINGS BEFORE YOU GET OUT OF SETUP!

7
EN!
next!
!
5. MAPPING ENTRANCE PANEL !
!
ENTRANCE PANEL SETUP!
Select the entrance panel to set their parameters ( touch push button or
display)!
!
!
ENTRANCE PANEL TOUCH BUTTONS Z1001-Z2001 !
If in the presence of a outdoor unit touch buttons must be set:!
TOUCH BUTTONS 1 call the indoor unit 01000001000 - Famili Briyan !
!
!
!
!
ENTRANCE PANEL TOUCH DISPLAY Z100D-Z200D !
If in the presence of a outdoor unit display must be set:!
!
PROPERTY LOGO: In JPG format!
!
PANEL RINGTONE REPEAT (sound/ring.mp3) suggested!
!
VOLUME ENTRANCE PANEL (from 0% to 100%)!
Default value 20% suggested!
!
STAUTS MESSAGE ( yes/no)!
If you set YES the entrance panel show messages!
(Calling, in conversation, door lock opened, end the conversation)!
!
ENABLE ANIMATION (yes/no)!
With this function activates an animation in the outdoor unit display that
ease the visitor in the use of the outdoor device!
!
SHOW CODE BUTTON (yes/no)!
Using this function enables the possibility to activate an automation from
the outdoore unit by code (ex.#123)!
!
ENABLE RECEPTION BUTTON (yes/no)!
With this function you enable a button dedicated to the call of concierge
station.!
!
BUILDING NAME: ( ex.Residence Argenta )!
!
STREET NUMBER: ( ex. 26 ….. 2B )!
!
WELCOME MESSAGE!
!
ALTERNATION MESSAGE!
!
TIME ALTERNATION: Settable in seconds!
!
!
!
!
!
!
!
!
!
!
!
!
!
!
!
!
!
!
!
!
SAVE SETTINGS BEFORE YOU GET OUT OF SETUP!

8
EN!
next!
OPERANTING ISTRUCTIONS!
!
1. FUNCTION BAR ( BUTTONS ON THE RIGHT) !
HOME !
RETURN !
SETUP!
SEARCH!
!
2. VIDEO DOOR PHONE WIDGET!
LOCK !
LIGHT STAIR!
GATE !
!
3. DATA AND TIME!
4. METEO (with internet connection)!
5. VIDEO DOOR PHONE FUNCTION!
Available to the call (green symbol)!
Do not disturbe (red symbol, choose how long)!
!
!
!
ANSWERING A CALL!
!
1. VIDEO DOOR PHONE FUNCTION!
2. TO END THE CALL!
3. MUTE MICROPHONE!
4. TO ANSWERING A CALL!
!
!
!
!
!
!
!
!
!
!
IPCALL VIDEO DOOR PHONE APP!
!
1. VIDEO DOOR PHONE FUNCTION!
2. CONCIERCE LIST!
INTERCOM CONTACT LIST!
ENTRANCE PANEL LIST!
LOG ACTIVITIES!
3. SETUP / AUDIO SETTINGS!
!
!
!
!
!
!
!
MESSAGING!
!
TO SEND TEXT MESSAGES AND FILES ( JPG – PDF ) FROM MONITOR
TO CONCIERCE AND FROM CONCIERGE TO MONITOR!
!
THE COMMUNICATION IS ABLE BETWEEN INTERNAL MONITOR AND
CONCIERCE!
1
2
3
5
4
1
2
3
4
1
2 3

9
EN!
next!
OPERATION:!
!
Important: For the monitor operation, the ID must have already been pro-
grammed. To check this, in all devices!
!
Operating times!
The answer and the conversation times depend on the configuration of the
corresponding entrance panel parameters. !
!
- Answer time (for entrance panel call): Default value 30 s!
- Answer time (for intercommunicating call): 30 s!
- Conversation time (for entrance panel call): Default value 120 s!
- Self-activation time (for entrance panel call): Default value 30s!
!
Answering a call!
A call from the outdoor entrance panel or from an intercommunicating
device can be answered during the chime cycle or once it has ended. To
answer, press green push button; to end the call, press red push button.!
!
Receiving a door call!
The monitor can receive calls from a door call button if connected to
terminals M and FP directly When the door call button is pressed, the
monitor emits a different tone to the one used for outdoor entrance panel
calls or intercommunicating calls.!
!
Making an intercommunicating call!
To make a call to another indoor unit, is neccessary to open the videodoor
phone app and choose the name to the contacts list.!
!
Muting the ringtone during a call (Mute function)!
When receiving a call from an outdoor entrance panel or from an intercom
device, the call ringtone can be muted by pressing button MUTE in home
page widget. You can set the mute time ( for example 30 minutes )!
!
Door lock command!
If you press the lock button by home page widget to send a lock opening
command to the entrance panel. The lock is connect to the power supply
for security !
!
Self-start!
The videodoor phone is able to recognize the entrance panel or CCTV
cameras.!
From the entrance list you can make a self-start function for monitoring
and conversation.!
!
Calling a concierge station!
Form the concierge list you can call the concierce service ( lobby,
managment office, guard office)!
!
Alarm and Panic buttons!
The monitor can sand two alarms to Concierce station!
Connecting a button dirctly to terminals M and AL, you can sand an alarm
( gas detector, smoke detector ) to concierge!
If connecting a button dirctly to terminals M and P, you can sand an panic
alarm to concierge . This function is able from widget SOS!
!
Choice a ringtone!
Through the settings you can choose between different electronic
ringtone.!
!
Ringtone volume adjustment!
Through the settings you can choose between different volume levels plus
mute.!

10
EN!
next!
SINGLE RESIDENCE SYSTEM WITH 7” VIDEO DOOR PHONE AND ONE AUDIO-VIDEO ENTRANCE PANEL!
P1
Mains
90-260Vac
50-60Hz
Entrance panel
L
P3 P4 P5
HOME INTERNET
CAT5
CAT5
CAT5
IN2 – Stair light
IN3 – Driveway gate
IN3IN2
1
2
P
CH1
FP
RJ45
Panic Button
Alarm INPUT
GND
Outdoor call button
S+
AUX1 AUX2
12Vcc 1A Lock
AUX1- Stair light
AUX2 – Driveway gate
Power Supply
Z6001
Terminals Up to 100mt
1,2,3,4,5 RJ45
Cable CAT 5
Lock 1,5 mm2
Other 1 mm2
Conductor section
RJ45
IN4 – free
IN1–Lock release
IN1
P2
Entrance panel
Video door phone
AUX3
AUX3 - free
PORTE RJ45
AL
GND
N
GND GND
GND – INPUT
GND – INPUT
S-
Lock return
COM
1
COM
2
COM
3
USB
IN4
PW-
PW+
Power +12V
Relè additional chime
CH2
USB
M
Relè additional chime
Power -
Video door phone
Entrance panel
Video door phone

11
EN!
next!
P1
Entrance panel
Video door phone 1
L
P3 P4 P5
Internet of building
CAT5
CAT5
CAT5
IN3IN2
1
S+
AUX1 AUX2
12Vcc 1A Lock
Power Supply
Z6001
RJ45
IN1
P2
AUX3
PORTE RJ45
GND
N
GND GND
S-
Lock return
COM
1
COM
2
COM
3
USB
IN4
Video door phone 2
DOUBLE RESIDENCE SYSTEM WITH 7” VIDEO DOOR PHONE AND ONE AUDIO-VIDEO ENTRANCE PANEL!
Entrance panel
Video door phone
2
P
CH1
FP
RJ45
AL
PW-
PW+
CH2
USB
M
2
P
CH1
FP
RJ45
Panic Button
Alarm INPUT
GND
Outdoor call button
AL
PW-
PW+
Power +12V
Relè additional chime
CH2
USB
M
Relè additional chime
Power -
Panic Button
Alarm INPUT
GND
Outdoor call button
Power +12V
Relè additional chime
Relè additional chime
Power -
Mains
90-260Vac
50-60Hz
Terminals Up to 100mt
1,2,3,4,5 RJ45
Cable CAT 5
Lock 1,5 mm2
Other 1 mm2
Conductor section
IN2 – Stair light
IN3 – Driveway gate
AUX1- Stair light
AUX2 – Driveway gate
IN4 – free
IN1–Lock release
AUX3 - free
GND – INPUT
GND – INPUT

12
EN!
next!
Entrance panel
Video door phone 1
CAT5
CAT5
CAT5
RJ45
Video door phone 2
with internet connection
DOUBLE RESIDENCE SYSTEM WITH 1 VIDEO DOOR PHONE, 2 VIDEO DOOR PHONES WITH INTERNET CONNECTION AND ONE AUDIO-VIDEO
ENTRANCE PANEL WITH TWO PUSH BUTTONS!
HOME INTERNET
12Vcc 1A Lock
1
2
P
CH1
FP
AL
PW-
PW+
CH2
USB
M
2
P
CH1
FP
AL
PW-
PW+
CH2
USB
M
FIREWALL Distributor
Z600F
Power Supply
Z6001
Terminals Up to 100mt
1,2,3,4,5 RJ45
Cable CAT 5
Lock 1,5 mm2
Other 1 mm2
Conductor section
Internet of building

13
EN!
next!
Entrance panel
CAT5
CAT5
RJ45
MULTIPLE RESIDENCE SYSTEM WITH ONE AUDIO-VIDEO ENTRANCE PANEL, POWER SUPPLY, DISTRIBUTOR AND 12 VIDEO DOOR PHONES !
12Vcc 1A Lock
CAT5
CAT5
Video door phone
1
2
P
CH1
FP
AL
PW-
PW+
CH2
USB
M
2
P
CH1
FP
AL
PW-
PW+
CH2
USB
M
Video door phone
Video door phone
Distributor Z60DV
Distributor Z60DVDistributor Z60DV
Power Supply
Z6001
Video door phone
Internet of building
Terminals Up to 100mt
1,2,3,4,5 RJ45
Cable CAT 5
Lock 1,5 mm2
Other 1 mm2
Conductor section

14
EN!
next!
CAT5
CAT5
BUILDING COMPLEX SYSTEM WITH TWO AUDIO-VIDEO ENTRANCE PANELS, POWER SUPPLY, CONCIERGE STATION AND DISTRIBUTOR!
CAT5
Video door phone
12Vcc 1A Lock
CONCIERGE
INTERNET
of building
Entrance panel
12Vcc 1A Lock
1
1
2
P
CH1
FP
AL
PW-
PW+
CH2
USB
M
Video door phone
Distributor Z60DVDistributor Z60DV
Power Supply
Z6001
Distributor Z60DT
Terminals Up to 100mt
1,2,3,4,5 RJ45
Cable CAT 5
Lock 1,5 mm2
Other 1 mm2
Conductor section

15
EN!
next!
CONNECTION VARIANTS:!
!
!
WIRING DIAGRAM ADDITIONAL ELECTRONIC CHIME!
WIRING DIAGRAM DOOR CALL BUTTON !
Additional chime C.A.
Power supply
230Vac
Relè
Additional chime C.C.
Power supply
12 - 24Vdc
Video door phone
=
Video door phone
Contact – Push button - Sensor
2
P
CH1
FP
RJ45
AL
PW-
PW+
CH2
USB
M
2
P
CH1
FP
RJ45
AL
PW-
PW+
CH2
USB
M
2
P
CH1
FP
RJ45
AL
PW-
PW+
CH2
USB
M
ALLARM INPUT to concierge
Power supply
12 Vdc
Video door phone
Panic Button
Alarm INPUT
GND
Outdoor call button
Power +12V
Relè additional chime
Relè additional chime
Power -
Panic Button
Alarm INPUT
GND
Outdoor call button
Power +12V
Relè additional chime
Relè additional chime
Power -
Panic Button
Alarm INPUT
GND
Outdoor call button
Power +12V
Relè additional chime
Relè additional chime
Power -

16
EN!
next!
CONNECTION VARIANTS:!
!
WIRING DIAGRAM DOOR RELESE CONTROL !
P1
L
P3 P4 P5
IN2 – Stair light
IN3
IN2
S+
AUX1 AUX2
12Vcc 1A Lock
12345$6789+$*9:;7$
<1=<>?')$$
AUX2 - Driveway gate
Power Supply
Z6001
IN1
P2
AUX3
AUX3 - free
PORTE RJ45
GND
N
GND GND
GND – INPUT
S-
Lock return
COM
1
COM
2
COM
3
USB
IN4
STAIRS LIGHT CONTOL
P1
L
P3 P4 P5
IN3
IN2
S+
AUX1 AUX2
12Vcc 1A Lock
Power Supply
Z6001
IN1– Lock release
IN1
P2
AUX3
PORTE RJ45
GND
N
GND GND
GND – INPUT
S-
COM
1
COM
2
COM
3
USB
IN4
WIRING DIAGRAM DOOR RELESE CONTROL!
wire 1,5mm2
DOOR RELEASE CONTROL
Mains
90-260Vac
50-60Hz
Mains
90-260Vac
50-60Hz
AUX1- Stair light
AUX2 – Driveway gate
AUX3 - free

17
EN!
next!
INSTALLATION NOTE : !

18
EN!
next!
INSTALLATION NOTE : !

19
EN!
next!
SAFETY INSTRUCTIONS FOR INSTALLERS!
"!
This equipment is used in video door entry and home & building
automation systems.!
!
The instructions in this document provide important information about
safety, installation, use and maintenance of the product.!
!
Verify that the equipments are undamaged, after purchase.!
!
The packaging contains potential dangerous sources for children (screws
and dowels).!
!
The installation must respect the current CEI regulations.!
!
It is necessary to install to the power sypply a protection bipolar type
switch to video door entry system.!
!
Before connecting this equipment verify the output voltage supplied from
the distribution network.!
!
Before performing maintenance operations, disconnect the device.!
!
In case of failure or malfunction, disconnect the device and contact the
technical assistance centre.!
!
Do not obstruct opening of ventilation or heat exit slots.!
!
The protection bipolar type switch must be located in the main framework
of the House.!
WARNING:!
This equipment must be fixed to the wall according to the installation
instructions.!
"!
This leaflet must always be attached to the system documentation.!
!
!
!
Product is according to EC Directive 2004/108/EC, 2006/95/EC and
following norms. !
Directive 2012/19/UE (WEEE)!
!
The crossed-out wheelie bin symbol marked on the product indicates that
the product must be assigned to a differentiated collection centre for
electrical and electronic equipment or returned to the dealer to purchase a
new product.!
!
For further details regarding the collection systems available, contact your
local waste disposal service.!
!
The user is responsible for assigning the equipment purchased, to the
appropriate collection facilities.!
!
!
!
!
Risks connected to substances considered as dangerous (WEEE).!
!
According to the WEEE Directive, these electrical and electronic products
contain harmful substances for people and the environment.!
!
It is obligatory treat the recycling of the materials in such way to avoid
negative impacts on the environment and people’s health.!
!
Adaptation to current regulations allows a correct recycling of which the
product is made..!

!
Via Monte Grappa, 25!
31020 Villorba (TV) ITALY!
Tel. 0422 350680!
Fax. 0422 446958!
www.infiniteplay.com!
ENG!
18901004 – RL00 01 14!
ZEALABS - ITALY!
This manual suits for next models
1
Table of contents
Other Infinite Play Intercom System manuals
Infinite Play
Infinite Play ZK117 User manual
Infinite Play
Infinite Play ZK171 User manual

Infinite Play
Infinite Play PLEATS Z4000 User guide
Infinite Play
Infinite Play ZK117 User manual
Infinite Play
Infinite Play ZK217 User manual
Infinite Play
Infinite Play Small User manual
Infinite Play
Infinite Play Flat Z1001 User manual
Infinite Play
Infinite Play Z6001 User manual
Infinite Play
Infinite Play PLEATS User manual
Infinite Play
Infinite Play Pleats User guide
