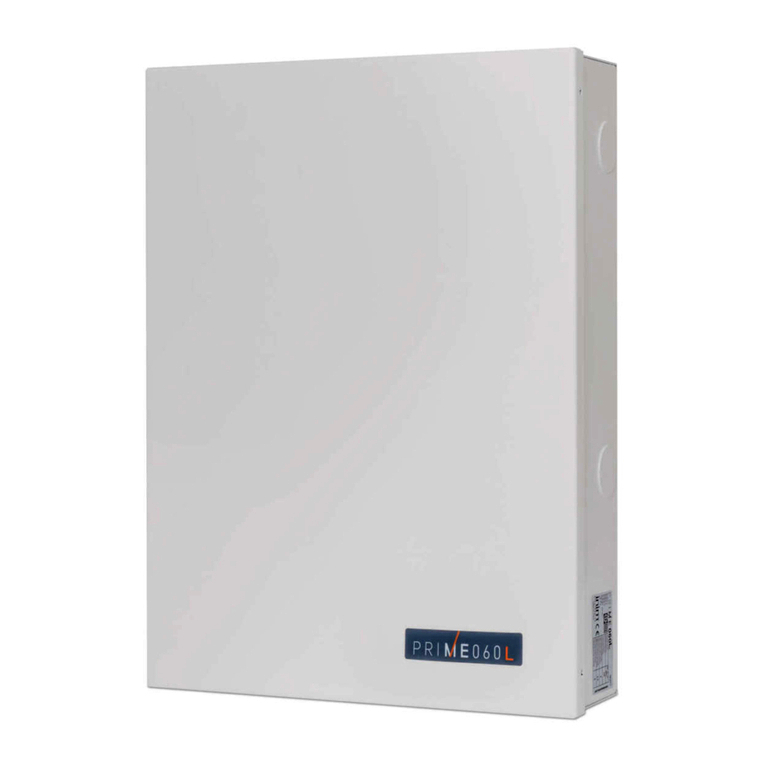
INIM Electronics Prime Series User manual

Installation manual
1
Prime
Anti-intrusion control panels and security systems
Installation manual
EN 50131-1
EN 50131-3
EN 50131-6
EN 50131-10
EN 50136-1
EN 50136-2
EN 50130-4
EN 50130-5
CEB T031

2
Anti-intrusion control panels
Warranty
INIM Electronics s.r.l. (Seller, Our, Us) warrants the original purchaser that this product shall
be free from defects in materials and workmanship under normal use for a period of 24
months. As INIM Electronics s.r.l. does not install this product directly, and due to the
possibility that it may be used with other equipment not approved by Us; INIM Electronics
s.r.l. does not warrant against loss of quality, degradation of performance of this product or
actual damage that results from the use of products, parts or other replaceable items (such as
consumables) that are neither made nor recommended by INIM Electronics. Seller obligation
and liability under this warranty is expressly limited to repairing or replacing, at Seller's
option, any product not meeting the specifications. In no event shall INIM Electronics s.r.l. be
liable to the purchaser or any other person for any loss or damage whether direct of indirect
or consequential or incidental, including without limitation, any damages for lost profits,
stolen goods, or claims by any other party caused by defective products or otherwise arising
from the incorrect or otherwise improper installation or use of this product.
This warranty applies only to defects in parts and workmanship relating to normal use. It does
not cover damage arising from improper maintenance or negligence, damage caused by fire,
flood, wind or lightning, vandalism, fair wear and tear.
INIM Electronics s.r.l. shall, at its option, repair or replace any defective products. Improper use,
that is, use for purposes other than those mentioned in this manual will void the warranty. Contact
Our authorized dealer, or visit our website for further information regarding this warranty.
Limited
warranty
INIM Electronics s.r.l. shall not be liable to the purchaser or any other person for damage
arising from improper storage, handling or use of this product.
Installation of this Product must be carried out by qualified persons appointed by INIM
Electronics. Installation of this Product must be carried out in accordance with Our instructions
in the product manual.
Copyright
The information contained in this document is the sole property of INIM Electronics s.r.l. No
part may be copied without written authorization from INIM Electronics s.r.l.
All rights reserved.
RED European
Directive
compliance
Hereby INIM Electronics s.r.l. declares that the following devices are in compliance with the
essential requirements and other relevant provisions of Directive 2014/53/UE.
Prime240L, Prime120L, Prime060S, Aria/HG, Joy/MAX, Quadra/P, nBy/S, nBy/X, Alien/GB and
variants, Alien/SB and variants, Air2-BS200/50 and variants, Air2-KF100, Air2-MC100B and
variants, Air2-MC200B and variants, Air2-UT100, Air2-FD100, Air2-Hedera-F and variants,
Air2-Aria/B and Air2-Aria/N, AIR2-XIR200W, AIR2-XDT200W, AIR2-DT200TB and variants,
SmartLinkAdv/GP, SmartLinkAdv/G
All the devices mentioned here above can be used in all EU countries without restrictions.
The full declarations of conformity can be found at URL: www.inim.biz
Leading-edge
systems
(DM37/08)
The devices described in this manual, depending on the settings selected during the
installation phase and the implementation of the concepts illustrated in this guide, allow you
to create an Intrusion Detection and Hold-up Alarm System (I & HAS) compliant with EN
50131-1:2006 + A1: 2009, safety grade 3 (at highest) and an alarm transmission system
(ATS) compliant with EN 50136-1: 2012 in category ATS6 (at highest SP6 or DP4).
The devices described are compliant with European standards EN 50131-3: 2009 (in reference
to control and indicating equipment - CIE), EN 50131-6: 2008 + A1: 2014 (in reference to
power supplies - PS), EN 50131- 10: 2014 and EN 50136-2: 2013 (in reference to
transceivers on supervised sites - SPT).
As a support to the design, planning, operation, installation, commissioning and maintenance
of intrusion alarm systems installed in buildings, the following regulatory documents should
be consulted: CEI 79-3 and CEI CLC / TS 50131-7.
Depending on the State where the components described are installed, certified compliance
with local laws and regulations may be required.
WEEE
Informative notice regarding the disposal of electrical and electronic equipment
(applicable in countries with differentiated waste collection systems)
The crossed-out bin symbol on the equipment or on its packaging indicates that the product
must be disposed of correctly at the end of its working life and should never be disposed of
together with general household waste.
The user, therefore, must take the equipment that has reached the end of its working life to the
appropriate civic amenities site designated to the differentiated collection of electrical and
electronic waste. As an alternative to the autonomous-management of electrical and electronic
waste, you can hand over the equipment you wish to dispose of to a dealer when purchasing
new equipment of the same type. You are also entitled to convey for disposal small electronic-
waste products with dimensions of less than 25cm to the premises of electronic retail outlets
with sales areas of at least 400m2, free of charge and without any obligation to buy.
Appropriate differentiated waste collection for the subsequent recycling of the discarded
equipment, its treatment and its environmentally compatible disposal helps to avoid possible
negative effects on the environment and on health and favours the re-use and/or recycling of
the materials it is made of.

Installation manual
3
Table of
contents
Warranty . . . . . . . . . . . . . . . . . . . . . . . . . . . . . . . . . . . . . . . . . . . . . . . . . 2
Limited warranty . . . . . . . . . . . . . . . . . . . . . . . . . . . . . . . . . . . . . . . . . . . 2
Copyright. . . . . . . . . . . . . . . . . . . . . . . . . . . . . . . . . . . . . . . . . . . . . . . . . 2
RED European Directive compliance . . . . . . . . . . . . . . . . . . . . . . . . . . . . . . 2
Leading-edge systems (DM37/08) . . . . . . . . . . . . . . . . . . . . . . . . . . . . . . . 2
WEEE . . . . . . . . . . . . . . . . . . . . . . . . . . . . . . . . . . . . . . . . . . . . . . . . . . . 2
Table of contents . . . . . . . . . . . . . . . . . . . . . . . . . . . . . . . . . . . . . . . . . . . 3
About this manual. . . . . . . . . . . . . . . . . . . . . . . . . . . . . . . . . . . . . . . . . . . 5
0-1 Terminology . . . . . . . . . . . . . . . . . . . . . . . . . . . . . . . . . . . . . . . . . . . . . . . . . . 5
0-2 Graphic conventions. . . . . . . . . . . . . . . . . . . . . . . . . . . . . . . . . . . . . . . . . . . . . 5
Chapter 1 General information . . . . . . . . . . . . . . . . . . . . . . . . . . . . . . . . . . . . . . . . . 6
1-1 Manufacturer's details . . . . . . . . . . . . . . . . . . . . . . . . . . . . . . . . . . . . . . . . . . . 6
1-2 Description of the product and various models . . . . . . . . . . . . . . . . . . . . . . . . . . 6
1-3 Registered patents. . . . . . . . . . . . . . . . . . . . . . . . . . . . . . . . . . . . . . . . . . . . . . 6
1-4 Manuals . . . . . . . . . . . . . . . . . . . . . . . . . . . . . . . . . . . . . . . . . . . . . . . . . . . . . 7
1-5 Operator Qualifications . . . . . . . . . . . . . . . . . . . . . . . . . . . . . . . . . . . . . . . . . . . 7
1-6 Access Levels . . . . . . . . . . . . . . . . . . . . . . . . . . . . . . . . . . . . . . . . . . . . . . . . . 8
Chapter 2 The control panel and peripherals . . . . . . . . . . . . . . . . . . . . . . . . . . . . . . . . 9
2-1 Prime control panels . . . . . . . . . . . . . . . . . . . . . . . . . . . . . . . . . . . . . . . . . . . . 9
2-2 Environmental Conditions . . . . . . . . . . . . . . . . . . . . . . . . . . . . . . . . . . . . . . . . . 16
2-3 Peripherals . . . . . . . . . . . . . . . . . . . . . . . . . . . . . . . . . . . . . . . . . . . . . . . . . . . 16
2-4 SmartLogos30M voice board . . . . . . . . . . . . . . . . . . . . . . . . . . . . . . . . . . . . . . . 27
2-5 PrimeLAN ethernet interface . . . . . . . . . . . . . . . . . . . . . . . . . . . . . . . . . . . . . . . 27
Chapter 3 Installation . . . . . . . . . . . . . . . . . . . . . . . . . . . . . . . . . . . . . . . . . . . . . . . 29
3-1 Installing the control panel . . . . . . . . . . . . . . . . . . . . . . . . . . . . . . . . . . . . . . . . 29
3-2 Connecting peripherals . . . . . . . . . . . . . . . . . . . . . . . . . . . . . . . . . . . . . . . . . . . 34
3-3 Addressing the peripherals . . . . . . . . . . . . . . . . . . . . . . . . . . . . . . . . . . . . . . . . 39
3-4 Auto-enrolling peripherals. . . . . . . . . . . . . . . . . . . . . . . . . . . . . . . . . . . . . . . . . 42
3-5 Wiring and balancing alarm detectors. . . . . . . . . . . . . . . . . . . . . . . . . . . . . . . . . 42
3-6 Wiring and balancing rollerblind/shock sensors . . . . . . . . . . . . . . . . . . . . . . . . . . 44
3-7 Connection of wireless detectors . . . . . . . . . . . . . . . . . . . . . . . . . . . . . . . . . . . . 45
3-8 Learn zone balancing . . . . . . . . . . . . . . . . . . . . . . . . . . . . . . . . . . . . . . . . . . . . 45
3-9 Connection of outputs . . . . . . . . . . . . . . . . . . . . . . . . . . . . . . . . . . . . . . . . . . . 46
3-10 Installation of add-on boards . . . . . . . . . . . . . . . . . . . . . . . . . . . . . . . . . . . . . . 46
Chapter 4 First power up . . . . . . . . . . . . . . . . . . . . . . . . . . . . . . . . . . . . . . . . . . . . . 48
Chapter 5 First operational test . . . . . . . . . . . . . . . . . . . . . . . . . . . . . . . . . . . . . . . . . 49

4
Anti-intrusion control panels

Installation manual
About this manual 5
About this manual
MANUAL CODE
DCMIINE0PRIMEE
VERSION
1.40
0-1
Terminology
CONTROL PANEL,
SYSTEM, DEVICE
Refer to the control panel or any constituent part of the Prime intrusion control system.
LEFT, RIGHT,
BEHIND, ABOVE,
BELOW
Refer to the directions as perceived by the operator when directly in front of the mounted
device.
QUALIFIED
PERSONNEL
Persons whose training, expertise and knowledge of the products and laws regarding security
systems, are able to create, in accordance with the requirements of the purchaser, the most
suitable solution for the protected premises.
SELECT
Click on a specific item on the interface (drop-down menu, options box, graphic object, etc.).
PRESS
Click on a video button, or push a key on the control-panel keypad.
0-2
Graphic conventions
Note
The notes contain important information relating to the text.
ATTENTION!
The “Attention” prompts indicate that total or partial disregard of the procedure could
damage the device or its peripherals.
DANGER!
The “DANGER” warnings indicate that total or partial disregard of the procedure could injure
the operator or persons in the vicinity.

6General information
Anti-intrusion control panels
Chapter
1
General information
1-1
Manufacturer's details
Manufacturer: INIM ELECTRONICS s.r.l.
Production plant: Centobuchi, via Dei Lavoratori 10
63076, Monteprandone (AP), Italy
Tel.: +39 0735 705007
Fax: +39 0735 704912
e-mail: info@inim.biz
Web: www.inim.biz
The persons authorized by the manufacturer to repair or replace the parts of this system have
authorization to work on INIM Electronics brand devices only.
1-2
Description of the product and
various models
DESCRIPTION
Intrusion control panel
MODELS
Prime060S, Prime060L, Prime120L, Prime240L
COMPLIANCY
EN 50131-1:2006+A1:2009,
EN 50131-3:2009,
EN 50131-6:2008+A1:2014,
EN 50131-10:2014,
EN 50136-1:2012,
EN 50136-2:2013,
EN 50130-4:2011+A1:2014,
EN 50130-5:2011,
CEB T031:2014-12 (ed.1)
SECURITY GRADE
3
ATS CATEGORIES
up to SP6 or DP4 (depending on the configurations, refer to tables 2-8 and 2-9)
1-3
Registered patents
The Prime series of control panels employs the following INIM-patented technologies.
•Input/Output Terminals: each terminal on board the control panel, keypads and
expansion boards can be configured as either an input or output zone.
•nBy/X proximity reader: this reader has been especially designed to flush-mount to all
models of electrical light-switch backboxes.
•Learn zone balancing: this option allows the control panel to save the balancing values
of all the system zones automatically, thus eliminating the task of typing them in.

Installation manual
General information 7
1-4
Manuals
INSTALLATION
AND
PROGRAMMING
GUIDE
The guide, supplied with each control panel, provides all the instructions and illustrations
necessary for fast installation and programming of the Prime system.
It provides step by step descriptions of the procedures required for the system wiring, the
various connections and first powerup. It also provides a table for the peripheral addressing
process and a quick guide indicating default parameters and values and how to program/
change them.
INSTALLATION
MANUAL
(THIS MANUAL)
The installation manual contains the technical specifications of all the system components and
the instructions for their installation, including instructions with wiring diagrams relating to
the various modules.
It also contains the instructions for system commissioning
In order to provide adequate protection, the installer must adhere to all the manufacturer's
guidelines relating to the active and passive security devices of this system.
MANUAL FOR
SYSTEM
PROGRAMMING
The Programming manual contains instructions for the configuration and programming of the
Prime system, as well as the descriptions of all the parameters and options, irrespective the
means chosen for system programming (keypad, software, etc.).
It also contains the instructions for commissioning, maintenance and troubleshooting
techniques.
SOFTWARE
MANUAL
The Prime/STUDIO software manual contains the description of the software and the
instructions for its installation and use.
It is the duty of the person who programs the Prime system to adhere to the instructions and
to have complete knowledge of the software in order to proceed swiftly and properly with the
configuration and programming procedures.
SUPPORT MANUAL
This manual provides the installer and programmer of the Prime system with useful
information.
USER'S MANUAL
This manual contains instructions relating to the user interface of the Prime system, its
functions and how to use them.
This manual is supplied with every control panel and must be given to the end-user for
consultation. It is the duty of the installer to ensure that the end-user fully understands how
the system works and is aware of the configuration set by the installer.
The manuals which are not supplied with the apparatus can be ordered, making reference to
their respective codes, or downloaded from www.inim.biz.
1-5
Operator Qualifications
INSTALLER
The installer is the person (or group of persons) who sets up and programs the entire security
system in accordance with the purchaser's requirements and in respect of the safety laws in
force. As the only individual in contact with system users, it is the installer's responsibility to
instruct them on how to use the security system properly.
Under normal circumstances, the installer is not allowed to arm/disarm the system without
previous authorization from the user. All the system partitions must be disarmed before
accessing the parameter programming phase.
The access code of the installer is a level 3 access code.
USER
The users are the occupants of the building where the Prime intrusion control panel is
installed. Only authorized users can access and operate the system.
Thanks to the extreme flexibility of the system, the most common operations can be carried
out without authorization. This operating method must be expressly requested by the main
user, as it considerably lowers the security level of the system and may cause false alarms,
accidental arm/disarm operations, etc.

8General information
Anti-intrusion control panels
A system access code can be associated with each user. The programming process allows you
to define the code hierarchy:
•User
•Manager
•Master
Each code, in accordance with its assigned level in the system-hierarchy (the “User” being
the lowest level), is capable of carrying out the following operations on all other codes that
are hierarchically inferior:
•• enable/disable
•• change PIN
•• change several programming parameters
If the system programming complies with security grade 3 of EN 50131, some partition
arming or delete memory operations, requested from a keypad, may be authorized by the
entry of a level 3 code (installer code) as well as by a user code.
1-6
Access Levels
The normative defines the following system-access levels, regardless of system-access
limitations:
•Level 1 - access by any person (e.g. passer-by)
•Level 2 - access by a user
•Level 3 - access by the installer or maintenance operator access (authorized by a level 2
user)
•Level 4 - manufacturer access

Installation manual
The control panel and peripherals 9
Chapter
2
The control panel and peripherals
2-1
Prime control panels
2-1-1
Package contents
Inside the package you will find:
• Metal enclosure containing the motherboard and wired power supply
• User's Manual
• Quick guide to installation and programming
• Plastic bag containing:
- 20 3k9 Ohm 1/4W resistances
- 20 6k8 Ohm 1/4W resistances
- Backup-battery wire
- Earth connection ring terminal
- Ring terminal nut
- Thermal probe for optimization of the battery charging process
- 3 screws to secure the frontplate of the metal enclosure
- “INIM Electronics security-protected area” sticker
The control panel data labels are affixed to the outside of the control panel enclosure.
2-1-2
Control panel descriptions
INIM
Electronics
security-
protected
area
Table 2-1: Control panels - electrical and mechanical features
Prime control panel models Prime060S Prime060L Prime120L Prime240L
Voltage
power supply 230V ~ -15% +10% 50/60Hz
nominal output 13,8V
output range from 9 to 13.8V
Current draw
maximum 0.5A 1.1A
of control panel mother-
board 180mA @ 13.8V
Fault voltage on power outputs 9.8V
Threshold for protection from deep discharge 9.5V
from overload 15.4V
Maximum power-supply voltage ripple 550mV 200mV
PS type A
Maximum voltage on I-BUS 4A
Type of alarm notification (EN 50131-1, par. 8.6) D (
a
)
IP Protection grade 30
Enclosure Dimensions (W x H x D) 27.5 x 37.4 x 8.6 cm 37.5 x 46.6 x 9.2 cm
Weight (without battery) 3.2Kg 5Kg
Security grade EN50131-3 3
EN50131-6 3
a. Also notification types A, B and C are possible depending on the configuration of the control panel and system.

10 The control panel and peripherals
Anti-intrusion control panels
The following table shows the maximum number of devices supported by the various control
panel models.
Table 2-2: Type SD and distribution of the currents
Prime control panel models Prime060S Prime060L Prime120L Prime240L
SD type
(backup battery)
rated voltage 12V
maximum capacity 7Ah 9Ah 7Ah 9Ah 7Ah 9Ah 17Ah 18Ah
maximum recharge time 24h (80% charged)
maximum internal resistance (R
i max
)1.50Ohm 0.50Ohm
Maximum deliv-
erable current @
12V
total 3.7A 6.2A
for external loads
autonomy 30h
(
a
)
50mA 120mA 50mA 120mA 50mA 120mA 380mA 420mA
autonomy 12h
(
b
)
400mA 570mA 400mA 570mA 400mA 570mA 1230mA 1320mA
autonomy 4h (
c
)
1570mA 2070mA 1570mA 2070mA 1570mA 2070mA 4070mA 4320mA
Max. current available on each +AUX terminal 1500mA
Maximum deliverable current to open-
collector outputs
T1, .., T10 250mA
OC1, OC2 500mA
a. The system autonomy in absence of the primary power source can be limited to 30h for systems with security grade 3 or 4, that is,
as long as the primary power source failure is notified to an alarm receiving centre or to another remote control panel.
b. If the system is declassified to grade 2, autonomy can be limited to 12h.
c. For type A or B power supplies, if the system includes an ancillary power supply that switches automatically between the primary
power source and the ancillary power-supply, the autonomy can be limited to 4h regardless of the system security grade.
Table 2-3: Control panel - main features
Prime control panel models Prime060S Prime060L Prime120L Prime240L
Partitions 10 20 30
Total zones 120 240 480
Keypads 10 15
Voice memo slots 10
Expansions 40
Readers 20 30
Sounder/flashers 10
Air2-BS200 Transceivers 20 30
Digital keys and wireless command devices 150
Possible key combinations 4294967296
IB200 isolators 16
GSM/GPRS/2G/3G Communicators 1
Codes 50 100
Scenarios 30 50
Timers 20 40
Recordable Events 4000
Programmable events 30 50 60
Table 2-4: Number of terminals
Prime control panel models Prime060S Prime060L Prime120L Prime240L
Ter minal s on pa nel
total 10
configurable as inputs 10
configurable as rollerblind/shock 10
configurable as outputs 10
terminals on keypads 30
terminals on expan-
sion boards
total 200
available 60 120 200
Total terminals 60 120 240

Installation manual
The control panel and peripherals 11
Following is an illustration of open Prime control panels showing their assembled parts and
completed wiring, as supplied.
ATTENTION!
Do not tamper with or disconnect any wiring that has been completed at the factory.
In the event of replacement by the installer of one of the parts listed below (for maintenance
or repairs), the manufacturer recommends that connection or disconnection of any wires is
done only after disconnecting both the AC mains voltage and the battery.
Outputs on control-
panel motherboard
total 15
terminals (T1, ..., T10) 10
relay 1
open collector (OC1, OC2) 2
Auxiliary outputs (AUX1, AUX2) 2
Table 2-4: Number of terminals
Prime control panel models Prime060S Prime060L Prime120L Prime240L
Prime060S
A
B
K
I
J
L
G
C
E
D
F
H
K
K
K
K
M
M
N
N
N
N
N

12 The control panel and peripherals
Anti-intrusion control panels
A
B
K
I
J
L
G
C
E
DF
H
K
K
K
K
M
M
M
M
N
N
N
N
Prime060L
Prime120L
Prime240L
Table 2-5: Control panels - description of parts
Models
Prime Prime060S
Prime060L
Prime120L
Prime240L
A
Metal enclosure
B
Mother board
C
Switching power supply
D
Thermal probe connector
E
Battery connector
F
Mains input terminal board
G
Mains cable entry
N
L
230V ~ 50/60 Hz
AC I
nput
NL
230V ~ 50/60 Hz
AC I
nput

Installation manual
The control panel and peripherals 13
H
Ground connection screws
I
Frontplate earth wire
J
Wires between switching-power and control panel
K
Fixing-screw locations for the metal enclosure
L
Compartment for backup battery
M
FLEX5/U or Nexus expansion board location holes
N
Lateral cable entries (on the sides of the box)
Table 2-5: Control panels - description of parts
Models
Prime Prime060S
Prime060L
Prime120L
Prime240L
Prime control panel board
O
C
E
F
H I JK
M
N
PAB
L
DF
A
P
P
G G
G G
Table 2-6: Mother board - description of parts
A
Connector for the power supply to board wires
B
Open-panel tamper microswitch
C
SmartLogos30M voice-board connector
D RESET
System reset button
EFACTORY
Button to reset default settings (factory settings)
F
Connector for the optional board
G
Fixing holes for the optional board
H
Dislodgement-tamper microswitch connector (accessory item)
I
Connector for the open-panel tamper microswitch (accessory item)
J
Maintenance jumper connectors
K
VCC
Green power LED
RUN
Blue activity LED
BUS
Yellow BUS activity-on-BUS LED
PSTN
Red PSTN-fault LED
L
RJ45 connector for the LAN network
M
Green USB-connected LED
N
MicroUSB connector
O
Ancillary earth contact
P
Terminal board

14 The control panel and peripherals
Anti-intrusion control panels
2-1-3
LED activity
The LEDs on the control panel motherboard (refer to Table 2-6: Mother board - description of
parts, K) may help in providing information regarding the proper operating capacity of the
control panel firmware and I-BUS. Specifically:
GREEN VCC LED
Green LED ON solid indicates the power supply is present. If ON solid it indicates that the
control panel is operating properly. LED OFF or blinking indicates power-supply failure or that
trouble is present. The control panel will continue to operate until the deep battery discharge
threshold is reached (9.5V).
BLUE RUN LED
If the control panel is operating properly, the blue LED on the motherboard will blink rapidly.
At the end of a programming session via PC, during restoral of factory default settings and
during re-programming operations on the control panel and peripheral firmware, the LED may
be either On solid or Off or the entire time. However, once the operation is complete it will
start to blink again as previously described.
If the LED is On or Off permanently for no apparent reason (see above), it means that all the
system functions are blocked.
YELLOW BUS LED
If the control panel is operating properly, the yellow LED on the motherboard should flicker. At
the end of a programming session via PC, during restoral of factory default settings and
during re-programming operations on the control panel and peripheral firmware, the LED may
be either On solid or Off or the entire time. However, once the operation is complete it will
start to blink again as previously described.
If the yellow LED is On or Off permanently, it means that there is trouble on the I-BUS.
If the LED is On or Off permanently for no apparent reason (see above), it means that the I-
BUS is blocked. This condition is confirmed by the loss of communication with the keypads,
readers and expansions.
RED PSTN LED
The Red LED ON solid indicates the ongoing progress of:
• a phone call (on the PSTN line or through Nexus)
• an SMS text message
• a SIA-IP communication
2-1-4
ATS Categories
Prime control panels used alone or together with any of the following described optional
devices constitutes an SPT (Supervised Premises Transceiver) which can be used to create an
ATS (Alarm transmission System) as defined in EN 50136-1 and EN 50136-2 standards.
The following table shows the maximum ATS categories achievable with the SPT
configurations and main communication channel in use, together with the respective
parameters.
Table 2-7: Mother board - terminal board
n. icon/identifier function
1-2-3 NO NC COM
Voltage-free contacts of the relay output
4+OC
13.8V
350mA ancillary power supply
5-6 OC1 OC2
Open-collector output
7-8-9-10 + D S -
I-BUS connections
11-23 AUX1 AUX2
13.8V output terminals
25 AUX3
13.8V 350mA protected ancillary power supply
12-14-16-18-20-22-
24-26-28-30-32-34-
36
Power supply negative (earth or GND)
13-15-17-19-21-27-
29-31-33-35
T1-T2-T3-T4-T5-T6-
T7-T8-T9-T10
Control panel input/output terminals
37-38
Internal telephone-line connection
39-40 PSTN
Land-line connection (PSTN)
/
Earth connection

Installation manual
The control panel and peripherals 15
2-1-5
Events log memory
The control panel events are saved to a non-volatile semiconductor-memory which retains
data without the need of power.
The electrical characteristics of semiconductor devices diminish over time. However, a
minimum period of 40 years data retention is guaranteed.
2-1-6
I-BUS interconnections
Prime control panels are equipped with a 4-wire BUS for peripheral interconnections (2 power-
supply wires and 2 data exchange wires, refer to paragraph 3-2-1 The I-BUS line wiring).
The intellectual property rights regarding the electrical, structural and protocol features of the
BUS are the sole property of INIM Electronics s.r.l.
The I-BUS is not a RS485 differential BUS.
COMMUNICATION
I-BUS
The control panel monitors the I-BUS continuously.
If no signals (control panel and peripheral signals) are detected on the I-BUS for over 90
seconds, the keypad displays will show the warning opposite. The display will show:
1. Keypad model
2. Keypad firmware version
3. Error type
4. the address of the keypad and the address of the built reader
First check that cable “D” of the I-BUS is connected properly. Then check the proper operating
capacity of the I-BUS and the general integrity of the entire system.
If the message opposite appears on the keypad display, it means that I-BUS is operating
properly but cannot communicate with the keypad in question.
Therefore, the keypad is not present in the system configuration.
Note
One of the two messages shown in the figures may also appear during the control panel firmware
updates.
If you are using an Alien user interface, the above-mentioned information will be shown on
the bottom bar on the home page.
Table 2-8: ATS categories based on configurations
SPT Configurations SPT primary network inter-
face
ATS Categories
Prime control
panels Nexus Nexus/G
Nexus/3G PrimeLAN Single Path
(SP)
Dual Path
(DP)
X
Internet 6 2
XX
XX
Internet or GSM/GPRS/UMTS/
HSPA 64
XX
XXX
Table 2-9: ATS Parameters
ATS Categories Transmission time Time relation Replacement
security
Information
security Operating mode
Classification Maximum values
Single Path 2 D2 (60s) M2 (120s) T2 (25h) S0 I0
Pass-through
6 D4 (10s) M4 (20s) T6 (20s) S2 I3
Dual Path 2 D3 (20s) M3 (60s) T3a (30min) S0 I0
4 D4 (10s) M4 (20s) T5 (90s) S2 I3
- JOY/MAX -
FW RELEASE X.YZ
NO COMMUNICATION
K01 P14
- JOY/MAX -
FW RELEASE X.YZ
NOT ENROLLED
K01 P14

16 The control panel and peripherals
Anti-intrusion control panels
2-2
Environmental Conditions
Prime control panels must not be installed outdoors and are suitable for operating under the
following conditions:
•Temperature: from -10° to +40°C
•Maximum humidity:75% (without condensation)
•Environmental Classification:II
The peripherals must not be installed outdoors and are suitable for operating under the
following conditions:
•Temperature: from -10° to +40°C
•Maximum humidity:75% (without condensation)
•Environmental Classification:II
The nBy/S reader is suitable for outdoor installation and operates best under the following
conditions:
•Temperature: from -25° to +70°C
•Maximum humidity:93% (without condensation; for 30 days per year granting that the
relative humidity can touch points of 95% without being subject to condensation)
•Protection grade:IP 34
•Environmental classification:IV
2-3
Peripherals
The Prime system provides for the use of devices connectible to the control panel via I-BUS:
• JOY/GR, JOY/MAX, Aria/HG, nCode/G, Concept/G, Alien/G e Alien/S keypads
• Readers (nBy/S and nBy/X)
• Expansions (Flex5)
• Transceiver (Air2-BS200)
• Sounderflashers (Ivy-B)
• 2G/3G dialers (Nexus)
•Isolators(IB200)
ATTENTION!
The connectible peripherals must have firmware versions higher than or equal to 5.00.
2-3-1
Joy/GR and Joy/MAX keypads
• Backlit graphic display
• Icon Easy4U interface
•4indicatorLEDs
• Signal buzzer
• Tamper and opening protection
• Mounts to “503” outlets
• 2 Input/Output terminals
Joy/MAX only:
• Thermometer and chronothermostat function
• Microphone and loudspeaker for voice functions
• Built-in proximity reader
Table 2-10: Joy - electrical and mechanical features
Model JOY/GR JOY/MAX
Voltage
from 9 to 16V
Typical current draw
70mA 90mA
Terminals configurable as OC outputs
2
Maximum current draw per terminal
150mA
Dimensions (W x H x D)
142 x 116 x 24 mm
Weight
160g 180g

Installation manual
The control panel and peripherals 17
Keypad terminals:
Terminals T1 and T2 can be configured as:
• Input (also as Rollerblind or Shock)
•Output
•Doublezone
• Supervised Output
The keypad package contains a sticker (to be located under the keypad flip) which can be
used to note down the keypad address or label, its location, the partitions it controls and any
phone-contact numbers.
Table 2-11: Joy - description of parts
Model JOY/GR JOY/MAX
A
Ter minal b oar d
B
Buzzer
C
/Microphone
D
/Temperaturesensor
E
Open-tamper microswitch
F
Backlit graphic display
G
Signaling LEDs
H
/Antenna
I
/ Speaker wire connector
J
Wire entry
K
Wall-mount screw locations
L
Speaker housing
M
Board supports
N
Dislodgement-tamper microswitch screw location
O
Dislodgement-tamper microswitch spring
A
B
C
E
G
H
K
L
D
F
K
K
K
K
KK
M
MM
I
J
O
N
JOY keypad board
JOY keypad backbox
Table 2-12: Joy - terminal board
n. identifier description
1+
Ter minal “
+
” for the connection of the I-BUS
2D
Ter min al “
D
” for the connection of the I-BUS
3S
Termin al “
S
” for the connection of the I-BUS
4-
Ter minal “
-
” for the connection of the I-BUS
5T1
Screw terminal of keypad terminal T1
6
Negative power terminal (Negative or GND)
7T2
Screw terminal of keypad terminal T2
8
Negative power terminal (Negative or GND)
1 2 3 4 5 6 7 8
A

18 The control panel and peripherals
Anti-intrusion control panels
2-3-2
Aria/HG keypad
• Backlit graphic display
• Icon Easy4U interface
• Brightness sensor
•4indicatorLEDs
• Signal buzzer
• Inertial tamper protection
• Mounts to “503” outlets
• Thermometer and chronothermostat function
• 2 Input/Output terminals
• Microphone and loudspeaker for voice functions
• Built-in proximity reader
Connection of the keypad is achieved through the connector on the back and must done using
the 8 wire cable which comes with the keypad.
Table 2-13: Aria/HG - electrical and mechanical features
Voltage
from 9 to 16V
Typical current draw
90mA
Terminals configurable as OC outputs
2
Maximum current draw per terminal
100mA
Dimensions (W x H x D)
140 x 115 x 27mm
Weight
228g
Table 2-14: Aria/HG - description of parts
A
Display
B
Brightness sensor
C
LED
D
Microphone
E
Proximity reader
F
Cable connector
G
Speaker
H
Counter support
I
Wall bracket sup-
port
J
Screw location
K
Backlocking grips
L
Screw locations
M
Cable entry
Aria/HG - front
A
B
DE
CI
Aria/HG - back
F
J
G
H
I
K
Aria/HG - wall bracket
K
L
LL
L
L
L
M
Aria/HG - 8 wire cable
Table 2-15: Aria/HG - connection wires
colour terminal description
Red +
Cable/Terminal “
+
” of the I-BUS and RS485 BUS
Yellow D
Cable/Terminal “
D
” for the I-BUS connection
Green S
Cable/Terminal “
S
” for the I-BUS connection
Black -
Cable/Terminal “
-
” of the I-BUS and RS485 BUS

Installation manual
The control panel and peripherals 19
Terminals T1 and T2 can be configured as:
• Input (also as Rollerblind or Shock)
•Output
•Doublezone
• Supervised Output
2-3-3
nCode/G and Concept/G Keypads
• Backlit graphic display
• Icon Easy4U interface
•4indicatorLEDs
• Signal buzzer
• Tamper protection
• Mounts to “503” outlet boxes, vertical position
• 1 Input/Output terminal
Blue T1
Wire/terminal of keypad terminal T1
Black -
Negative power wire/terminal (Negative or GND)
Grey T2
Wire/terminal of keypad terminal T2
Black -
Negative power wire/terminal (Negative or GND)
Table 2-15: Aria/HG - connection wires
colour terminal description
Table 2-16: nCode/G, Concept/G - electrical and mechanical features
Model nCode/G Concept/G
Voltage
from 9 to 16V
Typical current draw
70mA 80mA
Terminals configurable as OC outputs
1
Maximum current draw per terminal
150mA
Dimensions (W x H x D)
87 x 129 x 18 mm 87 x 129 x 16.5 mm
Weight
135g 155g
Buttons
23
(in soft rubber)
23
(touch)
Table 2-17: nCode/G and Concept/G - description of parts
A
Backlit graphic dis-
play
B
Signaling LEDs
C
Cable connector
D
Tamper microswitch
E
Screw location
F
Screw location
G
Terminal board
guide
H
Buzzer
A
B
nCode/G keypad frontplate
A
B
Concept/G keypad frontplate
C
E
D
F F
F
F F
G
H
G
Retro keypads
nCode/G and Concept/G Keypads
6 wire cable KB100 - terminal board

20 The control panel and peripherals
Anti-intrusion control panels
You can connect Code/G and Concept/G keypads using the connector on the back of the
device, using either the 6 wire cable (included), or the KB100 terminal board included in the
deep-bracket kit (accessory kit).
nCode/G and Concept/G keypads are equipped with a buzzer and a T1 terminal which can be
configured as:
• Input (also as Rollerblind or Shock)
•Output
•Doublezone
2-3-4
Alien/G and Alien/S touch screen keypads
• 65000 colour display
• Touch-screen
• Protection against removal and dislodgement tamper
• Input/Output terminals (Alien/G only)
• Thermometer and chronothermostat function
• Microphone and loudspeaker for voice functions
• Built-in proximity reader
• System interface with I-BUS (and BUS RS485, for future use)
•USBInterface
• SD card interface
• Photoframe function with images on SD card
• Background customization with images on SD Card
• Skin selection
• Colours available: black or white
Table 2-18: Brackets - description of parts
I
Wire entry
L
Wall-mount screw locations
M
Flush-mount screw locations
N
Backlocking grips
I
M
Mounting bracket
M
L L
LL
N
N
N
NN
KB100 - deep mounting bracket
I
M
M
L L
LL
N
N
N
NN
LL
L
Table 2-19: Connection cables - KB100 terminal board
n. colour KB100 termi-
nal board description
1Red +
Wire/Terminal “
+
” for the I-BUS connection
2 Yellow D
Wire/Terminal “
D
” for the I-BUS connection
3Green S
Wire/Terminal “
S
” for the I-BUS connection
4 Black -
Wire/Terminal “
-
” for the I-BUS connection
5 Blue T1
Wire/terminal of keypad terminal T1
6 Black
Negative power wire/terminal (Negative or GND)
Other manuals for Prime Series
1
This manual suits for next models
4
Table of contents
Other INIM Electronics Control Panel manuals
INIM Electronics
INIM Electronics SmartLight User manual

INIM Electronics
INIM Electronics Previdia Compact Quick guide
INIM Electronics
INIM Electronics Prime Series User manual

INIM Electronics
INIM Electronics SmartLoop User manual
INIM Electronics
INIM Electronics SmartLine Series Assembly instructions
INIM Electronics
INIM Electronics PREVIDIA MAX Parts list manual
INIM Electronics
INIM Electronics Previdia Compact User manual

INIM Electronics
INIM Electronics Previdia Compact User manual

INIM Electronics
INIM Electronics PREVIDIA MAX User manual

INIM Electronics
INIM Electronics SmartLoop User manual
