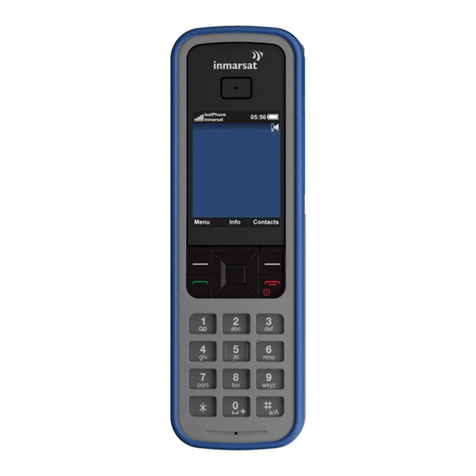
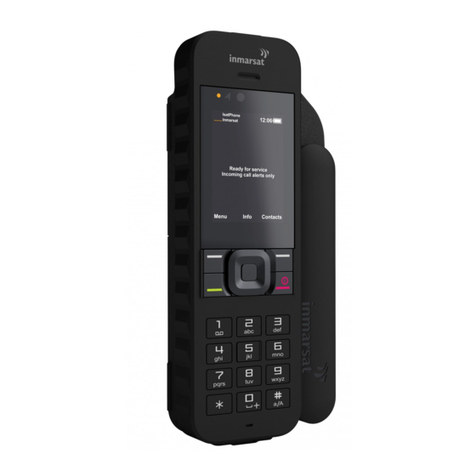
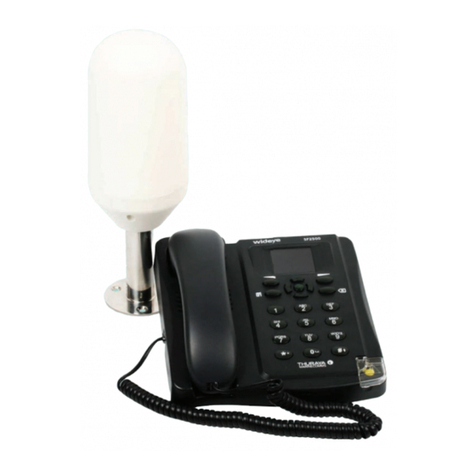
Inmarsat IsatPhone User manual

Using Voicemail
o
n IsatPhone,
LandPhone and
FleetPhone
Version 01
04
July 20
08
inmarsat.com
Whilst the information has been prepared by Inmarsat in good faith, and all reasonable efforts have been made to ensu
re its accuracy, Inmarsat makes no warranty or representation as to the accuracy,
completeness or fitness for purpose or use of the information. Inmarsat shall not be liable for any loss or damage of any kin
d, including indirect or consequential loss, aris
ing from use of the information and all
warranties and conditions, whether express or implied by statute, common law or otherwise, are hereby excluded to the extent
permitted by English law. INMARSAT is a trademark of the International Mobile
Satellite Org
anisation, Inmarsat LOGO is a trademark of Inmarsat (IP) Company Limited. Both trademarks are licensed to Inmarsat Global Lim
ited
. © Inmarsat Global Limited 2008
. All rights reserved.

Contents
Getting started
1
1
Introduction
1
2
Accessing voicemail
1
3
Setting up voicemail for the first time
1
4
Setting up call forwarding to voicemail
2
Using voicemail
4
5
Useful commands
4
6
Listening to voicemail messages
4
7
Managing the messages
5
7.1
Chang
ing the automatic message play setting
5
7.2
Changing the play order
5
7.3
Changing the message content
6
8
Setting up and changing your greetings
6
9
Changing the PIN and PIN usage
7
9.1
Chan
ging the PIN
7
9.2
Changing the Fast login and PIN skip settings
7

Using Voicemail on IsatP
hone, LandPhone and FleetPhone
Page
1
Getting started
1
Introduction
This document describes how to manag
e your voicemail services
on IsatPhone, LandPhone and
FleetPhone
.
You can listen to and manage voicemail messages, and set up and edit voicemail administration
settings using
the IsatPhone or
FleetPhone
keypad
, or
any suitable handset
connected to the
LandPhone
.
Important:
The pho
ne
do
es
NOT send you a notification when you have a new voicemail message.
You must access the voicemail system periodically to check if you have any new
messages. Refer to “
Listening to voic
email messages
” on page
4
for details.
2
Accessing voicemail
To access voicemail, simply dial either the short dial code or the
full
number, as follows:
•
Short code:
57
0
•
Full
number:
00
870
772 001 899
Depending on how your mailbox is set up, you may also need:
•
Your
mailbox ID
–
This is the phone number associated with your account. It is
supplied by your
service provider.
•
Your
PIN
–
supplied to you by your service provider.
Enter these if prompted.
When y
ou hear the automated voicemail
greeting,
y
ou can now carry ou
t any of the operations
described in this document.
3
Setting up voicemail for the first time
The first time you access voicemail, you will be talked through the minimum set up procedure by
the automated voice. As part of this procedure, you are asked to e
nter a PIN number, and record a
voicemail greeting.
Use the procedure below to assist you, if required:
a.
Access voicemail usin
g the short code or full number, shown in “
Accessing voicemail
” above.
b.
When prompted, enter a
new
4
-
dig
it PIN, followed by the
#
symbol.
Note: The
#
symbol is referred to as the “pound” symbol by the automated voice.
c.
When prompted, re
-
enter the same 4
-
digit PIN, followed by
#
. If the PINs you entered in steps
b.
and
c.
match, you are informed that the PIN h
as been changed.
Note:
You must enter a PIN when setting up voicemail for the first time. You are
subsequently
prompted to enter this PIN each time you turn on your phone. If you want to disable this
feature, you can do so at any time after completing the
initial set up. Refer to “
Changing
the Fast l
ogin and PIN skip settings
” on page 7 for details.

Using Voicemail on IsatP
hone, LandPhone and FleetPhone
Page
2
d.
When prompted, s
ay
your name and press
#
.
This is NOT your full greeting text; s
ay
your name
only. This name is called the system name
, and is used to take
a
voicemail message when no
other greeting is available.
e.
When prompted, do the following:
•
Press
1
to use this system name and proceed with the setup procedure.
•
Press
2
to listen to the system name.
•
Press
3
to re
-
record your system nam
e.
f.
When prompted, say the greeting that you want callers to hear when you are unable to take a
call, and press
#
.
g.
When prompted, do the following:
•
Press
1
to use this greeting and proceed with the setup procedure.
•
Press
2
to listen to the greeting.
•
Press
3
to re
-
record your greeting.
The recorded voice now confirms that the setup procedure is complete, informs you if there are any
voicemail messages for you, and offers you further administration options. Refer to the following
sections for details.
4
Setting
up call forwarding to voicemail
By default, all incoming calls are forwarded to the
following
voicemail number
:
00
870
772
001
899
If you want to change this default setting,
you must se
t
up
call forwarding for
the types of incoming
call that you want to
divert
to voicemail
or disable all call forwarding
.
The
call forwarding
options are
as follows:
•
Forward all incoming calls to voicemail (the default setting).
•
Forward incoming calls to voicemail if the phone is
out of reach
, for example the terminal is
swi
tched off or out of coverage.
•
Forward incoming calls to voicemail if the phone is
busy
.
•
Forward incoming calls to voicemail if the phone is
not answered
after a certain period of time.
The following table shows the commands that you must
enter
into the
pho
ne’s keypad
to
set up or
edit your
call forwarding
options
.
See the Examples after the table for guidance.
Call forwarding option
Command (enter
using the
keypad
)
Call forward all
c
alls
-
activate (
register
)
*
*21*DN
#
#
Call forward all calls
–
deactivat
e
(deregister)
#
#21
##
Call forward all calls
–
check current status
*#21
##
Call forward
if out of reach
–
activate (
register
)
*
*62*DN
#
#
Call forward
if out of reach
–
deactivate
(deregister)
#
#62
##

Using Voicemail on IsatP
hone, LandPhone and FleetPhone
Page
3
Call forward
if out of reach
–
check current status
*#
62
##
Call forward
if
busy
–
activate (
register
)
*
*67*DN
#
#
Call forward
if
busy
–
deactivate
(deregister)
#
#67
##
Call forward
if
busy
–
check current status
*#67
##
Call forward if
no
t answered
–
activate (
register
)
*
*6
1
*DN*
*T#
#
Call forward
if not answ
ered
–
deactivate
(deregister)
#
#61
##
Call forward
is not answered
–
check current status
*#61
##
Note:
In the table
above
:
D
N refers to Destination Number
–
t
ype in a valid telephone number at this point in
the command.
T refers to
T
ime elapsed, in seconds
, before the c
all is forwarded
–
type in a figure
at this point in the command.
S
ee the examples below for details
.
Example
s
•
To forward
incoming
calls to the voicemail number
when the phone is busy
:
Activate (r
egister
)
the
number
using the format
*
*
67
*DN*#
#
(where DN is the
destination
teleph
one number
,
to which
calls will be
forward
ed
).
Keystroke
s
:
*
*
67
*008707720018
99
#
#
(sets up calls to be forwarded to voicemail
when the phone is busy
)
.
•
To forward
incoming
call
s
that
do not
receive
a
reply to
the voicemail number:
Activate (r
egister
)
the number and the time that you want to elapse before the call is forwarded
,
using
the format *
*
61*DN**T#
#
(where DN is the
destination telephone number
to which
calls
will be forwarded,
and T is the time elapsed before the call is forwarded
, in seconds
).
Keystrokes:
*
*
61*00870772001899**20#
#
(sets up calls to be forward to voicemail
,
after 20 seconds without reply).
•
To deactivate a service, enter the required command.
•
To check on the current status of a service, enter the required command.

Using Voicemail on IsatP
hone, LandPhone and FleetPhone
Page
4
Using voicemail
5
Useful commands
There are some commands that you can use anywhere in the voicema
il system, and that will help
you navigate through the system.
They are as follows:
•
Press
*1
to return to the main menu from anywhere in the system.
•
Press
*2
to return to the previous menu from anywhere in the system.
•
Press
*3
to erase a message.
•
Press
*8
to make a call from within the mailbox system. You are prompted to enter the number
(followed by
#
)
, and the voicemail system will then try and connect you.
•
Press
7
to move back several seconds while listening to a message.
•
Press
8
to pause the voicemail s
ystem, then press
8
again to resume.
•
Press
9
to move forward several seconds while listening to a message.
•
Press
*9
to exit the voicemail system.
•
Press
*0
for help with the current operation.
•
Press
0
for a list of further menu options.
6
Listening to voic
email messages
To listen to and manage voicemail messages:
a.
Dial
57
0
(or the alternative
full
number)
to access voicemail. The recorded voice informs you
how many new messages you have (if any) and how many saved messages (if any).
b.
Either:
•
If you have a ne
w message, it will be played automatically. You will hear the caller’s number
(if supplied), the time and date of the call, and the message itself. The message is saved
automatically, and the next new message (if any) is played.
•
If you have a saved message
, you can listen to it by pressing
1
. You will hear the caller’s
number (if supplied), the time and date of the call, and the message itself.
c.
You can now do one of the following:
•
Press
1
to listen to a message again.
•
Press
2
, then press
1
to dial the numbe
r of the caller and return the call.
•
Press
3
to erase the message.
•
Press
6
to tag a saved message as a new message. This is useful if you want to remind
yourself that you have yet to respond to a message. Next time you access voicemail, this
message plays
as a new message.
•
Press
#
to save the message.

Using Voicemail on IsatP
hone, LandPhone and FleetPhone
Page
5
Note the following:
•
The maximum length of a
voicemail
message is 60 seconds.
•
If you do not want messages to be played automatically when you access voicemail, you can
disable this feature
and go straight t
o the main menu when you access voicemail
. Refer to
“
Changing the auto
matic message play
setting
” on page
5
.
•
By default, the most recently received message is played first. If you want to
reverse the
order in
which messages are played
, refer to
“
Changing the play order
” on page
5
.
•
By default, the header information (which includes the caller’s number, and the date and time
that the message was rec
eived), and the message itself are both played. If you want to play
only
the header or only the message, refer to
“
Changing the message content
” on page
6
.
Important:
The phone d
oes NOT send you a no
tification when you have a new voicemail message.
You must access the voicemail system periodically to check if you have any new
messages.
Note:
The mailbox can store a maximum of 10 messages. If the mailbox is full, a caller will be
unable to leave a me
ssage.
7
Managing the messages
If required, you can change the default settings for your voicemail messages. The default settings
are as follows:
•
You are notified of how many new messages you have and how many saved messages each
time you access voicemail.
In addition, new messages play automatically. If required, you can
disable this feature
and go straight to the main menu when you access voicemail
. Refer to
“Changing the
auto
matic message
play
setting” on page
5
.
•
The most recent
ly received
message plays f
irst. If required, you can
reverse the order in which
messages are
play
ed
.
Refer to “Changing the play order” on page
5.
•
The header information and the message both play. If required, you can play header only, or the
message only. Refer to “Changing the me
ssage content” on page
6.
7.1
Changing the auto
matic message play
setting
You can choose whether or not you want to be notified of how many new and saved messages you
have each time you access voicemail. To change the current setting:
a.
From the main menu, sele
ct
4
.
b.
From the sub
-
menu, select
5
.
c.
From the sub
-
menu, select
1
.
d.
Select
1
to change the current setting.
(
S
o, for example, if this feature is enabled, selecting
1
disables it
.)
7.2
Changing the play order
You can choose whether you want to play messages in the
order they were received (oldest
message first), or in reverse order (newest message first). To change the current setting:
a.
From the main menu, select
4
.
b.
From the sub
-
menu, select
5
.

Using Voicemail on IsatP
hone, LandPhone and FleetPhone
Page
6
c.
Either:
•
To change the setting for new messages, select
2
from the sub
-
menu
.
Select
1
to change the
current setting.
•
To change the setting for saved messages, select
3
from the sub
-
menu
.
Select
1
to change
the current setting.
7.3
Changing the message content
You can choose if you want to play the header
only (the header include
s the caller’s number and
the time and date of the call), the message only, or header and message together. To change the
current setting:
a.
From the main menu, select
4
.
b.
From the sub
-
menu, select
5
.
c.
From the
sub
-
menu, select
5
.
d.
Either:
•
Select
1
to play the
header only.
•
Select
2
to play the message only.
•
Select
3
to play the header and message.
8
Setting up and changing your greetings
By default, you have one greeting already recorded
,
set up the first time you accessed voicemail.
If required, you can change
this greeting, or you can record further greetings
specific to
the reason
for voicemail picking up the call. You can set up or change any of the following greetings:
•
All calls greeting
–
this is the greeting you set up by default, and that is used to answ
er all calls
picked up by voicemail, unless you set up other greeting types.
•
No answer greeting
–
if you record this greeting, it is used when you are not able to take a call.
•
Busy greeting
–
if you record this greeting, it is used when you are busy on ano
ther call.
To change or set up a greeting:
a.
From the main menu, select
3
.
The recorded voice informs you of the
greetings
currently active.
b.
Do one of the following:
•
Press
1
to change the All
c
alls greeting.
•
Press
4
to set up or change the No answer greeting
.
•
Press
5
to set up or change the Busy greeting.
c.
When prompted, record the greeting, then press
#
.
d.
When prompted, do one
of
the following:
•
Press
1
to listen to the greeting.
•
Press
2
to use the greeting.
(
If the greeting is already in use, press
2
to turn
off the greeting.
Turning off the greeting is not the same as deleting the greeting; you can use it again in future
by returning to this option and pressing
2
.
)
•
Press
3
to re
-
record the greeting.
•
Press
6
to erase the greeting.

Using Voicemail on IsatP
hone, LandPhone and FleetPhone
Page
7
9
Changing the PIN and PIN usag
e
You can change the PIN that you use to access voicemail, and you can change the login options if
you want to increase or decrease voicemail security.
9.1
Changing the PIN
To change the voicemail PIN:
a.
From the main menu, select
4
.
b.
From the
sub
-
menu
, select
3
.
c.
From the
sub
-
menu, select
1
.
d.
When prompted, enter your new 4
-
digit PIN and press
#
.
e.
When prompted, re
-
enter the same 4
-
digit PIN and press
#
. If the PINs you entered in steps d.
and e. match, you are informed that the PIN has changed.
9.2
Changing the Fast l
ogin and PIN skip settings
If you enable the Fast login and PIN skip settings, you can access voicemail without having to
confirm any security details.
To enable (or disable) Fast login and PIN skip:
a.
From the main menu, select
4
.
b.
From the
sub
-
menu, select
3
.
c.
From the
sub
-
menu, select
2
.
d.
Either:
•
Select
1
to change the current Fast login
setting
.
•
Select
2
to
enter the
PIN skip
option
.
Select 1 to change the current PIN skip setting.
.
Other manuals for IsatPhone
3
This manual suits for next models
2
Table of contents
Other Inmarsat Marine GPS System manuals

Inmarsat
Inmarsat IsatPhone 2 Operating manual

Inmarsat
Inmarsat LandPhone User manual

Inmarsat
Inmarsat GX-9 User manual

Inmarsat
Inmarsat IsatPhone User manual

Inmarsat
Inmarsat IsatPhone 2 User manual

Inmarsat
Inmarsat IsatPhone 2 User manual

Inmarsat
Inmarsat LandPhone User manual
Inmarsat
Inmarsat IsatPhone 2 User manual
Inmarsat
Inmarsat IsatPhone Pro User manual
Inmarsat
Inmarsat B-M-C User manual