Inmarsat LandPhone User manual

1
LandPhone
User guide
The mobile satellite company™

3
Welcome
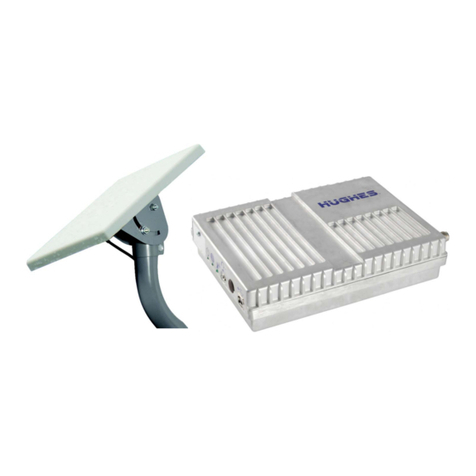
LandPhone is Inmarsat’s fixed satellite phone service, for
use in remote locations where local networks are unreliable
or non-existent.
LandPhone is:
• Easytoset-upanduse.
• Arobustsolutionforoutdoors.
• Idealformulti-usercommunities.
• ForuseinAsia,AfricaandtheMiddleEast.
This user guide explains in detail how to set up, connect
anduseyourphone.

4Contents
Contents
Before you start 06
Introducing your LandPhone 07
Antenna 07
Antennamountingplateassembly 08
Antennacable 09
Terminal 09
Power adapter 11
Installing your LandPhone 12
Deciding on a location for the antenna 12
Installing the antenna 12
Pointing the antenna 14
Settinguptheterminal 17
Connectingatelephonehandset 19
Connecting to the network 20
Switchingontheterminal 20
InsertingtheSIMcard 20
Registering with the network 22
Making and receiving calls 25
Makingacall 25
Receivingacall 27
Supplementary services 28
Callerlineidentication(CLI) 28
Callholding 29
Callwaiting 30
Call forwarding – all calls 32
Call forwarding – no answer 34
Call forwarding – not reachable 36
Callforwarding–busy 39
Conferencecalling/5-partyservice 41
Call barring – all outgoing calls 42
Call barring – all incoming calls 44
Cancelling all call barring 46
Voicemail 47
ChangingorunlockingthePIN 47

Contents 5
Setting up a fax or data connection 49
Hardwaresetup 49
Softwaresetup 49
Software-initiatedfaxanddatacalls 52
MakingadatacallusingHyperTerminal 53
Preparingforadatacallusingdial-upnetworking 56
Guidelines for safe and efcient use 60
Terminalcare 60
Antennacare 61
Blasting areas 61
Powersupply 61
Types of tone 62
Display indicators 63
Commands for supplementary services 65
Troubleshooting 67
TheLCDdoesnotdisplay 67
Unabletoregisterwiththenetwork 67
Thesignalreceptionisweak 67
Thereisnodialtone 68
Thereisnoring-backtone 68
Callsalwaysgetcut-off 68
Thereisvoiceechoonthecall 68
Unabeltomakecalls 69
Unabletoreceivecalls 69
Unabletousesupplementaryservices 69
For your safety 70
Techinical specications 71
Terminal 71
AC/DCadapter 71
Antenna 71
Cable 72
Packaging 72
Channel number map 73

6Beforeyoustart
Before you start
Package contents
WhenyoupurchasedtheInmarsatLandPhone,youshouldhave
received the following:
• Antenna.
• Antennamountingplateassembly.
• Antennacable.
• Terminal.
• ACPoweradapterandcable.
Additional requirements:
Inadditiontothepackagecontentslistedabove,youwillneedthe
following (not supplied):
• Apipeorpolebetween0.75inchesand1.25inches(19mmand
32mm) in diameter. The pipe or pole should be made of steel or
other material suitable for local weather conditions.
• AnAC/DCpowersupply.
• Agoodqualitytelephonehandset.Foralistofhandsetssuggested
forusewiththeLandPhone,contactyourserviceprovider.
Subscription and SIM card
Beforeyoucanuseyourterminal,youmustobtainasubscriptionfrom
anauthorisedserviceprovider.YouwillbeprovidedwithaSIMCard
withyoursubscription.
Important:
• Pleasecheckthesupplementaryservicesandsubscriptionfeatures
availabletoyouwithyourserviceprovider.
• Toensurethatthesupplementaryservicesfunctionasexpected,
please enter the commands specified in this user guide.
About this guide
The following conventions are used in this guide:
• LettersinBoldindicateamenu,functionorkey.
• Theslashcharacter(/)isusedtoseparatemenusfromsub-menus.
Forexample,Networks/New searchindicatesthatyoushould

IntroducingyourLandPhone7
select the Networks menu option and then New search in the
sub-menu.
• Textwithinbrackets()indicatesthecurrentsettingforthe
functiondisplayed;<and >indicatethatyoucanscrollthrough
more options.
• Theterm‘select’impliesmovingtothespeciediteminthe
menu or sub-menu, and pressing the YESkey.
Further details and support
IfyouexperienceproblemswhilstusingyourLandPhone,contactyour
service provider for customer support.
Inanemergency,theInmarsatCustomerServicesTechnicalHelpdesk
is available to assist. To contact Inmarsat customer services:
Tel:+44(0)2077281300
E-mail: [email protected]
Fax: +44(0)2077281142
Introducing your
LandPhone
The LandPhone is a fixed satellite phone for use in remote locations
where local networks are unreliable or do not exist. You can use it
byconnectingastandardtelephonehandset(notsupplied)tothe
LandPhone terminal.
Antenna
The antenna sends and receives signals to and from the satellite. It
must be installed outside and positioned to avoid obstructions from
buildingsandtrees.Makesuretheantennaispointingtowardsthe
satellite to obtain the maximum possible signal strength.

8IntroducingyourLandPhone
Antenna mounting plate assembly
Theantennaissuppliedwithacustomisedmountingplateassemblythat
enablesyoutoattachtheantennatoapoleorsimilarconstruction.
Theantennamountingplateassemblyallowsadjustmentofthe
antenna elevation angle and direction during pointing.
Note:Beforeyoucanmounttheantenna,youneedtoobtainapipe
orpolebetween0.75inchesand1.25inches(19mmand32mm)in
diameter. The pole should be made of steel or other material suitable
for local weather conditions.
Package contents:
• 1Mountingplate
• 2U-bolts
• 4Smallwingnuts
• 1Largewingnut
• 1Longbolt
• 6Flatwashers
• 1Springwasher
• 1Spacer
• 1Tighteningtool

IntroducingyourLandPhone9
Antenna cable
The antenna cable connects the antenna to the terminal. The standard
lengthofthecableis34.5ft(10.5m).Ifthedistancebetweenthe
antenna and the terminal is less than this, do not cut the cable, as it
isdesignedtomatchthesignaltransmittingandreceivingcapability
ofboththeantennaandtheterminal.Also,ashortenedcablecould
affectvoicequality.Ifyourequireacableofadifferentlength,please
contactyourserviceprovidertocheckonavailability.
Note:Onlyuseacableofthetypeandlengthrecommendedto
maintainthesignalreceivingcapabilityoftheterminal.Seecable
specicationsonpage72.
Terminal
The terminal processes the signal between the satellite and an
attached handset, and converts it into a voice call. You can also
connect a computer to the terminal, and make fax or data calls.

10IntroducingyourLandPhone
It consists of the following components:
SIM card reader
TheSIMcardreader,locatedattherearoftheterminal,iswhereyou
insertyourcreditcard-sizedSIMcard.
Thereadercapturesyour
identification number and
otherinformationaboutyour
subscriptionfromtheSIMcard.
The terminal can then register
youwiththenetwork.
Note: The LandPhone uses a
credit-cardsizedSIMcard.Donot
punch out the smaller, postage
stamp-sizedSIMcard.
LCD display
TheLCDdisplayshowstheterminal’sstatusandcondition,and
providesyouwithinformationsuchas:
• SIMcardstatus.
• Networkregistrationstatus.
• Signalstrength.
• Callconnectiondetails.
• Supplementaryservicesdetails.
Connectors
There are a number of connectors at the rear of the terminal allowing
youtoconnect:
• Atelephonehandset(‘Phone’connector).
• Theantenna(‘Antenna’connector).
• Acomputer,usingaDB9connector(‘Data’connector).
• Thepoweradapter(‘Power’connector).

IntroducingyourLandPhone11
Note:AtelephonehandsetisnotsuppliedwiththeLandPhone.
Anygenerallyavailabletelephonehandsetcanbeusedwiththe
LandPhone;however,youcanimprovevoicequalityandminimise
voiceechobyusingagoodqualityhandset.
Note:Foranuptodatelistofhandsetssuggestedforusewith
yourLandPhone,contactyourserviceprovider.
Power switch
The power switch is located on the side of the terminal, near to the
connectors. This turns the terminal on and off. Press the power
buttonforapproximately4secondstoturntheterminalonoroff.
This switch is an electronic switch,
thereforeitwillonlyfunctionif
there is power supplied to the unit.
When the unit is turned off, but
the power adapter is still plugged
in, the unit continues to consume
minimumpower.Ifyouwantto
turntheLandPhonecompletely
off, unplug the power adapter.
Power adapter
Thepoweradapterconvertsthemainalternativecurrent(AC)
electricitysupplytodirectcurrent(DC).Theadaptercanbeused
with110Vor220Vpowersupply.Theoutputfromtheadapterto
the terminal is 12V. The adapter is designed for continuous operation.
It is normal for the adapter to feel warm.
Note: The LandPhone does not run on batteries, although an external
batterycanbeused.Contactyourserviceproviderfordetails.

12InstallingyourLandPhone
Installing your
LandPhone
ThissectiondescribeshowtoinstallyourInmarsatLandPhone.
Followtheinstructionsbelowtoensureoptimumperformance.
Deciding on a location for the antenna
Beforeyouassembleandinstalltheantenna,youmustrstdecideon
a suitable location, and on where to point it to obtain maximum signal
strength from the satellite.
Position the antenna to avoid obstructions
Whenchoosingthelocationofyourantenna,makesurethatthereare
no obstructions such as trees, buildings or other structures in the line
of sight between the antenna and the satellite. Obstructions can block
the signal being transmitted to and from the satellite.
Yes
No
Installing the antenna
Youneedapipeorpoleofbetween0.75inchesand1.25inches
(19mmand32mm)indiameter.Thepolemustbemadeofsteelor
materialsuitableforlocalweatherconditions.Attachthepoletoa
solidstructure,suchasaconcretebaseoratthegroundbyusingmetal
clamps.
Safety information:Toavoidthepossibilityoflightningstrike,ensure
that the top of the antenna is set at a lower height than the highest
building or tree within the immediate area.

InstallingyourLandPhone13
Fixing the antenna and mounting plate to the pole
To fix the antenna to the mounting plate:
1. Connect the antenna mounting to the antenna leg using the long
boltassembly(longbolt,largewingnut,twowashers,spring
washer and spacer).
Mounting
Washer
Wing nut
U-bolt
Antenna leg
2. Tightenthenutjustenoughtoholdtheantennainplace,butmake
surethatyoucanaltertheangleoftheantenna,ifrequired.
3. Position the U-bolts round the mounting pole, as indicated below:
U-bolt
Mounting
Washer
Wing nut
Antenna leg
Main pole
4. AttachtheU-boltstotheantennamountingusingthewingnuts
and washers.
5. Tightenthefourwingnutssothatmountingplateisattachedtothe
polesecurelyandcannotbemoved.(Youcanloosenthewingnuts
latertomakeneadjustmentstotheantennaposition).

14InstallingyourLandPhone
Pointing the antenna
Inmarsatrecommendsthatyoumanuallypointtheantennainthe
directionofthesatellite.Todothis,identifyyourlocationonthe
coveragemapatthebackofthisguide,andnoteyourpositionrelative
to the I-4 satellite (the satellite is located in the centre of the coverage
area,asindicatedonthecoveragemap).Youcanthenadjustthe
elevationandazimuthoftheantenna,asdescribedbelow.
Adjusting the elevation
The elevation is the vertical angle of the antenna relative
tothehorizon.Toadjusttheelevation:
1. IdentifyyourlocationinrelationtotheI-4satelliteusing
the map below:
2. Estimatetherequiredelevationangleforyourlocation;some
degreeelevationsareshownforguidance.Forexample,any
pointonthecirclemarked20˚requiresthatyoupointthe
antennaata20˚elevationangle.
3. Loosen the wing nut indicated in the diagram below, and move the
antenna to the estimated elevation angle. Use the markings on the
mounting for guidance.

InstallingyourLandPhone15
45
50
75
90
75
60
45
50
75
90
75
60
4. Re-tightenthewingnutonceyouhavepositionedtheantenna.
Adjusting the azimuth
Theazimuthisthehorizontalangleoftheantennameasured
clockwise relative to North.
Toadjusttheazimuth:
1. IdentifyyourlocationinrelationtotheI-4satelliteusing
the map below:
2. Estimatetherequiredazimuthdirectionforyourlocation;some
exampledirectionsareshownforguidance.Forexample,anypoint
onthelinemarked230˚requiresthatyoupointtheantennaatan
azimuthof230˚.

16InstallingyourLandPhone
3. Loosen the wing nuts holding the U-bolts to the pole,
as indicated in the diagram below, and move the antenna
totheestimatedazimuth.Useacompasstoassistyouin
pointing the antenna.
45
50
75
90
75
60
45
50
75
90
75
60
4. Re-tightenthewingnutsonceyouhavepositionedtheantenna.
Connecting the antenna cable
To connect the cable to the antenna:
1. Connect the large connector on the antenna cable to the antenna,
and hand tighten.
Antenna
connector
Large connector
of antenna cable
2. Stick the rubber tape supplied to the top of the connector. Stretch
itandwinditclockwisedowntheconnector.Eachturnshouldhalf
overlapthepreviousturn.Afteryouhavewoundthetapedown
approximately3.5inches(10cm),reversethedirectionandwindthe
tape back towards the top of the connector. Continue until all the tape
is used up.
Height
10cm

InstallingyourLandPhone17
3. Allowthecabletoarchawayfromthepole(asshownbelow)to
enableadjustmentoftheantennaelevation.
#ABLE4IES
4. Use the cable ties supplied to tie the cable to the pole below the
mounting plate. Position the ties at even intervals so that the cable
is secured down its full length.
5.Laytheremainingcablefromtheantennatotheterminal.
Notes:
• Donotdamagethecable.
• Usestandardcableclampstoafxthecabletowall,plank,etc.
Setting up the terminal
Notethefollowingwhenyouinstalltheterminal:
• Theterminalmustbelocatedinside.
• Theterminalmustbelocatedinadry,dust-freeplace.
• Theterminalmustnotbeexposedtoextremesoftemperature,
andmustbekeptawayfromdirectsunlight.
• Theterminalmustbelocatednearapoweroutlet.
• Theterminalmustnotbeexposedtoexcessivevibration.
• Theterminalmustbelocatedinaplacewhereitcanconnect
to the antenna cable.
• Theterminal’sSIMcardslotmustbeaccessible,incaseyouwant
toreplaceyourSIMcard.
• Theterminalmustnotbelocatedtooclosetoanyradio
communicationsequipment,suchasCBandSSB,whichcould
interfere with the signal.

18InstallingyourLandPhone
Connecting the antenna cable to the terminal
To connect the antenna cable to the terminal:
1. ConnecttheSMA-typeconnectorontheantennacabletothe
connectormarked‘Antenna’ontheterminal.
2. Turntheconnectorclockwiseandtightenbyhand.Donotusea
wrenchoroverturntheconnectorasthismaydamagetheterminal.
Connecting the power adapter
Toconnecttheterminaltothepowersupply:
1. Connect the power adapter cable connector to the terminal
connectormarked‘Power’.
2. Connectthepoweradaptertothepowersupply.
Safety information:
• Ensurethatthepowersourceiscompatiblewiththepoweradapter,
i.e.either110Vor220V.
• Onlyusethepoweradapterprovidedinthepackage.

InstallingyourLandPhone19
Connecting a telephone handset
To connect a telephone handset (not supplied) to the terminal:
1. Placethetelephonehandsetinthedesiredlocation.Ifrequired,use
alongertelephonecabletolocatethetelephonehandsetawayfrom
the terminal.
2. Connect the telephone cable connector to the terminal connector
marked‘Phone’.
Note: You cannot use a conventional fax machine with the LandPhone.
Youcanonlyuseappropriatefaxsoftware.Referto‘Settingupafaxor
dataconnection’onpage49fordetails.

20 Connecting to the network
Connecting
to the network
AfteryouhaveinstalledandconnectedyourLandPhone,youmust
insert(and,ifnecessary,activate)theSIMcardandregisterwiththe
I-4 satellite.
Switching on the terminal
To switch on the terminal:
1. Ensurethatthepoweradapteris
connected to the power outlet.
2. Turnontheterminalbypressing
and holding the on/off switch
(located on the side of terminal)
forapproximately4seconds,
or until the LCD is activated.
3. TheLCDdisplaysInsert SIM.
Inserting the SIM card
ToinserttheSIMcard:
1. InsertyourSIMcardintotheSIMcardreaderwiththechipfacing
downward.

Connecting to the network 21
• IftheSIMcardisinsertedcorrectly,
theLCDdisplaysPlease wait.
• IftheSIMcardisinsertedincorrectly,
theLCDdisplaysPlease wait
followedbyCheck card. Remove
andre-inserttheSIMcard.
2. IftheSIMPINisenabled,theLCDwilldisplayEnter SIM PIN.
Enterthe4-digitPINsuppliedbyyourserviceprovider.
Note: The Inmarsat default PIN is 8888.
TheLCDwilldisplayas****forsecuritypurposes.IfthePINis
enteredcorrectly,Searchingisdisplayed.Otherwise,Enter SIM PIN
isredisplayed.
Activating the SIM card
IfyourSIMCardrequiresactivation,simplyfollowtheinstructions
providedbyyourauthorisedInmarsatserviceprovider.
Note:IfyouenterthePINincorrectly3times,theSIMcardlocks.Refer
to“ChangingorunlockingthePIN”onpage47,forinstructionson
unlocking the PIN.
Other manuals for LandPhone
1
Table of contents
Other Inmarsat Marine GPS System manuals
Inmarsat
Inmarsat IsatPhone 2 User manual
Inmarsat
Inmarsat IsatPhone User manual
Inmarsat
Inmarsat IsatPhone Pro User manual

Inmarsat
Inmarsat wideye iFleetONE User manual

Inmarsat
Inmarsat IsatPhone User manual

Inmarsat
Inmarsat IsatPhone Pro Installation guide

Inmarsat
Inmarsat GX-9 User manual

Inmarsat
Inmarsat B-M-C User manual

Inmarsat
Inmarsat IsatPhone 2 User manual
Inmarsat
Inmarsat IsatPhone 2 Operating manual


