manuals.online logo
Brands
  1. Home
  2. •
  3. Brands
  4. •
  5. Interlogix
  6. •
  7. Keypad
  8. •
  9. Interlogix NX-1815E User manual

Interlogix NX-1815E User manual

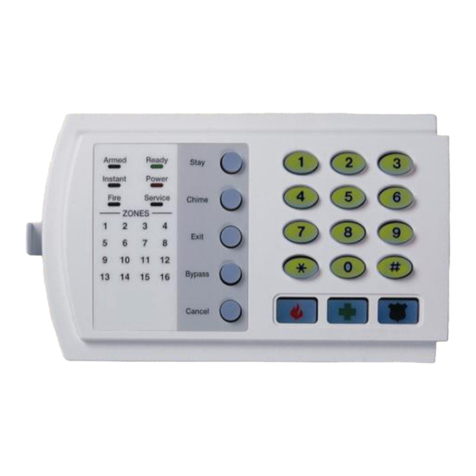
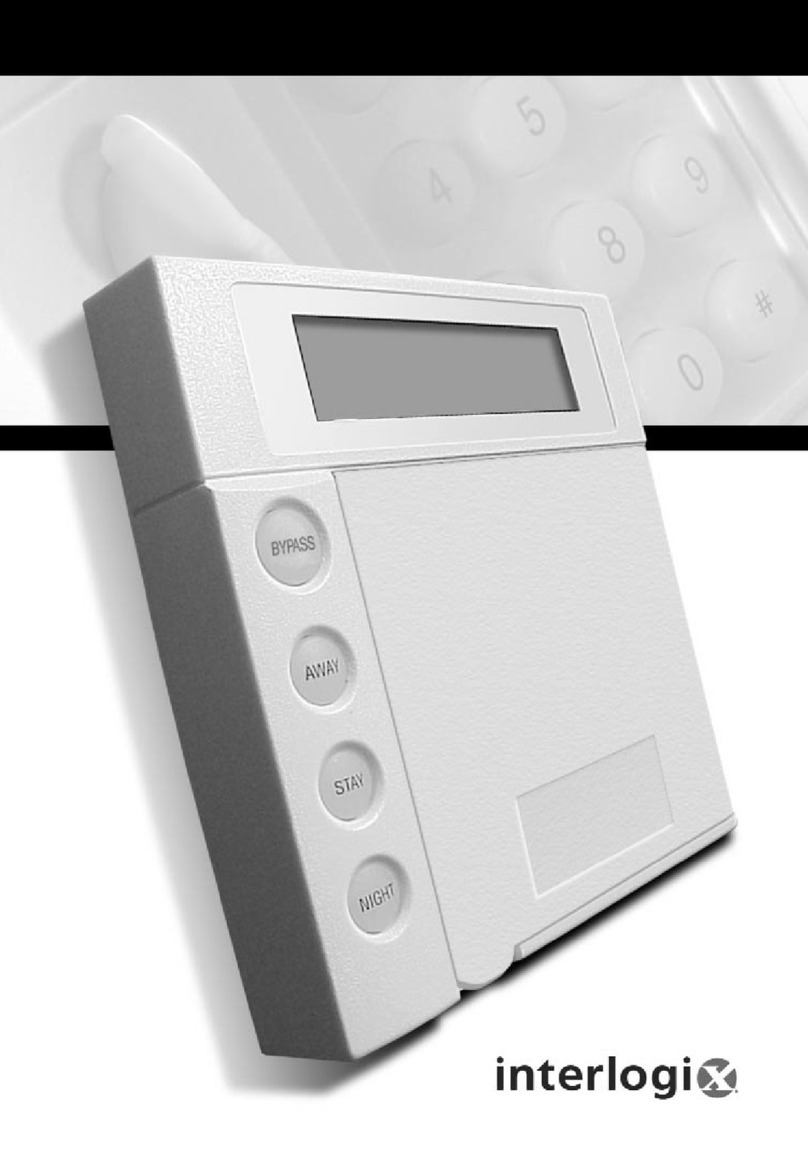
NX-1815E NetworXVoice
Keypad with16 zone LEDs
User Manual
P/N230248 REVD ISS06MAR15
www.msealarms.com.au
Copyright ©2015UTCFire&SecurityAmericasCorporation,Inc.
Allrightsreserved.
Thisdocumentmaynotbecopied inwholeorinpartorotherwise
reproducedwithout priorwrittenconsentfromUTCFire&Security
AmericasCorporation,Inc., except wherespecificallypermittedunder
USandinternationalcopyright law.
Trademarksand
patents
TheNX-1815Enameand logoaretrademarksofUTCFire&Security
AmericasCorporation,Inc.
Othertradenamesused inthis documentmaybetrademarksor
registeredtrademarksofthemanufacturers orvendors oftherespective
products.
Manufacturer Placedon themarketby:
UTCFire&SecurityAmericasCorporation,Inc.
3211ProgressDrive, Lincolnton,NC,28092, USA
Authorized EUmanufacturingrepresentative:
UTCFire&SecurityB.V.
Kelvinstraat7,6003 DHWeert,Netherlands
FCCcompliance Thisequipmenthasbeentestedandfoundto complywith thelimitsfor
aClass Bdigitaldevice,pursuanttopart15ofthe FCCRules.These
limitsaredesignedtoprovide reasonableprotectionagainstharmful
interferencewhentheequipmentis operatedinacommercial
environment. This equipment generates,uses,andcanradiate radio
frequencyenergyand,ifnotinstalledandusedinaccordancewith the
instructionmanual,maycauseharmfulinterferenceto radio
communications.
Youarecautionedthatanychangesormodificationsnotexpressly
approvedbythe partyresponsibleforcompliancecouldvoidthe user's
authoritytooperatetheequipment.
NFPA72 Checklocalordinances,thisdeviceis not listedbyanapprovedtestlab
tomeet NFPA72andthereforemaynotbesoldorinstalledforusewith
afiresysteminsomelocalities.
EUcompliance
EUdirectives UTCFire&Securityherebydeclaresthat this deviceis incompliance
withtheapplicablerequirementsandprovisionsofoneormoreofthe
Directives1999/5/EC,2014/30/EUand2014/35/EU.Formore
informationsee: www.utcfireandsecurity.com or www.interlogix.com
2012/19/EU(WEEEdirective): Productsmarkedwiththissymbol
cannot bedisposedofasunsortedmunicipalwasteintheEuropean
Union.Forproperrecycling,returnthisproductto yourlocalsupplier
uponthepurchaseofequivalentnewequipment, ordisposeofitat
designatedcollection points.Formoreinformationsee:
www.recyclethis.info.
2006/66/EC(batterydirective): Thisproductcontainsabatterythat
cannot bedisposedofasunsortedmunicipalwasteintheEuropean
Union.Seethe productdocumentation forspecificbatteryinformation.
Thebatteryismarkedwiththissymbol,whichmayinclude letteringto
indicatecadmium(Cd),lead(Pb),ormercury(Hg).Forproperrecycling,
returnthebatteryto yoursupplierorto adesignatedcollection point.For
moreinformationsee: www.recyclethis.info.
Contactinformation www.utcfireandsecurity.com or www.interlogix.com
Customersupport www.interlogix.com/customer-support or www.utcfssecurityproducts.eu
www.msealarms.com.au
NX-1815ENetworXVoiceKeypad with16zoneLEDsUserManual3
Content
Importantinformation4
Limitation ofliability4
Advisorymessages4
Warranty4
Introduction 5
Glossaryofterms 6
TheNX-1815E7
Legend 7
Indicators,Icons and Lights8
AwayArming 8
StayArming9
Disarming9
Emergency Activation Keys 10
Understanding theMainMenu 11
Controlling Zone Bypasses !Menu 111
Control The Zone Chime !Menu 212
System Event History !Menu 312
System Test !Menu 413
UserConfiguration !Menu 516
Phone NumberConfiguration !Menu 618
OutputControl !Menu 719
VoiceMessage Recording !Menu 820
BasicSystem Configuration !Menu 921
Word Library25
www.msealarms.com.au
4NX-1815ENetworXVoiceKeypadwith 16zone LEDsUserManual
Importantinformation
Limitationofliability
Tothe maximum extentpermitted byapplicable law,in no eventwillUTCFS be
liable foranylostprofitsorbusiness opportunities,loss ofuse,business
interruption,loss ofdata,oranyotherindirect,special,incidental, or
consequential damagesunderanytheoryofliability,whetherbased in contract,
tort,negligence,productliability,orotherwise.Becausesome jurisdictionsdo not
allowthe exclusion orlimitation ofliabilityforconsequential orincidental
damagesthe precedinglimitation maynotapplytoyou.Inanyeventthe total
liabilityofUTCFS shall notexceed the purchasepriceofthe product.The
foregoing limitation will applytothe maximum extentpermitted byapplicable law,
regardless ofwhetherUTCFS hasbeen advised ofthe possibilityofsuch
damagesand regardless ofwhetheranyremedyfailsofitsessentialpurpose.
Installation in accordancewith thismanual,applicable codes,and the instructions
ofthe authorityhavingjurisdiction ismandatory.
While everyprecaution hasbeen taken during the preparation ofthismanual to
ensurethe accuracy ofitscontents,UTCFS assumesno responsibilityforerrors
oromissions.
Advisorymessages
Advisorymessagesalertyou toconditionsorpracticesthatcan causeunwanted
results.The advisorymessagesused in thisdocumentareshownand described
below.
WARNING: Warningmessagesadviseyou ofhazardsthatcould resultin injury
orloss oflife.Theytell you whichactions totakeortoavoidin ordertoprevent
the injuryorloss oflife.
Caution: Caution messagesadviseyou ofpossible equipmentdamage.Theytell
you whichactionstotakeortoavoid in ordertopreventthe damage.
Note: Notemessagesadviseyou ofthe possible loss oftime oreffort. They
describe howtoavoid the loss.Notesarealsoused topointoutimportant
information thatyou should read.
Warranty
UTCFire&SecurityAmericasCorporation, Inc.guaranteesthisproductagainst
defectivepartsand workmanship fortwenty-four(24)monthsfrom the dateof
purchase.Ifanydefectappearsduring the warrantyperiod contactyourservice
provider.UTCFire&SecurityAmericasCorporation,Inc.assumesno liabilityfor
consequential orindirectdamage,and acceptsno responsibilityforrepairing
www.msealarms.com.au
NX-1815ENetworXVoiceKeypad with16zoneLEDsUserManual5
damagetothe productcaused bymisuse,careless handling,orwhererepairs
havebeen madebyothers.
Nootherguarantee,written orverbal, isauthorized byUTCFire&Security
AmericasCorporation,Inc.
Introduction
YourNX-1815Eisan intuitiveinterfaceforusersofyoursecuritysystem.It
deliversone ofthe mostuserfriendlyexperiencesforcontrollingasecurity
system availabletoday.Itsvoicepromptsenable even the newestusersto
immediatelyutilizethe full powerofyoursecuritysystem.
Wetrustthatyou will enjoyyourNX-1815E,and wewould liketothankyou for
choosingaNetworX SecuritySystem.
All usersofyoursecuritysystem should read and followthe instructionsand
precautionsin thismanual beforeoperating yoursecuritysystem.Failuretodo
socould resultin the securitysystem notworkingasintended.
Thismanual should be keptin an accessible location forthe lifeofthe security
system.If you do notunderstand anypartofthismanual,you should ask your
serviceproviderforfurtherclarification.Read the entiremanual and if possible,
practiceon the NX-1815Ewhilstyoursecurityproviderison site.
Keep inmind,the level ofsecurityyou willobtain with thissystem relates
specificallywithtwomajorfactors:
The quantity,quality,and placementofsecuritydevicesattached tothis
securitysystem.
The knowledge you haveofthe securitysystem and howthatknowledgeis
utilized in aweeklytestofthe completesystem.
Thisproductistobe installed byqualified SERVICEPERSONNELonly
The equipmentshould onlybe operated with an approved poweradapterwith
insulated livepins.
Caution: Risk ofexplosion if batteryisreplaced byan incorrecttype.Disposeof
batteriesaccording tothe instructions.Contactyourserviceproviderfor
replacementbatteries.
www.msealarms.com.au
6NX-1815ENetworXVoiceKeypadwith 16zone LEDsUserManual
Glossaryofterms
AuthorityLevel Thelevelofaccess assignedto ausers pincode.
Arm ToturnyoursecuritysystemOn.
Partition Agroupofzoneswithinthesecuritysystemconfiguredwith individualcontrol.
Users ofthesecuritysystemareassignedpartitionsthattheyareallowed to
control.
AwayMode Toturnyoursecuritysystemonwhenyou areleavingthepremises.
CentralStation Locationwherealarmsignalsaresent duringanalarmreport.
ChimeMode Anoperationalmodethat willemitabeep atthekeypadwhenspecific zonesare
activated.
ChimeGroup Allthezonesthat willactivatechime, wheninchimemode.
Communicator Thedevicethat communicatesalarmsignalsgenerated fromyoursecurity
systemtoyourcentralstation.
Duress Code Apredetermineduserpincodethatwillarm/disarmthesecuritysystemwhilst
sendingaspecialcodetothecentralstationindicating the userisentering /
leaving the premisesunderduress.Onlyapplicableon monitoredsystems.
Disarm ToturnyoursecuritysystemOff.
Exitdelay Thetimeallowedto exitthepremisesafterthe securitysystemisarmed.
Entrydelay Thetimeallowedtodisarmyoursecuritysystemafterthefirstdetectiondevice
hasbeenactivated.
ForcedArming Anoptionthat allowscertainzonesnotto besecurewhenarming.Asecurity
systemthat is readyto be "forcearmed#willflashthecorrespondingpartition
lightgreen.Generallyassignedto detection devicesthat covertheNX-181xx
(e.g., motion sensors,frontdoorreedswitches),allowingtheuserto armthe
securitysystemwithouttheneedtowaitforthosezonesto be secure.
MasterCode Afour(4)orsix (6)digitpincode thatisused byauserto armordisarm the
securitysystem.Itsmainfeatureistheabilityto create, alteranddeleteuserpin
codes.Canalsobeused asafunctioncodeforall features.NOTE:Yoursecurity
systemmayhaveeitherfour(4)digitpincodesorsix(6)digitpincodes,butnot
amixtureofboth.
Monitored Asecuritysystemthatis configuredto sendall alarmsignalstoacentralstation.
Outputs Whereexternaldevicesareconfigured.Thesedevicescan becontrolledfrom
yoursecuritysystem.
Perimeter Theouteredgeoftheprotectedpartition, i.e., doors andwindows
QuickArm Anoption that allowsyoutoturnon(ARM)the securitysystembytouchingthe
[AWAY].
SelfMonitored Asecuritysystemthat isprogrammed tosendalarmsignalstoaprivate phone
number.Notallfeaturesareavailablewithaself-monitoredsystem.
StayMode Toturnyoursecuritysystemon whenyouarestaying inthepremises,thiswill
automaticallybypasspreprogrammedzonesandarmothers.Mainlyutilizedfor
armingjustthe perimeterofthepremises.
Service
Provider
Theinstallation/maintenancecompanyservicingyoursecuritysystem.
UserCode Afour(4)orsix (6)digitpincode thatisused byauserto armordisarm the
securitysystem.Alsocanbeused asafunctioncodeforcertainfeatures.
Note: Asystemmayhaveeitherfour(4)digitpincodesorsix(6)digitpincodes,
butnotamixtureofboth.
Zone Locationon yoursecuritysystemwhereadetection deviceis connected.
www.msealarms.com.au
NX-1815ENetworXVoiceKeypad with16zoneLEDsUserManual7
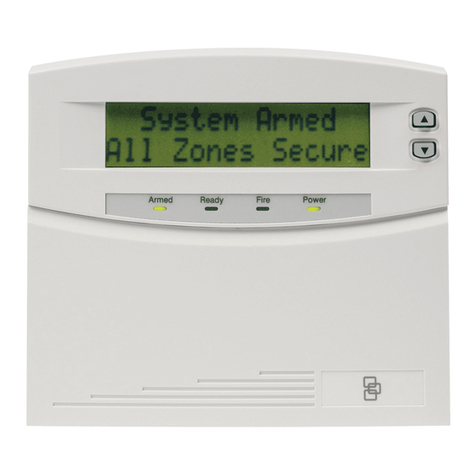
TheNX-1815E
Partition/Zone lights
Control
keys
Numerictouchpad
Microphone
Legend
Vitalvisualinformationforyou toreview
[2]Pressthecorrespondingnumberonthe keypad
[AWAY]Pressthe correspondingkeyonthekeypad
[?]-[ENTER] Pressthe correspondingnumberonthe keypadfollowedbytheEnter
key
[?]-[?]-[?]-[?]-[ENTER] Pressthecorrespondingnumbersequenceonthekeypadfollowedby
theEnterkey
Exitthepremises,orwalk-testthemotion sensors
www.msealarms.com.au
8NX-1815ENetworXVoiceKeypadwith 16zone LEDsUserManual
Indicators,IconsandLights
GreenSystemisready.
YellowSystemmessagepresent.
Redflashing Oneormorezonesareinalarmcondition.
RedsteadySystemtroublemessagepresent.
Tohearsystemmessages,pressthestatuskey.
Off Partitionisnot readyto arm "AWAY.#
Green Partitionisreadytoarm.
GreenflashingPartitionisreadyforforcedarming.
RedPartitionisarmedinthe "AWAY#mode.
Off Partition isnot readyto stayarm,checkzones
Green Partitionisreadytoarm.
GreenflashingPartitionisreadyforforcedarming.
RedPartitionisarmed inthe "STAY#INSTANTmode.
YellowPartitionis armedinthe "STAY#mode.
GreenOK
RedFireconditionpresent
OnMainspowerisconnected
Off Mainspowerisdisconnected
MENUAccessmainmenu,andwhenprompted allowsusers to exitsubmenus.
ENTEREntersselectedoption, usewhenprompted
Partition
LEDs
1 -16
Off Zone isOK
Yellowflashing Zone isactivated(open)
YellowsteadyZoneis bypassed(isolated)
AwayArming
Awayarming isused when you areleaving and you wantthe premisesprotected
in yourabsence.Ifyourserviceproviderhasenabled the "forced arming#feature,
you will be able toarmyoursecuritysystem with pre-programmed zonesnot
secure.Thisfeatureisideal forsystemsthathaveentry/exitdoorsfitted with
doorcontacts,allowingyou toarmyoursystem with the dooropened,and
protectingthe doorafteritsclosed.YourNX-1815Ewillannounceall zonesthat
arenotsecurewhen armed.You mayarmyoursystem byentering your4or6
www.msealarms.com.au
NX-1815ENetworXVoiceKeypad with16zoneLEDsUserManual9
digituserPINcode,orifyourserviceproviderhasenabled the quick armfeature,
you can simplypress the Awaykey.
StepHowto: Armyoursysteminthe AwayMode!
1.Closeallprotecteddoors andwindows,ensureeveryonehasleftthepremises.
Ensurethestatuslightislitgreen.
2. [AWAY]Press[Away].
OR
[?]-[?]-
[?]-[?] Enteryouruserpincode.
3. Vacatethepremisesimmediately.
StayArming
Stayarming isused when you arestaying in the premisesand wishtoarm
certain zonesand bypass othersIE:Armingthe perimeterofthe premises,whilst
automaticallybypassingall the internal movementsensors.If an armed zone is
alarmed whilstyoursecuritysystem isin the staymode,itwill initiate awarning
tone atyourNX-1815Eand yoursirenswillsound atthe end ofthiswarning.
Yourserviceproviderpredeterminesthiswarning time atthe time ofinstallation.
StepHowto: Armyoursysteminthe StayMode!
1. Closeallprotecteddoors andwindows.Ifmotionsensors areincludedinyour "Staymode#
haveeveryonemoveoutofthosepartitions.
Ensurethestatuslightislitgreen.
2. [STAY]Press[Stay].
3. Yoursecuritysystemisnowarmedinthe staymode.
Disarming
Makeyourwaytothe NX-1815Ethrough one ofthe designated entry/exit doors.
When you aredetected entering,yourNX-1815Ewillrepeatawarning message
forthe duration ofthe entrydelayuntil avalid PINcode isentered.Yoursirens
and communicatorwillactivateatthe end ofthe entrydelaytime ifavalid PIN
code isnotentered.Awayand Staymodescan be configured with differententry
delaytimes,ask yourserviceproviderforfurtherdetails.
StepHowto: Disarmyoursystemfrom eitherthe Away!or Stay!Modes
1.
Enterthepremisesthrough yourdesignatedentrydoor/s.Ifyoursecuritysystemhasbeen
designedto detectyourpresencewhenmaking yourwayto theNX-1815E,awarning
message remindingyouto turnoff yoursecuritysystemwillbeannounced. Ifyour
presenceisnot detected,nowarningmessageisannounced.
www.msealarms.com.au
10 NX-1815ENetworXVoiceKeypadwith 16 zone LEDsUserManual
2. [?]-[?]-
[?]-[?]
EnteryouruserPINcodeto disarmfromeithertheawayorstayarming
modes.
Yoursystemisnowdisarmedfromeitherthe AwayorStaymodes.
EmergencyActivationKeys
Three (3)emergency functionsareavailable via yourNX-1815Etoprovide
personal supportin areasof:Fire,Medical and Police(duress)alarm.Toactivate
thesefunctionspress and holdthe required keys fortwoseconds.You should
onlypress thesekeys inan emergencysituation thatrequiresaresponsebya
central station.Check with yourserviceprovidertofind outif yoursecurity
system hasthese function keysenabled and clarifywhatresponses,if any,will
be provided uponactivation.
Activatingyourpersonalemergencyfunctions
Fire[1]-[3] Press andholdfor2seconds.
Medical[4]-[6]Press andholdfor2seconds.
Panic[7]-[9]Press andholdfor2seconds.
www.msealarms.com.au
NX-1815ENetworXVoiceKeypad with16zoneLEDsUserManual11
UnderstandingtheMainMenu
Pressing the [MENU]keyaccess the NX-1815E$smain menu,hereyou will find
the 10 main featuresused forcustomisation and setup ofyoursecuritysystem.
From the momentyou press the menu key,the NX-1815E$spersonal voiceguide
(PVG)will guide you throughyourchosen selection.
[Menu][1]Zonebypass
[2] Zone chime
[3] Event history
[4] Systemtest
[5]Userconfiguration
[6]Phonenumberconfiguration
[7] Outputcontrol
[8]Voicemessagerecording
[9]Basic systemconfiguration
[0] Advancedsystemconfiguration
ControllingZoneBypasses "Menu1
The zone bypass menu isused tobypass (isolate)selected zonesin your
securitysystem.Abypassed zone isnotcapable ofactivating an alarm,asitis
temporarilydisabled from yoursystem.Thisoption iscommonlyused tobypass
zonesthatrequireservice,orzonesthatyou wishtotemporarilyadd toyour
"staymode#. Whilststilloffering securityon the remainingzones,bypassing
zoneslowersyourlevel ofsecurityand caution should be exercised.All
bypassed zonesareresetand cleared from memorywhen yoursecuritysystem
isnextarmed /disarmed.Yoursecuritysystem mustbe disarmed (turned off)
beforebeingable tobypass zones.Afterbypassing yourselected zones,your
securitysystem mustbe armed (turned on in eitherthe awayorstaymode to
securethe remainingzones.
Note: Pressstatustocheck bypassed zones,orsimplyarmyoursecuritysystem
and all bypassed zoneswill be announced automatically.
Howto: Bypass asinglezone
StepExample:Howto bypasszone5
1. [MENU]-
[1]Selectsmainmenu-Option1, Tocontrolzone bypass.
2. [5]-
[ENTER] Selectszone 5.
3. [0] Toggleszone 5fromun-bypassedtobypassed state(orifalready
bypassed,frombypassedtoun-bypassed.)
4. [MENU] Exitsbacktomainmenu.
www.msealarms.com.au
12 NX-1815ENetworXVoiceKeypadwith 16 zone LEDsUserManual
5. [MENU] Pressmenuto exit.
ControlTheZoneChime "Menu2
You can setup yourNX-1815Esothat itwill "beep#when selected zonesare
tripped oractivated,thisiscalled chime.Chime mode doesnottriggerany
alarms,and it isonlyused asalowlevel alertsuchasacustomerentrydoor.
You can add and deletezonesfrom the "chime group#offering averyflexible
chime mode feature.The zonesyou haveselected tobe in the "chime group#are
stored in memoryand arenotcleared when the securitysystem isarmed and
disarmed.
Howto: Controlchime mode
StepExample:Turning On /Off ChimeMode
1.[MENU] -[2]Selectsmainmenu-Option 2,ChimeMode.
2.[0]Toggleschimemode On/Off.
3. [MENU]Exitsbackto mainmenu.
4. [MENU]Press menuto exit.
Howto: Add azonetothechimegroup
StepExample:Adding zone4chimegroup
1.[MENU] -[2]Selectsmainmenu-Option 2,ChimeMode.
2. [4]-[ENTER] Selectszone 4.
3.[0]Set /Unsetchimetothis zone and addsittothe chimegroup.
4. [MENU]Exitsbackto mainmenu.
5. [MENU]Press menuto exit.
System EventHistory "Menu3
Menu 3 - SystemEventHistory
1Lastalarmmemory
2Event history
The EventHistorymenu isused tolisten tothe last185 eventsthatoccurred in
yoursecuritysystem.Theseeventsareheld withinyoursecuritysystems
memory,and include eventssuchas,arming,disarming,system faultsand
alarmed zones.All eventsaretime datestamped soensureyourclock isset
correctlyin menu 9.Alarmmemoryisaquick recall ofthe lastzone(s)that
caused yoursecuritysystem togointoalarmcondition.
www.msealarms.com.au
NX-1815ENetworXVoiceKeypad with16zoneLEDsUserManual13
Howto: Viewalarmmemory
StepExample:Toreviewthezone/zonesthatcausedthelastalarmcondition
1.[MENU] -[3]Selectsmainmenu-Option3, EventHistory.
2.[?]-[?]-[?]-[?] EnteryourMasterpincode.
3. [1] Toreviewslastalarmmemory.
4.[MENU] Movesbacktoalarmmemory/event historyselection (step3).
5. [MENU]Exitsbacktomainmenu.
6. [MENU]Press menutoexit.
Howto: Reviewevent history
StepExample: Torevieweventsheldwithinyoursecuritysystem(up to 185events
arestored)
1.[MENU] -[3]Selectsmainmenu -Option 3,Event History.
2.[?]-[?]-[?]-[?] EnteryourMasterpincode.
3. [2] Toreviewslastalarmmemory.
4.[MENU] Movesbackto alarmmemory/eventhistoryselection (step3).
5. [MENU]Exitsbackto mainmenu.
6. [MENU]Press menuto exit.
System Test "Menu4
Menu 4 - SystemTest
1SirenTest
2CommunicatorTest
3BatteryTest
4ZoneWalk Test
0SystemVersionnumber
Yoursecuritysystem ismade up ofdifferentcomponents,broughttogetherto
produceaverypowerful,yeteasy tousesecuritysystem.Thesecomponentsare
yoursirens,communicator,back up batteryand detection devices. Allthese
differentcomponentsrequireregulartesting and maintenancein orderforthem
toremain in peakoperational performance.Thesecomponentscan be tested
from thismenu,and shouldbe scheduled foraweeklytest. Failuretoconduct
regulartesting can resultin system failurewhen mostrequired.The four
available system testsare:
www.msealarms.com.au
14 NX-1815ENetworXVoiceKeypadwith 16 zone LEDsUserManual
SirenTest
The Sirensareused asaudible deterrentsinthe eventofyoursecuritysystem
activating.Asthistestsoundsallthe audible devicesconnected toyoursecurity
system,it isadvisable tonotifyneighboursand otherpersonswithin the premises
priortoactivating thistest.
Communicator Test
The Communicatorislocated within yoursecuritysystem.The communicator,(if
enabled),isthe devicethatcommunicateswith acentralstation who analyseall
the incomingalarmsignalsand engage the appropriateresponses/services
dependanton the type ofalarmsignalsreceived.Alternativelythe communicator
can be enabled tocall an alternatephone number, likeamobilephone,thisis
sometimescalled self-monitoring ordomesticdialling.When testing your
communicator,no sirenswill sound and atestmessage will be senttothe central
station forconfirmation ofthe test. If selfmonitored,the person answering the
numberprogrammed in yoursecuritysystem willhearasiren sound when they
answerthe phone.Contactthe centralstation and anyperson whosephone
numbersareprogrammed inthe system priortoactivating thisthe communicator
test. The communicatortestisonlyavailableif yoursecuritysystem hasbeen
setup todial acentralstation,orenabled fordomesticdialling.
BatteryTest
The backup batteryishoused within yoursecuritysystemsmain control boxand
providespowerwhen mainspowerhas been interrupted.Prolonged operation
usingonlythe backup batterywill resultintotal system failuresothe condition of
the batteryiscritical tosustain the powerrequired forthe longestperiod oftime.
It isrecommended tochange yourbatteryatperiodical intervals,pleasereferto
yourserviceproviderforfurtherinformation.Thisfeatureisused totestthe
condition ofyourback up battery.
ZoneWalkTest
Zone Walktestisused totestthe connectivitybetween youralarmdevices IE:
motion sensors,doorcontactsetc,and yoursecuritysystem.When in walktest
mode yourNX-181xx willemitthe chime "beep#each time azone isactivated,
and chirpthe outside siren.Partition Lightswill alsoblinkred afteradetection
devicein thatpartition hasbeen activated.You mustexit WalkTestmode when
you aresatisfied all the zonesfunction correctly.Yourcommunicatorwillnot
function duringthistest.
System Version number
Thismenu isaservicetool foryoursystem provider.
StepHowto: Performasirentest
1.[MENU] -[4]Selectsmainmenu-Option4, SystemTest.
2.[?]-[?]-[?]-[?] EnteryourMasterpincode.
3.[1]Selectsthesirentesting.Externalandinternalsirenswillsound.
www.msealarms.com.au
NX-1815ENetworXVoiceKeypad with16zoneLEDsUserManual15
4.[AWAY]Tostopsirens(within30seconds).
5.[MENU] Movesbacktosystemtestmenu(step3).
6. [MENU]Exitsbacktomainmenu.
7. [MENU]Press menutoexit.
StepHowto: Performacommunicatortest
1.[MENU] -[4]Selectsmainmenu-Option4, SystemTest.
2.[?]-[?]-[?]-[?] EnteryourMasterpincode.
3. [2] Selectscommunicatortest.
4.[MENU] Movesbacktosystemtestmenu(step3).
5. [MENU]Exitsbacktomainmenu.
6. [MENU]Press menutoexit.
StepHowto: Performabatterytest
1.[MENU] -[4]Selectsmainmenu-Option4, SystemTest.
2.[?]-[?]-[?]-[?] EnteryourMasterpincode.
3. [3] Selectsbatterytest.
4.[MENU] Movesbacktosystemtestmenu(step3).
5. [MENU]Exitsbacktomainmenu.
6. [MENU]Press menutoexit.
StepHowto: Performazonewalk test
1.[MENU] -[4]Selectsmainmenu-Option4, SystemTest.
2.[?]-[?]-[?]-[?] EnteryourMasterpincode.
3. [4] Selectszone walktest.
4.
Activatealldetection devices,bywalkingwithinthefieldofviewof
motionsensors andopening and closing all protectedwindowsand
doors.
5.[STATUS]Pressstatustoreviewtestedzones.
6.[MENU] Movesbacktosystemtestmenu(step3).
7. [MENU]Exitsbacktomainmenu.
8. [MENU]Pressmenutoexit
www.msealarms.com.au
16 NX-1815ENetworXVoiceKeypadwith 16 zone LEDsUserManual
UserConfiguration "Menu5
Menu 5-UserConfiguration
1UserPIN
2UserPartition
3UserAuthority
The userconfiguration menu iswhereuserauthoritylevels,PINcodesand
partitionsareassigned tousersofyoursecuritysystem.
UserPIN !Thisisthe code used to armand disarmpartitionswithinyour
securitysystem.Theyaregenerallyfourdigitsin length,butcan be configured by
yourserviceprovidertobe sixdigitsin lengthif thislevel ofsecurityisrequired.
UserPartition -Assigning differentpartitions tousersswhichsections(partitions)
ofthe securitysystem ausermayaccess to.
UserAuthority-Authorization levelsdetermine the optionsavailable touser,
userauthorization iswhereyou would alterand increaseausersauthorityto
become aMasterCode.Userswith MasterPINscan create,deleteand modify
otherusercodeswith equal orless authoritythan themselves.
Howto: Configure(setup) anewpincodefor aspecificuser
StepExample:Configurepincode2580foruser4.
1.[MENU] -[5]Selectsmainmenu -Option 5,Userconfiguration.
2.[?]-[?]-[?]-[?] EnteryourMasterpincode.
3.[1]Selectsto configureuserpin.
4. [4] ![ENTER] Selectsuser4.
5.
[2]-[5]-[8]-[0]
[ENTER]
Setsuser4pincode as2580.
6.[MENU] Movesbackto userconfiguration(step3).
7. [MENU]Exitsbacktomainmenu.
8. [MENU]Press menutoexit.
Howto: Deleteapincodefromaspecificuser
StepExample:Deletethepincodethatis configuredforuser4.
1.[MENU] -[5]Selectsmainmenu-Option5, Userconfiguration.
2.[?]-[?]-[?]-[?] EnteryourMasterpincode.
3.[1]Selectstoconfigureuserpin.
4. [4] ![ENTER] Selectsuser4.
5.[0]-[ENTER] Todisableuser.
www.msealarms.com.au
NX-1815ENetworXVoiceKeypad with16zoneLEDsUserManual17
6.[MENU] Movesbacktouserconfiguration(step 3).
7. [MENU]Exitsbackto mainmenu.
8. [MENU] Pressmenuto exit.
Howto: Configure(setup)partition controlfor aspecificuser
StepExample:Configurecontrolof partition 2foruser4.
1.[MENU] -[5]Selectsmainmenu-Option5, Userconfiguration.
2.[?]-[?]-[?]-[?] EnteryourMasterpincode.
3.[2]Selectstoconfigureuserpartition.
4. [4]-[ENTER] Selectsuser4.
5. [2]
Selectspartition2.
Note: Pressingenterwillannouncethe partitionsavailableforthisuser,
andthe zone lightswillindicateselected partitions.
6.[MENU] Movesbacktouserconfiguration(step 3).
7. [MENU]Exitsbackto mainmenu.
8. [MENU]Press menuto exit.
Howto:ConfigureAuthoritylevelsfor aspecificuser
StepExample:Changeuser6to amastercode.
1.[MENU]-[5] Selectsmainmenu-Option5, Userconfiguration.
2.[?]-[?]-[?]-[?]EnteryourMasterpincode.
3.[3] Selectstoconfigureuserauthority.
4. [6] -[ENTER] Selectsuser6.
5. [4] Selectsoption 4,mastercodeauthority(seeTable1below.)
Note: Zonelightswillindicate selectedauthorityoptions.
6.[MENU]Movesbacktouserconfiguration(step 3.)
7. [MENU] Exitsbackto mainmenu.
8. [MENU] Press menuto exit.
Table1:UserAuthorityOptions
1 Reserved 5 Arm/disarmcode
2 ArmOnly 6 Allowedtobypass zones
3 Armonlyafterclosewindow 7 Usercodewillsendopen, closereports.
4 Mastercodeauthority 8 Mustbeoff.
www.msealarms.com.au
18 NX-1815ENetworXVoiceKeypadwith 16 zone LEDsUserManual
Notes: The system mustbe disarmed beforeaccessing userconfiguration.
Donotremoveallpartitionsfrom auserspartition control.Useextreme caution
when modifyingauserwithmastercode authority.
If you attempttoenteraPINcode thatisalreadybeingused byanotheruser,the
following announcementwill be heard "PINcode hasfailed#followed bythree
fastbeeps,simplyselectanotherPINcode.
Keep userPINinformation in asafeplace,do notdiscloseyourPINtoothers.
Contactyourserviceprovidertoconfirmavailable PINcodesand partitionson
yoursystem.
PhoneNumberConfiguration "Menu6
Menu 6-Phonenumberconfiguration
1Alarmphonenumber1
2Alarmphonenumber2
3Alarmphonenumber3
7Divertphonenumber1
8Divertphonenumber2
9Divertphonenumber3
Menu6 Alarmphonenumbers will onlybe available if yoursystem is
configured forselfmonitoring(alsoknownasdomesticdialling).Ifself-monitoring
isenabled,and asuitable connection tothe telephone networkisavailable, your
securitysystem hasthe abilitytocall three differentnumbersinthe eventofan
alarmcondition,thesearealarmphone numbers1,2and 3.
Asiren tone will be heardbythe receiving party,and the call can be terminated
(ended)bypressingand holdingthe starkeyon the receivingphone.
Caution should be used when selecting self-monitoring,asit doesnotofferthe
same level ofprotection provided byaprofessional monitoringstation.
Divertphone numbers1,2and 3will be called when an intercom call isinitiated
from an outdoorintercom entrancestation.
Howto: Enterphonenumbers
StepExample:Programming inalarmphonenumber1.
1.[MENU] -[6]Selectsmainmenu-Option6, PhoneNumberConfiguration
2.[?]-[?]-[?]-[?] EnteryourMasterpincode.
3.[1]Selectsalarmphonenumber1.
4. Phone
Number Enterthe phone numberthat alarmphonenumber1willdial.
www.msealarms.com.au
NX-1815ENetworXVoiceKeypad with16zoneLEDsUserManual19
5.[ENTER]Acceptsthephonenumberentered.
6.[MENU] MovesbacktoPhonenumberconfiguration.
7. [MENU]Exitsbackto mainmenu.
8. [MENU]Press menuto exit
Howto: Deletephonenumbers
StepExample:Deletealarmphonenumber1.
1.[MENU] -[6]Selectsmainmenu-Option 6,PhoneNumberConfiguration.
2.[?]-[?]-[?]-[?] EnteryourMasterpincode.
3.[1]Selectsalarmphonenumber1.
4.[0]Disablesalarmphonenumber1.
5.[ENTER]Acceptsdeletion.
6.[MENU] Movesbackto PhoneNumberConfiguration.
7. [MENU]Exitsbackto mainmenu.
8. [MENU]Press menuto exit.
Note: Onthe following pagesyou willfind examplesforenteringand deleting
alarmphone numberone.Toenterordeleteotherphone numbers,change only
yourphone numberselection atstep 3.Remembertoseekpermission from the
ownersofthe phone numbersthatyou enter,and it isrecommended thata
communication testbe carried outtoverifyconnectivity.Additional equipmentis
required forDivertand SMSmessaging,ask yourserviceproviderforfurther
details.
OutputControl "Menu7
Yoursecuritysystem can be configured tocontrol up to16 outputs.These
outputscan be used foravarietyofapplications,suchasexternal lighting
control,electricshuttercontrol oreven garage doorcontrol.Asadditional
equipmentisrequired toenable thesefeatures,pleasecontactyourservice
providerforfurtherdetails.
Howto: Controloutputs
StepExample:Controlconnectedoutputs
1.[MENU] -[7]Selectsmainmenu-Option 7,Output Control.
2.[5]-[ENTER] Selectwhichoutput isto becontrolled (from1to16),forexample, select
output5.
3. [?]Press[1]to turnoutputon,touch[2] toturnoutput off.
4.[MENU] Movesbacktooutputselection.
www.msealarms.com.au
20 NX-1815ENetworXVoiceKeypadwith 16 zone LEDsUserManual
5. [MENU]Exitsbackto mainmenu.
6. [MENU]Press menuto exit.
VoiceMessageRecording "Menu8
Menu 8-Voicemessagerecording
4Zonenameconfiguration
5 Partitionnameconfiguration
6Outputnameconfiguration
Menu 8allowsyou tobuild yourowncustom namesforzones,partitionsand
outputsusingwordsfrom the wordlibrarytable.
Uptoeightwordsmaybe strungtogethertobuild amoredetailed name.
StepExample:Configureazonename,partition nameoroutput name
1.[MENU]-[8]Selectsmainmenu-Option8, Voicemessagerecording
2.[?]-[?]-[?]-[?]EnteryourmasterPIN code
3. [?]
4=Zone name
5=Partitionname
6=Outputname
4.[?] -[ENTER] SelectwhichZone,Partition orOutput numberisto beconfigured
5. [?] -[ENTER]Selectlibraryword1
[?] -[ENTER]Selectlibraryword2
[?] -[ENTER]Selectlibraryword3
[?] -[ENTER]Selectlibraryword4
[?] -[ENTER]Selectlibraryword5
[?] -[ENTER]Selectlibraryword6
[?] -[ENTER]Selectlibraryword7
[?] -[ENTER]Selectlibraryword8
Note:Pressawayto resetnamesbackto default
6.[MENU]MovesbacktoZone,Partitionand Output numberselection(step 4).
7.[MENU]Movesbackto voicemessagerecording menu(step3)
8. [MENU] Movesbackto mainmenu
9.[MENU]Exitsmainmenu
www.msealarms.com.au

Other manuals for NX-1815E

1

Other Interlogix Keypad manuals

Interlogix CADDX NX148-E User manual

Interlogix

Interlogix CADDX NX148-E User manual

Interlogix NX-181 Series User manual

Interlogix

Interlogix NX-181 Series User manual

Interlogix NXG-183 Series User manual

Interlogix

Interlogix NXG-183 Series User manual

Interlogix NXG-183 Series Assembly instructions

Interlogix

Interlogix NXG-183 Series Assembly instructions

Interlogix NX-148E-RF User manual

Interlogix

Interlogix NX-148E-RF User manual

Interlogix NX-182xx NetworX Product information sheet

Interlogix

Interlogix NX-182xx NetworX Product information sheet

Interlogix NX-181xx NetworX User manual

Interlogix

Interlogix NX-181xx NetworX User manual

Interlogix NX1192E User manual

Interlogix

Interlogix NX1192E User manual

Interlogix SuperBus 2000 2X16 User manual

Interlogix

Interlogix SuperBus 2000 2X16 User manual

Interlogix TVK-800 User manual

Interlogix

Interlogix TVK-800 User manual

Interlogix NX1248 User manual

Interlogix

Interlogix NX1248 User manual

Interlogix ATS1151 Assembly instructions

Interlogix

Interlogix ATS1151 Assembly instructions

Interlogix ACL875SU Assembly instructions

Interlogix

Interlogix ACL875SU Assembly instructions

Interlogix NetworX NX-6V2 User manual

Interlogix

Interlogix NetworX NX-6V2 User manual

Interlogix NX-4V2 User manual

Interlogix

Interlogix NX-4V2 User manual

Interlogix NX-1815E User manual

Interlogix

Interlogix NX-1815E User manual

Popular Keypad manuals by other brands

Blaupunkt KP-R1 manual

Blaupunkt

Blaupunkt KP-R1 manual

Eaton DX-KEY-LED instruction manual

Eaton

Eaton DX-KEY-LED instruction manual

Velbus VMBKP manual

Velbus

Velbus VMBKP manual

XPR Access LCS-RS user manual

XPR Access

XPR Access LCS-RS user manual

Paradox K32+ Quick install guide

Paradox

Paradox K32+ Quick install guide

Paradox K35 quick start

Paradox

Paradox K35 quick start

C & K Systems System 238 user guide

C & K Systems

C & K Systems System 238 user guide

Paradox Esprit 639 installation manual

Paradox

Paradox Esprit 639 installation manual

ICT ELT-KLCS user manual

ICT

ICT ELT-KLCS user manual

AMX Mio Modero Classic quick start guide

AMX

AMX Mio Modero Classic quick start guide

NAPCO Gemini GEM-P816 installation instructions

NAPCO

NAPCO Gemini GEM-P816 installation instructions

Rasonic RSL-VF03 Operation manual

Rasonic

Rasonic RSL-VF03 Operation manual

LEGRAND AU7010 Series installation instructions

LEGRAND

LEGRAND AU7010 Series installation instructions

DSC PowerSeries Neo HS2TCHP installation instructions

DSC

DSC PowerSeries Neo HS2TCHP installation instructions

Macally BTNUMKEY user manual

Macally

Macally BTNUMKEY user manual

Transmitter Solutions BC-2010 user manual

Transmitter Solutions

Transmitter Solutions BC-2010 user manual

urmet domus 1092/621 user manual

urmet domus

urmet domus 1092/621 user manual

BFT Q.BO Touch installation manual

BFT

BFT Q.BO Touch installation manual

manuals.online logo
manuals.online logoBrands
  • About & Mission
  • Contact us
  • Privacy Policy
  • Terms and Conditions

Copyright 2025 Manuals.Online. All Rights Reserved.