manuals.online logo
Brands
  1. Home
  2. •
  3. Brands
  4. •
  5. inVue
  6. •
  7. Lock
  8. •
  9. inVue LIVE LL101 User manual

inVue LIVE LL101 User manual

For technical assistance call
1
NA / LATAM // 704.752.6513 •888.55.INVUE
EMEA // +31.23.8900150
APAC // +852.3127.6811
LIVE Slider Lock LL101
8Slide the panels into the closed
position. The strike plate should
emerge from between the 2
panels.
5Lightly tighten the 2 screws to
hold the strike plate in place.
4Place the strike plate onto the
back panel.
7Fully tighten the screws.
6Pull the red tab to expose the
adhesive.
Note: Back the screws off slightly
if the tab is not easy to pull.
3Back the 2 plastic screws out to
allow it to t over the panel.
2Use the provided alcohol wipe
to clean the edge of the BACK
panel where the strike plate
will be mounted. Allow it to dry
completely.
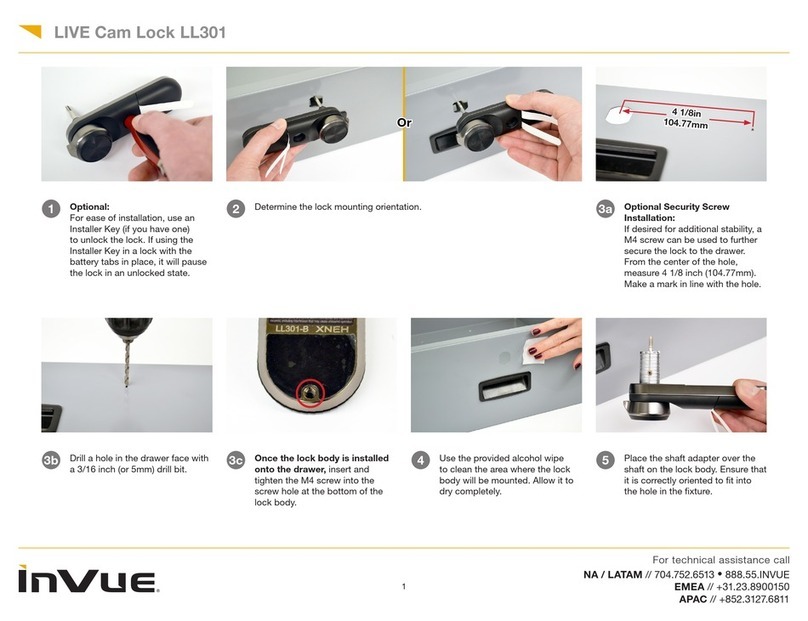
1Optional:
For ease of installation, use an
Installer Key (if you have one)
to unlock the lock. If using the
Installer Key in a lock with the
battery tabs in place, it will pause
the lock in an unlocked state.
For technical assistance call
2
NA / LATAM // 704.752.6513 •888.55.INVUE
EMEA // +31.23.8900150
APAC // +852.3127.6811
LIVE Slider Lock LL101
12 Press the lock against the panel
for at least 10 seconds.
11 Pull the 2 red tabs to expose the
adhesives.
10 Slide the lock onto the strike plate.
9Clean the edge of the front panel
near the strike plate. Allow it to dry
completely.
13 Pull the battery tabs.
14 Open the InVue LIVE Access app
and enter your login credentials.
Note: Your Passcode is the same
as your OKM User PIN.
16 Tap the lock knob with the NFC
antenna of the device being used.
The lock will unlock and relock
within 4 seconds.
15 If prompted, select the site where
the lock has been installed.
For technical assistance call
3
NA / LATAM // 704.752.6513 •888.55.INVUE
EMEA // +31.23.8900150
APAC // +852.3127.6811
LIVE Slider Lock LL101
17 Click on the “Update Device
Settings” link to modify the Device
Name, Description, or Zone to
complete the enrollment.
Note: You must have the “Manage
Devices” permission to see and
access this link.
18 Rename the device and enter an
optional description if desired. 19 Assign the device to the
appropriate Zone in your store or
site.
Note: Zones are created in Access
Manager
20 Click “Save” once the lock
description elds have been lled
out.
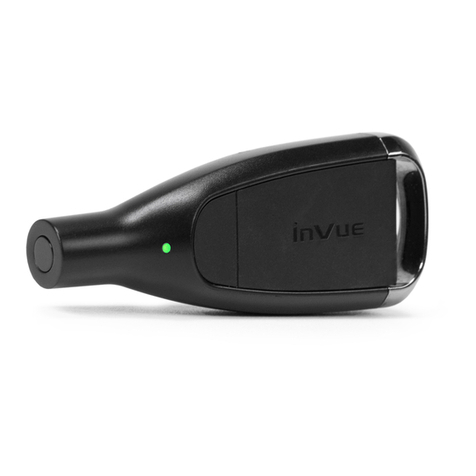
21a21a Lock Activation Using OneKEY:
Place a charged and coded
OneKEY against the lens on the
lock and press the button the Key.
The LED on the Key and the lock
will ash green.
21b21b You will have several seconds to
slide the door panels open. If the
LED on the lock ashes red before
the lock is opened, it will need to
be unlocked again.
22a22a Lock Activation Using NFC:
Open the InVue LIVE Access App
on your smart device. Tap your
device against the round panel on
the lock.
22b22b Once conrmed by the App
displaying “unlocked” and the
LED ashing green, you will have
several seconds to slide the
door panels open. If the LED on
the lock ashes red before the
lock is opened, it will need to be
unlocked again.
For technical assistance call
4
NA / LATAM // 704.752.6513 •888.55.INVUE
EMEA // +31.23.8900150
APAC // +852.3127.6811
LIVE Slider Lock LL101
23a23a Using the 2D Barcode:
Insert a thin edged tool into the
small notch between the lock body
and the round plate.
23b23b Remove the panel to reveal the
barcode. 24a24a Lock Activation Using Scanning
Device:
If your smart device has a built
in barcode reader, aim and scan
the code on the front of the lock
while the InVue LIVE Access App
is open.
24b24b Once conrmed by the App
displaying “unlocked” and the
LED ashing green, you will have
several seconds to slide the
door panels open. If the LED on
the lock ashes red before the
lock is opened, it will need to be
unlocked again.
2727 Remove the battery panel from the
lock.
25a25a Lock Activation Using Device
Camera:
Open the InVue LIVE Access
App on your smart device and
toggle to the “Camera Scan”
screen. Center the barcode in the
viewnder.
25b25b Once conrmed by the App
displaying “unlocked” and the
LED ashing green, you will have
several seconds to slide the
door panels open. If the LED on
the lock ashes red before the
lock is opened, it will need to be
unlocked again.
26 Battery Replacement Steps:
Place a magnet key near the end
of the battery panel on the lock.
Note: Even with low batteries
the lock will still function with a
OneKEY.
For technical assistance call
5
NA / LATAM // 704.752.6513 •888.55.INVUE
EMEA // +31.23.8900150
APAC // +852.3127.6811
LIVE Slider Lock LL101
2828 Replace the old batteries with new
CR123A non-rechargeable lithium
batteries.
2929 Slide the battery panel back into
place.
Warning – Fire, Explosion,
Burn Hazard:
InVue recommends the use
of Great Power or Energizer
CR123A batteries. Use of other batteries,
mixing of used and new or different
battery chemistries may present a risk
of leakage, re, explosion and serious
personal injury. Do not ingest, recharge,
misuse, short circuit, improperly store
or discard, disassemble or heat above
212°F (100°C). Keep away from children.
!

Other inVue Lock manuals

inVue LL301 User manual

inVue

inVue LL301 User manual

inVue L410 User manual

inVue

inVue L410 User manual

inVue L410 User manual

inVue

inVue L410 User manual

inVue PL106 User manual

inVue

inVue PL106 User manual

inVue OneKEY User manual

inVue

inVue OneKEY User manual

inVue PL401 User manual

inVue

inVue PL401 User manual

inVue PL601 User manual

inVue

inVue PL601 User manual

inVue Smart Lock PL501 User manual

inVue

inVue Smart Lock PL501 User manual

Popular Lock manuals by other brands

Piot PiTraveler K200 quick start guide

Piot

Piot PiTraveler K200 quick start guide

COMPX Timberline CB-294 instruction sheet

COMPX

COMPX Timberline CB-294 instruction sheet

Assa Abloy 1048.10 Mounting & installation

Assa Abloy

Assa Abloy 1048.10 Mounting & installation

Siegenia GENIUS 2.2 PANIC operating instructions

Siegenia

Siegenia GENIUS 2.2 PANIC operating instructions

Ingersoll-Rand Falcon RU Series installation instructions

Ingersoll-Rand

Ingersoll-Rand Falcon RU Series installation instructions

COMPX C8422 Dimensional drawing

COMPX

COMPX C8422 Dimensional drawing

Metro DataVac STARSYS WIRELESS quick start guide

Metro DataVac

Metro DataVac STARSYS WIRELESS quick start guide

Schlage BE499WB user manual

Schlage

Schlage BE499WB user manual

Alarm Lock DL5200 installation instructions

Alarm Lock

Alarm Lock DL5200 installation instructions

Burg Wächter secuENTRY ENTRY 7710 RFID manual

Burg Wächter

Burg Wächter secuENTRY ENTRY 7710 RFID manual

Deli Electronic password Series user manual

Deli

Deli Electronic password Series user manual

Sunnect AP501 user manual

Sunnect

Sunnect AP501 user manual

Amazon B07T5MMHXS quick start guide

Amazon

Amazon B07T5MMHXS quick start guide

Command access MLB51 installation instructions

Command access

Command access MLB51 installation instructions

Glue GL04 Series user guide

Glue

Glue GL04 Series user guide

Safelock Systems LA GARD 701 User operating instructions

Safelock Systems

Safelock Systems LA GARD 701 User operating instructions

Kaba La Gard MECHANICAL OPERATING AND CHANGING INSTRUCTIONS

Kaba

Kaba La Gard MECHANICAL OPERATING AND CHANGING INSTRUCTIONS

Squire Inigma FL1 user guide

Squire

Squire Inigma FL1 user guide

manuals.online logo
manuals.online logoBrands
  • About & Mission
  • Contact us
  • Privacy Policy
  • Terms and Conditions

Copyright 2025 Manuals.Online. All Rights Reserved.