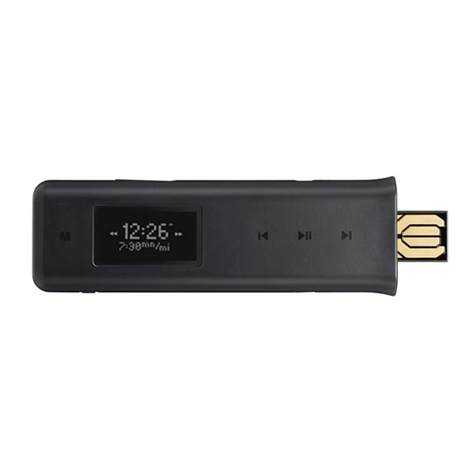
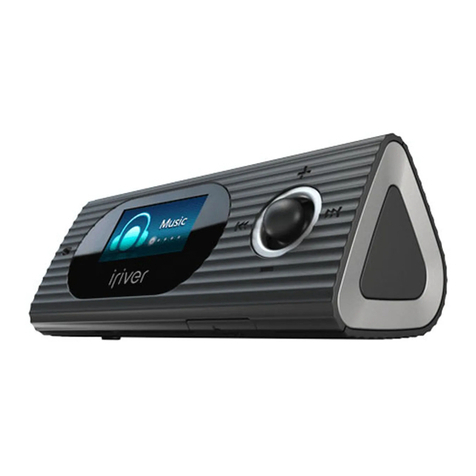
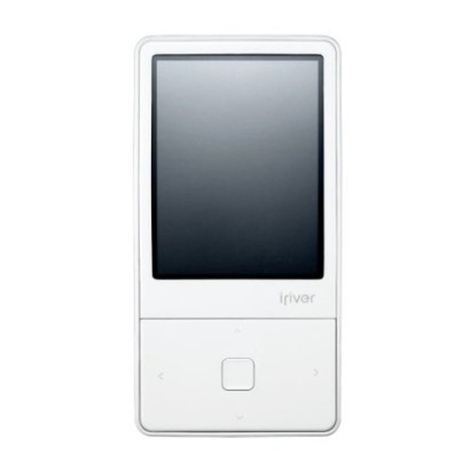
IRiver N10 User manual

http://www.iriver.com
User’s Manual
N10
Thank you for purchasing the product. Please read the manual carefully before use.
All manuals and user guides at all-guides.com
all-guides.com

I Quick Start I
Turning on/off the Player 2
Listening to music 2
Recording 3
Charging the Player 4
Chapter
1
All manuals and user guides at all-guides.com

2
Quick Start
Turning on/off the Player
Quick Start
Playing Music
Turning on the player
Press the PL Y/STOP button to
turn the player on.
I
Press and hold
The player will power off after a period of time with no-activity (not playing music, etc.).
Please see Page 46 to adjust this setting.
1
Selecting track
: Selects the previous track.
: Selects the next track.
I
3
Controlling volume
+: Increases volume
-: Decreases volume
I
4
Playing music
Press the PL Y/STOP button to
play music.
I
2
Connecting earphones
Connect the earphones as shown above.
Type Type B
I
1
Turning off the player
Press and hold the PL Y/STOP
button to turn the player off.
I
2
Press the PL Y/STOP button
again to play music.
I
All manuals and user guides at all-guides.com

3
I1 Quick Start I
Quick Start
ecording Voice
Starting recording
Press the MENU button.
- Recording will be started.
4
Finishing recording
Press the MENU button again.
- Recording will be finished.
5
Listening to recording file
Press the PL Y/STOP button after
stopping recording to play the recorded file.
I
I
I
6
Quick Start
ecording Voice
Navigating menu
Press and hold the MENU button.
Press and hold
I
1
ecording Stand By
Press the PL Y/STOP button.
- The player will be in standby mode with
displaying RECORD RE DY on LCD.
I
3
Selecting Voice ecording
Press the / button to select [Voice].
I
2
All manuals and user guides at all-guides.com

4
Quick Start Guide
Charging the Player
Charging with USB cable.
Push the "PUSH OPEN" on the back of your player to disconnect its cap as shown below.
Connect the USB port and PC with USB cable to charge battery.
The player will charge automatically when the player is connected to the PC.
I
1
l
Player will charge even when powered off.
l
Charging time: pprox. 1.5 hours ( t full discharge, Stop mode)
Note ...
All manuals and user guides at all-guides.com

I Getting started I
Greetings 6
Copyright and Certifications 6
Trademarks and Disclaims 7
Features 9
Accessories 9
Locating the Controls 1
LCD Display 11
Chapter
2
All manuals and user guides at all-guides.com
all-guides.com

6
Getting started
Greetings
Getting started
Copyright and Certifications
Thank your for your iriver purchase.
Also, welcome to the world of N1 , the market-leading MP3 player.
We are sure that the iriver's N1 player may sufficiently satisfy you and make your life more
enjoyable. This user's manual is provided to help you safely use the product. Please read
this manual carefully before using it. Thank you.
I
http://www.iriver.co.kr
The iriver's home page provides the overview of company and products, other related information,
and answers to common questions. Firmware and software updates are also available as well as
the most recent information about your iriver product.
You may get useful information from "User's Forum" and FAQ. Register your ID and get any
appropriate online customer support. Also, you can get newsletter such as newly announced product,
firmware upgrade, various promotion events via email.
I
Copyright
iriver Limited has all the rights of the patent, trademark, literary property and intellectual property related
to this manual. You may not copy or reproduce any part of this manual unless authorized by iriver Limited.
You can be punished by using any part of this manual illegally.
The software, audio and video which have an intellectual property are protected by copyright and
international laws. It is user s responsibilities when he/she reproduce or distribute the contents created
by this product.
The companies, institutions, products, people and events used in examples are not real data. We don't
have any intension to be related with any companies, institutions, products, people and events through
this manual and should not draw inferences. Users are responsible for observing the copyrights and
intellectual properties.
© 1999~2 4 iriver Limited, All rights reserved.
Certifications
CE, FCC, MIC
I
I
All manuals and user guides at all-guides.com

7
I2 Getting started I
Getting started
Trademarks and Limited Liabi ity
Trademarks
Windows, Windows 98 SE, Windows ME, Windows 2 , Windows XP and
Windows Media Player are registered trademarks of Microsoft Corp.
I
Limited Liabi ity
Neither the Manufacturer, importers nor dealers is responsible for any accidental damage including
bodily injury or any damage resulting from misuse or unsuitable operation by you.
The information on this manual is prepared with the current product specifications.
The manufacturer, iriver Limited, is adding new features to the product and may persistently
apply new technologies hereafter.
All standards may be changed at any time without notice.
I
Note ...
All manuals and user guides at all-guides.com

Getting started
Features
16 Gray Organic EL Disp ay Supporting Mu tip e Languages
N1 series comes with 16 gray OELD which can support multiple languages (4 languages).
I
Neck ace with Integrated Earphones
I
Direct Charging via USB
I
6 Preset EQ : Norma , Rock, Jazz, C assic, U Bass, Meta
I
Xtreme EQ and Xtreme 3D
Customize your own EQ with Xtreme EQ and enhance bass and surround sound with Xtreme 3D.
I
Voice Recording
Voice record level is automatically controlled by AGC function.
I
Firmware Upgrade
Provides the latest updated features via firmware upgrade.
I
Supports 100 fo ders tota and up to 260 fi es at one time
I
Simp e navigation makes it easy to find any song
I
8
All manuals and user guides at all-guides.com

9
I2 Getting started I
Main unit
I
Getting started
Accessories Accessories subject to change without notice and may vary from image shown.
Earphone Covers
I
Mini USB Adapter /
USB Cable
I
Installation CD
I
User Manual/Warranty Card/
Quick Start Guide
I
Type B
Necklace, cap
I
Type A
Necklace style earphone
I
Hold connection part of necklace and push it
into the direction of arrow.
Hold the end of strap and pull it out to the
direction of arrow to separate the connection
part.
Put the separated end into the neck strap hole
on the player. The connected part will be
released.
Assemble the earphone in the opposite order
after putting the strap in the connection hole of
the player.
All manuals and user guides at all-guides.com

Getting started
Locating the Contro s Actual player may differ slightly from images below.
Front View
Type A Type B
I
1
Rear View
I
2
OEL Screen
USB Connection
Port
OEL Screen
USB Connection
Port
Eject button
Cap
Getting started
Locating the Contro s Actual player may differ slightly from images below.
Front View
I
1
Rear View
I
2
Earphone jack
Neck strap
Eject button
Cap
1
All manuals and user guides at all-guides.com
all-guides.com

11
I2 Getting started I
Getting started
Locating the Contro s The images below can be different from the product.
Left side
I
1
Right side
I
2
PLAY / STOP / TURN
ON / TURN OFF
button
Long : MENU button
Short : A-B Repeat
Volume – / Move to
the Down button
Volume + / Move to
the Up button
Next Track/
Move to the Left button
Previous Track/
Move to the Right button
Getting started
LCD Disp ay
1 6
7
2
3
4
5
MUSIC mode
I
1
1 Clock
2 Progress Bar
3 Playback Mode / Status
4 Folder Name
5 Music Title
6 Battery Indicatorr
7 Play Time
8 Volume Level
9 EQ / File Format / Bit Rate /
Sample Rate
All manuals and user guides at all-guides.com

Getting started
LCD Disp ay
IRM (iriver Rights Management)
iriver Rights Management is a digital music format.
Please visit our web site for details about this music format.
Fi e format
I
ASF WMA MP3 IRM
Getting started
LCD Disp ay
RECORD mode [Before Recording]
[After Recording]
I
2
1 Recording Status
2 Recording Icon
3 Status Bar
4 Number of Files
5 Recording Time
6 Remaining Time
7 Recording Status Bar
8 Recording Folder Name
9 Recording File Name
12
All manuals and user guides at all-guides.com

I Basic Operation I
PC Software Installation 14
Connecting to the PC 17
Installation of "New Hardware" 18
Safely Removing the Player from the PC 1
Operate the Software 20
Learning the Basic Function 22
Toolbar Menu 22
File Managing Tools 23
File Menu 23
View Menu 24
Tools 24
Windows 25
Help 25
Downloading from the PC 26
Basic Operation 27
Navigation 27
MP3 28
Voice Recording 2
Menu Setting 31
Deleting File or Folder 32
Chapter
3
All manuals and user guides at all-guides.com

14
Basic Functions
PC Software Installation Install the software before connecting the player to PC.
On inserting software installation CD into CD-ROM drive located in PC,
the following screen will appear.
- IIf the installation program does not automatically run in a few
seconds, click My Computer icon to browse the CD-ROM drive
and run SETUP.EXE manually.
- The software installation CD contains :
Device Driver
Manager Program for PC
Manager Program for Mac
1
System Requirements (Windows)
Pentium 133Mhz or higher CD-ROM drive
USB port 10MB of free hard disk space or higher
Windows 8 SE/ME/2000/XP
Basic Operation
PC Software Installation
Install the software before connecting the player to PC.
- The software enables you to save MP3 and other format files into your player.
- For Microsoft Windows 2000, login as Administrator to install the software.
- For Microsoft Windows 2000 user, login as Administrator to install the software.
All manuals and user guides at all-guides.com

15
I3 Basic Operation I
Basic Operation
PC Software Installation Install software before connecting the player to PC.
Insert the installation CD into the CD-ROM
drive. Installation starts automatically.
1
Select a language for iriver Music Manager and
Click "Next" after selecting the language to install.
2
Basic Operation
PC Software Installation
Click "Next" to install iriver Music Manager.
3
Select a folder to install iriver Music Manager
and click [OK].
Select the folder to install. Click "Next"
4
All manuals and user guides at all-guides.com
all-guides.com

16
Basic Operation
PC Software Installation
Basic Operation
PC Software Installation
Click “Next” to continue the installation.
5
Click “Install” to proceed.
6
Click “Finish” when installation is complete.
7
All manuals and user guides at all-guides.com

17
I3 Basic Operation I
Basic Operation
Connecting to t e PC
Push the "PUSH OPEN" on the back of your player to disconnect its cap as shown below.
Connect the USB port and PC with USB cable.
1
Basic Operation
Connecting to t e PC
"USB CONNECTED" will appear on the LCD screen of the player.
2
Connect the USB cable to the PC after playback stops to avoid errors.
All manuals and user guides at all-guides.com

18
Basic Operation
Installation of "New Hardware"
After connecting the player to your PC, "Found New Hardware" screen is displayed.
1
Information screen is displayed on the PC.
New hardware is installed successfully and ready to use.
2
l
New hardware installation process starts after installing iriver Music Manager program.
Basic Operation
Installation of "New Hardware"
All manuals and user guides at all-guides.com

1
I3 Basic Operation I
Right-click the "Safely Remove Hardware" icon in the taskbar.
1
Basic Operation
Safely Removing t e Player from t e PC
Basic Operation
Safely Removing t e Player from t e PC
If abnormally removed from PC, the player may be damaged or cause serious malfunction.
Select the device to remove and click “Stop”.
2
All manuals and user guides at all-guides.com
Table of contents
Other IRiver MP3 Player manuals

IRiver
IRiver ACTIVO CT10 User manual

IRiver
IRiver T20 User manual

IRiver
IRiver H10 User manual

IRiver
IRiver iHP-140 User manual

IRiver
IRiver iFP-880 Assembly Instructions

IRiver
IRiver E10 User manual

IRiver
IRiver Astell & Kern AK120 II User manual

IRiver
IRiver T8 User manual

IRiver
IRiver E100 4GB User manual

IRiver
IRiver iHP-100 Series User manual

IRiver
IRiver iFP-790 Assembly Instructions

IRiver
IRiver X20 User manual

IRiver
IRiver Data Play IDP-100 User manual

IRiver
IRiver E200 User manual

IRiver
IRiver T30 512MB User manual

IRiver
IRiver H10 5GB User manual

IRiver
IRiver T10 User manual

IRiver
IRiver iFP-799 User manual

IRiver
IRiver H10 User manual

IRiver
IRiver Astell & Kern AK380 User manual