Steel Multi Column radiators have specific left & right hand threaded bushes & these can be easily damaged if forced
or incorrectly fitted (this will inevitably cause leaks).
Your radiator has 4 open water ways, protected by plastic bungs, 3 black and one red, the top of the radiator is
indicated by the red plastic bung. The bungs must be removed to allow the bushes to be fitted. Bushes require a dry
fit connection only; you must not use any Compound materials (e.g. Jet Blue) or Plumbers Hemp.
Please be aware that the bushes are left and right-handed so you will need to look closely at the threads to identify
which side to fit the bushes.
3. Orientation and Fitting Bushes
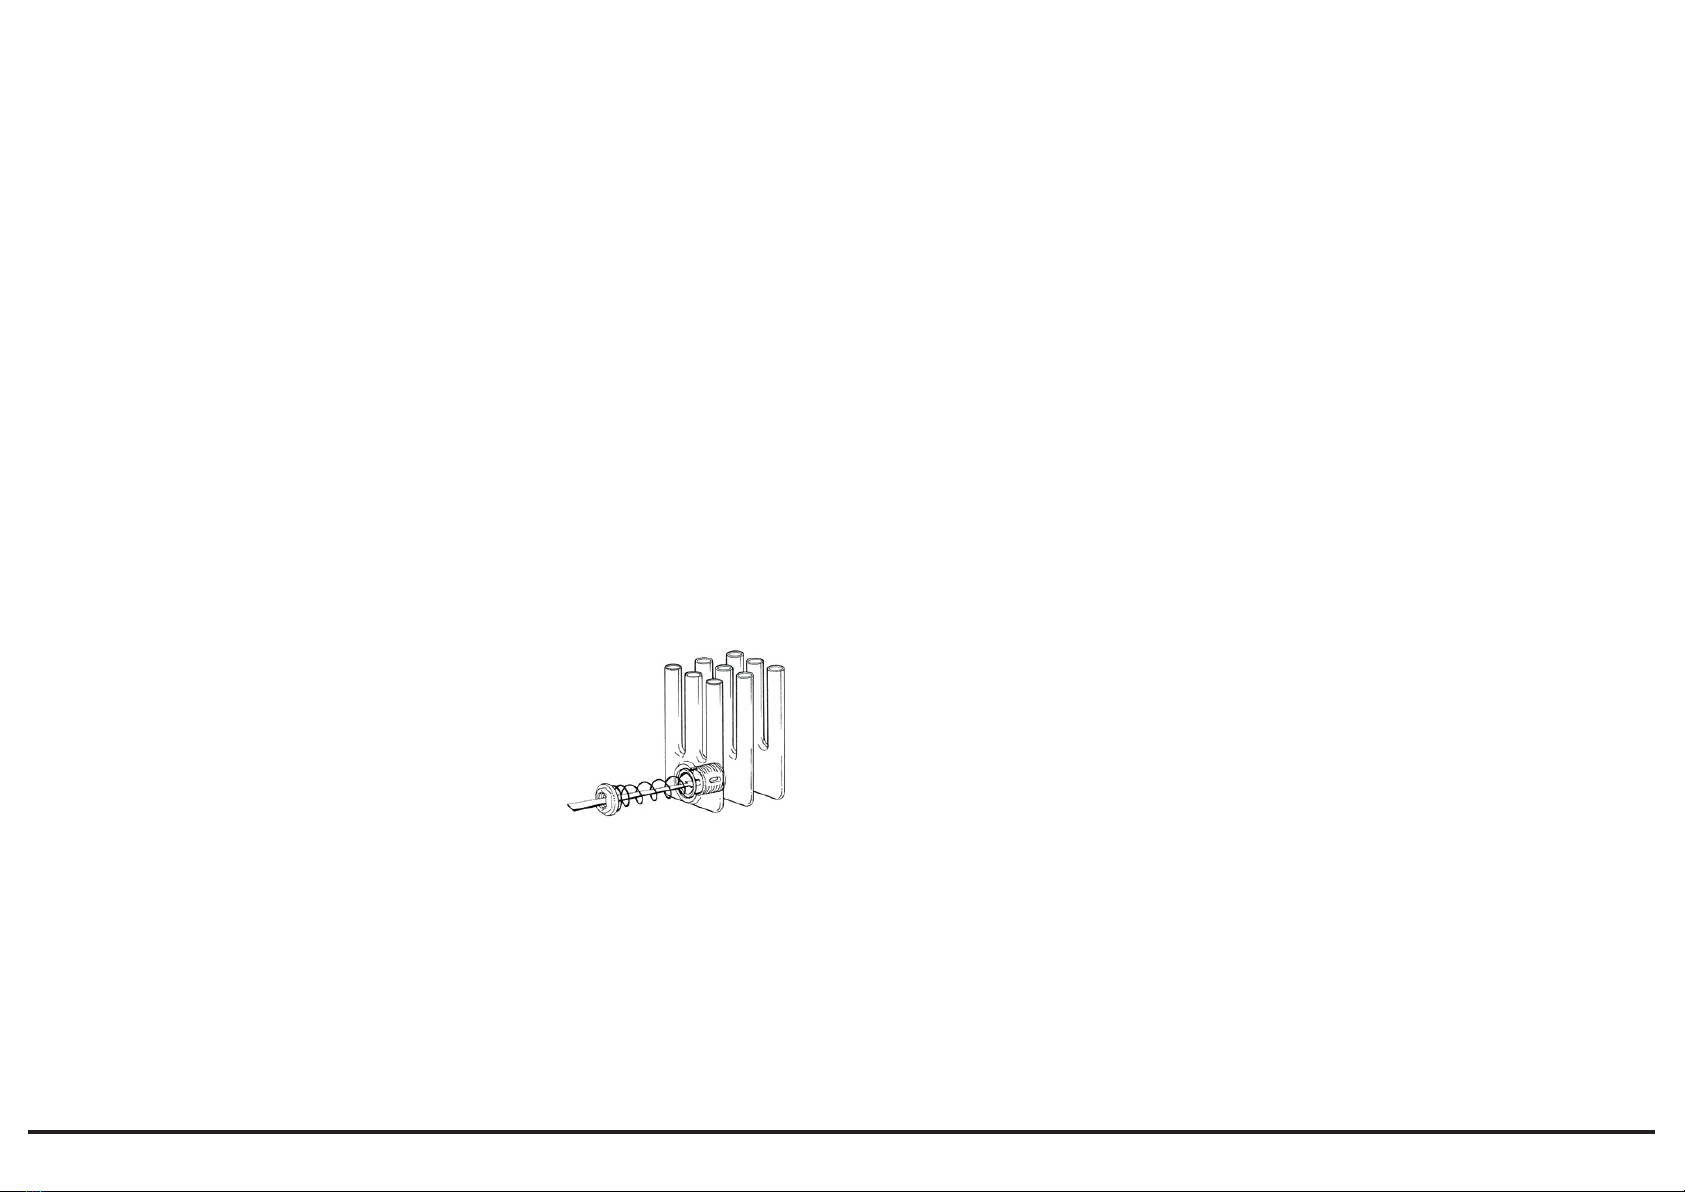
The spring diverter is recommended for all radiator sizes, however, please
be aware it is essential for all radiators over 1000mm high.
The diverter is inserted into the lower water way, the metal cap goes in
first followed by the spring and is located pushed tight up against the first
internal barrel nipple and held in place by a bush. The flow must enter this
end first (please see diagram right).
4. Fit Diverter
You will need:
• Tape measure
• Electric drill and bits
• Spirit level
• Suitable screws and plugs
2. Contents
You should have:
• 1 Radiator
• 1 Diverter
• 4 Bushes
• 1 Manual Airvent
• 1 Blank Plug
PLEASE NOTE: We will supply the correct number of brackets and wall ties with each order; prices for extra
brackets / feet & wall ties are available on request.
Plus your chosen mounting option:
• Standard Wall Brackets
• Stud Wall Brackets
• Floor Mounts
• Cast Feet
• Slip on feet
7. Hang & Commission
With all bracket positions marked and / or fixed, the radiator is placed in its final position
for valve and pipe work connections. Please ensure the flow is connected to the correct
end nearest the diverter (please see multi column orientation drawing on the other page).
When commissioning your radiator on an indirect/closed system we recommend using a suitable quality &
quantity of mixed metal inhibitor to protect against scale & corrosion.
Damage caused to systems not protected by a suitable inhibitor will not be covered by manufacturer’s guarantee.
For standard wall brackets fix the clamp bracket and the complete wall tie to the radiator and mark their positions on
the wall. Drill holes and fix the wall plates for the bracket ensuring they are all level. Hang the radiator clamp brackets
onto the wall plates, then using a long screwdriver secure the wall ties to the wall. For slip on feet and floor mounts
fix the wall ties in place on the top of the radiator and place the radiator in situ, mark the wall ties position, fix the wall
plates, then position the radiator and secure the wall ties to the wall plates.
PLEASE NOTE: It is essential that all brackets are level to ensure a vertical alignment for connecting the pipework.
Please ensure the correct fixings (screws /raw plugs) are used for the wall type you are fitting your radiator to.
6. Fix Wall Brackets / Feet
Wall brackets are typically positioned two or three sections in from either end (please see bracket positions
drawing on the other page). The standard wall bracket is a clamp style with a separate mounting plate that
is fixed to the wall. When securing the brackets to the radiator wrap masking tape around your screwdriver to
reduce the risk of damaging the paint finish. Fit the wall brackets and wall ties on to the back of the radiator two
sections in from each end.
5. Mark Bracket Positions
PLEASE NOTE: It is essential that all brackets are level to ensure a vertical alignment for connecting the pipework.
Technical Specifications
Materials Mild Steel.
Connections ½” flow & return
Test pressure 13 Bar
Testing authority EN442
Maximum operating pressure 8 Bar
Maximum working temperature 95ºC
Packaging Wrapped in polyethylene
with cardboard protectors
PLEASE NOTE: Systems using micro bore pipework must have adequate pressure and flow rates for the number and
style of radiators on the system.
This product is guaranteed for 10 years. The guarantees in all cases are subject to the products being installed in
accordance with British and or European standards as well as these fitting instructions. The guarantees in all cases are
restricted to the free of charge replacement or repair of the failed product only. Our liability will under no circumstances
extend beyond the repair or replacement of the product supplied by us. Claims for either labour in replacement or
damage to property are not admissible. Any goods that are returned, in the event of a problem, will belong to us.
Guarantees & Liabilities
All products must be inspected once removed from the packaging and your point of purchase notified within 28 days
of delivery of any scratches, blemishes or other damage. Your point of purchase will then agree appropriate action.
Imperfectradiatorsshouldthereforenotbefittedandyourpointofpurchasewillnotacceptresponsibilityforreplacement
of scratched or damaged radiators once they have been fitted. This includes any consequential loss or cost of fitting.
If your point of purchase are not notified within 28 days of the date on the signed delivery note then it will be
deemed that they have fully complied with their obligations and claims will not be considered.
Failure to comply with any of the above may invalidate any claims. Your point of purchase recommend that after
you check the product on delivery that it is stored in its packaging to prevent damage prior to installation, they
cannot accept responsibility for items damaged after delivery.
Terms & Conditions
MCF_SS_1.2 www.irsap.co.uk


