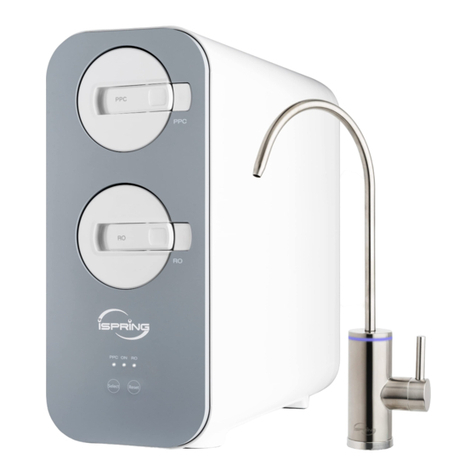
Ispring RO1000 Series Manual

Copyright ©2005-2023 ISPRING WATER SYSTEMS, LLC. All rights reserved.
CF RO PC Rinse
1000 GPD


We stand behind our products
Since 2005, iSpring has been dedicated to providing high-quality drinking water to families across
the United States. We provide various residential faucets and water filtration systems that deliver
pure, healthy, and tasty water to you and your family.
At iSpring, we strive to develop products to the highest of standards and aim to make excellent
drinking water accessible for all households. With affordable pricing, reliable quality, prompt
delivery, and top-notch customer service, we hope to assist in bringing you great water for years to
come.

Prior to Installation
Read this instruction manual carefully prior to installation.
Keep this manual readily available for future reference.
Table of Contents
User Information.........................................................................................................3
Component Identification............................................................................................4
Product Features..........................................................................................................5
Product Structure and Size ..........................................................................................6
Installation
Preparation ...........................................................................................................6
Feed Water Adapter Installation...........................................................................7
Faucet Installation ................................................................................................7
System Installation and Setup...............................................................................8
Connecting the Power Supply ............................................................................11
Using the System
Starting for the First Time ..................................................................................12
Routine Maintenance..........................................................................................12
Replacing the Filters...........................................................................................12
Display and Operating Area/Indicators ..............................................................13
Filter Service Life Reset.....................................................................................14
Malfunction Inspection.......................................................................................14
Warranty
iSpring Standard Limited Warranty (End-Users Only)...........................................
Warranty Registration Form ...................................................................................

www.123filter.com | +1 (678) 261-7611 | Support@123Filter.com Page 3
User Information
Users must adhere to the installation specifications described in this Product Installation and
Operation Manual (hereinafter referred to as the "instruction manual"). iSpring is not responsible for
any damage, loss, or injury resulting from neglect, improper maintenance, or unauthorized
modification of products.
●The unit should be placed only on flat surfaces. Do not mount the product on a wall.
●This product is designed for residential use only. Contact iSpring customer service for
inquiries related to usage in non-residential settings.
●The operating temperature range is 41°F - 100°F. If the water temperature or ambient
temperature falls below 41°F, immediately shut off the inline water supply, turn off the inline water
adapter, and drain the remaining water from the system.
●In case of malfunction due to damage or failure of the power supply system, unplug the
system immediately and contact iSpring customer service for guidance.
●If leaking occurs, shut off the inline water supply by turning off the adapter. Then unplug the
system and contact iSpring customer service.
●Use only authorized iSpring parts and filters. Using unauthorized or aftermarket components
will void the product warranty.
●This product is equipped with built-in systems to prevent internal leaks and minimize the risk
of water damage. However, it is recommended that users check external fittings and connections
regularly to ensure all components are secure and operating properly.
●Unauthorized modification and disassembly are strictly prohibited and will void the warranty.
●Never touch the power cord connector when your hands are wet, as this may result in electric
shock.
●Use only water to clean this product. Do NOT use corrosive cleaning products or any
materials that could damage the product.

www.123filter.com | +1 (678) 261-7611 | Support@123Filter.com Page 5
Product Features
1) Product Scope
•For residential use ONLY.
•Applicable water requirement: It is highly recommended to use this system on municipal
water supply. Never use a water source that is microbiologically unsafe or of unknown
quality without adequate disinfection/pre-filtration.
2) Specifications
Specifications
Inlet Water Pressure
15 - 60 psi
Working Water Pressure
60 - 130 psi
Inlet Water Temperature
41 - 100°F
Rated Power Specifications
AC 110-220 V / 50-60 Hz, 180 W
3) Filtration Performance
Stage
Filter
Purpose
1st
Composite
Filter
Removes unpleasant chlorine, taste, odor, cloudiness, and coloring.
Removes dirt, sand, silt, rust, and scale particles and absorbs THMs
and pesticides.
2nd
Reverse
Osmosis
Membrane
Removes lead (up to 98% of lead), fluoride, arsenic, hormones,
asbestos, calcium, sodium, and more using a 0.0001 (one ten-
thousandth) micron membrane.
3rd
Post
Carbon
Filter
Improves taste, removes even more odor
4) Filter Service Life Table
Stage
Filter
Recommended Replacement Cycle
1st
Composite Filter
6-12 Months
2nd
Reverse Osmosis Membrane
24-36 Months
3rd
Post Carbon Filter
6-12 Months
Note: The actual performance varies depending on several factors, such as water quality and
operating conditions. Factors like high TDS (500 ppm+), low temperatures (below 55°F), and
low incoming water pressure (below 25 psi) will limit the performance of the system and reduce
filter life.

Page 6 www.123filter.com | +1 (678) 261-7611 | Support@123Filter.com
Product Structure and Size
Installation
1) Preparation
Check the packing list to confirm all accessories are included in the package. Contact iSpring
customer service if any components are missing.
A. Choose a suitable location for the system. Again, it cannot be mounted and must be placed
on a flat surface. Ensure the system is installed ONLY INDOORS using a cold-water supply.
B. Required tools:

www.123filter.com | +1 (678) 261-7611 | Support@123Filter.com Page 7
2) Feed Water Adapter Installation
A. Slide the nut onto the 3/8'' PE pipe, then insert the pipe into the male fitting on the feed water
adapter and tighten the nut using a spanner wrench.
B. Turn off the cold-water supply valve and unscrew the kitchen faucet connector pipe.
C. Install the feed water adapter on the cold-water supply valve and tighten using a spanner
wrench: (make sure the O-ring is seated inside the adapter).
D. Re-install the cold-water hose on the feed water adapter, then tighten using a spanner wrench
(make sure the O-ring is seated inside the hose cap).
3) Faucet Installation
Choose a suitable location on the sink or countertop and install the faucet on a flat surface, as shown
in the image below. A 1" –1.5" hole is required if there is not an existing one.
How to drill a 1" hole in your sink or countertop
a. It is highly recommended that users watch the YouTube video "How to Drill Faucet Holes"
to better understand this process. Depending on your countertop, you may want to hire an
experienced professional to ensure the hole is drilled correctly.
b. Choose a 1/2" Diamond Core Bit for granite counters and a titanium drill bit for steel. Do
NOT use a hammer drill on natural stone, glass, and ceramic.

Page 8 www.123filter.com | +1 (678) 261-7611 | Support@123Filter.com
c. An indent should be made with a punch on the steel before drilling to help guide the bit.
d. Use caution when drilling on a Porcelain sink, as it could be easily chipped. Set drill speed to
slow. Press the bit downward firmly until breaking through the slippery surface. Some users
find it easier to secure the bit by drilling through a pieceof wood firmly pressed on thesurface.
e. Use coolantto disperse heat. Choose water for granite and oil for steel. Use the Water Suction
Cup to hold the coolant inside and prevent the drill bit from slipping.
f. Starting at the slowest speed, hold the drill firmly and vertically and prevent the drill bit from
slipping on the counter.
g. Once breaking through the smooth surface, swirl the drill slightly to evenly apply pressure in
a circle.
Be patient and deliberate. It can take 20 –40 minutes to drill through 1".
4) System Installation and Setup
Precautions:
•Make clean cuts on the tube to ensure a tight, sealed connection.
•Insert each pipe about 1/2'' into the fittings/ports to prevent leaks.
•Always use the C-clips to secure the quick-fitting connections.
•After assembly, check to ensure the connection is not leaking.

www.123filter.com | +1 (678) 261-7611 | Support@123Filter.com Page 9
Inlet Water Pipeline Installation:
A. Cut the 3/8" PE pipe, which is connected to the feed water adapter, to the appropriate length
using a utility knife.
B. Insert the other end of the tube into the 3/8" elbow fitting, then plug the stem end into the
port marked "Inlet" at the top of the system. Secure the connection by inserting the enclosed
3/8" C-clip.
Drinking Faucet Pipeline Installation:
A. Cut the tubing with a utility knife to the desired length.
B. Insert the tubing into the last 3/8" elbow fitting, then plug the stem end into the port marked
"Faucet". Insert the C-clip to lock the connection.
C. Insert the other end of the tubing into the push-in fitting of the drinking faucet.

Page 10 www.123filter.com | +1 (678) 261-7611 | Support@123Filter.com
Drain Pipeline Installation:
A. Choose a spot on the drainpipe that is convenient for installing the drain saddle and tubing.
A horizontal pipe is recommended to minimize dripping sounds during use.
B. Drill a 1/4" hole in the drainpipe and paste the black sticky pad around the hole.
C. Cut the 1/4" tubing end tip to make a 45-degree angle. Insert the tubing through the hole into
the drain pipe. Then install the backplate and tighten the two screws with hex nuts while the
tubing remains in the hole.
Note: The YouTube video ''iSpring RO System Drain Saddle ADS1K DIY Installation''
is a good reference.
D. Insert the other end of the 1/4'' tubing to the ¼'' elbow fitting, then insert the stem to the port
marked "Drain" at the top of the system and secure it using the C-clip.

Page 12 www.123filter.com | +1 (678) 261-7611 | Support@123Filter.com
Using the System
1) Starting for the First Time
A. To start the system, plug in the power adapter, then turn on the feed water adapter. Turn on
the faucet. Vibrations can be expected as the pump starts.
B. Turn on the faucet and let it run for about 15 minutes to flush the system. This should be
done each time the filters are changed.
C. During this process, carefully check all fittings for secure connections.
D. Once the rinsing is completed, turn it off and check for leaks again. If no leaks are present,
the system is ready for use.
2) Routine Maintenance
•If the system will not be used for an extended period of time (1 week or longer), remove the
filter and seal it with plastic wrap. Store the sealed filter in the fridge to protect the system
against microbiological growth. To start the system again after the period of non-use, flush
the system for at least 10 minutes OR change the filters.
•Meanwhile, disconnect the water supply, drain the system, and disconnect the power.
•Follow the recommended filter replacement schedule. Replace the filter as soon as the
indicator is on. Note that the filter life depends on the number of people in the household and
the water source quality. Failure to replace the filter based on the recommended schedule will
void the warranty and can cause damage to the system or potential health hazards.
3) Replacing the Filters
A. Disconnect the water supply and turn on the faucet to drain the remaining water in the system.
B. Remove the magnetic front panel by lifting it from the bottom.
C. Press the filter release button on the filter that needs to be replaced; the filter will be released
and pop out. Remove the used filter from the slot.
D. Insert the new filter into the slot all the way to the end. The release button will click when it
is in position.

www.123filter.com | +1 (678) 261-7611 | Support@123Filter.com Page 13
E. Turn on the water supply and plug the system back into the power outlet.
F. Reset the filter status by pressing and holding the corresponding filter button for 5 seconds.
A "beep" will sound as the button is pressed, and the indicator will turn red –hold the button
until the indicator light turns solid blue.
G. Replace the front panel, turn on the faucet, and let the system run for 10-15 minutes to rinse
the filter.
4) Display and Operating Area/Indicators
A. Lights/Buttons Layout
-All lights shown come with a touch mechanism and serve the purpose of buttons. All
lights are either blue or red, depending on different scenarios. All lights will beep after
being pressed and held for 5 seconds. All lights display solid blue, indicating a
default/normal operation.
-CF, RO, and PC lights indicate the filter life of each filter. The "Rinse" light indicates the
working status of the system.

Page 14 www.123filter.com | +1 (678) 261-7611 | Support@123Filter.com
-Each time the system is plugged into a power outlet, the system will initiate an automatic
rinse process that lasts 18 seconds. Each time after the system has been idled for over 24
hours, the system will initiate an automatic rinse process that lasts 18 seconds. An 18-
second manual rinse can be initiated by pressing the "Rinse" button for 5 seconds. During
the rinse process, automatic or manual, the "Rinse" light will blink blue.
B. ''Filter Service Life'' Light:
Service Life
Prompt
Filter Life Indicators
Buzzer
Normal
Solid Blue
None
<10%
Blink Red
Beep
Filter Life End
Solid Red
Beep
5) Filter Service Life Reset
After replacing the filters, reset the filter status by pressing and holding the corresponding
filter button for 5 seconds. A "beep" will sound as the button is pressed, and the indicator will
turn red –hold the button until the indicator light turns solid blue.
Note: In the event that multiple filters are replaced at the same time, perform the reset
sequence one filter at a time. DO NOT reset multiple filter lights at the same time.
6) Malfunction Inspection
Fault Codes
Type
Reminder
Solution
"Rinse"
Light
Filter Life
Indicators
Buzzer
Timeout protection
for continuous pump
operation.
Water Dispensing >1
hr.
Blink
Blue
Blink Blue
Beep
Shut off the faucet, unplug the system
from the power outlet, let it rest for 1
minute, then plug it back in, resuming
normal operation.
Water leakage
protection.
Blink Red
Blink Blue
Beep
Unplug the system from the power
outlet; check and clean/fix the leak, then
plug the system back in, resuming
normal operation.
Low incoming water
pressure.
Blink Red
Blink Red
Beep
Check the inlet water supply status or
incoming water pressures. The system
will resume functional status when the
water pressure returns to normal.
In case of issues/questions/concerns, please contact iSpring Support at support@ispringfilter.com

.

__________________ __________________
__________________ __________________
______________________________________________
____________ ______________ _________________
___________________________________________
__________________________________________________________


¡
¢
£¢
¤
Table of contents
Other Ispring Water Filtration System manuals
Ispring
Ispring RO500 Service manual

Ispring
Ispring RCC7 Service manual

Ispring
Ispring RCS5T Manual

Ispring
Ispring WCFM500K Parts list manual

Ispring
Ispring DF1 Series User manual

Ispring
Ispring RCC Series Manual

Ispring
Ispring UVF11A Manual

Ispring
Ispring RCC7 Service manual

Ispring
Ispring WSP Series User manual
Ispring
Ispring DF1 Series User manual

Ispring
Ispring UVF55FS Manual

Ispring
Ispring WF Series Operation and maintenance manual

Ispring
Ispring WF150K Manual

Ispring
Ispring RCC7 User manual

Ispring
Ispring WSP-ARB User manual

Ispring
Ispring WSP-ARB User manual

Ispring
Ispring CR500-A-S-1 User manual

Ispring
Ispring RCC7AK User manual
Ispring
Ispring WF1024 Manual

Ispring
Ispring CU-A4 Manual