manuals.online logo
Brands
  1. Home
  2. •
  3. Brands
  4. •
  5. JABSCO
  6. •
  7. Water Pump
  8. •
  9. JABSCO 36680-2 Series User manual

JABSCO 36680-2 Series User manual

Other manuals for 36680-2 Series

1

This manual suits for next models

2

Other JABSCO Water Pump manuals

JABSCO 31595-009 User manual

JABSCO

JABSCO 31595-009 User manual

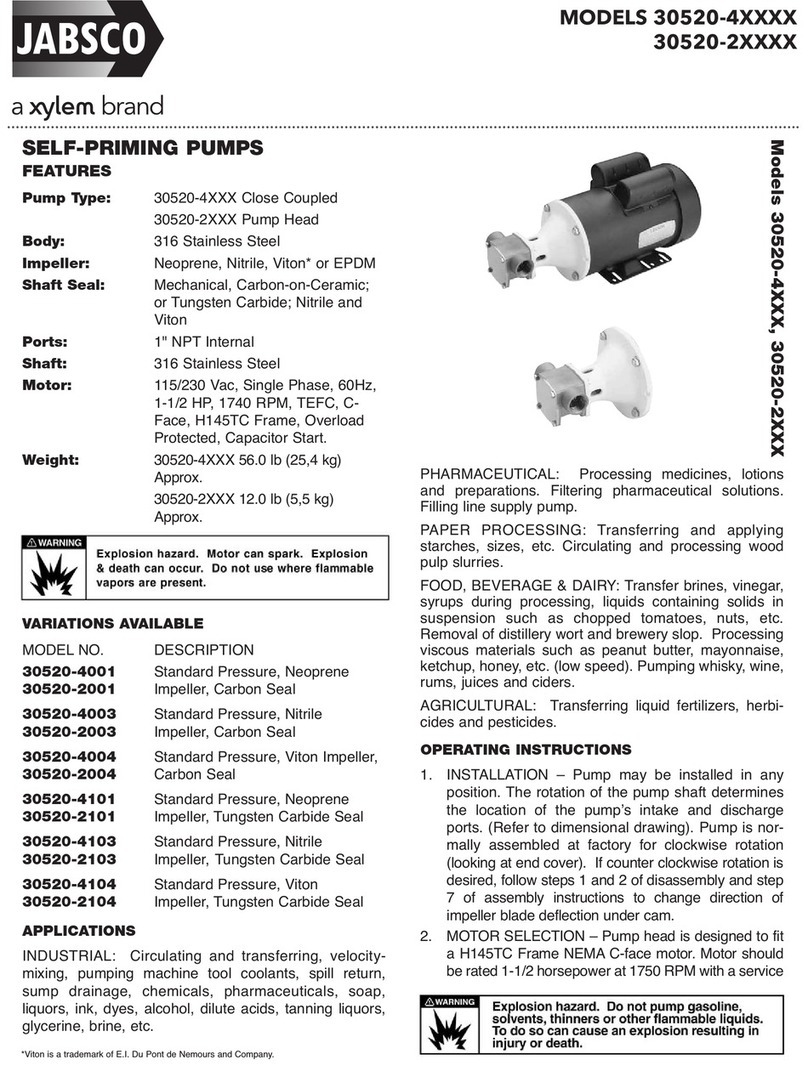
JABSCO 30520-4 Series User manual

JABSCO

JABSCO 30520-4 Series User manual

JABSCO 59520 Series User manual

JABSCO

JABSCO 59520 Series User manual

JABSCO 30296 Series User manual

JABSCO

JABSCO 30296 Series User manual

JABSCO 28 Series User manual

JABSCO

JABSCO 28 Series User manual

JABSCO 29200-0120 User manual

JABSCO

JABSCO 29200-0120 User manual

JABSCO 52520-1000 User manual

JABSCO

JABSCO 52520-1000 User manual

JABSCO 30580-0 Series User manual

JABSCO

JABSCO 30580-0 Series User manual

JABSCO 18940-0010 Owner's manual

JABSCO

JABSCO 18940-0010 Owner's manual

JABSCO 30510-3 Series User manual

JABSCO

JABSCO 30510-3 Series User manual

JABSCO 37202-Series User manual

JABSCO

JABSCO 37202-Series User manual

JABSCO 30560-0 Series User manual

JABSCO

JABSCO 30560-0 Series User manual

JABSCO 51510 Series User manual

JABSCO

JABSCO 51510 Series User manual

JABSCO 30580 Series User manual

JABSCO

JABSCO 30580 Series User manual

JABSCO 18330 Series User manual

JABSCO

JABSCO 18330 Series User manual

JABSCO 31295-0092 User manual

JABSCO

JABSCO 31295-0092 User manual

JABSCO 31295 Series User manual

JABSCO

JABSCO 31295 Series User manual

JABSCO 50840 Series User manual

JABSCO

JABSCO 50840 Series User manual

JABSCO 32605 Series User manual

JABSCO

JABSCO 32605 Series User manual

JABSCO 17860 Series User manual

JABSCO

JABSCO 17860 Series User manual

JABSCO 18490-0000 Operation manual

JABSCO

JABSCO 18490-0000 Operation manual

JABSCO 18590 Series User manual

JABSCO

JABSCO 18590 Series User manual

JABSCO 2620 Series User manual

JABSCO

JABSCO 2620 Series User manual

JABSCO 33745-0000 User manual

JABSCO

JABSCO 33745-0000 User manual

Popular Water Pump manuals by other brands

Watershed Innovations HYDRAPUMP SMART FLEX Instructional manual

Watershed Innovations

Watershed Innovations HYDRAPUMP SMART FLEX Instructional manual

Graco Modu-Flo AL-5M instructions

Graco

Graco Modu-Flo AL-5M instructions

Messner MultiSystem MPF 3000 operating instructions

Messner

Messner MultiSystem MPF 3000 operating instructions

Xylem Bell & Gossett WEHT0311M Installation, operation and maintenance instructions

Xylem

Xylem Bell & Gossett WEHT0311M Installation, operation and maintenance instructions

WilTec 50739 Operation manual

WilTec

WilTec 50739 Operation manual

Franklin Electric Little Giant 555702 HRK-360S instruction sheet

Franklin Electric

Franklin Electric Little Giant 555702 HRK-360S instruction sheet

Ingersoll-Rand PD02P Series Operator's manual

Ingersoll-Rand

Ingersoll-Rand PD02P Series Operator's manual

VS ZJ Series Operating	 instruction

VS

VS ZJ Series Operating instruction

Flotec FPZS50RP owner's manual

Flotec

Flotec FPZS50RP owner's manual

SKF Lincoln FlowMaster II User and maintenance instructions

SKF

SKF Lincoln FlowMaster II User and maintenance instructions

Xylem Lowara LSB Series Installation, operation and maintenance instructions

Xylem

Xylem Lowara LSB Series Installation, operation and maintenance instructions

Water Duro Pumps DCJ500 Operating & installation instructions

Water

Water Duro Pumps DCJ500 Operating & installation instructions

Action P490 Operating instructions & parts manual

Action

Action P490 Operating instructions & parts manual

Flo King Permacore Reusable Carbon Bag Disassembly. & Cleaning Instructions

Flo King

Flo King Permacore Reusable Carbon Bag Disassembly. & Cleaning Instructions

ARO ARO PD15P-X Operator's manual

ARO

ARO ARO PD15P-X Operator's manual

Pumptec 112V Series Operating instructions and parts manual

Pumptec

Pumptec 112V Series Operating instructions and parts manual

Virax 262070 user manual

Virax

Virax 262070 user manual

Neptun NPHW 5500 operating instructions

Neptun

Neptun NPHW 5500 operating instructions

manuals.online logo
manuals.online logoBrands
  • About & Mission
  • Contact us
  • Privacy Policy
  • Terms and Conditions

Copyright 2025 Manuals.Online. All Rights Reserved.

STANDARD MODELS
Amperage
Model Voltage (Nominal)
36680-2000 12 Vdc 7
36680-2010 24 Vdc 5
Model 36680-2 Series
ELECTRIC BILGE PUMP
FEATURES
• Self-Priming
• Diaphragm Design Allows Dry Running
• Quiet Operation
• Built-in Hydraulic Pulsation Dampener
• Permanently Lubricated Ball Bearings on Shaft and
Connecting Rod
• Corrosion Resistant Materials Throughout for Sea Water
Service
• NMMA Type Accepted
• Meets USCG Regulation 183.410 and ISO 8846 MARINE
for Ignition Protection.
SPECIFICATIONS
U.S. GPM Liters/Min. Imp.GPM
Open Flow: 5.5 21 4.5
Vert. Dry Suction Lift: 7 Feet (2,1m)
Ports: 3/4” Slip-on Hose
Weight: 8 lb (3,6 kg)
INSTALLATION
MOUNTING
Mount upright in a dry location (above highest bilge water
level) on a solid surface. Selection of a dry cool ventilated
location will generally extend pump life. Adjust belt tension
for 1/4 inch play between pulleys.
PLUMBING
For intake and discharge use 3/4” ID non-collapsible hose.
Keep intake and discharge lines free of kinks and restric-
tions. Use a 3/4” bilge strainer (Model 35890-0000) or a 3/4”
in-line strainer (Model 36200-0000) in the intake line from the
bilge to protect pump from debris. Use a 3/4” thru-hull fitting
located above the waterline at all angles of heel or pitch.
WIRING
Wiring pump in a circuit independent of all other electrical
fixtures. Use stranded copper wire. Install fuse/breaker in
positive lead. See table for recommended wire and fuse size.
Model 36680-2 Series
MAINTENANCE
WINTER STORAGE: When possible, it is preferred that the
complete pump be removed and stored in a warm dry place.
If this is not possible, the pump must be completely drained,
hoses removed and pump run until all water is expelled.
WIRING AND FUSE SIZE
Model Model
Wire Length Between 36680-2000 36680-2010
Battery and Motor 12 Volt 24 Volt
1-25 feet 12 AWG 14 AWG
25-50 feet 10 AWG 14 AWG
Fuse/Breaker* 10 AMP 6 AMP
*Customer supplied, not included with pump.
DIMENSIONAL DRAWING
Inches (Millimetres)
MANUAL
OFF
PUMP
AUTOMATIC
BATTERY FUSE/
BREAKER
Automatic Bilge Switch
Model 34875-0000 or
Model 30295-1000
per instructions
3-WAY SWITCH
44960-0001
WIRING DIAGRAM FOR AUTOMATIC OPERATION
See diagram for wiring connections. Use a 10 amp-rated
switch (44960-Series). After installation, it is recommended
that voltage be checked at the motor terminals with motor
operating under full load. Voltage should not be less than
90% of rated motor voltage.
43000-0534 (36680-2) 10/11/02 5:23 PM Page 1
U.S.A.
Jabsco
20 Icon
Foothill Ranch, CA 92610-3000
Tel: (949) 609-5106
Fax: (949) 859-1254
UNITED KINGDOM
Jabsco
Bingley Road, Hoddesdon
Hertfordsire EN11 OBU
Tel: +44 (0) 1992 450145
Fax: +44 (0) 1992 467132
CANADA
Fluid Products Canada
55 Royal Road
Guelph, Ontario N1H 1T1
Tel: (519) 821.1900
Fax: (519) 821.2569
JAPAN
NHK Jabsco Company Ltd.
3-21-10, Shin-Yokohama
Kohoku-Ku, Yokohama, 222
Tel: 045.475.8906
Fax: 045.475.8908
GERMANY
Jabsco GmbH
Oststrasse 28
22840 Norderstedt
Tel: +49-40-53 43 73 -0
Fax: +49-40-53 53 73 -11
© Copyright 2002, ITT Industries Printed in U.S.A. All Rights Reserved Form: 43000-0534 Rev. 10/2002
EXPLODED VIEW
PARTS LIST
36680-Series
PART
KEY DESCRIPTION NUMBER QTY
1 Motor Kit 12 Vdc 30200-0000 1
1 Motor Kit 24 Vdc 30200-0010
2 Motor Mount 34628-0000 1
3 Small Pulley 37169-0000 1
4 Large Pulley 37171-0001 1
5 Belt 30022-0000* 1
6 Jack Shaft Assembly 35690-0002 – see Note 1 1
7 Connecting Rod Kit 37173-0001 – see Note 1 1
8 Diaphragm Plate 35212-0000 2
9 Diaphragm 30016-0000* 1
10 Retainer 35173-0000 1
11 Valve Set (Inlet & Outlet) 30003-0000*† 1 Set
12 Base Assembly†44114-1000 1
13 Ports (Inlet & Outlet) Barb 37175-0000† 1 Set
15 Pulsation Dampener 44127-1000 1
17 Bottom Plate 35686-0000†1
20 Vibration Pad Kit 43990-0058† 1 Set
21 Hardware Kit 43990-0071 1 Set
Service Kit* 43990-0062
SERVICE
TROUBLESHOOTING
Problems Causes
Loss of suction to pump — Air leak in suction line.
— Bilge pickup not submerged.
— Intake hose kinked or plugged.
— Fouled intake or discharge value.
— Ruptured diaphragm.
Rough or noisy operation — Intake or discharge hose kinked
or plugged.
— Pump not mounted firmly.
— Loosened eccentric screw.
— Ruptured or collapsed pulsation
dampener.
VALVE REPLACEMENT
1. Remove four bolts securing jack shaft assembly.
2. Expose valves by lifting jack shaft and the attached
diaphragm assembly from pump base. Remove and clean
or replace valves.
3. Install valves, making sure rubber flapper is UP on intake
and DOWN on discharge.
4. Replace motor-mount-diaphragm assembly and fasten evenly
to base with the four tie down bolts and washers.
DIAPHRAGM AND CONNECTING ROD REPLACEMENT
1. Remove four bolts securing jack shaft assembly.
2. Lift jack shaft and the attached diaphragm assembly from
pump base.
3. Remove two diaphragm retainer screws and the bottom
diaphragm retainer.
4. Remove lock nut. Remove connecting rod and diaphragm
from the top of diaphragm retainer, then unscrew bolt to
separate diaphragm plates.
5. Check diaphragm for cuts and cracks. Check rod assembly
bearing for excessive wear. Replace if badly worn.
6. Loosely reassemble diaphragm, diaphragm plates, connecting
rod spacer and diaphragm bolt onto connecting rod. Using lock
nut, firmly secure connecting rod to jack shaft. Secure
diaphragm to upper diaphragm retainer with the bottom
diaphragm retainer and two screws.
7. Tighten connecting rod bolt.
8. Replace motor-mount-diaphragm assembly and fasten evenly
to base with the four tie down bolts and washers.
PULSATION DAMPENER REPLACEMENT
1. Disconnect power leads from pump and remove from mount.
2. Remove nine bottom plate screws and the bottom plate.
Pull out and replace pulsation dampener.
3. Replace bottom plate and screws. Tighten evenly to ensure
an air and water seal.
4. Reinstall pump and reconnect power leads.
* Indicates parts contained in Service Kit.
†Indicates parts supplied with Base Assembly.
NOTE 1 — Jack shaft assembly kit, with part number ending in -0002
includes new style connecting rod (37173-0001) with a 5/16” diameter hole
and two (2) lock nuts. Previous model pumps use a connecting rod (37173-
0000) with a 1/4” diameter hole and a bolt.
THE PRODUCTS DESCRIBED HEREIN ARE SUBJECT TO THE
JABSCO ONE YEAR LIMITED WARRANTY, WHICH IS AVAILABLE
FOR YOUR INSPECTION UPON REQUEST.
NOTICE: Turn off power to pump before servicing. Failure to do
so could cause leakage of water during repair.
43000-0534 (36680-2) 10/11/02 5:23 PM Page 2