JackRabbit 30 User manual

JACKRABBIT
!
!
OWNER’S – OPERATOR’S MANUAL
!
!
!
!
30/36 ELEVATOR
With
WOODCHUCK DESTICKER
!
!
!
!
!
!
!
!
!
!
!
!
Phone (209) 599-6118 Fax (209) 599-6119
6/10/14 E-mail sales@jackrabbit.bz or info@jackrabbit.bz

!
2!
TO OUR CUSTOMERS:
!
Thank you for choosing JackRabbit. We stand behind our products and are very proud of the
equipment we design and manufacture. Preventive maintenance is the easiest and least
expensive type of maintenance. Please take the time to review this Owner’s Operator’s Manual.
It can save you time and expense.
WARRANTY
!
JACKRABBIT warrants each new piece of equipment and parts manufactured by it to be free
from defects in material and workmanship under normal use and service. The obligation of
JACKRABBIT shall be limited to replacing any part which shall, within 1 year (1 season) after
delivery to the original purchaser, be returned to JACKRABBIT with transportation charges
prepaid and which an examination by JACKRABBIT discloses defective. This Warranty does
not obligate JACKRABBIT to bear the cost of labor, travel time or hauling in connection with
the replacement or repair of the defective parts and in no event will be liable for consequential
damages including but not limited to loss of crop, rental or substitute equipment or other
commercial loss.
!
No warranties or representations made by persons other than representatives of JACKRABBIT
expressly authorized in writing to do so shall be valid and binding upon JACKRABBIT. No
dealer shall be authorized to bind JACKRABBIT in this respect.
!
JACKRABBIT makes no warranty with respect to component parts not manufactured by
JACKRABBIT. This warranty shall not apply to any equipment which has been altered in any
way outside of manufacturer’s factory, or which has been subject to misuse, neglect or accident.
!
This warranty is expressly in lieu of all other warranties and representations, expressed,
implied, or statutory, including warranties of merchantability and fitness for a particular
use, and all other liabilities or obligations on the part of JACKRABBIT, foreseeable or not.
!
USER’S RESPONSIBILITY
!
It is the responsibility of the user to read the Operator’s Manual and understand the safe and
correct operating procedures as pertains to the operation of the product and to lubricate and
maintain the product according to the maintenance schedule in the Operator’s Manual.
!
WARRANTY SERVICE
!
Warranty service may be obtained through an authorized dealer or JackRabbit service facility.
Write or call: JackRabbit, 471 Industrial Ave, CA 95366, telephone (209) 599-6118
Website: www.jackrabbit.bz
!
!
!
!
!
!
!
!
6/10/14

!
3!
TABLE OF CONTENTS
!
Page
SAFETY!......................................................................................................................................................!4!
!!!SAFETY!SIGNAL!WORDS!..........................................................................................................................!4!
!!GENERAL!SAFETY!GUIDELINES!................................................................................................................!5!
!!SAFETY!DECAL!CARE!................................................................................................................................!5!
!!TIRE!SAFETY!.............................................................................................................................................!6!
!!LIGHTING!AND!MARKING!........................................................................................................................!6!
!!BEFORE!OPERATION!................................................................................................................................!6!
!!DURING!OPERATION!...............................................................................................................................!7!
!!HIGHWAY!AND!TRANSPORT!OPERATIONS!..............................................................................................!9!
!!FOLLOWING!OPERATION!......................................................................................................................!10!
SECTION(B(SPECIFICATIONS(.......................................................................................................(16!
SECTION(C(CONTROLS,(GAUGES(AND(VALVES(.......................................................................(18!
SECTION(D(OPERATING(PROCEDURES(....................................................................................(21!
TOWING!..................................................................................................................................................!24!
SECTION(E(MAINTENANCE(PROCEDURES(AND(SCHEDULE(...............................................(26!
ENGINE!FILTER!SERVICE!INSTRUCTIONS!.................................................................................................!27!
CONVEYOR!BELT!ADJUSTMENTS!INSTRUCTIONS!....................................................................................!29!
STORAGE!OFF!SEASON!............................................................................................................................!33!
SECTION(F(SYSTEMS(DIAGRAMS(................................................................................................(34!
SECTION(G(TROUBLE(SHOOTING(...............................................................................................(38!

!
!
4!
SAFETY
Read and understand this manual and all safety signs before operating and maintaining.
Review the safety instructions and precautions annually.
TAKE NOTE! THIS SAFETY ALERT SYMBOL FOUND THROUGHOUT THIS MANUAL IS
USED TO CALL YOUR ATTENTION TO INSTRUCTIONS INVOLVING YOUR PERSONAL
SAFETY AND THE SAFETY OF OTHERS. FAILURE TO FOLLOW THESE INSTRUCTIONS
CAN RESULT IN INJURY OR DEATH.
THIS SYMBOL MEANS
-ATTENTION!
-BECOME ALERT!
-YOUR SAFETY IS INVOLVED!
SAFETY SIGNAL WORDS
Note the use of the signal words
DANGER, WARNING and
CAUTION with the safety messages.
The appropriate signal word for each
has been selected using the
following guidelines:
DANGER: Indicates an imminently
hazardous situation that, if not
avoided, will result in death or
serious injury. This signal word is to
be limited to the most extreme
situations typically for machine
components which, for functional
purposes, cannot be guarded.
WARNING: Indicates a potentially
hazardous situation that, if not
avoided, could result in death or
serious injury, and includes hazards
that are exposed when guards are
removed. It may also be used to
alert against unsafe practices.
CAUTION: Indicates a potentially
hazardous situation that, if not
avoided, may result in minor or
moderate injury. It may also be
used to alert against unsafe
practices.

!
!
5!
GENERAL SAFETY GUIDELINES
Safety of the operator is one of the main concerns in designing and developing a new piece of
equipment. Designers and manufacturers build in as many safety features as possible.
However, every year many accidents occur which could have been avoided by a few seconds
of thought and a more careful approach to handling equipment. You, the operator, can avoid
many accidents by observing the following precautions in this section. To avoid personal
injury, study the following precautions and insist those working with you, or for you, follow
them.
Replace any CAUTION, WARNING, DANGER or instruction safety decal that is not readable
or is missing. Location of such decals is indicated in this booklet.
Do not attempt to operate this equipment under the influence of drugs or alcohol.
Review the safety instructions with all users annually.
This equipment is dangerous to children and persons unfamiliar with its operation. The
operator should be a responsible adult familiar with farm machinery and trained in this
equipment’s operations. Do not allow persons to operate or assemble this unit until they
have read this manual and have developed a thorough understanding of the safety
precautions and of how it works.
To prevent injury or death, use a tractor equipped with a Roll Over Protective System (ROPS).
Do not paint over, remove or deface any safety signs or warning decals on your equipment.
Observe all safety signs and practice the instructions on them.
Never exceed the limits of a piece of machinery. If its ability to do a job, or to do so safely, is
in question - DON’T TRY IT.
SAFETY DECAL CARE
•Keep safety signs clean and legible at all times.
•Replace safety signs that are missing or have become illegible.
•Replaced parts that displayed a safety sign should also display the current sign.
•Safety signs are available from your Distributor or Dealer Parts Department or the
factory.
How$to$Install$Safety$Signs:!
•Be sure that the installation area is clean and dry.
•Decide on the exact position before you remove the backing paper.
•Remove the smallest portion of the split backing paper.
•Align the decal over the specified area and carefully press the small portion with the
exposed sticky backing in place.
•Slowly peel back the remaining paper and carefully smooth the remaining portion of
the decal in place.
•Small air pockets can be pierced with a pin and smoothed out using the piece of decal
backing paper.

!
!
6!
TIRE SAFETY
!
•Failure to follow proper procedures when mounting a tire on a wheel or rim can produce
an explosion which may result in serious injury or death.
•Do not attempt to mount a tire unless you have the proper equipment and experience to
do the job.
•Inflating or servicing tires can be dangerous. Whenever possible, trained personnel
should be called to service and/or mount tires.
•Always order and install tires and wheels with appropriate capacity to meet or exceed the
anticipated weight to be placed on the equipment.
•The rims and tires should be mounted on the feeder with the valve stem to the inside. We
use reverse disc rims as a protection that livestock do not step on the valve stems and
break them off. Be sure you have proper tire pressure and the lug nuts are properly
tightened. Check wheel bearings on a regular basis and grease semiannually.
LIGHTING AND MARKING
!
•It is the responsibility of the customer to know the lighting and marking requirements of the
local highway authorities and to install and maintain the equipment to provide compliance
with the regulations. Add extra lights when transporting at night or during periods of
limited visibility.
•Lighting kits are available from your dealer or from the manufacturer.
BEFORE OPERATION
•
•Carefully study and understand this manual.
•Do not wear loose-fitting clothing which may catch in moving parts.
•Always wear protective clothing and substantial shoes.
•Keep wheel lug nuts or bolts tightened to specified torque.
•Assure that agricultural implement tires are inflated evenly.
•Give the unit a visual inspection for any loose bolts, worn parts or cracked welds, and
make necessary repairs. Follow the maintenance safety instructions included in this
manual.
•Be sure that there are no tools lying on or in the equipment.

!
!
7!
•Do not use the unit until you are sure that the area is clear, especially children and
animals.
•Don’t hurry the learning process or take the unit for granted. Ease into it and become
familiar with your new equipment.
•Practice operation of your equipment and its attachments. Completely familiarize yourself
and other operators with its operation before using.
•Use a tractor equipped with a Roll Over Protective System (ROPS) and fasten your seat
belt prior to starting the engine.
•The manufacturer does not recommend usage of tractor with ROPS removed.
•Move tractor wheels to the widest recommended settings to increase stability.
•Securely attach to towing unit. Use a high strength, appropriately-sized hitch pin with a
mechanical retainer and attach safety chain.
•Do not allow anyone to stand between the tongue or hitch and the towing vehicle when
backing up to the equipment.
DURING OPERATION
•Children should not be allowed on the product.
•Clear the area of small children and bystanders before moving the feeder.
•Securely attach feeder to towing unit, using a hardened 3/4” pin, a metal retainer, and
safety chains if required. Shift towing unit to a lower gear before going down steep
downgrades, thus using the engine as a retarding force. Keep towing vehicle in gear at all
times. Slow down for corners and rough terrain.
•Make sure you are in compliance with all local and state regulations regarding transporting
equipment on public roads and highways. Lights and slow moving signs must be clean
and visible by overtaking or oncoming traffic when feeder is transported.
•SAFETY CHAIN - If equipment is going to be transported on a public highway, a safety
chain should be obtained and installed. Always follow state and local regulations
regarding a safety chain and auxiliary lighting when towing farm equipment on a public
highway. Be sure to check with local law enforcement agencies for your own particular
regulations. Only a safety chain (not an elastic or nylon/plastic tow strap) should be used
to retain the connection between the towing and towed machines in the event of
separation of the primary attaching system.
•Install the safety chain by crossing the chains under the tongue and secure to the draw bar
cage or hitch or bumper frame.
•Beware of bystanders, particularly children! Always look around to make sure that it is
safe to start the engine of the towing vehicle or move the unit. This is particularly
important with higher noise levels and quiet cabs, as you may not hear people shouting.
!
!
8!
•NO PASSENGERS ALLOWED - Do not carry passengers anywhere on, or in, the tractor
or equipment, except as required for operation.
•Keep hands and clothing clear of moving parts.
•Do not clean, lubricate or adjust your equipment while it is moving.
•When halting operation, even periodically, set the tractor or towing vehicle brakes,
disengage the PTO, shut off the engine and remove the ignition key.
•Be especially observant of the operating area and terrain - watch for holes, rocks or other
hidden hazards. Always inspect the area prior to operation.
−DO NOT operate near the edge of drop-offs or banks.
−DO NOT operate on steep slopes as overturn may result.
−Operate up and down (not across) intermediate slopes. Avoid sudden starts and
stops.

!
!
9!
HIGHWAY AND TRANSPORT OPERATIONS
•Adopt safe driving practices:
−Keep the brake pedals latched together at all times. NEVER USE INDEPENDENT
BRAKING WITH MACHINE IN TOW AS LOSS OF CONTROL AND/OR UPSET OF
UNIT CAN RESULT.
−Always drive at a safe speed relative to local conditions and ensure that your speed is
low enough for an emergency stop to be safe and secure. Keep speed to a minimum.
−Reduce speed prior to turns to avoid the risk of overturning.
−Avoid sudden uphill turns on steep slopes.
−Always keep the tractor or towing vehicle in gear to provide engine braking when going
downhill. Do not coast.
−Do not drink and drive!
•Comply with state and local laws governing highway safety and movement of farm
machinery on public roads.
•Use approved accessory lighting flags and necessary warning devices to protect operators
of other vehicles on the highway during daylight and nighttime transport. Various safety
lights and devices are available from your dealer.
•The use of flashing amber lights is acceptable in most localities. However, some localities
prohibit their use. Local laws should be checked for all highway lighting and marking
requirements.
•When driving the tractor and equipment on the road or highway under 40 kph (20 mph) at
night or during the day, use flashing amber warning lights and a slow moving vehicle
(SMV) identification emblem.
•Plan your route to avoid heavy traffic.
•Be a safe and courteous driver. Always yield to oncoming traffic in all situations, including
narrow bridges, intersections, etc.
•Be observant of bridge loading ratings. Do not cross bridges rated lower than the gross
weight as which you are operating.
•Watch for obstructions overhead and to the side while transporting.
•Always operate equipment in a position to provide maximum visibility at all times. Make
allowances for increased length and weight of the equipment when making turns, stopping
the unit, etc.
•Pick the levelest possible route when transporting across fields. Avoid the edges of
ditches or gullies and steep hillsides.

!
!
10!
•Be extra careful when working on inclines.
•Maneuver the tractor or towing vehicle at safe speeds.
•Avoid overhead wires or other obstacles. Contact with overhead lines could cause serious
injury or death.
•Avoid loose fill, rocks and holes; they can be dangerous for equipment operation or
movement.
•Allow for unit length when making turns.
•Operate the towing vehicle from the operator’s seat only.
•Never stand alongside of unit with engine running or attempt to start engine and/or operate
machine while standing alongside of unit.
•Never leave running equipment attachments unattended.
•As a precaution, always recheck the hardware on equipment following every 100 hours of
operation. Correct all problems. Follow the maintenance safety procedures.
FOLLOWING OPERATION
•Following operation, or when unhitching, stop the tractor or towing vehicle, set the brakes,
disengage the PTO and all power drives, shut off the engine and remove the ignition
keys.
•Store the unit in an area away from human activity.
•Do not park equipment where it will be exposed to livestock for long periods of time.
Damage and livestock injury could result.
•Do not permit children to play on or around the stored unit.
•Make sure all parked machines are on a hard, level surface and engage all safety devices.
•Wheel chocks may be needed to prevent unit from rolling.

!
!
11!
PERFORMING MAINTENANCE
•Good maintenance is your responsibility. Poor maintenance is an invitation to trouble.
•Make sure there is plenty of ventilation. Never operate the engine of the towing vehicle in
a closed building. The exhaust fumes may cause asphyxiation.
•Before working on the vehicle, set the brakes, disengage the PTO and all power drives,
shut off the engine and remove the ignition keys.
•Be certain all moving parts on attachments have come to a complete stop before
attempting to perform maintenance.
•Always use a safety support and block the wheels. Never use a jack to support the
feeder.
•Always use the proper tools or equipment for the job at hand.
•Use extreme caution when making adjustments.
•Never replace hex bolts with less than grade five bolts unless otherwise specified.
•After servicing, be sure all tools, parts and service equipment are removed.
•Where replacement parts are necessary for periodic maintenance and servicing, genuine
factory replacement parts must be used to restore your equipment to original
specifications. The manufacturer will not claim responsibility for use of unapproved parts
and/or accessories and other damages as a result of their use.
•If equipment has been altered in any way from original design, the manufacturer does not
accept any liability for injury or warranty.
$

!
12!
SECTION A SAFETY
INSTRUCTIONS
!
IMPORTANT SAFETY NOTICE
!
Improper practices or carelessness can cause bodily injury or death.
!
Always instruct the operator in proper operating procedures. The operator must read and
understand all safety instructions in the Owner’s Operator’s Manual and those placed on
the 30/36 elevator.
!
SAFETY INSTRUCTIONS
!
1. Danger: Always check and make sure elevator’s operational site is a safe distance
from power lines.
!
2. Danger: Operational site should be level to prevent tipping of the unit during
operation.
!
3. Warning: All guards must be in place prior to starting the elevator or Wood Chuck.
!
4. Warning: Always check, making sure all personnel are clear of elevator prior to
starting engine.
!
5. Danger: The belts and WoodChuck may be started and stopped unexpectedly when the
engine is running. Keep all personnel clear of belts, WoodChuck fingers and moving
parts when the engine is running.
!
See page 7 item 2 for remote control information.
!
6. Danger: Stop belts and WoodChuck, and turn off engine prior to clearing material
from belts or Wood Chuck.
!
7. Warning: Turn off engine prior to tightening or adjusting belts (see page 17 for belt
adjustments).
!
8. Warning: Turn off engine prior to tightening or adjusting WoodChuck chain.
!
9. Warning: Always wear protective eye goggles when checking for hydraulic leaks. Do
not check hydraulic lines for leaks with your hands. High pressure oil leaking
through a small hole will penetrate the skin. This will cause serious bodily injury or
death.
!
10. Danger: Always check route to be traveled prior to towing the 30/36 elevator.
Check the route for low electric power lines and other obstructions.

!
13!
11. Warning: Always use a suitable tow vehicle. The vehicle must be designed to tow a
unit weighing 8,000 lbs at speeds up to 55 mph.
!
12. Danger: Never tow the 30/36 elevator at a speed above 55 mph.
!
13. Danger: Never tow the 30/36 elevator on a public road or highway at night without
lights.
!
14. Warning: Always use a safety chain when towing the 30/36 elevator.
!
15. Caution: Always check tires for damage and proper inflation prior to towing the
30/36 elevator.
!
16. Warning: Always install the “Transit Link” prior to towing the elevator.
See page 13 for details.
!
17. Caution: Always replace safety labels and signs if they become illegible.

!
14!
INSTRUCCIONES DE SEGURIDAD
!
AVISO IMPORTANTE DE SEGURIDA
!
Uso incorrecto o descuido puede causar lesiones o muerte.
!
Siempre ensene al operador el procedimiento propio de operacion. El operador debe de
leer y entender todas las instrucciones de seguridad en el manual de operactiony las reglas
puestas en el 30/36 elevador.
!
INSTRUCCIONES DE SEGURIDAD
!
1. Peligro: Siempre revise y este seguro que el sitio de operacion del elevador este
localizado a una distanica segura de las lineas de conduccion electricas.
!
2. Peligro: El sitio de operacion debe de estar plano para prevenir que se incline la
unidad cuando este en operaction.
!
3. Advertencia: Todas las guardias de ben de estar puestas antes de comenzar el
elevador o Wood Chuck.
!
4. Advertencia: Siempre revise y este seguro que el parsonal este alejado del elevador
antes de comenzar el motor.
!
5. Peligro: Las bandas y el WoodChuck se activarán y detendrán inesperadamente
cuando el motor se encuentra en marcha. Mantener a todo el personal alejado de las
bandas, los dedos del WoodChuck y las piezas en movimiento cuando el motor se
encuentra en marcha.
!
Consulte la información de control remoto en la partida 2 de la página 7.
!
6. Advertencia: Pare las bandas y Wood Chuck, y apague el motor antes de limpiar el
material de las bandas o Wood Chuck.
!
7. Advertencia: Apague el motor antes de apretar y ajustar las bandas (vea en la
pagina 17 para el ajuste de las bandas).
!
8. Advertencia: Apague el motor antes de apretar o ajustar la cadena del Wood
Chuck.
!
9. Advertencia: Siempre use lentes de proteccion cuando revise goteras de acelte
hidraulico. No revise las goteras de lineas hidraulicas con sus manos. Goteras de
aceite con presion alta puede penetrar la piel. Esto puede causar heridas al cupero o
la muerte.
!
10. Peligro: Siempre revise la ruta que va a ser recorrida antes de manejar el 30/36 a
un sitio nuevo, para que no haiga lines de electricidad bajas y otros obstaculos.

!
15!
11. Advertencia: Siempre use un vehiculo de remolque apropiado. El vehiculo debe de
estar discenado para remolcar una unidad que peso 8,000 libras a velocidades hasta
55 mph.
!
12. Peligro: Nunca remolque el 30/36 a vehocidades arriba de 55 mph.
!
13. Peligro: Nunca remolque el 30/36 en camino publicos o carreteras durante la
noche sin luces.
!
14. Advertencia: Siempre use cadenas de seguridad cuando remolque el 30/36.
!
15. Advertencia: Siempre revise las llantas por danos y inflacion propias antes de
remolear el 30/36.
!
16. Advertencia: Siempre instale el “eslabón de traslado” antes de remolcar el elevador
30/36. Consulte los detalles en la página 13.
!
17. Advertencia: Siempre reemplaze las etiquetas y lateroros de seguridad si estan
ilegibles.

!
!
16!
SECTION B SPECIFICATIONS
!
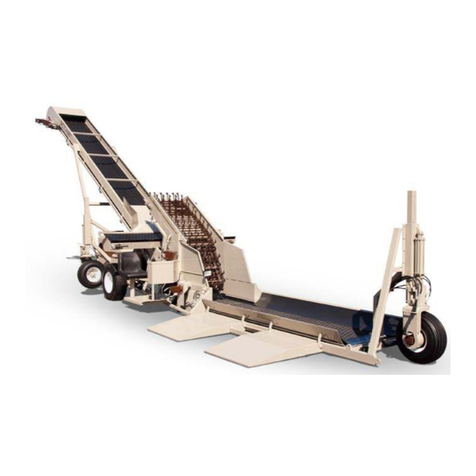
30/36 ELEVATOR
!
!
!
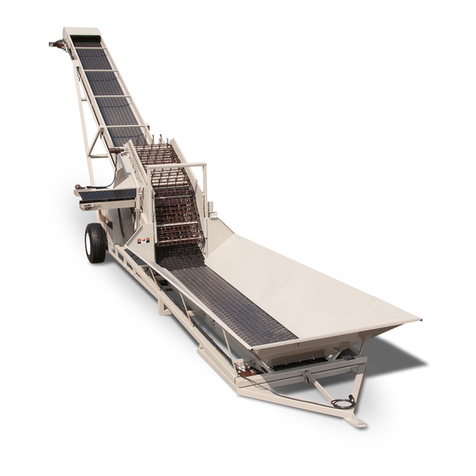
Product Transfer Two belts: horizontal belt in hopper feeds material onto
inclined belt.
!
Belt Width Horizontal: 30”
Inclined: 36”
!
Belt Speed Variable horizontal belt speed
!
Belt Drive Hydraulic motors
!
Hopper Width 6’ 8” Length 16’
!
Length 44’ 2’’ overall (Standard Model)
!
Height 13’ 1” (in towing configuration) Standard Model
!
Spout Clearance 15’ (in operating configuration) Standard Model
!
16’ 6” (in operating configuration) with 30 degree incline
conveyor& 3 ft. extension (Option)
!
Width 8’ 8”
Weight 7720 lbs
Tires (2) 12-16.5 TLR R-3
!
Controls Pod mounted, adjustable
!
Jack Stand Hydraulic
!
Power Deutz diesel, D2011 L4i
!
WoodChuck Desticker Optional
!
All specifications subject to change without notice. For further information call
JackRabbit at (209) 599-6118.

!
!
17!
MAINTENANCE MATERIAL SPECIFICATIONS
!
1. Engine Oil: 15W = 40 Multi-viscosity motor oil.
(See Operation Manual for special conditions).
!
2. Engine Oil Filter: JackRabbit 27010 Deutz 117 4416
!
3. Fuel Filter: JackRabbit 27011 Deutz 117 4696
!
4. Fuel Capacity = 42 US gal
!
5. Hydraulic Oil ISO – 68
Capacity 24 US gal with filter change
!
6. Hydraulic Oil Filter: JackRabbit 27811 LHS SPE 60 – 10
!
7. Lubricant (Grease): Lithium Base NGL 1 or NGL 2 (For extreme pressure)
!
8. Air Filters:
Outer – JackRabbit 27013 4L-1B P827653
Inner – JackRabbit 27014 4L-1B P829332
!
9. Fan Belt: See Deutz “ Parts Manual”
!
10. Starter: See Deutz “Parts Manual ”
!
11. Alternator: See Deutz “Parts Manual”

!
18!
SECTION C CONTROLS, GAUGES AND VALVES
!
1. KEY SWITCH AND IGNITION: Start engine in idle position
!
2. BELTS CONROL: Rocker Switch “Push ON – Push OFF.” Push ON after engine
has started.
!
REMOTE CONTROL (option): The elevator can be equipped with a remote
control Transmitter and Receiver that allows the JackRunner driver or other
personnel to start, stop, throttle up or down without using the controls on the
elevator. The 30/36 Elevator with this option is equipped with a WARNING
HORN that will sound prior to startup of the belts or WoodChuck.
!
Keep all personnel clear of belts, WoodChuck fingers and moving parts when
elevator engine is running.
!
3. THROTTLE SPEED CONTROL – TURTLE = IDLE, RABBIT = FULL SPEED
THROTTLE: Rocker Switch Push TURTLE – Push RABBIT. This switch controls
both belts and the WoodChuck option.
!
4. & 4A BELT SPEED CONTROL: 4 is hopper belt and 4A is desticker belts. Turn
clockwise to increase belt speed. Turn counter clockwise to decrease belt speed.
This control is normally set and not changed unless there is a significant change in
product characteristics. For best performance do not adjust higher than 7 on flow
control.
!
5 SELECTOR VALVE: Push handle forward for use of the Hydraulic Jack. Pull
the handle to the rear when the WoodChuck is to be raised to the (out of operation
position) or lowered to the (in service position). Rocker switch 7 will raise or lower
the Jack or WoodChuck.
!
6. HYDRAULIC JACK: A toggle switch located on frame, near towing hitch will raise
or lower jack. Rocker switch 7 will also raise or lower jack with selector valve in
forward position.
!
7. JACK or WOODCHUCK: Rocker Switch, Push TOP of switch to raise, Push
BOTTOM to lower.
!
8. WOODCHUCK (Option): Rocker Switch Push – ON PUSH – OFF. WoodChuck
will only operate when belt control is engaged.
!
9. KEY – IGNITION LIGHT: The light glows green when the key is in the ON
position.
!
10. ALTERNATOR WARNING LIGHT: The light glows red when the battery is
discharging.

!
19!
11. OIL WARNING LIGHT: The light glows red when oil pressure is low. Engine
must be turned OFF when this light is ON or serious damage will occur.
!
12. OIL TEMPERATURE GAUGE: The gauge displays safe and unsafe operating
ranges. The engine must be turned OFF if needle is in unsafe operating range or
serious damage will occur.
!
13. FUEL GAUGE: The gauge is located on top of diesel tank.
!
14. HYDRAULIC OIL LEVEL GAUGE (Bullet Type): Level must be between gauges.
Bottom gauge must be full and the top one empty.
!
15. Hour Meter: Records time the key switch was in the on position.
!

!
20!
!
!
!
!
!
This manual suits for next models
1
Table of contents
Other JackRabbit Elevator manuals