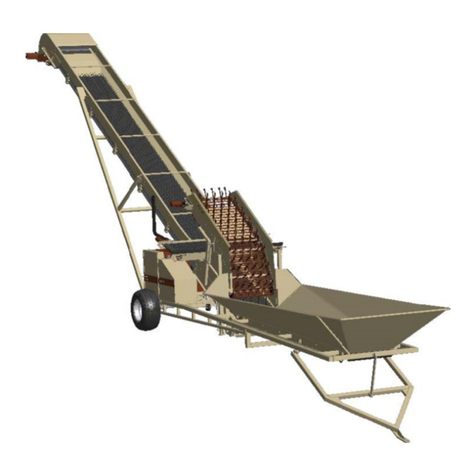
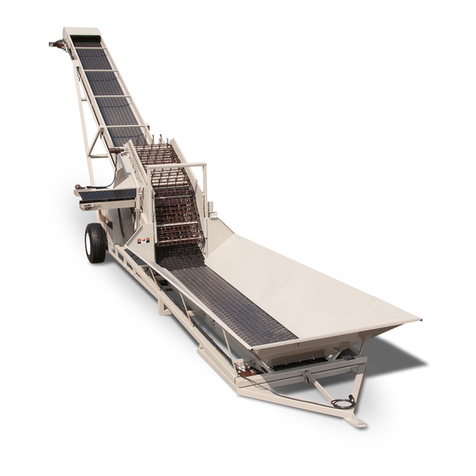
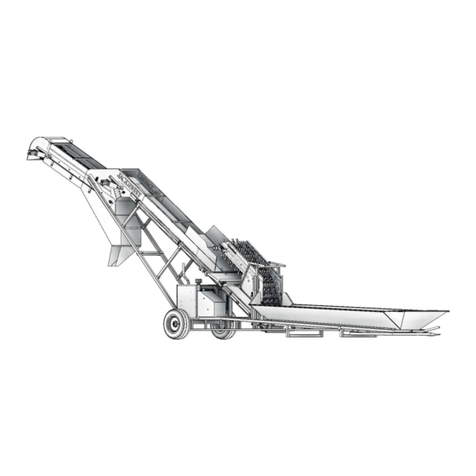
JackRabbit YARDJACK User manual

JACKRABBIT
OWNER – OPERATOR MANUAL
YARDJACK
SELF-PROPELLED 36/36 ELEVATOR
SERIAL # 34--- Year 2012

Phone (209) 599-6118 Fax (209) 599-6119
4/1/09 E-mail sales@jackrabbit.bz or info@jackrabbit.bz
TO OUR CUSTOMERS:
Thank you for choosing JackRabbit. We stand behind our products and are very proud of the
equipment we design and manufacture. Preventive maintenance is the easiest and least
expensive type of maintenance. Please take the time to review this Owner’s Operator’s Manual it
can save you time and expense.
WARRANTY
JACKRABBIT warrants each new piece of equipment and parts manufactured by it to be free
from defects in material and workmanship under normal use and service. The obligation of
JACKRABBIT shall be limited to replacing any part which shall, within 1 year (1 season) after
delivery to the original purchaser, be returned to JACKRABBIT with transportation charges
prepaid and which an examination by JACKRABBIT discloses defective. This Warranty does
not obligate JACKRABBIT to bear the cost of labor, travel time or hauling in connection with
the replacement or repair of the defective parts and in no event will be liable for consequential
damages including but not limited to loss of crop, rental or substitute equipment or other
commercial loss.
No warranties or representations made by persons other than representatives of JACKRABBIT
expressly authorized in writing to do so shall be valid and binding upon JACKRABBIT. No
dealer shall be authorized to bind JACKRABBIT in this respect.
JACKRABBIT makes no warranty with respect to component parts not manufactured by
JACKRABBIT. This warranty shall not apply to any equipment which has been altered in any
way outside of manufacturers factory, or which has been subject to misuse, neglect or accident.
This warranty is expressly in lieu of all other warranties and representations, expressed,
implied, or statutory, including warranties of merchantability and fitness for a particular
use, and all other liabilities or obligations on the part of JACKRABBIT, foreseeable or not.
USER’S RESPONSIBILITY
It is the responsibility of the user to read the Operator’s Manual and understand the safe and
correct operating procedures as pertains to the operation of the product and to lubricate and
maintain the product according to the maintenance schedule in the Operator’s Manual.
WARRANTY SERVICE
Warranty service may be obtained through an authorized dealer or JackRabbit service facility.
Write or call: JackRabbit, 471 Industrial Ave, CA 95366, telephone (209) 599-6118
TABLE OF CONTENTS
Page
Safety Instructions 1 – 2
Specifications YardJack 3 – 4
Maintenance Material Specification 4
Controls, Gauges and Valves 5 – 8
Operating Procedures 9 – 13
Maintenance Procedures and Schedule 14 – 20
Engine Air Filter Service Instructions 15 – 16
Conveyor Belt Adjustments Instructions 17
Daily Maintenance 18
125 Hour Maintenance 19
250 Hour or 3 Months Maintenance 19
500 Hour or 6 months Maintenance 19
Storage off Season 20
Systems Diagrams 21 – 23
Trouble Shooting 24
Owner Operator & Service Parts Manual Canister 25

SECTION A
IMPORTANT SAFETY NOTICE
Improper practices or carelessness can cause bodily injury or death.
Always instruct the operator in proper operating procedures. The operator must read and
understand
all safety instructions in the Owner’s - Operator’s Manual and those placed on the elevator.
If a problem arises with your equipment and a solution to the problem is not apparent, contact
your JackRabbit dealer or JackRabbit directly. Phone (209) 599-6118 or Fax (209) 599-6119.
SAFETY INSTRUCTIONS
1. Danger: Always check and make sure elevator’s operational site is a safe distance
from power lines.
2. Danger: Operational site should be level to prevent tipping of the unit.
3. Warning: All guards must be in place prior to starting the elevator.
4. Warning: Always check, making sure all personnel are clear of elevator prior to
starting engine.
5. Danger: Keep all personnel clear of belts and moving parts when in operation.
6. Stop belts and turn off engine prior to clearing material from belts.
7. Warning: Turn off engine prior to tightening or adjusting belts ( see page 17
for belt adjustments).
8. Warning: Always wear protective eye goggles when checking for hydraulic leaks.
Do not check hydraulic lines for leaks with your hands. High pressure oil
leaking
through a small hole will penetrate the skin. This will cause serious bodily injury
or death.
9. Danger: Always check route to be traveled prior to driving the elevator to a new
location for low electric power lines and other obstructions.
10. Warning: No riders.
11. Danger: Stay clear of horizontal belt when opening bottom dump trailer doors.
12. Caution: Always replace safety labels and signs if they become illegible.
1

INSTRUCCIONES DE SEGURIDAD
AVISO IMPORTANTE DE SEGURIDA
Uso incorrecto o descuido puede causar lesiones o muerte.
Siempre ensene al operador el procedimiento propio de operacion. El operador debe de
leer y entender todas las instrucciones de seguridad en el manual de operacion y las reglas
puestas en el YardJack elevador.
INSTRUCCIONES DE SEGURIDAD
1. Peligro: Siempre revise y este seguro que el sitio de operacion del elevador este
localizado a una distancia segura de las lineas de conduccion electricas.
2. Peligro: El sitio de operacion debe de estar plano para prevenir que se incline la
unidad.
3. Advertencia: Todas las guardias de ben de estar puestas antes de comenzar el
YardJack.
4. Advertencia: Siempre revise y este seguro que el personal este alejado antes de
comenzar el YardJack.
5. Peligro: Mantenga el personal alejado de las bandas y partes moviblas cuando este
en operacion.
6. Advertencia: Pare las bandas y apague el motor antes de limpiar materia de las
bandas.
7. Advertencia: Apague el motor antes de apretar y ajustar las bandas (vea en las
paginas 17 para el ajuste de las bandas).
8. Advertencia: Siempre use lentes de proteccion cuando revise goteras de aceite
hidraulico. No revise las goteras de lineas hidraulicas con sus manos. Goteras de
aceite con presion alta puede penatrar la piel. Esto puede causar heridas al cuerpo
ola muerte.
9. Peligro: Siempre revise la ruta que va a ser racorrida antes de manejar el elevador
(YardJack) a un sitio nuevo, para que no haiga lineas de electrecidad bajas y
otros
obstaculos.
10. Advertencia: No lleve pasajeros.
11. Peligro: Mantengase alejado de las bandas cuando este abriendo las puertas del
remolque de basura.
12. Advertencia: Siempre reamplaze las etiquetas y letreros de seguridad si estan
ilegibles.
2

SPECIFICATIONS
SERIAL #34---
Product Transfer Two belts: variable speed horizontal belt in drive over pan feeds material
on to incline belt in chute.
Belt Width Horizontal: 36" Inclined: 36"
Pan Height 5 1/2"
Flaps Independently hydraulically operated
Belt Speed Incline belt 700 FPM
Pan belt variable 0 - 650 FPM Belt
Drive Hydraulic motors
Hopper Length - 10' 8"
Width with flaps up - 4' 9"
Length 47' overall
Height 17’
Spout Clearance 14’ 9”
Width 12’ 5”
Weight 10,700 Lbs.
Tires (2) 16.5 – 14Ply
(3) 26 x 12.0 - 12 10 Ply, two are drivers
Controls Swiveling operator seat faces all controls during unloading and
sideways travel. Driving control moves with operator to forward
position for traveling from stock pile to stock pile.
Power Deutz Diesel TD
All specifications are subject to change without notice. For further information call JackRabbit at (209)
599-6118.
3

MAINTENANCE MATERIAL SPECIFICATIONS
1. Engine Oil: 15W - 40 Multi-viscosity motor oil. (See operation Manual for special
conditions).
2. Engine Oil Filter: JackRabbit # 27010 Deutz # 117 4417
3. Fuel Filter: JackRabbit # 27011 Deutz # 117 4696
4. Fuel Capacity = 24 US gal. Diesel
5. Hydraulic Oil: ISO - 68
Capacity 42 US gal. with filter change
6. Hydraulic Oil Filter: JackRabbit # 29491 LHA SPE 50 - 10
7. Lubricant (Grease): Lithium Base NGL l or NGL 2 (For extreme pressure)
8. Air Filters: Outer - JackRabbit # 28330
Inner - JackRabbit # 28331
9. Fan Belt: See Deutz “Spare Parts Catalog”
10. Starter: See Deutz “Spare Parts Catalog”
11. Alternator: See Deutz “Spare Parts Catalog”
12. Torque Hubs: 9 Ounces of 90W Gear Oil
4

CONTROLS, GAUGES AND VALVES
1. KEY SWITCH AND IGNITION: Start engine in idle position.
2. BELTS CONTROL (Push ON – Push OFF): Push ON after engine has started.
3. THROTTLE SPEED CONTROL: TURTLE = IDLE, RABBIT = FULL
4. LIGHTS: Push ON – Push OFF
5. DIRECTION CONTROL (FORWARD - SIDEWAYS): Rocker Switch push TOP for
forward travel. Push BOTTOM for sideways travel.
6. KEY - IGNITION LIGHT: The light glows green when the key is in the ON position.
7. OIL WARNING LIGHT: The light glows red when oil pressure is low. Engine must
be turned OFF when this light is ON or serious damage to the engine will occur.
8. ALTERNATOR WARNING LIGHT: The light glows red when the battery is
discharging.
9. OIL TEMPERATURE GAUGE: Gauge displays safe and unsafe operating ranges
The engine must be turned OFF if needle is in unsafe operating range or serious damage to
the engine will occur.
10. WOODCHUCK / WINKIE: Toggle the switch up to raise and lower the Winkie and down
to raise and lower the Woodchuck. .
11. WOODCHUCK CONTROL: Push ON – Push OFF
12. CROSS CONVEYER BELT: Controls the direction of the Cross Conveyer belt.
5
#11
#1
#2
#3
#4
#5
#6
#7
#8
#9
#10
#12
#22

PIVOT SEAT: The seat pivots forward and to the side. This orientates the driver to the
direction the joystick control produces.
13. JOYSTICK: The joystick provides directional control and power to the single drive wheel
at the front of the elevator. When sitting in the seat the following movements result in the
following actions:
A. PULL joystick to your left – turns wheel left
B. PUSH joystick to your right – turns wheel right
C. PUSH joystick forward – provides forward movement
D. PULL joystick backward – provides backward movement
F. Relief Valve, set at factory
*DO NOT USE THE JOYSTICK AS A BRAKE!!
When driving the elevator forward the joystick provides both the power and the steering function.
When driving sideways along a stock pile the joystick control provides power to the single wheel
both forward and backward, and must be used in conjunction with the rear wheel drive control (14)
or damage to the tires could occur.
6
#

14. REAR WHEEL DRIVE CONTROL: Pushing the joystick provides movement in the direction
the handle is pushed. Pulling the handle provides movement in the direction the handle is
pulled. This control must be used in conjunction with the joystick (13) or damage to tires
could occur.
15. REAR WHEELS HEIGHT CONTROL: Push the joystick forward to lower both rear
wheels. PULL handle to raise rear wheels.
16. WOODCHUCK/ WINKIE CONTROL : Push the joystick forward to move the
winkie/woodchuck down. Pull handle back to move winkie/woodchuck up (build stock
pile away from elevator). Winkie/woodchuck can be stopped in any position.
17. HOPPER FLAP CONTROL: Push the joysticks to lower flaps. Pull them to raise flaps.
18. FRONT WHEEL HEIGHT CONTROL: Pushing the handle lowers front wheel, pulling the
handle raises the front wheel.
19. HORIZONTAL BELT SPEED CONTROL: This control provides variable belt speeds (0
– 650 FPM). Turn to “0” to stop belt, turn to “10” for maximum speed.
20. FUEL GAUGE: The gauge is located on top of diesel tank.
21. HYDRAULIC OIL LEVEL GAUGE (Bullet Type): Level must be between gauges.
Bottom gauge must be full and the top one empty.
22. HOUR METER
7

OPERATING PROCEDURES
Do not allow anyone to operate the YardJack Elevator who has not been properly trained
in its safe operation.
Prior to operation the following items must be checked and/or adjusted to obtain maximum
performance and avoid unnecessary wear and stoppages.
1. Check and clean engine air filter. See Engine Air Filter Maintenance instructions
Pages 14.
2. Check the engine oil level and add oil if low. See Maintenance Materials
Specifications Page 4 & 7.
3. Check engine fan and alternator belt. Tighten if loose. See Engine Maintenance
Manual for proper tension.
4. Check engine cooling air intake. Make sure it is clean and unobstructed. Clean with high
pressure air if dirty.
5. Check battery connections. Clean terminals if they are corroded.
6. Check the hydraulic oil level. Add oil if level is below bottom sight gauge (Bullet Type).
7. Check fuel level and fill if low.
8. Check tension of both conveyor belts on elevator. All conveyor belts should be tightened if loose.
Check the tension of Woodchuck conveyor belts and chain.
9. Start engine (warm up 3 - 4 minutes) at idle.
10. Turn on elevator and Woodchuck conveyor belts. Both horizontal and incline conveyor belts must
move freely. If they don’t move freely STOP engine and free belt or belts that do not
move freely.
11. After conveyor belts run smoothly at low speed check each belt. Make sure they track
evenly on both head shaft and tail shaft pulley. Adjust belts if they do not track evenly
Or if they are loose. They must carry a full load without slipping. See Conveyor Belt
Adjustments Instructions Page 17.
12. Run belts at fast speed 3 - 4 minutes then recheck tracking. Adjust as necessary.
Now you are ready to start operations.
8

DAILY OPERATION
The YardJack Elevator is designed to stockpile almonds or similar crops.
1. The Yard Jack Elevator engine should be started at idle. Warm up the engine at
Idle for 1 - 2 minutes.
2. To drive the YardJack Elevator from service or storage area the rear wheels used to drive
sideways must be raised to their full UP position.
A. PULL rear wheels height control joystick (15) and hold until both wheels are
In full up position. The wheels may come up one at a time.
3. PUSH the top of FRONT DIRECTION rocker switch (5) on the control panel. This
increases the flow of oil to the front drive wheel and allows faster forward travel.
4. Turn pivot seat until facing forward (toward single drive wheel).
5. Use joystick to turn front drive wheel until it faces forward. This should be done with the
wheel in the full raised position.
6. Lower the front drive wheel by pushing front wheel height control (18). Hold the joystick
forward until the wheel is in down position.
7. To travel forward PUSH the joystick forward. Turning while traveling can be
accomplished by:
A. Turning to left, PUSH joystick to the left.
B. Turning to right, PUSH joystick to the right.
C. To slow down or stop quickly, let the joystick come back to its resting position
and lower the drive over ramp.
The steering is non reactive. The front wheel stays where you put it. It does not return to
center.
8. With the YardJack located where the stockpile will be built:
A. Raise the front wheel to its full up position (18).
B. Lower the hopper flaps (17).
C. Raise or lower winkie to desired angle (16).
9

9. Drive a set of bottom dump trailers over the horizontal conveyor pan.
A. Center the first trailer door over the conveyor belt.
B. Raise the hopper flaps (17).
C. Turn on belts with engine at idle (2).
D. Increase engine speed to full throttle (3).
E. Smoothly open trailer door. The open door width should load the horizontal belt
and the horizontal belt speed control (19) adjusts the rate of flow to the incline
conveyor belt. The rate of flow on to the incline conveyor should be heavy but
allows the engine to run free (do not lug the engine).
F. A bottom dump trailer (semi doubles) should be unloaded in 2 - 4 minutes
provided it is relatively stick free.
G. After the first trailer is empty the YardJack’s engine speed is reduced to idle, the
belts are stopped, and the hopper flaps lowered and the second trailer door is
centered over the conveyor belt. Unload the second trailer as described above.
10. When the stockpile is built to the desired height the YardJack is moved laterally
to lengthen the stockpile.
A. The driver seat is turned with the driver facing the conveyor and looking in the
direction the YardJack will travel.
B. The rear wheels are lowered until they are in the full down position.
10

C. The front drive steering wheel is rotated 90 degrees to allow sideways travel.
D. The front drive wheel is lowered to its full down position.
E. the YardJack driver slowly pushes the joystick forward with his right hand and
simultaneously pushes forward the rear wheel drive control to move the YardJack
sideways.
F. The YardJack can be backed up by pulling the controls instead of pushing
them.
11. With the YardJack in a new stockpiling location:
G. The front and rear wheels are raised to their full up position.
H. The hopper flaps are lowered and you are ready for another set of doubles.
The joystick and the rear wheel drive control can operate the front and rear wheels at slightly
different speeds. This provides the ability to steer the YardJack along the stockpile. Severe
speed differences can cause air loss in tires or tire damage.
WOODCHUCK DESTICKER
The YardJack Elevator can be equipped with a Woodchuck desticker. When the
Woodchuck is used the Woodchuck/Winkie switch must be toward the Woodchuck and left
in the ON position. It will automatically start when the belt ON switch is pushed.
The drive over ramp belt must be slowed down (control 19) to allow time for the for the
Woodchuck to remove the sticks.
The Woodchuck can be turned OFF and raised above the crop when the crop is free of most
sticks.
11
10B

To raise the Woodchuck:
1. Turn the Key to The ON position.
2. Push the Woodchuck/ Winkie switch to the toward “Woodchuck” position.
3. Push and hold the Woodchuck/ Winkie joystick down of the rocker switch (arrow
pointing up 10) until the Woodchuck reaches its maximum height.
To lower the Woodchuck:
1. Turn the Key to The ON position
2. Push the Woodchuck ON – OFF switch to the ON position.
*Make sure the Woodchuck/ Winkie switch is set to Woodchuck.
3. Push the hold lever labeled Winkie until the Woodchuck rests on the incline
conveyor frame.
MAINTENANCE PROCEDURES AND SCHEDULE
Before doing any service or maintenance work on the engine takes the time to review your
Engine Operation Manual. It provides additional technical information you will need to
correctly service and maintain the elevator engine.
CAUTION: Do not over grease bearings. Over greasing can damage seals and actually cause
an increase in internal friction.
The engine requires one time maintenance between 50 – 150 hours:
1. Check for engine leaks.
2. Change oil and oil filter.
3. Change fuel filter cartridge.
4. Re-tighten engine mounts.
5. Check V belt tension.
Check Engine Operation Manual for details and special conditions.
12

ENGINE AIR FILTERS SERVICE INSTRUCTIONS
CAUTION: Check to make sure both inner and outer air filters are seated properly.
LOOSE, DAMAGED OR INCORRECTLY INSTALLED FILTERS WILL CAUSE
SERIOUS ENGINE DAMAGE.
DAILY MAINTENANCE:
The amount of dust in the air will determine the frequency that the air filter system should
be serviced.
In very dusty conditions you may elect to perform items 1-10 daily.
In clean conditions you may elect to perform item 1 daily and items 1-10 weekly.
1. Empty dust discharge valve. Press lips apart of discharge slot. Clean slot from time
to time.
2. Remove service cover.
3. Gently pull the outer filter out of the filter housing. Avoid dislodging dust from
the filter.
4. Carefully wipe the inside of the outer tube with a clean cloth. Be careful not to
damage the inner safety cartridge.
13

5. With an air hose gently blow dust and dirt from outer filter by blowing air through
the filter from the inside (5 Bar or 73 PSI Maximum). Be careful not to damage the filter
with high velocity air from a nozzle.
6. Do not use high pressure air to clean the safety cartridge.
7. Check the outer filter for leaks. A streak of dust on the inside of the outer filter is
a tell tale sign.
8. Never clean inner safety cartridge (Replace).
9. Install outer filter over safety cartridge. Secure outer filter. Make sure that outer
filter is seated properly.
10. Replace service cover.
After the five services replace both outer filter and inner safetycartridge. See Maintenance Material
Specifications for outer filter and inner safety cartridge specifications.
14

CONVEYOR BELT ADJUSTMENTS INSTRUCTIONS
The tension of the belts should be tight enough to prevent slipping when under maximum load.
Belt alignment and tension are maintained by adjusting bolts that slide the pulley shaft
bearings in the forward and reverse directions. All adjustments should be made in small
increments with the belt running 1 – 2 minutes between adjustments.
1. Change alignment of the belt: Loosen bearing hold-down bolts. Turn the
adjustment bolt to tighten the belt on the side where the belt is too close or
rubbing. Re-tighten bearing hold-down bolts.
A. Run belt at low speed for 1 - 2 minutes allowing belt to center on
pulley. Re-adjust if necessary.
B. Run belt at fast speed for 2 – 3 minutes while checking alignment.
2. Increase belt tension: Loosen bearing hold-down bolts on idler pulley shaft. Turn
adjustment bolts on each side of belt an equal amount increasing belt tension.
Re- tighten bearing hold-down bolts.
A. Run belt at low-speed checking for correct tension and alignment. Re-
adjust if necessary.
B. Run belt at fast speed for 2 – 3 minutes while checking tension and
alignment.
Drive over Belt idler pulley is not shown in above photo. To increase bin belt tension
adjust Idler pulley at front end of bin.
15

DAILY MAINTENANCE
ENGINE:
1. Check oil level. Add oil if oil level is at or below add mark.
2. Check fan for damage and fan belt for proper tension.
3. Empty dust discharge valve.
4. Check Air Filter (see page 15 &16 for details).
5. Check General condition of engine for leaks or damage parts, worn or damaged
Belts and any change of engine appearance.
CHASSIS:
6. Check hydraulic oil level. If hydraulic oil is low add ONLY ISO – 68 hydraulic oil.
DO NOT add motor oil to hydraulic oil.
7. Check fuel level.
8. Check conveyor belt tension. The conveyor belts must be tight enough to carry a full
load without slipping.
9. Start engine at idle. Idle for 2 – 3 minutes to warm up oil and engine.
10. Start conveyor belts at low speed and check tracking. All conveyor belts should
track in center of pulleys. Then run conveyor belts at full speed and check tracking.
11. Check the general condition of the elevator for hydraulic leaks and worn or damaged
parts.
16

MAINTENANCE AT 125 HOURS
Perform the following after each 125 hours of operation.
1. Clean battery and cable connectors.
2. Service cooling system. See Engine Operation Manual for instructions.
MAINTENANCE AT 250 HOURS OR 3 MONTHS
1. Check engine air filter system. See pages 15 – 16. See Maintenance Materials
Specifications page 4 for replacement engine air filters.
2. Inspect air intake system. Tighten or replace parts as necessary to make sure air
intake system does not leak.
3. Change engine oil and oil filter. See Maintenance Materials Specifications page 4 for filter and oil
specifications. After oil and filter change run engine at idle and check for leaks at
filter and drain plug.
4. Service battery and cable connectors.
5. Service cooling system See Engine Operation Manual for instructions.
6. Check and adjust conveyor belts and woodchuck chain.
MAINTENANCE AT 500 HOURS OR 6 MONTHS
1. Perform Daily Maintenance
2. Perform 125 Hour Maintenance
3. Perform 250 Hour Maintenance
17
Table of contents
Other JackRabbit Elevator manuals