Jafar 4495 User manual

OPERATING MANUAL 07-2021 1/11
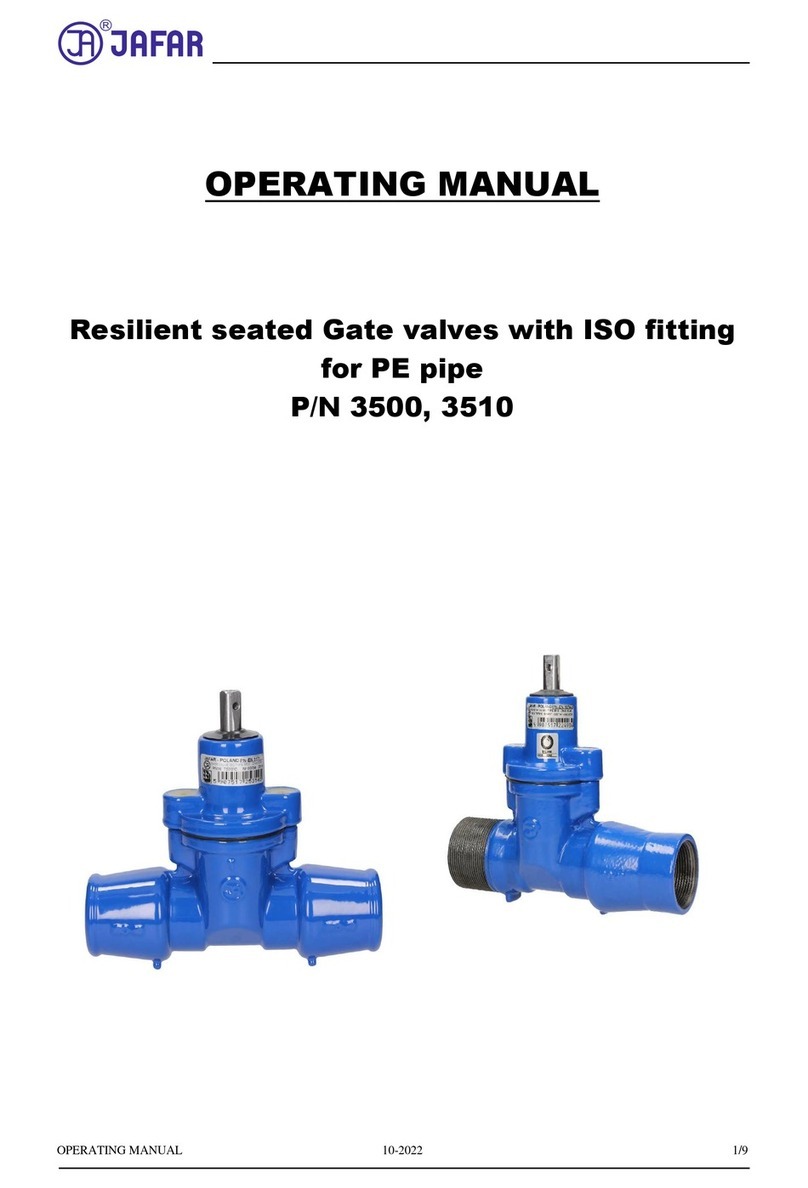
OPERATING MANUAL
Concentric butterfly valves
P/N 44 5 / 44 6 / 44 7

OPERATING MANUAL 07-2021 2/11
CONTENTS
1.
INTENDED USE.......................................................................................................................................... 3
2.
TECHNICAL DESCRIPTION................................................................................................................... 3
3.
PRODUCT IDENTIFICATION MARKING............................................................................................ 6
4.
STORAGE & TRANSPORT ...................................................................................................................... 7
5.
INSTALLATION ......................................................................................................................................... 7
6.
OPERATION.............................................................................................................................................. 10
7.
SAFETY...................................................................................................................................................... 10
8.
WARRANTY.............................................................................................................................................. 11

OPERATING MANUAL 07-2021 3/11
1. INTENDED USE
P/N 4495, 4496, and 4497 concentric butterfly valves are intended for potable water supply systems, blackwater
sewage systems and (if approved by the manufacturer) industrial media systems. Each valve can be installed in
overground and underground pipelines as an integral inline part of the piping. The valves are intended for stopping
and controlling the medium flow rate by operating the lever, a partial-turn gearbox, or a pneumatic or electric
operator (drive unit). The selected drive unit must ensure a stable closure actuation angle within 0° - 90°
and the correct operating torque value, see Table 1 or 2. P/N 4495 lug valves, P/N 4497 wafer valves, and P/N
4496 flanged valves are for installation between the opposing flanged ends of piping. P/N 4495 lug valves can also
be installed as termination of piping by using the valve body threaded holes.
2. TECHNICAL DESCRIPTION
•Production and acceptance according to EN 1074-2 (Valves for water supply. Fitness for purpose
requirements and appropriate verification tests. Isolating valves) and EN 12266-1 (Industrial valves. Testing
of valves).
•100% of each valve is leak tested.
•All concentric butterfly valves (P/N 4495, 4496, 4497) are sealed in both directions of flow.
•Application temperature range: 0°C to +70°C.
•Nominal pressure ratings: 1.0 MPa; 1.6 MPa.
•Nominal diameter range:
P/N 4495 (lug valve): DN40 - DN600 [mm];
P/N 4496 (flanged valve): DN150 - DN1200 [mm];
P/N 4495 (wafer valve): DN40 - DN1200 [mm];
•Hydraulic performance: maximum medium flow rate:
liquid media: PS10 max. 3[m/s]; PS16 max. 4[m/s];
gas media (applicable to P/N 4497 only): PS10/PS16 max. 30[m/s];
•Hydraulic resistance coefficient for the open valve varies from 0.5 to 1.7, depending on the valve DN (the
value decreases with the increase of the valve diameter).
•Valve operating torque values:
DN
[mm] ISO
5211 Closing/opening torque value on valve shaft required for (Nm),
liquid media
P/N
4495 4496 4497
Δp 1,0 [ΜPa]1,6[ΜPa]
1,0 [ΜPa]1,6[ΜPa]
1,0 [ΜPa]1,6[ΜPa]
40
F05
15
19
-
-
15
19
50 F05 20 28
- -
20 28
65 F05 26 34
- -
26 34
80 F05 35 58
- -
35 58
100 F07 55 75
- -
55 75
125 F07 91 125
- -
91 125
150 F07 130 180
130 180
130 180
200 F10 273 295
273 295
273 295
250 F10 364 405
364 405
364 405
300 F10 520 625
520 625
520 625
350 F10 1,090 1,125
1,090 1,125
1,090 1,125
400 F14 1,320 1,800
1,320 1,800
1,320 1,800
500 F14 2,660 3,070
2,660 3,070
2,660 3,070
600 F16 3,850 4,440
3,850 4,440
3,850 4,440
700 F25 - -
7,100 9,000
7,100 9,000
800 F25 - -
9,000 10,800
9,000 10,800
900 F25 - -
10,200 13,200
10,200 13,200
1000 F25 - -
12,000 15,000
12,000 15,000
1200 F30 - -
13,200 17,000
13,200 17,000
Table 1. Operating torque values for liquid media

OPERATING MANUAL 07-2021 4/11
DN
[mm]
ISO
5211
Closing/opening torque value on valve shaft required
for (Nm),
gas media*
P/N 4497
Δp 1.0 [MPa] 1.6 [MPa]
40 F05 16 24
50 F05 24 35
65 F05 31 43
80 F05 43 70
100 F07 66 94
125 F07 110 156
150 F07 156 219
200 F10 329 368
250 F10 438 506
300 F10 625 781
350 F10 1,313 1,594
400 F14 1,719 2,344
500 F14 3,469 4,000
600 F16 5,000 5,781
700 F25 9,219 11,719
800 F25 11,719 14,063
900 F25 13,281 17,188
1000 F25 15,625 19,531
1200 F30 17,188 22,031
Table 2. Operating torque values for gas media
* Applicable to networks which conduct chemically inert gases (e.g. air without oil). For the remaining gas group,
a separate document is available: “P/N 4497 Operating Manual for as Applications .
•The minimum valve switchover time (to close or open) dependent on the DN size (nominal diameter) is listed
in Table 2:
DN (mm) Switchover time (s)
40
-
350
10
400
-
600
16
700
-
800
40
900
-
1200
50
Table 3. Minimum valve switchover time
The valve switchover time is the minimum time to close or open the valve connected to a pump which delivers a
medium. The time values listed in Table 2 are calculated with the following formula:
= ∙
∙ ℎ ∙ ( − 1) ∙ √
T –> switchover time (s)
L –> piping length (m)
g –> 9.81(m/s
2
)
h –> nominal pressure in metres of sweet water
column
V –> flow rate (m/s)
k –> shockwave pressure rise factor, calculated in
relation to the nominal pressure (1-1.25)
The listed time values are calculated for: L=500(m), V= 4(m/s), k= 1.25. If the closing time is shorter, it is
mandatory to install water hammer dampers (and standard safety valves are unfit for this application).

OPERATING MANUAL 07-2021 5/11
•Valve control mode: the standard version of the valve has the clockwise closing sense of rotation. The closing
sense of rotation can be opposite on special order.The standard version control is operated with:
A lever: for DN40-DN200, applicable to P/N 4495, 4496, and 4497;
A self-retarding worm gearbox: for DN250-DN600, applicable to P/N 4495;
for DN250-DN1200, applicable to P/N 4496 and 4497;
On special request, the valves can be operated with:
Partial-turn electric operator (drive unit);
An electric drive worm gearbox;
A pneumatic operator (drive unit).
•Connection flanges (P/N 4496) and lugs (P/N 4495 & 4497) are fabricated to EN 1092-2 (Flanges and their
joints. Circular flanges for pipes, valves, fittings and accessories, PN. Cast iron flanges) and in sizes suitable
for nominal pressure ratings. The concentric butterfly lug valve (P/N 4495) features threaded holes in the
connection lugs. The concentric butterfly wafer valve (P/N 4497) standard version features a universal bolt
hole pattern (PN10/PN16) for sizes from DN40 to DN350. On special request, the universal bolt hole pattern
is available for sizes from DN400 to DN600.
•The installation (face to face) length and its tolerance are per EN 558 (Industrial valves. Face-to-face and
centre-to-face dimensions of metal valves for use in flanged pipe systems. Valves with PN and class marking);
Series 20 applicable to:
P/N 4495 (DN40-DN600);
P/N 4496 (DN150-DN1200)
P/N 4497 (DN40-DN1200).
•P/N 4496 concentric butterfly flange valves feature a non-replaceable elastomer insert (end seal). The end seal
comprises an aluminium ring on which a rubber sealing ring is mounted. The lug valves (P/N 4495) and the
wafer valves (4497) feature either of the two end seal version:
A replaceable insert (dovetail style) in the size range of DN40-DN350.
The end seal comprises an aluminium ring only.
A non-replaceable insert in the size range of DN400-DN1200 (in wafer valves) and DN400-
DN600 (in lug valves). The insert design is the same as for P/N 4496.
•The valve shaft is assembled with the closure plate as follows:
Pinned joint: P/N 4495 (DN400-DN600), P/N 4496 (DN150-DN1200), and P/N 4497 (DN400-
DN1200)
Spline joint: P/N 4495 (DN40-DN350) and P/N 4497 (DN40-DN350)
•Soft-seal concentric butterfly valves (P/N 4495, 4496, and 4497) in the size range of DN40-DN1200 have a
closure formed by a two-arm plate which pivots around an axis perpendicular to the medium flow. The pivot
shaft(s) are held by the necks, mounted on additional bearing sleeves. The pivot shafts are sealed by the
packing assembly, comprising an arrangement of o-rings. The valve closure is formed by a closure plate and
an elastomer insert which isolates the valve body on one end from the medium flow. The shaft is operated by
a lever, a gearbox, or an operator drive unit.
•The valve without a gearbox forms an assembly that can be adapted to various operators (drive units). To
ensure proper leak-tightness of the valve, an operator can only be installed by an authorized service of Fabryka
Armatur JAFAR. The operator must ensure a stable closure actuation angle within:
0 to 90°for the fully open and fully closed motion;
15°to 90°for flow control (damping);
and the proper operating torque (see Table 1 or 2). Long-term operation of the valve with an operator as a
flow damping valve may cause wear of the sealing insert and result in leaks through the closed valve.

OPERATING MANUAL 07-2021 6/11
3. PRODUCT IDENTIFICATION MARKING
The valve marking meets the following standards: EN 19 (Industrial valves. Marking of metallic valves), EN 1074-
1 (Valves for water supply. Fitness for purpose requirements and appropriate verification tests. Part 1: General
requirements). The permanent identification markings are on the front and back walls of the body chamber and on
the cylindrical closure plate. The marking contains the following data:
- closure plate material type;
- nominal diameter; - manufacturer's trade mark;
- nominal pressure; - nameplate.
The location on the valve specified in the documentation features the nameplate which contains the following
data:
Fig. 1. Valve nameplate sticker
1. Manufacturer's company and country of origin.
2. Manufacturer's company logo.
3. Polish construction mark (for the full range of diameter values).
4. Alphanumerical reference designation for the combination of mechanical properties and sizing of the
mating piping ends (PN).
5. CE marking
6. Maximum permitted pressure (PS).
7. Barcode.
8. Maximum / minimum permissible temperature (TS).
9. Production serial no. in the calendar year.
10. Year of manufacture of the product.
11. Sealing material specification (where the operating temperature shall not exceed 70°C for EPDM).
12. Reference standard the product is compliant with.
13. Nominal diameter (DN).

OPERATING MANUAL 07-2021 7/11
4. STORAGE & TRANSPORT
The products are packed on EURO pallets (1200x800 mm) or in custom containers, as applicable. Store the valves
in clean indoor rooms without bacteriological or chemical contaminants and at a room temperature between -20°C
and 70°C. Protect the paint coat and rubber parts from prolonged exposure to UV radiation. Protect the filters
against mechanical damage.
Do not compress any rubber parts. Keep the valve closure plate halfway open. Secure the products against shifting
during shipping and handling. Heavy valves (DN350 and larger) shall be handled with dedicated eye bolts; valve
sizes from DN80 to DN300 shall be handled on slings and secured from rotating. Do not handle by the lever, the
gearbox handwheel, or the operator/gearbox housing.
5. INSTALLATION
P/N 4495 and 4497 flange-to-flange cast iron valves and P/N 4496 flange valves can be installed in underground
or overground pipelines both in horizontal or vertical orientation. The listed products are suitable for joining with
the flanged ends of pipelines with the size equal to that of the valve flanges. P/N 4495 and 4497 do not require
additional gaskets between the piping valve flanges, while P/N 4496 requires additional gaskets between the
flanges.
Note that the completed installation must not expose the valve to bending or tensile stress from loading with the
unsupported pipeline sections. Install the product properly aligned with the piping centreline and with proper
parallelism and flatness of the mating connection flanges, with prevention of hydraulic shock, and with due
compensation of the pipeline dimensional changes from temperature and pressure. A valve is ready for installation
in the system as assembled and adjusted by the manufacturer. Any dismantling of the valve components (e.g. the
shaft, the closure panel, or sleeves) may result in loss of seal.
The requirements for correct quality of the mating flanges have to be satisfied, that is flatness and parallelism,
during the installation process. During the installation process, do not leave any installation tools, bolts, nuts, or
welding wire inside of the piping or they can stop at the end seal (the rubber insert) or within the closure panel of
the valve. This may lead to damage during closing of the valve and loss of seal across the valve. The valve sealing
is provided by an elastomer liner all over the inside of the body, and respectively:
•At the closure panel, by compression of the liner between the closure rim and the valve body;
•At the shaft(s), by compression of the closure panel faces and the snug fitting of the shaft(s) to the holes
in the liner;
•At the flanges, by compression of the liner by the piping flanges.
The manufacturing tolerance of the valves and their components are large enough to ensure full interchangeability.
The user carries out the installation of the valve in the pipeline on his or her own accord.
Use proper intrinsically safe tools and avoid all actions which may generate sparks during all repair and
maintenance work. Before attempting to install the valve, check the technical and commercial documents delivered
with the product to verify that your media and pipeline operating parameters comply with the manufacturer's
declaration.
If the valve is installed at the end of piping, mount a steel or cast-iron stub pipe on the free end of the butterfly
valve to guard the closure panel during opening. The stub pipe is not included. The lug valves can be installed as
piping termination without any extra stub pipes.
All concentric butterfly valves in the size range of DN40 to DN250 can be installed in horizontal or vertical
orientation (of the pivot shaft relative to the piping centreline) (Fig. 2). The valve in the size range of DN300 to
DN1200 can only be installed in horizontal orientation of the pivot shaft relative to the piping centreline. The
valves in the size range of DN200-DN250 can only be installed in vertical orientation and in diagonal piping after
prior consultation with and approval from the manufacturer. The valves larger than DN250 must never be installed
with the closure pivot shafts upright in the standard version. If the valve needs to be installed with the valve closure
pivot shafts upright, specify this in the purchase order.

OPERATING MANUAL 07-2021 8/11
Horizontal piping –
vertical orientation
Horizontal piping – horizontal
orientation
Vertical piping
Fig. 2. Orientation of the valve closure pivot shaft relative to the piping plane
shown for P/N 4497 DN100
Fig. 3. Recommended installation method
shown for flange-to-flange valves
The optimum installation orientation of concentric butterfly valves is to have the closure panel axis vertical with
the closing movement of the closure panel bottom opposite to the medium flow (Fig. 3). While the valve is being
closed or opened, the medium is at its maximum flow rate and entrains the contamination settled in the
neighbouring part of the pipeline. The valve installation shown in Fig. 3 considerably extends the service life and
operating reliability even with media loaded with contaminants which by their weight tend to settle down in the
piping. A consequence of this is that the deposits can be entrained from the upstream of the valve by the maximum
possible flow passing the bottom part of the valve closure during the opening operation (Fig. 4).
Fig. 4. A – Incorrect valve closure pivot
shaft orientation
B – Incorrect valve closure pivot
shaft orientation C – Correct valve closure pivot shaft
orientation
When designing the installation, consider that the horizontal orientation of the valve closure pivot shafts is the best
for operating performance and reliability:
1. the weight of the pivot shafts and the closure rests on both bearings;
2. the front-end bearing of the pivot shaft is unloaded;
3. the valve operating life is extended, especially when the liquid medium contains solids which tend to
settle at the bottom of the piping.
If the valve is installed with the valve closure pivot shafts aligned vertically, the solids are not effectively entrained
by a super-nominal flow; this may result in damage to the valve closure edges or the sealing ring mating edges.
Any change in the operating conditions must be consulted with the manufacturer beforehand.

OPERATING MANUAL 07-2021 9/11
Before attempting to install the valve, remove the main bore plugs, check the inner surfaces of the valve and
thoroughly flush with water, if necessary. Before installing the valve between the pipeline flanges, first remove all
shipping preservation from the surfaces, thoroughly clean the flange faces, install the properly selected seals (this
step applies to P/N 4496 only) and tighten the piping and valve flanges together with sufficiently long and properly
sized bolts or threaded bars. The valve and piping flange holes must be aligned. Tighten the connection flange
bolts crosswise to ensure a proper seal pressure. Start from the bolt holes near the valve pivot shaft. The tightening
torque of the bolt nuts is specified in the PN-63/M-82056. Install the valve on a base or a support sufficient for the
size and weight of the valve, to prevent straining of the piping by the valve. The valve must feature a suitable
operator, i.e. a handwheel and a gearbox, a gearbox in a rigid housing, an electric drive unit, or an operating drive
gearbox on a pedestal. When installing a housing, it is necessary to use a street box founded on a base slab. When
using a spindle extension, make sure that
the weight of the extension is not transferred to the valve spindle. To prevent the load transfer, use holding pieces,
mounted to the chamber/vault walls.
Having completed the installation, perform a pressure test at a maximum test pressure equal to 1.5 times the
nominal pressure in the fully open or 1.1 times the nominal pressure in fully closed position.
Caution! If the product has mechanical damage, do not install it in the pipeline.
Due to the non-uniformity of the speed and pressure fields near piping elbows and tees, it is recommended to
maintain a straight piping run at least 5 × DN long between the valve outer flange face and the piping bend or tee.
Fig. 5. Recommended distances from the piping bends
For the valves in the size range of DN200 to DN2000, the axis of the closure drive shaft must be perpendicular
to the centreline of the piping bend (an elbow or a tee) (see Fig. 5).
The general rule is not to install the valve near any bend or tee or any piping bends (elbows / tees), especially with
the valve on the high-pressure side of the piping (in the pump to valve to piping curve system) (see Fig. 5). The
normal flow deflection over a piping bend will be aggravated by the low-pressure area of the valve (where a risk
of flow interruption exists).
Irrespective of the requirement for a straight piping run at least 5 × DN long between the valve outer flange face
and the piping bend (alternatively, the designed valve can be replaced with one of a higher pressure rating), to
minimise the localised flow acceleration and interruption by the piping bend. The valve shall be installed with the
centreline of the valve closure pivot shaft perpendicular to the vertical line of the piping bend so that the valve
closure drive shaft centreline is aligned with the piping bend plane. Apart from normal flow deflection by the
piping bend, the liquid flow applies a high strain in the low-pressure valve area. This generates a very high
hydrodynamic moment.
The pipe inner diameter shall be equal to the nominal diameter (DN) of the valve plus the tolerance for the
deviations provided for by the foundry industry for the given pipe I.D.
If the valve is installed with an operator or an operator and gearbox unit, check the electrical wiring and fire-proof
protection features (also during coupling and adjustment of the operator) for conformity with the respective
operating manuals from the operator drive unit manufacturer.
Caution! If the product has mechanical damage, do not install it in the pipeline.
Caution! When mounting the butterflay valve with the electric actuator in the horizontal position, it is
absolutely necessary to use a support or slings in order to relieve the valve, see example below.

OPERATING MANUAL 07-2021 10/11
6. OPERATION
The valve shall be operated in accordance with all relevant requirements for stop valves.
To ensure full operational efficiency, carry out a technical inspection and maintenance at least once a year as
follows:
•Operate the valve from the fully open position to the fully closed position, or vice versa.
•If the valve operation is difficult, i.e. the valve reaches the maximum driving torque before either of its
limit positions, repeat the full operation three times (by opening and closing the valve repeatedly).
•Check the tightness of all connections and seals with the valve closed.
If all the actions above have been completed with a good result, visually inspect the corrosion protection. If the
paint coat is damaged, rebuild it with the paint kits available from JAFAR.
Exceeding the operating limits of the valve may result in damage that will not covered by the warranty or the
statutory warranty granted by the manufacturer.
7. SAFETY
All installation and operation tasks related to the product shall be only be done by qualified professionals with
sufficient training and experience to assess the current situation and identify and avoid hazards. Failure to follow
this warning or this Operating Manual may cause death, severe bodily injury or substantial property damage.
Fabryka Armatur Jafar S.A. shall not be liable for any accidents or emergencies related to incorrect installation or
operation of the product. Note that the valve installation could be pressurized or contain various type of stray gas
or aggressive liquids. If the installation is operated explosion hazard zones, ATEX requirements may apply; this
will require suitably trained professionals (according to ATEX requirements). Do not use tools which may generate
electrostatic discharge in the ATEX zone.
Do not use the product without thorough knowledge and understanding of this Operating Manual. Follow the
general health and safety rules. Keep this Operating Manual throughout the service life of the product to ensure a
safe operation of the latter.

OPERATING MANUAL 07-2021 11/11
8. WARRANTY
The product assembled, installed and operated in compliance with this Operating Manual and the Product
Specification Sheet is covered by a commercial warranty from the manufacturer. The warranty terms, conditions
and period are specified in the Warranty Certificate available from www.jafar.com.pl.
The manufacturer may provide this product with custom materials and modifications on order. The final selection
of the product which meets the optimum criteria for the installation project in question is made by the installation
designer, who should consider this Operating Manual along with other data and information of significance for the
correct operation of the product.
Failure to comply with the guidelines and instructions in this Operation and Maintenance Manual releases the
manufacturer from all obligations, liability and warranty. Due to continuous business development, the
manufacturer reserves the right to modify and change the design of the product shown herein.
This manual suits for next models
2
Table of contents
Other Jafar Control Unit manuals