manuals.online logo
Brands
  1. Home
  2. •
  3. Brands
  4. •
  5. Jaga
  6. •
  7. Heater
  8. •
  9. Jaga BRIZA 041 Wall User manual

Jaga BRIZA 041 Wall User manual

Montagehandleiding / Instructions de montage / Montagehinweis / Mounting instructions
BRIZA 041/055 Wall
2 pijps / 2 tuyaux / 2 Leiter / 2 pipe - 4 pijps / 4 tuyaux / 4 Leiter / 4 pipe
HybridRadiator
Lees deze handleiding aandachtig voor een correcte installatie van het product.
Lire attentivement la totalité de la notice avant l' installation.
Bevor Sie mit der Montage beginnen, lesen Sie daher dieses Handbuch sorgfältig durch.
Please read this manual carefully before installing.
Als het toestel gebruikt wordt voor koelen
moeten de hydraulische leidingen geïsoleerd worden.
Si l'appareil est utilisé pour refroidir, les tuyaux doivent
être isolés.
Wenn das Gerät zur Kühlung verwendet werden, sollten
die Rohre isoliert werden.
If the unit is used for cooling, the pipes must be insulated.
Algemene informatie / Informations générales / Allgemeine Informationen / General Information
Onderdelen / Parts / Teile
1
Low H2O warmtewisselaar
Échangeur de chaleur Low H2O
Low H2O Wärmetauscher
Low H2O heat exchanger
2
Standaard hydraulische aansluiting: 3/4” (Eurocone)
Raccordement hydraulique 3/4” (Eurocone)
Hydraulische Anschluß 3/4” (Eurocone)
Hydraulic connection 3/4” (Eurocone)
3
Bekleding uit electrolytisch verzinkte staalplaat
Encastrement en tôle d'acier électro-zingué
Verkleidungsteile Stahlblech.elektrolytisch verzinkt
Frame made od reinforced galvanised steel plate
4
Condensafvoer
Condensat Drain
Kondensatableiter
Condensate Drain
5
Tangentiële ventilator
Ventilateur tangentiel
Tangentialventilator
Tangential fan
6
RVS filter
Filtre en acier inoxydable
Edelstahlfilter
Stainless steel filter
7
Bekleding
Habillage
Verkleidung
Covering
8
Elektrische aansluiting
Raccordement électrique
Elektrischer Anschluß
Electrical connection
1
2
3
4
5
6
7
8
• hydraulische aansluiting 3/4” (Eurocone) links / elektri-
sche aansluiting rechts
• raccordement hydraulique 3/4” (Eurocone) à gauche /
électrique à droite
• Hydraulische Anschluß 3/4” (Eurocone) Links / elektri-
scher Anschluß rechts
• hydraulic connection 3/4” (Eurocone) to the left / electri-
cal connection on the right side
• Het toestel dient te allen tijde bereikbaar te blijven
voor onderhoud.
• L'appareil doit être accessible tout le temps pour un
entretien éventuel.
• Das Gerät muß jederzeit für Wartungsarbeiten
zugänglich sein.
• The unit exchanger must always be kept accessible for
maintenance purposes.
Hydraulische aansluitingen / Connexions hydrauliques / Hydraulische Anschlüss / Hydraulic connections
OPTIE / OPTION
24VDC
Eurocone /”
Klemkoppelngen /" M
Raccords bcônes /" M
Klemmrngverschraubungen /" M
Sleeve couplngs /" M
Code / ART.-NR. CODY.SC5.10.3...
(
code klemkoppelng nvullen)
Omschrijving
•
ventiel Eurocone x 3/4" M24 90°
•
retourventiel Eurocone x 3/4" M24 90°
•
thermische motor 0...10V (24V)
Description
•
vanne Eurocone x 3/4" M24 90°
•
vanne retour Eurocone x 3/4" M24 90°
•
moteur thermique 0...10V (24V)
Beschreibung
•
Ventil Eurocone x 3/4" M24 90°
•
Rückschlagventil Eurocone x 3/4" M24
•
thermische motor 0...10V (24V)
Description
• valve Eurocone x M24 90°
• lockshield Eurocone x M24 90°
• thermal motor 0...10V (24V)
2 retourventielen
2 vannes de retour
2 Rücklaufverschraubungen
2 lockshields
Eurocone /”
Klemkoppelngen /" M
Raccords bcônes /" M
Klemmrngverschraubungen /" M
Sleeve couplngs /" M
Code / ART.-NR. CODY.LOB.00.3...
(
code klemkoppelng nvullen)
Omschrijving
• 2 retourventielen 3/4" M24 90°
Description
• 2 vannes de retour 3/4" M24 90°
Beschreibung
•
2 Rücklaufverschraubungen 3/4" M24 90°
Description
• 2 lockshields 3/4" M24 90°
230 Volt
/”
Code / ART.-NR. 7990.409
• 180° - G1/2”F / NG 230V 2Watt
Code / ART.-NR. 7990.411
• 180° - G3/4”F / NG 230V 2Watt
Omschrijving
• enkel voor montage op de verdeler
• met standindicator (open/dicht)
• klemkoppelingen door de installateur te voor-
zien
Description
• uniquement pour montage sur le collecteur.
• avec indicateur de position (ouvert/fermé)
• raccords bicônes à prévoir par l'installateur
Beschreibung
• nur zur Montage am Verteiler
• mit Standindikator (offen/geschlossen)
• Klemmringverschraubungen sind durch den
Heizungsbauer vorzusehen
Description
• only for mounting on the distributor
• with position indicator (open/closed)
• sleeve couplings have to be provided by the
installer
Klemkoppelingen 3/4" M24
Rraccords bcônes 3/4" M24
Klemmringverschraubungen 3/4" M24
Sleeve couplings 3/4" M24
Code /
ART.-NR.
Dunwandig metaal
Tube métallique de précision
Präzisionsmetallrohr
precision metal tube
110 ø M24 x 10/1
112 ø M24 x 12/1
114 ø M24 x 14/1
115 ø M24 x 15/1
116 ø M24 x 16/1
118 ø M24 x 18/1
Kunststof / synthétique
Kunststoff Rohr / Synthetic tube
212 ø M24 x 12/2
214 ø M24 x 14/2
219 ø M24 x 16/15
216 ø M24 x 16/2
217 ø M24 x 17/2
218 ø M24 x 18/2
VPE/ALU / Multcouches PER/ALU / VPE/ALU /
RPE/ALU tube
314 ø M24 x 14/2
316 ø M24 x 16/2
326 ø M24 x 16/22
318 ø M24 x 18/2
336 ø M24 x 16/22
enkel voor TEE-bus
Stalen V bus / Tuyau en acer
Esenrohr Zentralhezung / Steel tube for H
501 ø M24 x 1/2”
503 ø M24 x 3/8"
set
96
Aansluitsets / Kits de raccordement / Anschlußsatze / Connection sets
set
95
Ø 1cm
Ø 1cm
7.8
min. 10
min. 10
L
13
L
41
16.5 8.5
7.8
3.8
3.9
2.8
25
A
A
R
R
13
L
41
16.5 8.5
7.3
4.5
2.8
25
A
R
812.5
812.5
Ø 1cm
Ø 1cm
7.8
min. 10
min. 10
L
13
L
41
16.5 8.5
7.8
3.8
3.9
2.8
25
A
A
R
R
13
L
41
16.5 8.5
7.3
4.5
2.8
25
A
R
812.5
812.5
Afmetingen - hydraulische aansluitingen / Dimensions - connexions hydrauliques / Abmessungen - hydraulische Anschlüss / Dimensions - hydraulic connections
Condensafvoer / Évacuation des condensats
Kondenswasserabfuhr / Condensation drain
Condensafvoer / Évacuation des condensats
Kondenswasserabfuhr / Condensation drain
A: aanvoer / arrivée / Vorlauf / flow R: retour / Rücklauf / return
2-pijps / 2 tuyaux / 2 leiter / 2 pipe
4-pijps / 4 tuyaux / 4 leiter / 4 pipe
model T 1 T 2 T 3 T4
L (cm) 75 95 125 145
BRIZA041 WALL
BRIZA055 WALL
Ø 1cm
Ø 1cm
A
A
R
R
R
A
55
13
137.8
13
25
5.2 5.2
3.8
8.3
3.7
3.9
55
L
16.5
8.5
L
16.5
8.5
812.5
812.5
Ø 1cm
Ø 1cm
A
A
R
R
R
A
55
13
137.8
13
25
5.2 5.2
3.8
8.3
3.7
3.9
55
L
16.5
8.5
L
16.5
8.5
812.5
812.5
Afmetingen - hydraulische aansluitingen / Dimensions - connexions hydrauliques / Abmessungen - hydraulische Anschlüss / Dimensions - hydraulic connections
Condensafvoer / Évacuation des condensats
Kondenswasserabfuhr / Condensation drain
Condensafvoer / Évacuation des condensats
Kondenswasserabfuhr / Condensation drain
A: aanvoer / arrivée / Vorlauf / flow R: retour / Rücklauf / return
2-pijps / 2 tuyaux / 2 leiter / 2 pipe
4-pijps / 4 tuyaux / 4 leiter / 4 pipe
model T 1 T 2 T 3 T4
L (cm) 75 95 125 145
A: aanvoer / arrivée / Vorlauf / flow R: retour / Rücklauf / return
Omkasting demonteren / Démontage du caisson / Gehäuse Demontage / Casing Disassembly
1a 1b
1c
Gemakkelijk installeren:
• de minimum afstand tussen onderzijde van de
bekleding en de vloer is minimum 10 cm. De
minimum uitblaasruimte bovenkant toestel is
15 cm.
Markeer en boor de gaten.
Schroef het toestel tegen de wand.
Het type wand - vol of hol - bepaalt welk soort
plug en schroef gebruikt dient te worden.
Leicht zu installieren
• Der Abstand zwischen der Unterseite der
Verkleidung und dem Boden muss mindestens
10 cm betragen. Der Ausblasraum über der
Oberseite des Gerätes muss mindestens 15 cm
betragen.
Markieren und bohren Sie die Löcher.
Schrauben Sie das Gerät an die Wand.
Die Art der Wand , fest oder hohl , bestimmt die
Art der Schrauben und Dübel die verwändet
werden.
Installation aisée:
• la distance entre la partie inférieure de
l’habillage et le sol doit être de 12 cm au mini-
mum. La distance minimum pour la soufflerie
sur la partie supérieure de l’appareil est de 15
cm.
Marquer et percer les trous
Vissez l’appareil contre la paroi.
Le type de mur, solide ou cavité, détermine le type
de vis ou le module d’extention qui est utilisé.
Easy to install
• the minimum distance between the bottom of
the panelling and the floor is at least 10 cm.
The minimum blow space at the top of the unit
is 15 cm.
Mark out and drill the holes.
Screw the device to the wall.
The type of wall, solid or cavity, determines the
type of screw or plug that is used.
Installatie / Installation
Plaatsen en bevestigen / Placer et fixer
Positionierung und Sicherung / Positioning and securing Hydraulisch aansluiten / Raccordement hydraulique
Hydraulischer Anschluss / Hydraulic connection
A
R
A: aanvoer / arrivée / Vorlauf / flow
R: retour / Rücklauf / return
OPTIE: Aansluitset / Kit de raccordement
Anschlußsatze / Connection set.
Installatie / Installation
Condensafvoer aansluiten / Raccordement de l'évacuation des condensats.
Anschluß Kondenswasserabfuhr / Connection of the condensation drain pipe.
Opgelet
Om geurhinder te voorkomen moet de condens-
afvoer aangesloten worden op een regelmatig
gebruikte afvoerbuis met geurafsluiter. Let er op
dat het toestel richting condensafvoer licht aflo-
pend gemonteerd wordt.
Warnung
Um einer Geruchsbelästigung entgegenzuwirken,
muss die Kondensatableitung an ein regelmäßig
benutztes Abflussrohr mit Geruchsverschluss
angeschlossen werden. Das Gerät leicht abschüs-
sig montieren wegen des Kondensatabläuf.
Attention
Pour éviter les odeurs désagréables, l’évacuation
de la condensation doit être reliée à une conduite
d’évacuation avec coupe-odeur utilisée réguliè-
rement. Incliner légèrement l'appareil afin de
faciliter l'écoulement du condensât.
Warning
To avoid smells connect the condensation outlet
to a frequently-used drainpipe fitted with a siphon
trap. Fit the Briza convector with a slight inclina-
tion to facilitate the drainage of the condensation
water.
5.6 2.5
10
12
Ø 1cm
Elektriciteit aansluiten / Raccordement électrique
Stromanschluss / Electrical connection
0...10 V Aansluiting op Domotica / Raccordement a une système domotique 0...10 V
Anschluss 0...10 V auf externe Automatisierungstechnik
Connecting an external 0...10 V analog inputtechnology
+ 0...10VDC
- 0VDC
0..10V
Domotica
230 VAC
L N
DC LO
DC ON
1 4
5 6
+ + - -
CODE: 7990.050/51/52
Netvoeding / Alimentation
Netzteil / Power supply
24 VDC
Briza
Clima Canal
Quatro Canal
24 VDC +
24 VDC
-
0..10 V
5c 5b
5a
Omkasting monteren / Montage de l’habillage / Gehäusemontage / Installation of casing
BELANGRIJK / IMPORTANT / WICHTIG
Waarschuwing: Avertissement Warnhinweis Warning
Dit apparaat is niet bedoeld voor gebruik door
personen (waaronder kinderen) met verminder-
de lichamelijke, zintuiglijke of geestelijke vermo-
gens, of die gebrek aan ervaring of kennis heb-
ben, tenzij iemand die verantwoordelijk is voor
hun veiligheid toezicht houdt of uitgelegd heeft
hoe het apparaat gebruikt dient te worden.
Houd kinderen onder toezicht om ervoor te zor-
gen dat ze niet met het apparaat spelen.
Cet appareil n’est pas destiné à être utilisé par
des personnes (notamment des enfants) dont
les capacités physiques, sensorielles ou intel-
lectuelles sont réduites, ou par des personnes
manquant d’expérience ou de connaissances, à
moins que celles-ci ne soient sous surveillance
ou qu’elles n’aient reçu des instructions quant à
l’utilisation de l’appareil par une personne res-
ponsable de leur sécurité.
Veillez à ce que les enfants ne puissent pas jouer
avec l’appareil.
Dieses Gerät ist für Benutzer (einschl. Kinder)
mit eingeschränkten physischen, sensorischen
oder psychischen Fähigkeiten bzw. ohne jegliche
Erfahrung oder Vorwissen nur dann geeignet,
wenn eine angemessene Aufsicht oder ausführ-
liche Anleitung zur Benutzung des Geräts durch
eine verantwortliche Person sichergestellt ist.
Achten Sie darauf, dass Kinder nicht mit dem Ge-
rät spielen
This appliance is not intended for use by persons
(including children) with reduced physical, sen-
sory or mental capabilities, or lack of experience
and knowledge, unless they have been given su-
pervision or instruction concerning use of the ap-
pliance by a person responsible for their safety.
Children should be supervised to ensure that they
do not play with the appliance.
Alleen wanneer de inhoud van deze handleiding
volledig wordt nageleefd kunnen fouten worden
voorkomen en is een storingsvrij gebruik moge-
lijk.
Het recht op garantie vervalt bij:
• fouten of beschadigingen die voortkomen door
het niet naleven van de montage, reiniging - of
gebruiksinstructies van de fabrikant
• een onjuist, oneigenlijk en/of onverantwoorde-
lijk gebruik of behandeling van het apparaat
• foutieve of ondeskundige reparaties en defecten
ontstaan door externe factoren
• zelf aangebrachte veranderingen aan het appa-
raat
• toestellen die zo ingebouwd zijn dat ze niet een-
voudig bereikbaar zijn.
In geval van vragen of klachten, kunt u zich wenden
tot uw leverancier of installateur.
Het auteursrecht van deze handleiding is eigen-
dom van de firma Jaga n.v.
Les erreurs ne peuvent être évitées et une utili-
sation exempte de pannes n'est possible que si
le contenu de ce manuel est totalement respecté.
Le droit à la garantie est supprimé en cas de:
• fautes ou dommages générés par le non-respect
des instructions de montage, de nettoyage ou
d'utilisation du fabricant.
• utilisation incorrecte, inappropriée et/ou utilisa-
tion ou usage irresponsable de l'appareil.
• réparations fautives ou incompétentes et pannes
causées par des facteurs externes
• modifications personnelles apportées à l'appa-
reil
• appareils encastrés qui ne sont pas facilement
accessibles.
Pour toute question ou plainte, vous pouvez vous
adresser à votre fournisseur ou installateur.
Le droit d'auteur de ce manuel est la propriété de
la société Jaga n.v.
Nur wenn der Inhalt dieser Gebrauchsanweisung
vollständig eingehalten wird, können Fehler ver-
mieden werden und ist eine störungsfreie Ver-
wendung möglich.
Der Garantieanspruch erlischt bei:
• Fehlern oder Beschädigungen, die durch Nicht-
einhaltung der Montage-, Reinigungs- oder Ge-
brauchsanweisungen des Herstellers entstehen.
• einer falschen, unsachgemäßen und/oder ver-
antwortungslosen Nutzung oder Behandlung
des Geräts
• falschen oder unsachgemäßen Reparaturen und
Mängeln, die aufgrund externer Faktoren ent-
standen sind
• selbst angebrachten Veränderungen am Gerät.
• Geräte die so eingebaut sind, daß sie nicht einf-
ach zu erreichen sind.
Bei Fragen oder Beschwerden können Sie sich an
Ihren Lieferanten oder Installateur wenden.
Das Urheberrecht dieser Gebrauchsanweisung be-
sitzt die Firma Jaga n.v.
Please follow these instructions carefully in order
to allow for an error-free installation and a care-
free use.
Entitlement to warranty is cancelled in case of:
• errors or damage resulting from not following
the assembly, cleaning or user instructions sup-
plied by the manufacturer,
• wrong, improper and/or irresponsible use or
treatment of the device,
• wrong or incompetent repairs and defects due to
external factors,
• self-applied changes to the device.
• equipment that is built in, in a way that it cannot
be reached normally.
If you have any questions or complaints, please
contact your supplier or installer.
The copyright of these instructions is the property
of the company Jaga Inc.
Gelieve deze instructies te volgen en te bewaren! S’il vous plaît garder cette instruction!
Bitte bewahren Sie diese Anleitung! Please follow and keep these instructions!
27200.23700024 - August 18, 2015 1:35 PM - Jaga N.V.

This manual suits for next models

1

Other Jaga Heater manuals

Jaga Aurora H52-TYPE16 User manual

Jaga

Jaga Aurora H52-TYPE16 User manual

Jaga Clima Canal H8 User manual

Jaga

Jaga Clima Canal H8 User manual

Jaga VERTIGA HYBRID User manual

Jaga

Jaga VERTIGA HYBRID User manual

Jaga Maxi FT 2020 User manual

Jaga

Jaga Maxi FT 2020 User manual

Jaga Maxi FF 2020 User manual

Jaga

Jaga Maxi FF 2020 User manual

Jaga FREEDOM User manual

Jaga

Jaga FREEDOM User manual

Jaga KNOCKONWOOD User manual

Jaga

Jaga KNOCKONWOOD User manual

Jaga IGUANA CIRCO Corner User manual

Jaga

Jaga IGUANA CIRCO Corner User manual

Jaga COCOON User manual

Jaga

Jaga COCOON User manual

Jaga MINF User manual

Jaga

Jaga MINF User manual

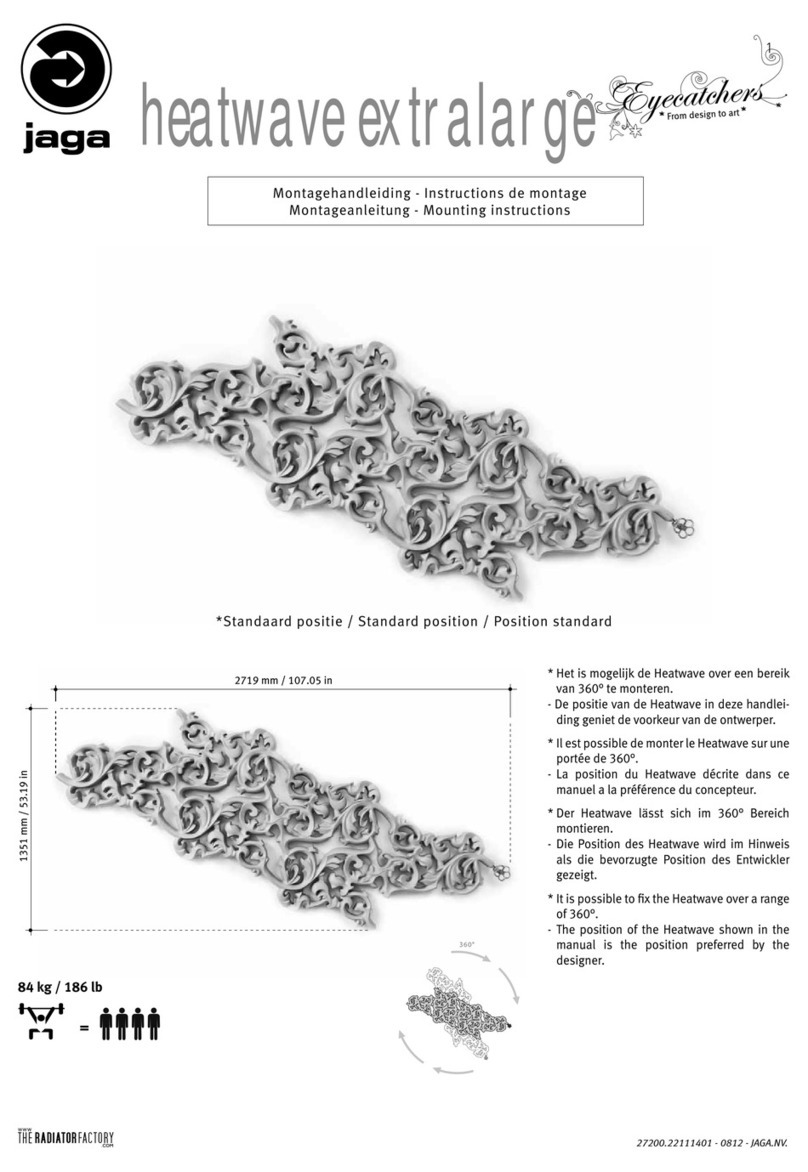
Jaga Eyecatchers heatwaveextralarge User manual

Jaga

Jaga Eyecatchers heatwaveextralarge User manual

Jaga MINI DYNAMIC CANAL User manual

Jaga

Jaga MINI DYNAMIC CANAL User manual

Jaga Micro Canal User manual

Jaga

Jaga Micro Canal User manual

Jaga IGUANA VISIO User manual

Jaga

Jaga IGUANA VISIO User manual

Jaga IGUANA APLANO APLW User manual

Jaga

Jaga IGUANA APLANO APLW User manual

Jaga Vertiga User manual

Jaga

Jaga Vertiga User manual

Jaga Eyecatchers Heatwave small User manual

Jaga

Jaga Eyecatchers Heatwave small User manual

Jaga Eyecatchers Iguana Circo Corner User manual

Jaga

Jaga Eyecatchers Iguana Circo Corner User manual

Jaga Eyecatchers Iguana Circo User manual
Jaga

Jaga Eyecatchers Iguana Circo User manual

Jaga heatwave User manual

Jaga

Jaga heatwave User manual

Jaga DBH-SET User manual

Jaga

Jaga DBH-SET User manual

Jaga BRIZA 12 User manual

Jaga

Jaga BRIZA 12 User manual

Jaga Iguana Arco User manual

Jaga

Jaga Iguana Arco User manual
Jaga Eyecatchers Sani Panel User manual

Jaga

Jaga Eyecatchers Sani Panel User manual

Popular Heater manuals by other brands

Premier CR-4928R instruction manual

Premier

Premier CR-4928R instruction manual

Duraflame 7QH1000 Owners operating manual and parts list

Duraflame

Duraflame 7QH1000 Owners operating manual and parts list

KING PCKW Series Installation and Maintenance

KING

KING PCKW Series Installation and Maintenance

nedis HTFA11CWT manual

nedis

nedis HTFA11CWT manual

Bosch TR4000 Installation and operating instructions

Bosch

Bosch TR4000 Installation and operating instructions

Mi-T-M MH-0075-RM10 Operator's manual

Mi-T-M

Mi-T-M MH-0075-RM10 Operator's manual

VOV Heating VHS-3175Q instruction manual

VOV Heating

VOV Heating VHS-3175Q instruction manual

Sovelor F35 instruction manual

Sovelor

Sovelor F35 instruction manual

Remington HH-150T-DFV User's manual and operating instructions

Remington

Remington HH-150T-DFV User's manual and operating instructions

Warmlite WL41001N instruction manual

Warmlite

Warmlite WL41001N instruction manual

EQUATION DL01C-1 EQ Assembly, Use, Maintenance Manual

EQUATION

EQUATION DL01C-1 EQ Assembly, Use, Maintenance Manual

Brant Radiant Heaters DX3 Series user manual

Brant Radiant Heaters

Brant Radiant Heaters DX3 Series user manual

Redwood CA900FI Installation & User Manual Instructions

Redwood

Redwood CA900FI Installation & User Manual Instructions

Dimplex DXUC2B Installation and operating instructions

Dimplex

Dimplex DXUC2B Installation and operating instructions

Sealey CD2013.V3 manual

Sealey

Sealey CD2013.V3 manual

Vornado VMH300 owner's guide

Vornado

Vornado VMH300 owner's guide

Vornado VMHi600 owner's guide

Vornado

Vornado VMHi600 owner's guide

Hatco Flav-R-Savor FS2HAS-15 Installation and operating manual

Hatco

Hatco Flav-R-Savor FS2HAS-15 Installation and operating manual

manuals.online logo
manuals.online logoBrands
  • About & Mission
  • Contact us
  • Privacy Policy
  • Terms and Conditions

Copyright 2025 Manuals.Online. All Rights Reserved.