manuals.online logo
Brands
  1. Home
  2. •
  3. Brands
  4. •
  5. Jaga
  6. •
  7. Heating System
  8. •
  9. Jaga CLIMA CANAL HYBRID User manual

Jaga CLIMA CANAL HYBRID User manual

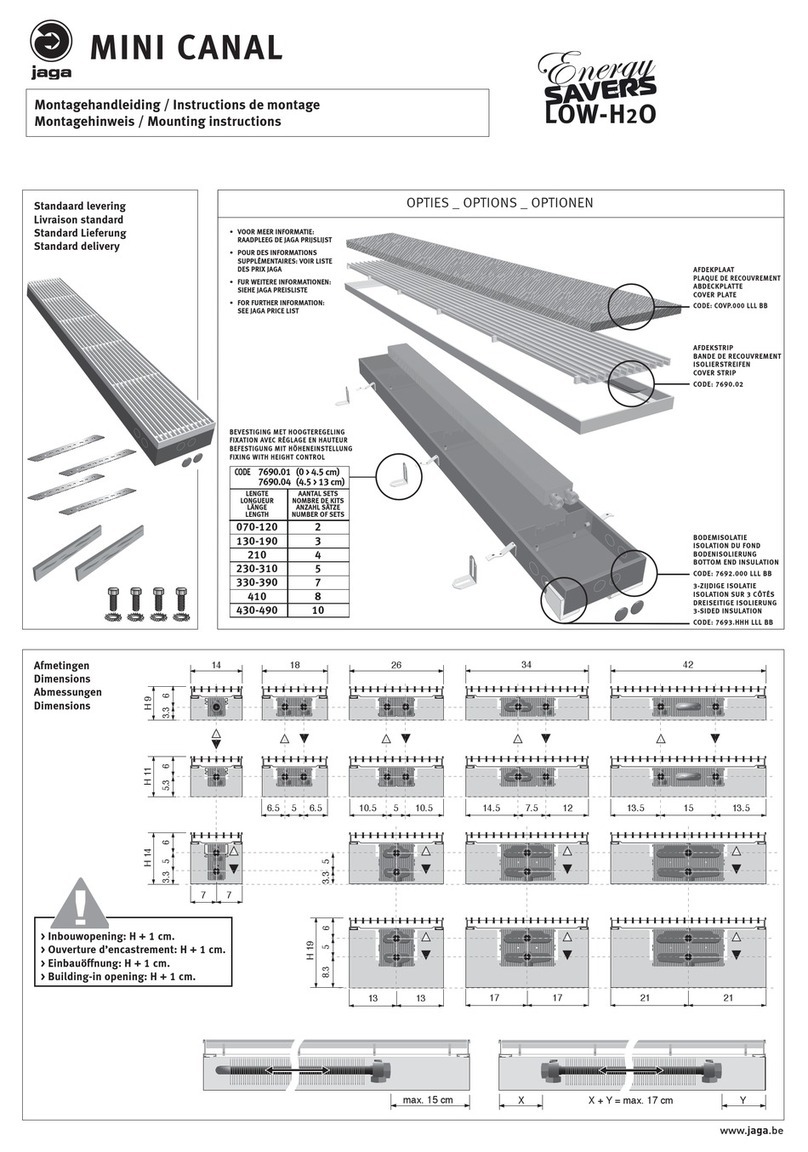
Montagehandleiding / Instructions de montage / Manual de montaje / Mounting instructions
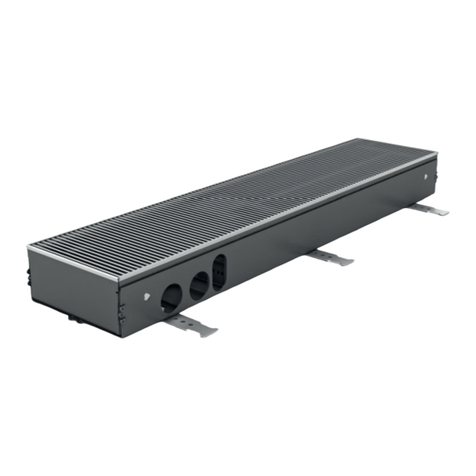
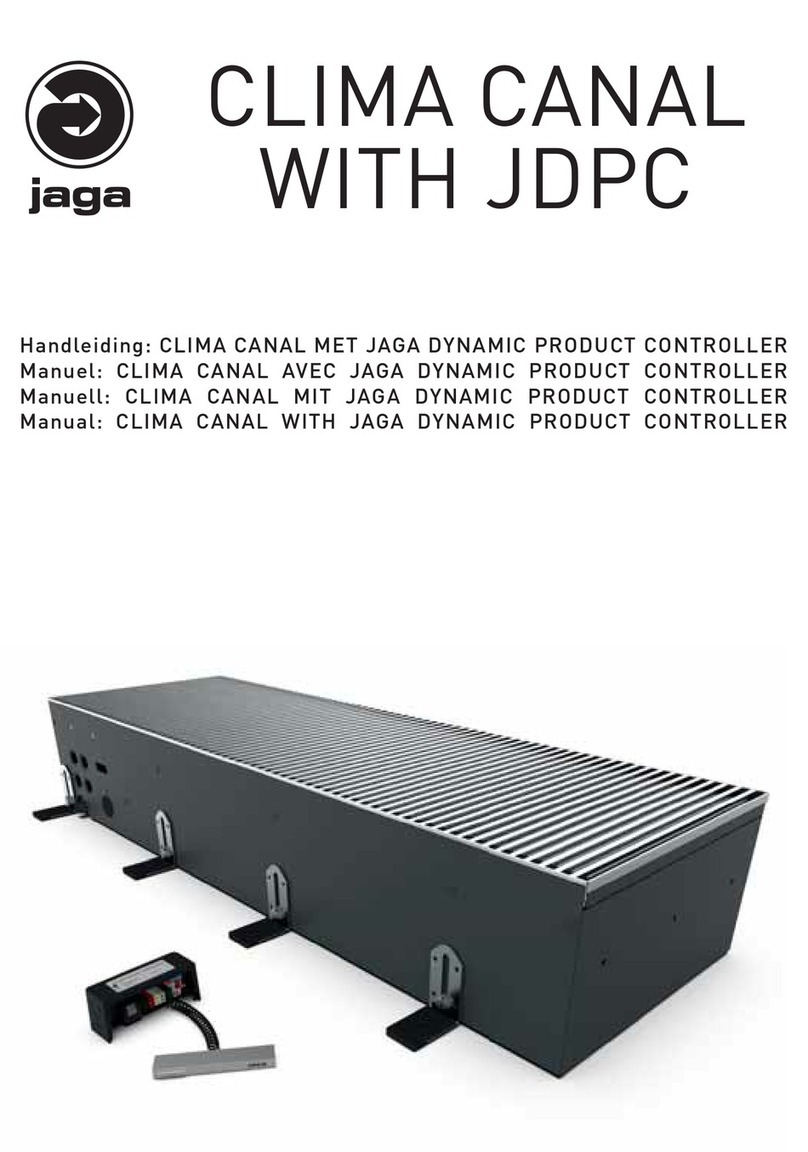
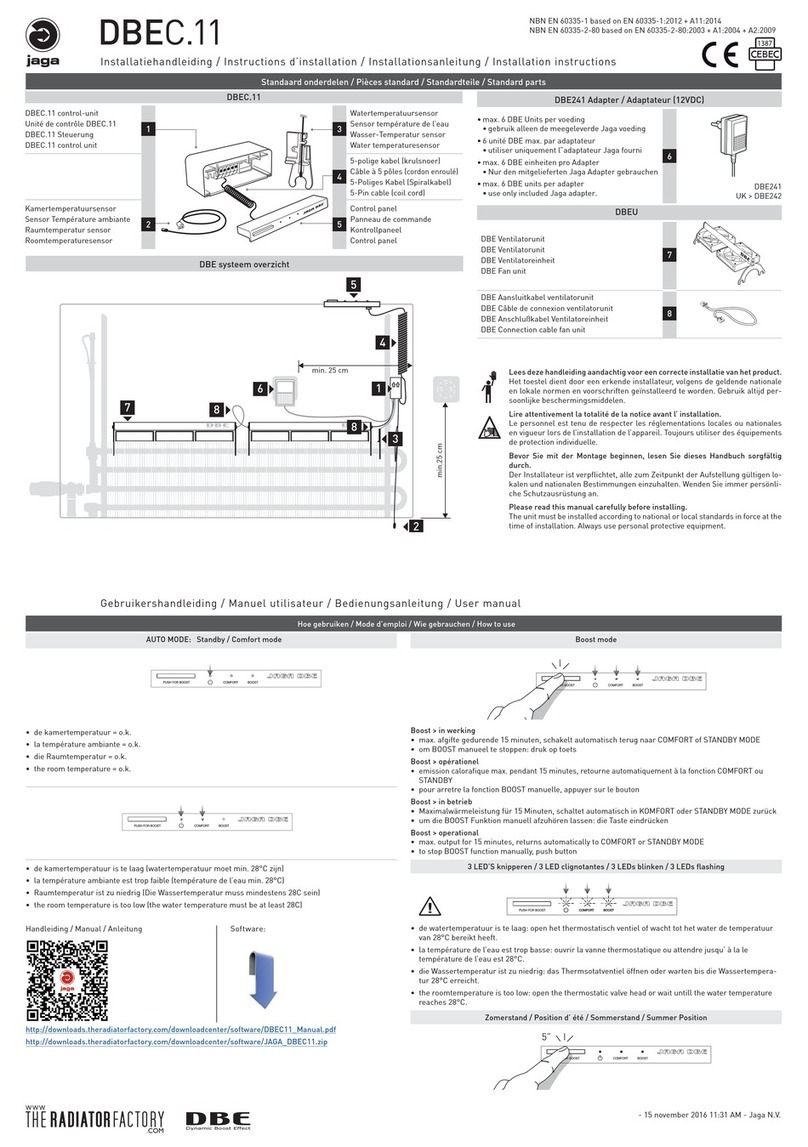
CLIMA CANAL HYBRID / CLIMA CANAL
Lees deze handleiding aandachtig voor een correcte installatie van het product.
Lire attentivement la totalité de la notice avant l' installation.
Por favor, lea este manual atentamente antes de instalar.
Please read this manual carefully before installing.
1
2
3
4
5
6
7
8
9
10
11
12
Samenstelling / composition / Zusammensetzung
1
Montage - werfpaneel
Panneau de protection
Panel de protección
Assembly protection panel
2
Rooster uit aluminium of hout
Grille réalisées en aluminium ou en bois
Rejilla de aluminio o madera
Grill from aluminum or wood
3
RVS Flexibels 15 cm 1/2” (roestvrij staal)
Flexibles 15cm 1/2” (acier inoxydable)
Flexibles15 cm 1/2” (acero inoxidable)
SSSFlexibles 15 cm 1/2” (stainless steel)
4
Fijnafstelling van hoogte
Réglage de la hauteur
Ajuste fino de altura
Fine tuning of height
5
Eindafwerking behuizing
Capuchon ducabinet
Lateral de al carcasat
Finishing of the end of the casing
6
Hoogteregeling
Réglage en hauteur
Ajuste de altura
Height adjustment
7
Low-H2Owarmtewisselaar
Echangeur de chaleur Low-H2O
Low-H2Ointercambiador de calor
Low-H2O heat exchanger
8
Tangentiële ventilator
Ventilateur tangentiel
Ventilador tangencial
Tangential fan
9
Aansluiting verluchtingskanaal (OPTIE)
ventilation connexion (OPTION)
Conexión a sistema de ventilación (OPCIONAL)
Connection for ventilationsystem (OPTION)
10
Elektrische aansluiting (altijd links)
Branchement électrique toujours à gauche
Conexión eléctrica siempre a la izquierda
Electrical connection always on the left hand side
11
Hydraulische aansluiting (altijd links)
Connection hydraulique toujours à gauche
Conexión hidráulica siempre a la izquierda
Hydraulic connection always left
12
Condensopvangbakje, afvoer Ø 20 (HYBRID)
Collecteur de condensats, purgeur Ø 20 (HYBRID)
Collector de condensados, Ø 20 (HYBRID)
Condensate collector, drain Ø 20 (HYBRID)
Als het toestel gebruikt wordt voor koelen moeten de
hydraulische leidingen geïsoleerd worden.
Si l'appareil est utilisé pour refroidir, les tuyaux doivent être iso-
lés.
Si la unidad se va a usar para refrigeración, los tubos deben ser
aislados.
If the unit is used for cooling, the pipes must be insulated.
* klemkoppelingen
* klemkoppelingen
*Racores
* klemkoppelingen
3/4" M24
Code
Cobre - Acerp flexible
110 ø M24 x 10/1
112 ø M24 x 12/1
114 ø M24 x 14/1
115 ø M24 x 15/1
116 ø M24 x 16/1
118 ø M24 x 18/1
Polietileno ret.
212 ø M24 x 12/2
214 ø M24 x 14/2
219 ø M24 x 16/15
216 ø M24 x 16/2
217 ø M24 x 17/2
218 ø M24 x 18/2
VPE/ALU Multicapa
314 ø M24 x 14/2
316 ø M24 x 16/2
326 ø M24 x 16/22
318 ø M24 x 18/2
336 ø M24 x 16/22
enkel voor TEE-bus
ACERO C.V. buis
501 ø M24 x 1/2”
503 ø M24 x 3/8"
Ventielsets / Kits de vanne /
Kits válvulas / valve kits
24 VDC (0...10VDC)
Code CODY.AA4.10.3...
Ventiel / vanne / Válvula / valve:
Eurocone G1/2” x M24 180°
Retourventiel / vanne de retour /
Detentor / return valve: G1/2” x
M24 180°
M24 180°
Code CODY.LOS.00.3...
Retourventiel / vanne de retour /
Detentor / return valve: G1/2” x
M24 180°
set
94
set
91
Jaga tweewegventiel en motor
230VDC
Enkel voor montage op centrale collector
Seulement pour collecteur central
Solo para montar en colector
Onlyfor mounting tocollector
code 7990.409
180°-G 1/2” F/NG 230 Volt 2 Watt
code 7990.4011
180°-G 3/4” F/NG 230 Volt 2 Watt
*
*
Elektrische aansluiting / Raccordement électrique / Conexión eléctrica / Electrical connection
Max. kabellengte (meter):
Max. longueur du câble (metre):
Max. Longitud cables (Metros):
Max. cable length (meter):
10 20 30 40 50 60 70 80 90 100
ØType 1 (4.37W),(aantal / nombre / número / number) Clima Canals:
1 mm218 9 6 4 3 2 1
1.5 mm228 14 9 7 5 4 3 2 1
2.5 mm247 23 15 11 9 7 6 5
ØType 2 (6.70W),(aantal / nombre / número / number) Clima Canals:
1 mm212 6 4 3 2
1.5 mm218 9 6 4 3 2
2.5 mm230 15 10 7 6 5 4 3
ØType 3 (10.30W),(aantal / nombre / número / number) Clima Canals:
1 mm28 4 2 1
1.5 mm212 6 4 3 2
2.5 mm220 10 6543 2
ØType 4 (12.10W),(aantal / nombre / número / number) Clima Canals:
1 mm26 3 2 1
1.5 mm210 5 3 2 1
2.5 mm217 8 5 4 3 2
(max. spanningsverlies 5%) / (tension déficitaire max. 5%) / (max. caida de tensión 5%) / (max. volt drop 5%)
Afmetingen / Dimensions / Abmessungen
Onderdelen/ Parts / Piezas
model > T1 T2 T3 T4
onderdeel / part / Piezas
aantal / nombre
número / number
1 set / 1 Satz
1 set / 1 Satz
1 set / 1 Satz
Hoogteregeling
Réglage en hauteur
ajuste de altura
Height adjustment
Clima Canal Clima Canal Hybrid
Model L
(cm) * H
(cm) * H
(cm) A
172.3 8.5 10 23.0
2108.3 8.5 10 22.5
3144.3 8.5 10 18.5
4180.3 8.5 10 14.5
*H: Tolerantie / tolérance / Tolerancia / tolerance: 0 > 0.2 cm
10.5 4
A
L
186
H
2.7
209
4
Ø3
Ø1.8
*Hybrid: condenswater afvoer
Hybrid: évacuation du condensat
Hybrid: salida de condensados
Hybrid: condensate drain
*
Optie: Lucht Aanvoer / Option: Alimentation en air
Opción: toma de aire / Option: Air Supply →
•installeer het toestel met de warmte-
wisselaar aan demuurkant.
•installez l’appareil avec l’échangeur
de chaleur à la paroi latérale.
•instalar el equipo con el lado del
intercambiador hacia la pared.
•install the device with the heat
exchanger to the wall side.
•om beschadiging van de onderdelen
te voorkomen verwijder het werfpa-
neel alvorens de verwarming op te
starten !!
•retirez le paneau de protection avant
d’utiliser l’appareil de chauffage !!
•equitar el panel protector antes de
utilizar el emisor de calor !!
•remove the protection-panel before
using the heating device !!
20 cm
•voorzie genoeg ruimte voor gordij-
nen!
•espace sufficant prévu pour les
rideaux!
•dejar suficiente espacio para las
cortinas!
•sufficient space for curtains fore-
seen!
WARMTEWISSELAAR / ÉCHANGEUR DE CHALEUR
INTERCAMBIADOR DE CALOR / HEAT EXCHANGER
WERFPANEEL / PANEAU DE PROTECTION
PANEL PROTECTOR / PROTECTION-PANEL
Clima Canal HYBRID:
• in koeling mode: isoleer de leidingen om eventuele condensatie te vermijden
• en mode de refroidissement: les conduites doivent être isolés afin d'éviter
toute condensation
•
modo refrigeración: Ias tuberías deben tener suficiente aislamiento para evitar
condensaciones
• cooling mode: the pipes must have sufficient thermal insulation to prevent
condensation
Let op !! / Attention !! / ¡¡Atención!! / Achtung !!
2a 2b 2c
2d
‹ OK
10 mm
Eindafwerking behuizing / Capuchon du cabinet
Acabado del final de la carcasa / Finishing end of the cabinet
Kanalen doorverbinden / Connexion des canaux / Conexión de canales / Connexion of canals
1
1
OK ›
•plaats de eindafwerking van de behuizing
•montez le capuchon du cabinet
• Montar el panel final de la carcasa
•mount the finishing end of the cabinet
Hoogteregeling / Réglage en hauteur / Ajuste de altura / Height adjustment
3Montage / Montaje / mounting
4
B
A
Clima Canal Clima Canal Hybrid
Amin 8.7 cm / max 9.3 cm min 10 cm / max 10.8 cm
Bmax 4.5 cm
3a Gebruik de regelschroeven om de Clima Canal op de gewenste
hoogte te zetten (3a).
Utilisez la vis de réglage pour placer le Clima Canal à la hauteur
souhaitée (3a).
Usar el tornillo de ajuste de altura del Clima Canal hasta alcanzar
la altura deseada (3a).
Use the adjustment screw to adjust the Clima Canal to the desired
height (3a).
3b Veranker de hoogteregeling (3b) en bevestig het toestel aan de
vloer ( 4 ).
Réglez la hauteur (3b) et fixez l’appareil au sol ( 4 )
Ajustar la altura del equipo (3b) y fijar la escuadra al suelo ( 4 ).
Adjust the height (3b) and attach the appliance on the floor ( 4 )
Let op !! / Attention !! / Atención / Achtung !!
• indien de Clima Canal niet vlak op de vloer bevestigd wordt moet
de ruimte onder het toestel met een vaste massa (beton of shape)
opgevuld worden.
•si le Clima Canal n’est pas fixé à plat sur le sol, l’espace sous
l’appareil doit être comblé avec une masse stable (béton ou
shape).
•Si el Clima Canal no está fijado firmemente al suelo, el espacio
por debajo debe rellenarse con una masa solida (como cemento o
cemento cola).
• if the Clima Canal is not fixed evenly to the floor, the space
beneath the unit must be filled with a solid mass (concrete or
subfloor).
• hydraulische aansluiting : 1/2”
•connectionshydraulique : 1/2”
•Conexión hidráuilica : 1/2”
•hydraulic connections : 1/2”
Hydraulische aansluiting / Raccordement Hydraulique / Conexión Hidráulica / Hydraulic connection
• om geurhinder te voorkomen moet de condensafvoer aange-
sloten worden op een regelmatig gebruikte afvoerbuis met
geurafsluiter.
• pour éviter les odeurs désagréables, l’évacuation de la conden-
sation doit être reliée à une conduite d’évacuation avec coupe-
odeurutilisée régulièrement.
•Para evitar olores desagradables, conectar la evacuación de
condensados a una salida usada frecuentemente con un sifón.
• to avoid smells connect the condensation outlet to a frequently-
used drainpipe fitted with a siphon trap.
5
5a 5b
- condensafvoer Ø 20
- purgeur de condensats Ø 20
-Salida de condensados de Ø 20
- condensate drain Ø 20
volgende Clima Canal / prochaine Clima Canal
siguiente Clima Canal / next Clima Canal
0...10V
24VDC
CLIMA CANAL
1
3
2
24V
Het gebruik van de flexibele aansluitingen is verplicht, dit om
het onderhoud van het toestel te kunnen garanderen.
L'utilisation de raccordements flexibles est obligatoire, ceci
pour pouvoir garantir l'entretien de l'appareil.
Es obligatorio utilizar las conexiones flexibles, para
garantizar el mantenimiento del radiador.
The use of flexible connections is obligated, this to
guarantee the maintenance of the radiator.
6a 6b
Elektrische aansluiting / Raccordement électrique / Conexión eléctrica / Electrical connection
Aansluiting condensafvoer / Raccordement purgeur de condensats / Conexión de la bandeja de condensados / Condensate drain connection
6
7
15 >< 25 cm
Voorbereiden voor vloer / Préparation / Preparación del suelo /floor preparation
Randisolatie / Isolation périphérique / Aislamiento perimetral / Rim insulation
8
• bij gebruik van vloeichape: kleef rondom af
met tape
• dans chape autonivelante: utiliser du ruban
adhésif
•Para cemento autonivelante: Sellar el
contorno con cinta
• by liquid levelling concrete: Place tape around
10
•plaats hetmontage-beschermpaneel.
• placez le bloc panneau de protection.
•Colocar el panel de protección.
• place the assembly protection panel
• draai de regelschroeven van de hoogte-fijnaf-
stelling los en trek de hoogteregeling tot boven
de te plaatsen vloer
• déserrez les vis de réglage du dispositif de
réglage de précision du nivellement et levez ce
dispositif jusqu'au dessus du sol à placer
•
•
Soltar los tornillos de ajuste de altura y
estirar le marco hacia arriba justo por
encima del nivel del suelo terminado.
loosen the adjusting screws of the height
adjustment and pull the height control up to
above the floor to be placed
Hoogtefijnafstelling / réglage de la hauteur / Feinabstimmung der Höhe / Finetuning of height
• zorg er voor dat de bovenkant van de hoogte-
fijnafstelling gelijk is met de afgewerkte vloer.
Veranker de hoogte fijnafstelling met de schroe-
ven
• veillez à ce que le côté supérieur du dispositif
de réglage de précision du nivellement soit au
même niveau que le sol fini. Fixez le réglage de
précision en hauteur à l'aide des vis
•aseguresé de que el ajuste de altura superior
está nivelado con el suelo terminado. Fijar el
ajuste de altura con los tornillos
• make sure the top of the height adjustment is
levelled with the finished floor. Anchor the height
adjustment with the screws
Randisolatie::
Als er een afwerkvloer wordt toegepast (gietvloer of een cementgebonden dekvloer) moet er ran-
disolatie geplaatst worden aan de langse zijde van het toestel, om het toestel te beschermenen om
spanningsverschillen op te vangen tijdens het verwarmen of koelen.
Isolation périphérique:
Si une couche de finition est appliquée (sol coulé ou chape de ciment), une isolation périphérique doit
être placée du côté long de l’appareil, afin de le protéger contre les différences de tension pendant le
chauffage ou le refroidissement.
Aislamiento perimetral:
Wenn ein Deckboden verwendet wird (Gussboden oder ein zementgebundener Deckboden) muss
Randdämmung an der längsten Geräteseite angebracht werden, um das Gerät zu schützen und
Spannungsunterschiede beim Erwärmen und Abkühlen auszugleichen.
Rim insulation::
If a screed is to be applied (poured floor or a cementitious screed) rim insulation will be required on
the long side of the appliance; to protect it and to cope with expansion differences during heating or
cooling.
Speciale aandachtspunten:
Onderhoud / Entretien / Mantenimiento / Maintenance
Reiniging van de schacht
•het binnenwerk is volledig uitneembaar
•reinig op regelmatige interval, (minstens één maal per jaar)
naargelang het gebruik en functie van de ruimte
•reinigen met behulp van een zachte vochtige spons, eventueel
doordrenkt met een niet-schurend huishoudelijk reinigingsmid-
del op waterbasis. Niet reinigen met producten op basis van
solventen en detergenten.
• vóór de installatie of onderhouden van de ventilator, altijd eerst
de stroom uitgeschakelen
• avant d’installer ou de réparer le ventilateur, s’assurer que
l’alimentation est coupée
•desconectar siempre la alimentación antes de instalar o hacer
mantenimiento de los ventiladores
• always disconnect and lock out power before installing or ser-
vicing the fan
Nettoyage du corps
•l’intérieur est totalement amovible
•nettoyez à intervalles réguliers (au moins 1 x par an) selon
l’utilisation et la fonction de l’espace
•nettoyez au moyen d’une éponge douce humide, éventuellement
imbibée d’un nettoyant aqueux domestique non abrasif. Ne pas
nettoyer avec des produits à base de solvants et de détergents.
Limpieza de los conductos
•Los elementos interiores son completamente desmontables.
•Es importante limpiar los conductos con regularidad (al
menos una vez al año)
•Limpiar con un paño suave humedecido con agua y jabón. No
usar productos con disolventes o detergentes abrasivos.
Cleaning the duct
• the interior is completely removable
• cleaning at regular interval is important, (at least once a year),
depending on the use and function of the room
•Clean with a soft cloth dampened with water and a little dish
soap. Do not use products based on solvents and detergents.
Filter reinigen
Een vervuilde filter hindert de luchtstroom naar de ventilator.
Reinig op regelmatige interval naargelang het gebruik en functie
van de ruimte. Het filter moet niet gedemonteerd worden voor
onderhoud en kan eenvoudig met een stofzuiger gereinigd worden
Nettoyer lefiltre
Un filtre encrassé empêche l’arrivée d’air vers le ventilateur.
Nettoyez à intervalles réguliers selon l’utilisation et la fonction de
l’espace. Le filtre ne doit pas être démonté pour l’entretien et peut
être aisément nettoyé avec un aspirateur
Limpieza de filtros
Un filtro sucio obstruye el paso de aire del ventilador. Limpiar los
filtros a intervalos regulares, dependiendo del funcionamiento y
uso de la estancia. El filtro no debe desmontarse para el
mantenimiento, simplemente debe ser limpiado con una
aspiradora
Cleaning the filters
A dirty filter obstructs the flow of air to the ventilator. Clean the
filter at regular intervals, depending on the usage and function of
the room. The filter must not be dismantled for maintenance and
can simply be cleaned with a vacuum cleaner.
9
Afwerken / Finition / Acabado / Finishing
Verwijder het werfpaneel alvorens de verwarming optestarten !
Retirez le paneau de protection avant d’utiliser l’appareil de chauf-
fage !!
¡Retirar el panel de protección antes de activar los equipos!
Remove the protection-panel before using the heating device !
OK !
Akoestische isolatie
Isolatie tegen luchtgeluid
Geluid wordt weerkaatst door harde materialen. Om luchtgeluid te
absorberen zijn zachte, poreuze stoffen het best geschikt.
Contactgeluidsisolatie
Geluid plant zich zeer gemakkelijk voort in harde materialen. Con-
tactgeluidsisolatie hangt in grote mate af van:
A. De kwaliteit van de plaatsing
• contactpunten.
Zorg er voor dat geluid- en /of mechanische trillingen niet
overgedragen kunnen worden tussen verschillende elemen-
ten, v.b. tussen de ingebouwde verwarmingstoestellen en een
metalen draagframe, via leidingen, langs luchtkanalen enz.
• holle akoestische ruimtes.
Waar lucht door kan, kan ook geluid door:
Isoleer de ingebouwde verwarmingstoestellen van holle
akoestische ruimtes. Vermijd holtes tussen isolatie en leidin-
gen. Deze vormen kleine klankkasten. Vermijd holtes langs
luchtkanalen (hiervan kan het akoestisch effect niet voorspeld
worden).
Isolation acoustique
Isolation contre le bruit aérien
Les matériaux durs réfléchissent le bruit. Les substances douces
et poreuses conviennent le mieux pour absorber le bruit aérien.
Isolation contre le bruit de contact
Le bruit se propage très facilement dans les matériaux durs.
L'isolation contre le bruit de contact dépend largement de:
A. La qualité du placement
• points de contact.
Veillez à ce que les vibrations sonores et/ou mécaniques
ne puissent se transmettre entre les différents éléments,
par exemple entre les appareils de chauffage intégrés et
un support métallique, via les conduites, le long des canaux
d'aération, etc.
• espaces acoustiques creux.
Là où l'air peut passer, le bruit peut aussi passer:
Isolez les appareils de chauffage intégrés des espaces acous-
tiques creux. Evitez les creux entre l'isolation et les conduites.
Ceux-ci forment de petites caisses de résonance. Evitez les
creux le long des conduites d'aération (on ne peut en prédire
l'effet acoustique).
Aislamiento acústico
Aislamiento contra el ruido del aire
El sonido es reflejado por materiales duros. Los materiales
blandos y porosos son los mejores para absorber vibraciones
Aislamiento contra el ruido por vibraciones
El ruido se transmite muy facilmente en materiales duros.
El aislamiento del ruido por contacto depende
principalmente:
A. La calidad del emplazamiento
Puntos de contacto.
Asegúrese de que el sonido y/o las vibraciones
mecánicas no se puedan transmitir entre los diferentes
elementos, por ejemplo, entre calentadores integrados
y un soporte de metal, a través de tuberías, a lo largo de
canales de ventilación, tarimas de madera, etc.
B. Espacios acústicos huecos.
Donde el aire puede pasar, el ruido también lo hace:
Aísle los radiadores integrados de espacios acústicos
huecos como suelos técnicos o tarimas flotantes. Evite
espacios entre el aislamiento y las tuberías. Estos
forman pequeñas cajas de resonancia. Evite espacios a
lo largo de los conductos de ventilación (no se puede
predecir el efecto acústico).
Montage in computervloeren
Montage dans faux-planchers
Montaje en suelos técnicos
Installation in false floors
CODE H (cm)
5207.05070000 5 > 7
5207.08130000 8>13
5207.13230000 13 >23
5207.20300000 20 > 30
Gebruik voor het plaatsen van Clima Canals in holle bodem
steeds de Jaga erkende regelbare voeten.
Voor advies: neem contact op met N.V.Jaga:
- e-mail: aftersales@jaga.be
- tel. 0032 11-29 41 11.
Bij afwijkende vloertypes: hou rekening met de geluidsover-
dracht en akoustiek.
Utilisez toujours, pour le placement du Clima Canal sur sol
concave, les pieds réglables agréés par Jaga.
Pour tout conseil, prenez contact avec JAGA SA:
- e-mail: aftersales@jaga.be
- tél. 0032 11-29 41 11.
Pour les types de sol particuliers, tenez comptede la trans-
mission du bruit et de l’acoustique
Use siempre los Pies ajustables Jaga para instalar Clima
Canal en suelos técnocos
Para Dudas: Contacte Kontaktieren Sie N.V. JAGA Deutschland:
- e-mail:i[email protected]
-tel. 0211-93 85 899
Para otros tipos de pisos: tenga en cuenta la transmisión de
sonido y la acústica.
Always use Jaga-approved adjustable feet when installing
Clima Canal units in hollow bottoms.
For advice, please contact N.V. Jaga:
- e-mail: Jaga@jaga.co.uk.
- tel. 0044 1531 631 533.
For special floor types, allow for sound transfer and acoustics
Acoustic isolation
Insulation against airborne noise
Sound is reflected by hard materials. Soft, porous substan-
ces are best suited to absorbing airborne sound.
Contact sound insulation
Sound travels very easily in hard materials.
Contact sound insulation will largely depend on this:
A. Quality of the placement
Contact points
Make sure that sound- and/or mechanical vibrations cannot
be transferred between different elements, e.g. between
the built-in heaters and a metal carrier, through pipes, al-
ong air ducts etc.
Hollow acoustic spaces.
Where air can travel, so can sound:
Isolate the built-in heaters in hollow acoustic spaces. Avoid
cavities between insulation and pipes. These form small re-
sonance boxes. Avoid cavities along air ducts (the acoustic
effect cannot be predicted for this).
Gelieve deze instructies te volgen en te bewaren! S’il vous plaît garder cette instruction!
Bitte bewahren Sie diese Anleitung! Please follow and keep these instructions!
27200.23900002 - July 9, 2014 9:47 AM - Jaga N.V.
BELANGRIJK / IMPORTANTE / WICHTIG
Waarschuwing: Avertissement Advertencia Warning
Dit apparaat is niet bedoeld voor gebruik door
personen (waaronder kinderen) met verminder-
de lichamelijke, zintuiglijke of geestelijke vermo-
gens, of die gebrek aan ervaring of kennis heb-
ben, tenzij iemand die verantwoordelijk is voor
hun veiligheid toezicht houdt of uitgelegd heeft
hoe het apparaat gebruikt dient te worden.
Houd kinderen onder toezicht om ervoor te zor-
gen dat ze niet met het apparaat spelen.
Cet appareil n’est pas destiné à être utilisé par
des personnes (notamment des enfants) dont
les capacités physiques, sensorielles ou intel-
lectuelles sont réduites, ou par des personnes
manquant d’expérience ou de connaissances, à
moins que celles-ci ne soient sous surveillance
ou qu’elles n’aient reçu des instructions quant à
l’utilisation de l’appareil par une personne res-
ponsable de leur sécurité.
Veillez à ce que les enfants ne puissent pas jouer
avec l’appareil.
Este electrodoméstico no está diseñado para ser
utilizado por personas (incluidos niños) con
capacidades físicas, sensoriales o mentales
reducidas, o falta de experiencia o conocimiento,
a menos que hayan recibido supervisión o
instrucciones sobre el uso del equipo por parte
de una Persona responsable de su seguridad.
Los niños deben ser supervisados para
asegurarse de que no jueguen con el equipo.
This appliance is not intended for use by persons
(including children) with reduced physical, sen-
sory or mental capabilities, or lack of experience
and knowledge, unless they have been given su-
pervision or instruction concerning use of the ap-
pliance by a person responsible for their safety.
Children should be supervised to ensure that they
do not play with the appliance.
Alleen wanneer de inhoud van deze handleiding
volledig wordt nageleefd kunnen fouten worden
voorkomen en is een storingsvrij gebruik moge-
lijk.
Het recht op garantie vervalt bij:
• fouten of beschadigingen die voortkomen door
het niet naleven van de montage, reiniging - of
gebruiksinstructies van de fabrikant
•een onjuist, oneigenlijk en/of onverantwoorde-
lijk gebruik of behandeling van het apparaat
•foutieve of ondeskundige reparaties en defecten
ontstaan door externe factoren
•zelf aangebrachte veranderingen aan het appa-
raat
•toestellen die zo ingebouwd zijn dat ze niet een-
voudig bereikbaar zijn.
In geval van vragen of klachten, kunt u zich wenden
tot uw leverancier of installateur.
Het auteursrecht van deze handleiding is eigen-
dom van de firma Jaga n.v.
Les erreurs ne peuvent être évitées et une utili-
sation exempte de pannes n'est possible que si
le contenu de ce manuel est totalement respecté.
Le droit à la garantie est supprimé en cas de:
•fautes ou dommages générés par le non-respect
des instructions de montage, de nettoyage ou
d'utilisation du fabricant.
•utilisation incorrecte, inappropriée et/ou utilisa-
tion ou usage irresponsable de l'appareil.
•réparations fautives ou incompétentes et pannes
causées par des facteurs externes
•modifications personnelles apportées à l'appa-
reil
•appareils encastrés qui ne sont pas facilement
accessibles.
Pour toute question ou plainte, vous pouvez vous
adresser à votre fournisseur ou installateur.
Le droit d'auteur de ce manuel est la propriété de
la société Jaga n.v.
Por favor, siga estas instrucciones cuidadosa-
mente para permitir una instalación sin errores
y un uso sin preocupaciones.
El derecho a la garantía se cancela en caso de:
•errores o daños resultantes de no seguir el
ensamblaje, la limpieza o las instrucciones
del usuario suministradas por el fabricante,
•uso o tratamiento incorrecto, inadecuado y/o
irresponsable del dispositivo,
•reparaciones y defectos incorrectos o
incompetentes debido a factores externos,
•cambios realizados al dispositivo,
•equipo instalado, de manera que no se
pueda alcanzar normalmente.
Si tiene alguna pregunta o queja, comuníquese
con su proveedor o instalador.
El copyright de estas instrucciones es propiedad
de la empresa Jaga Inc
Please follow these instructions carefully in order
to allow for an error-free installation and a care-
free use.
Entitlement to warranty is cancelled in case of:
•errors or damage resulting from not following
the assembly, cleaning or user instructions sup-
plied by the manufacturer,
•wrong, improper and/or irresponsible use or
treatment of the device,
•wrong or incompetent repairs and defects due to
external factors,
• self-applied changes to the device.
•equipment that is built in, in a way that it cannot
be reached normally.
If you have any questions or complaints, please
contact your supplier or installer.
The copyright of these instructions is the property
of the company Jaga Inc.

Other manuals for CLIMA CANAL HYBRID

2

This manual suits for next models

1

Other Jaga Heating System manuals

Jaga CLIMA CANAL User manual

Jaga

Jaga CLIMA CANAL User manual

Jaga DBEC.11 User manual

Jaga

Jaga DBEC.11 User manual

Jaga CLIMATE DESIGNERS User manual

Jaga

Jaga CLIMATE DESIGNERS User manual

Jaga heatwave small User manual

Jaga

Jaga heatwave small User manual

Jaga Micro Canal User manual

Jaga

Jaga Micro Canal User manual

Jaga CLIMA CANAL User manual

Jaga

Jaga CLIMA CANAL User manual

Jaga MINI DYNAMIC CANAL User manual

Jaga

Jaga MINI DYNAMIC CANAL User manual

Jaga Briza 22 User manual

Jaga

Jaga Briza 22 User manual

Jaga QUATRO CANAL HYBRID User manual

Jaga

Jaga QUATRO CANAL HYBRID User manual

Jaga FREEDOM CLIMA User manual

Jaga

Jaga FREEDOM CLIMA User manual

Jaga BRIZA 22 -JDPC.002 User manual

Jaga

Jaga BRIZA 22 -JDPC.002 User manual

Jaga Mini Canal User manual

Jaga

Jaga Mini Canal User manual

Popular Heating System manuals by other brands

Viessmann VITOCELL 300B Service instructions for contractors

Viessmann

Viessmann VITOCELL 300B Service instructions for contractors

Zehnder Rittling ComfoConnect KNX C manual

Zehnder Rittling

Zehnder Rittling ComfoConnect KNX C manual

Magnum Sol 300 installation manual

Magnum

Magnum Sol 300 installation manual

Robur GA ACF HT Installation, use and maintenance manual

Robur

Robur GA ACF HT Installation, use and maintenance manual

Juwent TROPIC-1 Original instruction manual

Juwent

Juwent TROPIC-1 Original instruction manual

MMotors JSC ECO-FRESH 01 LUX installation instructions

MMotors JSC

MMotors JSC ECO-FRESH 01 LUX installation instructions

Delfin DROPplus user manual

Delfin

Delfin DROPplus user manual

Goodman PG 15 SEER "M" SERIES installation instructions

Goodman

Goodman PG 15 SEER "M" SERIES installation instructions

RenewAire HE ERV Series Installation, operation and maintenance manual

RenewAire

RenewAire HE ERV Series Installation, operation and maintenance manual

Fuba AHZ780 manual

Fuba

Fuba AHZ780 manual

Heidolph HB 4000 digit instruction manual

Heidolph

Heidolph HB 4000 digit instruction manual

Gledhill Response A-Class ElectraMate User instructions

Gledhill Response

Gledhill Response A-Class ElectraMate User instructions

Daikin ECOLLECTRMV Operating lnstructions

Daikin

Daikin ECOLLECTRMV Operating lnstructions

Airxcel Aqua-Hot 200 Series installation manual

Airxcel

Airxcel Aqua-Hot 200 Series installation manual

Baxi SILA RCV 300 Installation instructions, Functioning and Maintenance

Baxi

Baxi SILA RCV 300 Installation instructions, Functioning and Maintenance

Chiltrix CXI34 manual

Chiltrix

Chiltrix CXI34 manual

Thermal Intelligence BASECAMP Operator's manual

Thermal Intelligence

Thermal Intelligence BASECAMP Operator's manual

Hotstart DLV Installation & operation manual

Hotstart

Hotstart DLV Installation & operation manual

manuals.online logo
manuals.online logoBrands
  • About & Mission
  • Contact us
  • Privacy Policy
  • Terms and Conditions

Copyright 2025 Manuals.Online. All Rights Reserved.