manuals.online logo
Brands
  1. Home
  2. •
  3. Brands
  4. •
  5. Jason.L
  6. •
  7. Indoor Furnishing
  8. •
  9. Jason.L Sit-Stand Series User manual

Jason.L Sit-Stand Series User manual

ASSEMBLY INSTRUCTION
MODEL : ST SUPREME E25T 90° LEFT
Electric L-Shaped Desk Frame
( Table Top 150X150cm / 180X150cm / 180X180cm )
V1.0
BOX NO.1
DG
Screw M5 X L16
Qty : 8
Axle Drive L400mm
Qty : 2
Hex Shaft L430mm
Qty : 1
Screw M5 X L10
Qty : 6
Left Column
Qty:1
Crossbar Motor Model
Qty : 1
Cable Tray
Qty : 1
Right Column
Qty: 1
Foot
Qty: 2
Crossbar Assy.
Qty: 1
Screw M6XL10
Qty : 3
Leveling Base
Qty: 4
Control Box
TC11
Qty : 1
Motor
TGM1-2252-003
Qty : 1
Rubber Pad Type-A
Qty: 10
Crossbar Assy.
Qty: 1
Side L Plate
Qty: 2
Screw M6 X L16
Qty : 8
Hex Shaft L295mm
Qty : 2
Hex Shaft L600mm
Qty : 1
Handset TH14
Qty : 1
01 02 03
04
05
06
07
08
09
10
11
12
13 14 15 16 17
18 19 20 21
Component List - ST SUPREME E25T 90°_V1.0
BOX NO.2
Crossbar Assembly
Qty: 1
Hex Shaft L430mm
Qty : 1
Screw M5 X L10
Qty : 6
Right Column
Qty: 1
Foot
Qty: 1
Crossbar Assy.
Qty: 1
Leveling Base
Qty: 2
Rubber Pad Type-A
Qty: 7
Side L Plate
Qty: 1
Screw M6 X L16
Qty : 4
NIL NIL
22 23
24
25
26
27
28 29 30 31
RHD Woodscrew
M5X25
Qty: 17
CSK Woodscrew
M4X30
Qty: 2
32 33
Component List - ST SUPREME E25T 90°_V1.0
V1.0 Pg.1/15
05
03
18
18
01
15
15
15
15
Marking 'L' column
direction must be follow
16
16
16
16
STEP 2 : Install Foot
STEP 3 : Install Crossbar Left Assy.
Step 1 : Install Leveling Base
ITEM NO.
DESCRIPTION
QTY.BOX NO.1
03
Foot
1
18
Leveling Base
2
ITEM NO.
DESCRIPTION
QTY.BOX NO.1
01
Left Column
1
15
Screw M6 XL16
4
ITEM NO.
DESCRIPTION
QTY.BOX NO.1
05
Crossbar Assy.
1
16
Screw M5 XL16
4
Assembly Instruction: Left Stand Assembly
V1.0 Pg.2/15
04
03
18
18
02
15
15 15
15
16
16
16 16
Marking 'R' column
direction must be follow
STEP 2 : Install Foot
STEP 3 : Install Crossbar Right Assy.
Step 1 : Install Leveling Base
ITEM NO.
DESCRIPTION
QTY.BOX NO.1
03
Foot
1
18
Leveling Base
2
ITEM NO.
DESCRIPTION
QTY.BOX NO.1
02
Right Column
1
15
Screw M6 XL16
4
ITEM NO.
DESCRIPTION
QTY.BOX NO.1
04
Crossbar Assy.
1
16
Screw M5 XL16
4
Assembly Instruction: Right Stand Assembly
V1.0 Pg.3/15
24
23
31
31
22
29
29 29
29
28
28
28
28
Marking 'R' column
direction must be follow
STEP 2 : Install Foot
STEP 3 : Install Crossbar Right Assy.
Step 1 : Install Leveling Base
ITEM NO.
DESCRIPTION
QTY.BOX NO.2
23
Foot
1
31
Leveling Base
2
ITEM NO.
DESCRIPTION
QTY.BOX NO.2
22
Right Column
1
29
Screw M6 XL16
4
ITEM NO.
DESCRIPTION
QTY.BOX NO.2
24
Crossbar Assy.
1
28
Screw M5 XL10
4
Assembly Instruction: 3rd Stand Assembly
Left Stand Assy.
(Refer Pg.1/15)
Right Stand Assy.
(Refer Pg.2/15)
3rd Stand Assy.
(Refer Pg.3/15)
07
27
Notes:
Step 1 : Select table size
(Refer table lower right side).
Step 2 : Intergrate Right Stand Assy & Crossbar Assembly (Item No.27)
(Before intergrate, Please follow
Figure A
Step 3 : Intergrate Crossbar Motor Model (Item No.07)
Step 4 : Intergrate Left Stand Assy.
Step 5 : Adjust and align distance.
(Refer table lower right side)
.
Step 6 : Lock Set Screw M6(x8)
Set Screw M6(X8)
Detail A
Detail B
Detail C
Pull out Axle Drive
from Geax box
**Follow direction
Gear Box
Figure A
Detail D
V1.0 Pg.4/15
ITEM NO.
DESCRIPTION
QTY.BOX NO.1 QTY.BOX NO.2
07
Crossbar Motor Model
1
-
27
Crossbar Assembly
-
1
Option
Table Size
Detail A
Detail B
Detail C
Detail D
1
150X150cm
145 145 110 300
2
180X150cm
175 175 110 350
3
180X180cm
175 175 140 350
Assembly Instruction: Integrate Left, Right & 3rd Stand
14
14
14
19
V1.0 Pg.5/15
ITEM NO.
DESCRIPTION
QTY.BOX NO.1
14
Screw M6 XL10
3
19
Motor TGM1-2252-003
1
Assembly Instruction: Install Motor Assembly
09
09
11
08
08
Press
Down
Press
Down
Press
Down
Axle Drive
DM
Set Screw M6(X4)
(50~60mm) (50~60mm)
Notes:
1.Before Insert Hex Shaft, make sure
Left Stand & Right Stand are at lowest position.
Please see attachment caution ! (Refer Pg10/15).
2. After insert Hex Shaft
11
, Hex Shaft
09
and Axle Drive
08 ,
align according as per
Figure No.1
dimension.
3. Align Axle Drive into gear box.
4. Locking Set Screw M6 (x4)
V1.0 Pg.6/15
For Length 145cm (5Feet)
ITEM NO.
DESCRIPTION
QTY.BOX NO.1
08
Axle Drive L400mm
2
09
Hex Shaft L295mm
2
11
Hex Shaft L430mm
1
Assembly Instruction: Axle Drive And Hex Shaft Assy.
Press
Down
Press
Down
Press
Down
Hex Shaft
Length 295mm
Axle Drive
Figure No.2
DT
Set Screw M6
(15~25mm)
Notes:
1.Before Insert Hex Shaft, make sure
Left Stand & Right Stand are at lowest position.
Please see attachment caution ! (Refer Pg10/15).
2. After insert Hex Shaft and Axle Drive,
align according as per
Figure No.2
dimension.
3. Locking Set Screw M6
V1.0 Pg.7/15
For Length 110cm (5Feet)
Assembly Instruction: Axle Drive And Hex Shaft Assy.
09 09
10
08
08
Press
Down
Press
Down
Press
Down
Axle Drive
DL
Set Screw M6(X4)
(50~60mm) (50~60mm)
Notes:
1.Before Insert Hex Shaft, make sure
Left Stand & Right Stand are at lowest position.
Please see attachment caution ! (Refer Pg10/15).
2. After insert Hex Shaft
10
, Hex Shaft
09
and Axle Drive
08 ,
align according as per
Figure No.3
dimension.
3. Align Axle Drive into gear box
4. Locking Set Screw M6 (x4)
V1.0 Pg.8/15
For Length 175cm (6Feet)
ITEM NO.
DESCRIPTION
QTY.BOX NO.1
08
Axle Drive L400mm
2
09
Hex Shaft L295mm
2
10
Hex Shaft L600mm
1
Assembly Instruction: Axle Drive And Hex Shaft Assy.
Press
Down
Press
Down
Press
Down
26
Axle Drive
K
Set Screw M6
300~310mm
Figure No.4
Notes:
1.Before Insert Hex Shaft, make sure
Left Stand & Right Stand are at lowest position.
Please see attachment caution ! (Refer Pg10/15).
2. After insert Hex Shaft
26
and Axle Drive,
align according as per
Figure No.4
dimension.
3. Locking Set Screw M6
V1.0 Pg.9/15
For Length 140cm (6Feet)
ITEM NO.
DESCRIPTION
QTY.BOX NO.2
26
Hex Shaft L430mm
1
Assembly Instruction: Axle Drive And Hex Shaft Assy.
AW
BC
BR
16
BN
16
BP
Press down the column make sure it is at lowest postion.
The marking O not appear means it is at lowest position
refer to below diagram.
Marking
fully seen
Marking
partially seen
Marking not seen
(Means at lowest position)
Press
Press
V1.0 Pg.10/15
Caution: Column Must Be At Lowest Position Before Install Hex Shaft
06
06
13
13
13
13
28
28
25
V1.0 Pg.11/15
ITEM NO.
DESCRIPTION
QTY.BOX NO.1 QTY.BOX NO.2
06
Side L Plate
2
-
13
Screw M5 XL10
4
-
25
Side L Plate
-
1
28
Screw M5 XL10
-
2
Assembly Instruction: Install Side L Plate
12
13
13
V1.0 Pg.12/15
ITEM NO.
DESCRIPTION
QTY.BOX NO.1
12
Cable Tray
1
13
Screw M5 XL10
2
Assembly Instruction: Install Cable Tray
20
21
V1.0 Pg.13/15
ITEM NO.
DESCRIPTION
QTY.BOX NO.1
20
Control Box TC11
1
21
Handset TH14
1
Assembly Instruction: Install Control Box & Handset
17
17
17
17
17
17 17
17
17
30
30
30
30
30
30
30
17
V1.0 Pg.14/15
ITEM NO.
DESCRIPTION
QTY.BOX NO.1 QTY.BOX NO.2
17
Rubber Pad Type-A
10
-
30
Rubber Pad Type-A
-
7
Assembly Instruction: Plug Rubber Pad Type-A
Cautions!
Make sure all cables are connected to control box before power up.
'DOWN' Button
'UP' Button
V1.0 Pg.15/15
Caution!
Duty cycle: Max. 2min ON / 18 min OFF.
Reset operation as below :
1.One time reset
For the first powered up, press and hold both 'Up' and 'Down' buttons,
simultaneously for more than 3 seconds until the desk moves down to
lowest position.
After checking the signal motor constant, reset was completed and ready
to use.
*The initialization procedure must be completed before the first running
after the table is installed or parts are prepared.*
2.Any dismantle of electrical component follow below procedure.
Follow procedure no.1 again.
Assembly Instruction: Reset The Desk Before Use

This manual suits for next models

4

Other Jason.L Indoor Furnishing manuals
Jason.L Switch System Small Round Meeting Table User manual

Jason.L

Jason.L Switch System Small Round Meeting Table User manual

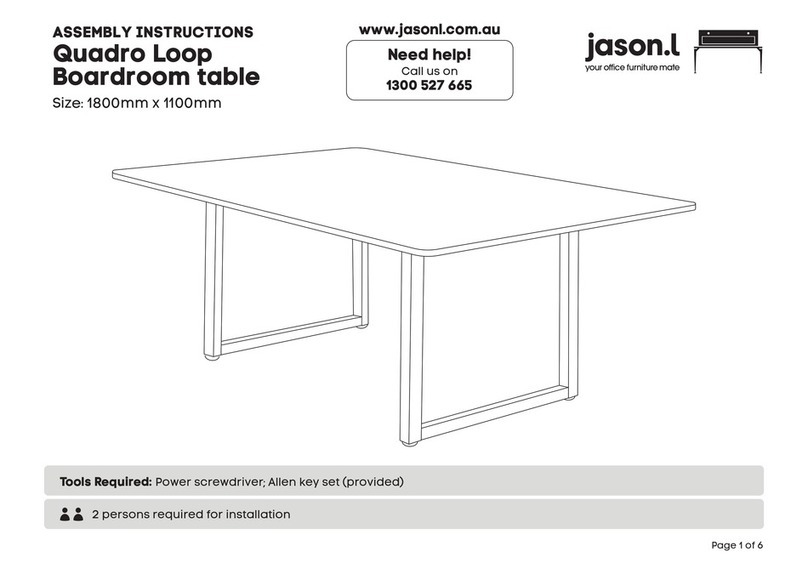
Jason.L Quadro Loop Boardroom table User manual

Jason.L

Jason.L Quadro Loop Boardroom table User manual

Jason.L Quadro 2 Person Run User manual

Jason.L

Jason.L Quadro 2 Person Run User manual

Jason.L Quadro User manual

Jason.L

Jason.L Quadro User manual

Jason.L Horizon Quadro Square User manual

Jason.L

Jason.L Horizon Quadro Square User manual

Jason.L Switch System User manual

Jason.L

Jason.L Switch System User manual

Jason.L Whistler 2.0 User manual

Jason.L

Jason.L Whistler 2.0 User manual

Jason.L Uniform 2 Door Storage Cupboard With Large Doors... User manual

Jason.L

Jason.L Uniform 2 Door Storage Cupboard With Large Doors... User manual

Jason.L Quadro Square L-Shaped Desk User manual

Jason.L

Jason.L Quadro Square L-Shaped Desk User manual

Jason.L Horizon Quadro Square 2P workstation User manual
Jason.L

Jason.L Horizon Quadro Square 2P workstation User manual

Jason.L Horizon Quadro A 4P workstation User manual

Jason.L

Jason.L Horizon Quadro A 4P workstation User manual

Jason.L Quadro Loop 3P Run workstation User manual

Jason.L

Jason.L Quadro Loop 3P Run workstation User manual

Jason.L Switch System Single Corner Desk User manual

Jason.L

Jason.L Switch System Single Corner Desk User manual

Jason.L Horizon L-Shaped Quadro Square User manual

Jason.L

Jason.L Horizon L-Shaped Quadro Square User manual

Jason.L Horizon Quadro A 2P Run workstation 1200x800... User manual

Jason.L

Jason.L Horizon Quadro A 2P Run workstation 1200x800... User manual

Jason.L Literail Workstation 2 Person User manual

Jason.L

Jason.L Literail Workstation 2 Person User manual

Jason.L Extra Range Storage User manual

Jason.L

Jason.L Extra Range Storage User manual

Jason.L Horizon Desk Quadro Square User manual

Jason.L

Jason.L Horizon Desk Quadro Square User manual

Jason.L Switch System 4 Person Workstation User manual

Jason.L

Jason.L Switch System 4 Person Workstation User manual

Jason.L Quadro Square 2P Run workstation User manual

Jason.L

Jason.L Quadro Square 2P Run workstation User manual

Jason.L Horizon User manual

Jason.L

Jason.L Horizon User manual

Jason.L Quadro A Boardroom table User manual

Jason.L

Jason.L Quadro A Boardroom table User manual

Jason.L Switch System Counter Table User manual

Jason.L

Jason.L Switch System Counter Table User manual

Jason.L Quadro Square User manual

Jason.L

Jason.L Quadro Square User manual

Popular Indoor Furnishing manuals by other brands

Airlocker RD123 installation guide

Airlocker

Airlocker RD123 installation guide

ATIM LUNCH 450 Assembly instructions

ATIM

ATIM LUNCH 450 Assembly instructions

pakoworld 228-000014 Assembly instruction

pakoworld

pakoworld 228-000014 Assembly instruction

Modern Living KK40 Assembling Instruction

Modern Living

Modern Living KK40 Assembling Instruction

FMD Furniture MEGA 1 Assembly instructions

FMD Furniture

FMD Furniture MEGA 1 Assembly instructions

Knoll Pixel KFXW4818 installation instructions

Knoll

Knoll Pixel KFXW4818 installation instructions

Velocity VRT9X Assembly instructions

Velocity

Velocity VRT9X Assembly instructions

Next HARTFORD 136040 Assembly instructions

Next

Next HARTFORD 136040 Assembly instructions

Weelko SilverFox 1031 quick start guide

Weelko

Weelko SilverFox 1031 quick start guide

Kimball Office Aspire Assembly instructions

Kimball Office

Kimball Office Aspire Assembly instructions

BIG FURNITURE WAREHOUSE CS412 manual

BIG FURNITURE WAREHOUSE

BIG FURNITURE WAREHOUSE CS412 manual

Gami H27-GRASLA 860 manual

Gami

Gami H27-GRASLA 860 manual

Mäusbacher Mio 0202 2T Assembly instructions

Mäusbacher

Mäusbacher Mio 0202 2T Assembly instructions

Home Decorators Collection FREMONT MD-V1791 Assembly instructions

Home Decorators Collection

Home Decorators Collection FREMONT MD-V1791 Assembly instructions

Mayline Medina Series Assembly instructions

Mayline

Mayline Medina Series Assembly instructions

OSP Home Furnishings SB5672 quick start guide

OSP Home Furnishings

OSP Home Furnishings SB5672 quick start guide

Allen + Roth 78649 quick start guide

Allen + Roth

Allen + Roth 78649 quick start guide

Graco 8828 owner's manual

Graco

Graco 8828 owner's manual

manuals.online logo
manuals.online logoBrands
  • About & Mission
  • Contact us
  • Privacy Policy
  • Terms and Conditions

Copyright 2025 Manuals.Online. All Rights Reserved.