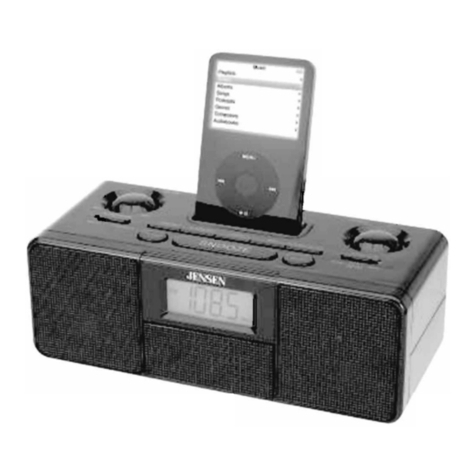
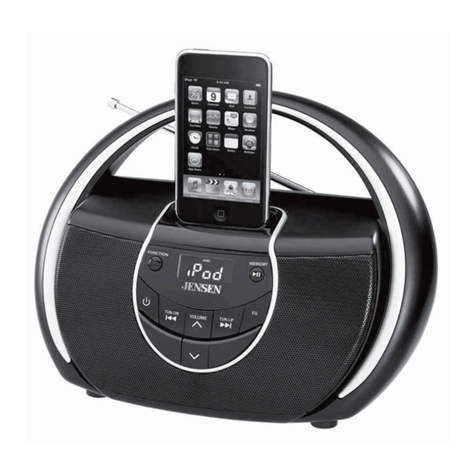
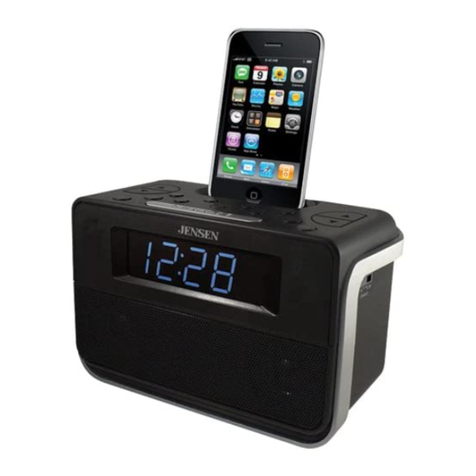
Jensen JiSS-120i User manual

Portable Docking Digital Music System
With CD for iPod and iPhone
USER MANUAL
JiSS-120i
(iPod/iPhone Not Included)
PLEASE READ THIS USER MANUAL COMPLETELY BEFORE OPERATING
THIS UNIT AND RETAIN THIS BOOKLET FOR FUTURE REFERENCE.
®

DEAR JENSEN® CUSTOMER
Selecting fine audio equipment such as the unit you've just purchased is only the start of
your musical enjoyment. Now it's time to consider how you can maximize the fun and
excitement your equipment offers. This manufacturer and the Electronic Industries
Association's Consumer Electronics Group want you to get the most out of your
equipment by playing it at a safe level. One that lets the sound come through loud and
clear without annoying blaring or distortion and, most importantly, without affecting your
sensitive hearing.
Sound can be deceiving. Over time your hearing "comfort level" adapts to higher
volumes of sound. So what sounds "normal" can actually be loud and harmful to your
hearing. Guard against this by setting your equipment at a safe level BEFORE your
hearing adapts.
To establish a safe level:
•Start your volume control at a low setting.
•Slowly increase the sound until you can hear it comfortably and clearly, and without
distortion.
Once you have established a comfortable sound level:
•Set the dial and leave it there.
Taking a minute to do this now will help to prevent hearing damage or loss in the future.
After all, we want you listening for a lifetime.
We Want You Listening For a Lifetime
Used wisely, your new sound equipment will provide a lifetime of fun and enjoyment.
Since hearing damage from loud noise is often undetectable until it is too late, this
manufacturer and the Electronic Industries Association's Consumer Electronics Group
recommend you avoid prolonged exposure to excessive noise.
Customer's Record:
The serial number of this product is found on its back cover. You should note the serial
number of this unit in the space provided as a permanent record of your purchase to aid
in identification in the event of theft of loss.
Model Number: JiSS-120i Serial Number: ____________________
- EN 1 -

IMPORTANT SAFETY INSTRUCTIONS
When used in the directed manner, this unit has been designed and manufactured to
ensure your personal safety. However, improper use can result in potential electrical shock
or fire hazards. Please read all safety and operating instructions carefully before
installation and use, and keep these instructions handy for future reference. Take special
note of all warnings listed in these instructions and on the unit.
1. Read these instructions – All the safety and operating instructions should be read
before the appliance is operated.
2. Keep these instructions – The safety and operating instructions should be kept for
future reference.
3. Heed all warnings – All warnings on the appliance and in the operating instructions
should be adhered to.
4. Follow all instructions – All operation and use instructions should be followed.
5. Do not use this apparatus near water – The appliance should not be used near water;
for example, near a bath tub, washbowl, kitchen sink, laundry tub, in a wet basement,
or near a swimming pool.
6. Clean only with dry cloth – The appliance should be cleaned only as recommended
by the manufacturer.
7. Do not block any ventilation openings. Install in accordance with the manufacturer’s
instructions. The appliance should be situated so that its location or position does not
interfere with its proper ventilation. For example, the appliance should not be
situated on a bed, sofa, rug, or similar surface that may block the ventilation
openings; or placed in a built-in installation, such as a bookcase or cabinet that may
impede the flow of air through the ventilation openings.
8. Do not install near any heat sources such as radiators, heat registers, stoves, or
other apparatus (including amplifiers) that produce heat.
9. AC adaptor is used as disconnect device and it should remain readily operable
during intended use. In order to disconnect the apparatus from the mains completely,
the AC adaptor should be disconnected form the mains socket outlet completely.
10. Only use attachments / accessories specified by the manufacturer.
11. Use only with a cart, stand, tripod, bracket, or table
specified by the manufacturer, or sold with the apparatus.
When a cart is used, use caution when moving the
cart/apparatus combination to avoid injury from tip-over.
12. Unplug this apparatus during lightning storms or when unused for
long periods of time.
13. Refer all servicing to qualified service personnel. Servicing is required when the
apparatus has been damaged in any way, such as power-supply cord or plug is
damaged, liquid has been spilled or objects have fallen into the apparatus, the
apparatus has been exposed to rain or moisture, does not operate normally, or has
been dropped.
- EN 2 -

14. This appliance shall not be exposed to dripping or splashing water and that no object
filled with liquids such as vases shall be placed on the apparatus.
15. Power Sources – The appliance should be connected to a power supply only of the
type described in the operating instructions or as marked on the appliance. Do not
overload wall outlet.
16. Battery shall not be exposed to excessive heat such as sunshine, fire or the
like.
17. Danger of explosion if battery is incorrectly replaced. Replace only with the same or
equivalent type.
18. Do not attempt to dismantle, open or repair this product yourself. If a fault occurs,
seek advice from your local qualified service technician or contact the distributor via
the telephone number at the back of this instruction manual.
19. Caution marking and nameplate are located on back of product.
IMPORTANT NOTE
Avoid installing the unit in locations described below:
•Places exposed to direct sunlight or close to heat radiating appliances such as
electric heaters.
•Places subject to constant vibration.
•Dusty, humid or moist places.
•Sources of electrical noise such as fluorescent lamps or motors.
•In case of malfunction due to electrostatic discharge, the apparatus has to be reset by
disconnecting it from mains supply and removing all the batteries. Wait at least for 30
seconds before reconnect the AC power cord or reinstall the batteries.
CAUTION
Note: This product complies with DHHS Rule 21 Subchapter J at date of
manufacture.
Follow the advice below for safe operations.
CLASS 1 LASER PRODUCT
This product contains a low power laser device.
CLASS 1 LASER PRODUCT
APPAREIL LASER DE CLASSE 1
PRODUCTO LASER DE CLASE 1
CAUTION
INVISIBLE LASER RADIATION
WHEN OPEN AND INTERLOCKS
DEFEATED.
AVOID EXPOSURE TO BEAM
- EN 3 -

ON PROTECTION AGAINST LASER ENERGY EXPOSURE
oAs the laser beam used in this compact disc player is harmful to the
eyes, do not attempt to disassemble the casing.
oStop operation immediately if any liquid or solid object should fall into
the cabinet.
oDo not touch the lens or poke at it. If you do, you may damage the
lens and the player may not operate properly.
oDo not put anything in the safety slot. If you do, the laser diode will be
ON when the CD door is still open.
oThis unit employs a laser. The use of controls or adjustment or
performance of procedures other than those specified here may
result in exposure to hazardous radiation.
ON PLACEMENT
•Do not use the unit in places which are extremely hot, cold, dusty, or humid.
•Place the unit on a flat and even surface.
•Do not restrict the air flow of the unit by placing it in a place with poor air flow,
by covering it with a cloth, or by placing it on a carpet.
ON SAFETY
•When connecting and disconnecting the AC power, grip the AC adaptor
plastic body and not the cord itself. Pulling the cord may damage it and create
hazard.
•When you are not going to use the unit for a long period of time, disconnect
the AC adaptor from the wall outlet and remove all batteries.
ON AC VOLTAGE
•Before use, check that the rated voltage of your unit matches your local
voltage.
ON CONDENSATION
•When left in a heated room where it is warm and damp, water droplets or
condensation may form inside the CD player.
•When there is condensation inside the unit, the unit may not function normally.
•Let it stand for 1 to 2 hours before turning the power on, or gradually heat the
room up and dry the unit before use.
Should any trouble occur, disconnect the AC adaptor and refer servicing to
qualified personnel.
- EN 4 -

COMPLIANCE WITH FCC REGULATIONS
This device complies with Part 15 of the FCC Rules. Operation is subject to the
following two conditions:
(1) this device may not cause harmful interference, and
(2) this device must accept any interference received, including interference
that may cause undesired operation.
NOTE : This equipment has been tested and found to comply with the limits for a
Class B digital device, pursuant to Part 15 of the FCC Rules. These limits are
designed to provide reasonable protection against harmful interference in a
residential installation. This equipment generates, uses and can radiate radio
frequency energy and, if not installed and used in accordance with the
instructions, may cause harmful interference to radio communications. However,
there is no guarantee that interference will not occur in a particular installation. If
this equipment does cause harmful interference to radio or television reception,
which can be determined by turning the equipment off and on, the user is
encouraged to try to correct the interference by one or more of the following
measures:
- Reorient or relocate the receiving antenna.
- Increase the separation between the equipment and receiver.
- Connect the equipment into an outlet on a circuit different from that to which
the receiver is connected.
- Consult the dealer or an experienced radio/TV technician for help.
CAUTION: Changes or modifications not expressly approved by the party
responsible for compliance could void the user’s authority to operate the
equipment.
PROTECT YOUR FURNITURE!!
This system is equipped with non-skid rubber ‘feet’ to prevent the product from
moving when you operate the controls. These ‘feet’ are made from non-migrating
rubber material specially formulated to avoid leaving any marks or stains on your
furniture. However certain types of oil based furniture polishes, wood
preservatives, or cleaning sprays may cause the rubber ‘feet’ to soften, and leave
marks or a rubber residue on the furniture.
To prevent any damage to your furniture we strongly recommend that you
purchase small self-adhesive felt pads, available at hardware stores and home
improvement centers everywhere, and apply these pads to the bottom of the
rubber ‘feet’ before you place the product on fine wooden furniture.
- EN 5 -

LOCATION OF CONTROLS
1 FM Telescopic Antenna 12 LED Display
2 Carrying Handle 13 CD PROGRAM Indicator
3 CD Door 14 Speakers
4 iPhone/iPod Docking Station 15 TUNING Knob
5 Skip/Search Forward Button 16 AM/FM BAND Selector
6 Skip/Search Backward Button 17 FUNCTION Selector
7 CD PROGRAM Button 18 VOLUME Control Knob
8 PLAY/PAUSE Button 19 AUX-IN Jack
9 CD STOP Button 20 DC IN Jack
10 CD REPEAT Button 21 Battery Compartment
11 POWER Indicator 22 FM STEREO Indicator
- EN 6 -
1
2
3
21
4
5
11 12 13 22 19 20
6
7
14 15 16 17 18 14
8
9
10

LED DISPLAY
POWER SOURCE
This unit operates using the included AC adaptor with 9V 1330mA (center-positive
) output and is compatible with standard 120V~ 60Hz AC household power or with
6 “C” size (UM-2) batteries (Not included).
A. AC POWER CONNECTION
1. Insert the the DC Plug of the AC Adaptor into the DC IN jack on the back of the unit.
Plug the AC Adaptor into a standard 120V~ 60Hz AC wall outlet.
2. Set the FUNCTION selector on the left hand side of the unit to AUX/iPod, CD or
RADIO mode, POWER indicator lights.
3. Set the FUNCTION selector to “STANDBY” positon after you finish listening.
B. BATTERY OPERATION
Note: For best performance and longer operating time, we recommend the use of alkaline-
type batteries.
1. Remove the Battery Door on the bottom of the unit.
2. Follow the marked polarities and install 6 “C” size (UM-2) batteries.
3. Replace the Battery Door.
IMPORTANT:Be sure that the batteries are installed correctly. Wrong polarity may
damage the unit.
BATTERY CARE
- Batteries shall not be exposed to excessive heat such as sunshine, fire or the like.
- Be sure that the batteries are installed correctly. Wrong polarity may damage the unit.
- Do not mix old and new batteries.
- Do not mix alkaline, standard (carbon-zinc) or rechargeable (nickel-cadmium) batteries.
- Only batteries of the same or equivalent type as recommend are to be used.
- If the unit is not to be used for an extended period of time, remove all batteries. Old or
leaking battery can cause damage to the unit and may void the warranty.
- Do not dispose batteries in fire. Batteries may leak or explode.
- Danger of explosion if battery is incorrectly replaced.
REPEAT
ALL
ONE
PLAY
PAUSE
- EN 7 -

LISTENING TO RADIO
1. Set the FUNCTION selector to RADIO position.
2. Set the BAND selector to AM or FM for the desired radio band.
3. Tune to your desired station with the TUNING knob. If FM mode is selected and you
tune to a FM Stereo station, the FM STEREO Indicator will light.
4. Adjust the VOLUME control to obtain the desired sound level from the Built-in
Speakers.
5. To turn the Radio off, set the FUNCTION selector to the STANDBY position.
HINTS FOR BEST RECEPTION:
AM - The AM antenna is located inside the cabinet of the unit. If AM reception is weak,
change the position of unit until the internal antenna picks up the strongest signal.
FM -To insure maximum FM tuner reception, the telescopic FM antenna should be fully
extended and rotated to obtain the best possible station reception.
NOTES: 1). If you want to charge your iPod/iPhone while listening to the FM radio, the FM
stereo indicator will be covered by the iPod and iPhone when docked.
2). You cannot charge your iPod/iPhone while listening to the AM radio.
CD OPERATION
This C
D player not only plays commercial CDs, but also self-
compiled CD-R/RW discs. Do
not attempt to play CD-ROM, CDI, VCD, DVD or computer CDs.
NOTES ON CD-R/RW DISCS
•Because of non-standardized format definition/production of CD-R/RW, playback
quality & performance are not guaranteed.
•Manufacturer is not responsible for the playability of CD-R/RW due to recording
conditions such as PC performance, writing software, media ability, etc.
•Do not attach a label or seal to either side of the CD-R/RW disc. It may cause a
malfunction.
INSERTING AN AUDIO CD DISC
1. Lift up the CD door to fully open it and carefully place an
audio CD disc with its label side facing upward in the CD
compartment and gently close the CD door.
2. Set the FUNCTION selector to CD position.
3. The unit will read the CD disc automatically, display will
briefly show flashing “- -” and then the total number of tracks
on the CD after a few seconds.
4. If no disc is inserted or if the inserted disc is not recognized, the display will show the
message “No”. If the CD door is not closed, the display will show “00”.
NOTES:
Keep the CD disc tray closed when the system is not in use to prevent dirt and dust
from entering the CD mechanism.
Never place more than one CD in the CD tray. If two discs are loaded at the same
time, the CD mechanism may jam and / or the discs themselves may be damaged.
- EN 8 -

AUDIO CD DISC PLAYBACK
1. When the CD door is closed and a CD is inside, the total number of the tracks
appears on the display.
2. Press the PLAY/PAUSE button to start CD playback, the first track
will play. PLAY/PAUSE indicator lights steadily.
3. Adjust the VOLUME control to obtain the desired sound level from the
Built-in Speakers.
IMPORTANT!!
If the disc is smudged or scratched it may skip or stop completely. This does not indicate a
problem with the player. If this occurs, try playing another disc. If that disc plays properly,
you may assume that the first disc is damaged and unplayable.
PLAY/PAUSE MODE
1. To temporarily stop playback while the CD playback disc is playing, press
the button once. PLAY/PAUSE indicator flashing, playback is now
paused.
2. The sound pauses, but the disc will continue to spin. To re-start playback,
press the buton again. The music will start from the exact position where it was
paused.
3. To stop the CD playback, press the STOP button once.
SKIP and SEARCH MODE
1. In play or pause mode, press the Skip/Search Forward button once to skip
forward to the next track or repeatedly to skip multiple tracks. Press the Skip/Search
Backward button to return to the beginning of the track, or press the button
repeatedly to skip backward several tracks.
2. During play mode, when the or button is pressed and held, the unit will do a
high speed audible search of the track, either forward or backward depending on
which button is pressed.
REPEAT MODE
1. Repeat One:
In the CD play mode, press the REPEAT button once, the REPEAT
indicator will show on the display and flash. This single track of music
will be repeated.
2. Repeat All:
In the CD play mode, press the REPEAT button twice, the REPEAT
indicator will show on the display steadily. The whole disc will be
played repeatedly.
3. To cancel repeat function
Press the REPEAT button repeatedly until all the play mode indicators go off on
the display. Standard playback mode will now resume.
NOTE: Repeat play function only works in CD mode.
- EN 9 -

PROGRAM MODE
1. In CD stop mode, press the PROGRAM button on unit. The
program indicator and first program location “01” will display and
flash.
2. Press the or button to choose your desired musical track.
For example, track 5 is selected, it will show in display steadily.
3. Press the PROGRAM button again to store this track in memory.
The LED display will go to “02” and blink to prompt for input.
4. Repeat the above procedures 2-3 until all desired tracks have
been stored. A total of 20 tracks can be stored in memory
for CD playback.
5. After you finish programming 20th tracks, the display will show programmed
tracks one by one in your program sequence and then return to show the first
programmed number “01” automatically and blink. The programmed tracks are ready
to play.
6. Press the button once to start the program playback.
7. To cancel the programmed memory, press the button twice or open the CD
door during the stop mode. The Program Indicator will go off.
LISTENING TO YOUR iPhone/iPod
1. Push the docking door to open it and expose the docking connector.
2. Gently place the iPhone/iPod onto the connector. The Apple device will begin
charging automatically.
NOTE: 1.)Your iPod/iPhone will not charge in AM radio mode.
2.) Your iPod/iPhone will only charge when the unit is powered by the AC
adaptor. Your iPod/iPhone will not charge when the unit is powered by the
batteries.
3. Set the FUNCTION selector to the AUX/iPod position.
4. Press the button to start playback.
5. Press the button to pause or resume play.
6. In play or pause mode, press the button to skip forward to the next track or
repeatedly to skip tracks. Press the button to return to the beginning of the track,
or press repeatedly to skip backward several tracks.
7. During play mode, when the or button is pressed and held, the unit will do a
high speed audible search of the track, either forward or backward depending on
which button is pressed.
8. Adjust the VOLUME control to obtain the desired sound level from the built-in
speakers.
Note: The volume level cannot be adjusted using the volume control on your
iPod/iPhone after docking.
- EN 10 -

9. To remove the iPod/iPhone from the unit, press and hold the Button on the main
unit for a few seconds to switch off the Apple device. Once the iPod/iPhone is
switched off, it can be gently remove it from the dock connector.
10. To turn the JiSS-120i off, set the FUNCTION selector the unit to STANDBY position.
The Power indicator will go off.
11. Push up on the docking door to lock it back in the closed position.
NOTE:
To prevent damaging the dock connector, don’t twist the iPod/iPhone while docking
or undocking it.
Be careful not to knock over the unit while an iPod/iPhone is docked on the
connector. This could damage the connector or your iPod/iPhone.
Don’t use the dock with any other iPod/iPhone accessories, such as FM transmitters
and microphones because they may cause a malfunction.
To prevent damage, always keep the dock door closed when not in use.
AUXILIARY INPUT OPERATION
This unit provides an auxiliary audio signal input jack for connecting external audio
devices like MP3 players, CD players and older, non-docking iPods (except iPod shuffle
3rd gen) and listen to your external source through the speakers of this system.
1. Use an audio cable (not included) with one 3.5 mm stereo plug on each end of the
cable.
2. Plug one end into the AUX-IN jack located on the rear panel of the unit and the other
end of the cable into the Line-out Jack or Headphone Jack of your external audio
device.
3. Turn on the external audio device.
4. Set FUNCTION selector to AUX/iPod position.
5. The volume level can now be controlled through the main unit. Operate all other
functions on the auxiliary device as usual.
Note:
(1) If you connected the Line-out Jack of your external device then you only need to
adjust the volume control of this system. If you connected the Headphone Jack of
your external device then you may need to adjust both the volume control of your
external device and the volume control of this system to find the most desirable
volume setting.
(2) Remove the audio cable from AUX IN jack when you finish listening. Don't forget to
switch off the power on your external device as well.
- EN 11 -

CARE AND MAINTENANCE
1. Avoid operating your unit under direct sunlight or in hot, humid or dusty places.
2. Keep your unit away from heating appliances and sources of electrical noise such as
fluorescent lamps or motors.
3. If drop-outs or interruptions occur in the music during CD play,
or if the CD fails to play at all, its bottom surface may require
cleaning. Before playing, wipe the disc from the center
outwards with a good soft cleaning cloth.
4. Unplug the unit from the electrical power outlet immediately in
case of malfunction.
Cleaning the Unit
To prevent fire or shock hazard, disconnect your unit from the AC power source when
cleaning.
The finish on the unit may be cleaned with a dust cloth and cared for as other
furniture. Use caution when cleaning and wiping the plastic parts.
If the cabinet becomes dusty wipe it with a soft dry dust cloth. Do not use any wax or
polish sprays on the cabinet.
If the front panel becomes dirty or smudged with fingerprints it may be cleaned with a
soft cloth slightly dampened with a mild soap and water solution. Never use abrasive
cloths or polishes as these will damage the finish of your unit.
CAUTION: Never allow any water or other liquids to get inside the unit while cleaning.
TROUBLESHOOTING GUIDE
If you experience difficulties in the use of this Docking System, please check the following
or call 1-800-777-5331 for Customer Service.
Symptom
Possible Problem
Unit does not
respond (no power)
AC Adaptor is not plugged
properly into a wall outlet or
the connector is not plugged
into the AC Socket on the
back of the System.
Re-plug the AC Adaptor
into the wall outlet and the
connector into AC Socket
on the System.
Wall outlet is not functioning.
Plug another device into
the same outlet to confirm
the outlet is working.
Radio no sound
Unit not in RADIO function
mode.
Volume set at minimum
Set FUNCTION selector to
RADIO position.
Increase Volume
Noise or sound
distorted on AM or
FM broadcast
Station not tuned properly for
AM or FM.
FM: Telescopic antenna is not
fully extended.
AM: The reception at the set
location is poor.
Retune the FM broadcast
station.
FM: Fully extend or reposition
the FM telescopic antenna.
AM: Change the position for
the best reception.
Solution
- EN 12 -

iPod/iPhone does
not respond to the
unit
iPod/iPhone is not
installed properly.
Remove your iPod/iPhone
from the dock and check for
any obstruction on the
connectors in the dock and on
your iPod/iPhone, then reseat
it in the dock.
Your iPod/iPhone is locked up.
Please make sure that your
iPod/iPhone is working
properly before docking into
the unit. Please refer to your
iPod/iPhone manual for info
on resetting the Pod/iPhone.
Unit not in iPod/iPhone mode. Make sure the FUNCTION
selector is set to iPod mode.
iPod/iPhone does
not charge
iPod/iPhone is not
installed properly.
Remove your iPod/iPhone
from the dock and check for
obstruction on the connectors
in the dock and on your
iPod/iPhone. Then reseat it in
the dock.
iPod/iPhone is locked up/
frozen. iPod/iPhone battery
has problem.
Please make sure your
iPod/iPhone is working
properly before docking into
the unit. Please refer to your
iPod/iPhone manual for details
on resetting.
Unit in AM mode. Select other mode for
charging.
CD disc does not
play
Unit not in CD function
mode.
Audio disc is installed
incorrectly.
It the disc is self-compiled, the
media used may not be
compatible with the player.
Select CD mode.
Insert audio disc with label
side up.
Use better quality blank media
and retest.
Audio disc
while playing
Disc is dirty or scratched.
Wipe disc with clean cloth or
use another disc.
Intermittent sound
from the player
Dirty or defective disc
Dirty pick up lens
Player is subject to excessive
shock or vibration
Clean or replace the
defective disc
Use a lens cleaning disc to
clean the lens
Relocate the player away
from shock or vibration
Unit gets warm after
extended play at
high volume
This is normal. Turn the unit off a period
of time or lower volume.
- EN 13 -

SPECIFICATIONS
Power Requirement
AC-DC adaptor Input: 120V ~ 60Hz
Main Unit
Output: 9V 1330mA or
Batteries 6 x “C” (UM-2)
Frequency Range AM 530 – 1710 KHz
FM 88 - 108 MHz
“Made for iPod” and “Made for iPhone” mean that an electronic accessory has been
designed to connect specifically to iPod and iPhone, respectively, and has been certified
by the developer to meet Apple performance standards. Apple is not responsible for the
operation of this device or its compliance with safety and regulatory standards. Please
note that the use of this accessory with iPhone or iPod may affect wireless performance.
iPhone, iPod, iPod classic, iPod nano, iPod shuffle, and iPod touch are trademarks of
Apple Inc., registered in the U.S. and other countries.
At Spectra, environmental and social responsibility
is a core value of our business. We are dedicated to
continuous implementation of responsible initiatives
with an aim to conserve and maintain the
environment through responsible recycling.
Please visit us at http://www.spectraintl.com/green.htm for more information on Spectra’s
green initiatives or to find a recycler in your area.
- EN 14 -

90 DAY LIMITED WARRANTY AND SERVICE
VALID IN THE U.S.A ONLY
SPECTRA MERCHANDISING INTERNATIONAL, INC. warrants this unit to be free from
defective materials or factory workmanship for a period of 90 days from the date of original
customer purchase and provided the product is utilized within the U.S.A. This warranty is
not assignable or transferable. Our obligation under this warranty is the repair or
replacement of the defective unit or any part thereof, except batteries, when it is returned
to the SPECTRA Service Department, accompanied by proof of the date of original
consumer purchase, such as a duplicate copy of a sales receipt.
You must pay all shipping charges required to ship the product to SPECTRA for warranty
service. If the product is repaired or replaced under warranty, the return charges will be at
SPECTRA’s expense. There are no other express warranties other than those stated
herein.
This warranty is valid only in accordance with the conditions set forth below:
1. The warranty applies to the SPECTRA product only while:
a. It remains in the possession of the original purchaser and proof of purchase is
demonstrated.
b. It has not been subjected to accident, misuse, abuse, improper service, usage outside
the descriptions and warnings covered within the user manual or non-SPECTRA
approved modifications.
c. Claims are made within the warranty period.
2. This warranty does not cover damage or equipment failure caused by electrical wiring
not in compliance with electrical codes or SPECTRA user manual specifications, or
failure to provide reasonable care and necessary maintenance as outlined in the user
manual.
3. Warranty of all SPECTRA products applies to residential use only and is void when
products are used in a nonresidential environment or installed outside the United States.
This warranty gives you specific legal rights, and you may also have other rights which
vary from state to state. TO OBTAIN SERVICE please remove all batteries (if any) and
pack the unit carefully and send it freight prepaid to SPECTRA at the address shown
below. IF THE UNIT IS RETURNED WITHIN THE WARRANTY PERIOD shown above,
please include a proof of purchase (dated cash register receipt) so that we may establish
your eligibility for warranty service and repair of the unit without cost. Also include a note
with a description explaining how the unit is defective. A customer service representative
may need to contact you regarding the status of your repair, so please include your name,
address, phone number and email address to expedite the process.
- EN 15 -

IF THE UNIT IS OUTSIDE THE WARRANTY PERIOD, please include a check for $30.00
to cover the cost of repair, handling and return postage. All out of warranty returns must be
sent prepaid.
It is recommended that you contact SPECTRA first at 1-800-777-5331 or by email
at custserv@spectraintl.com for updated information on the unit requiring service. In some
cases the model you have may be discontinued, and SPECTRA reserves the right to offer
alternative options for repair or replacement.
SPECTRA MERCHANDISING INTERNATIONAL, INC.
4230 North Normandy Avenue,
Chicago, IL60634, USA.
1-800-777-5331
To register your product, visit the link on the website below to enter your information.
http://www.spectraintl.com/wform.htm
0113 Printed in China
- EN 16 -

Sistema Musical de CD con Acoplamiento
para iPod and iPhone
Manual del Propietario
JiSS-120i
(iPod y iPhone No Incluido)
Por favor lea y observe cuidadosamente este Manual de Instrucciones
cuidadosamente antes de utilizar la unidad y reténgalo para futura referencia
®

- SP 1 -
ESTIMADO CLIENTE DE JENSEN®
Seleccionar un equipo de audio fino tal como la unidad que usted acaba de comprar es
solamente el inicio de su gratificación musical. Ahora es el momento de considerar como
puede maximizar la diversión y el entusiasmo que su equipo le ofrece. Este fabricante y
el Grupo de Consumidores de Electrónica de la Asociación de Industrias Electrónicas
desean que usted obtenga lo máximo de su equipo y operándolo en un nivel seguro. Un
nivel que permita que el sonido llegue en forma alta y clara sin estruendo o distorsión y,
más importante, sin afectar la sensibilidad de su audición. El sonido puede ser engañoso.
A lo largo del tiempo su “nivel de confort” auditivo se adapta a volúmenes de sonido más
altos. Por lo tanto lo que suena “normal” puede en realidad ser alto y causar daño a su
audición. Prevenga esto configurando su equipo en un nivel seguro ANTES de que su
oído se adapte.
Para establecer un nivel seguro:
•Inicie su control de volumen en una configuración baja.
•Lentamente aumente el sonido hasta que usted pueda escucharlo en forma
confortable y clara, y sin distorsión.
Una vez que este ha establecido un nivel de sonido confortable:
•Fije el selector y déjelo así.
Tomar un minuto para realizar esto ahora lo ayudará a prevenir daño en la audición o
pérdidas en el futuro. Después de todo, nosotros deseamos que usted escuche para
toda la vida.
Nosotros deseamos que usted escuche toda la vida
Usado conscientemente, su nuevo equipo de sonido brindará toda una vida de diversión
y gratificación. Debido a que el daño en la audición por ruidos altos es a menudo
indetectable hasta que es demasiado tarde, este fabricante y el Grupo de Consumidores
de Electrónica de la Asociación de Industrias Electrónicas le recomiendan evitar la
exposición prolongada al ruido excesivo.
Registro del cliente:
El número de serie de este producto se encuentra en la parte inferior de la cubierta.
Usted notará el número de serie de esta unidad en el espacio suministrado con el
registro permanente de su compra para ayudar en la identificación en el caso de robo o
pérdida.
Modelo número: JiSS-120i Número de serie:____________________

IMPORTANTES INSTRUCCIONES DE
SEGURIDADS
Esta unidad ha sido diseñada y fabricada para proteger su seguridad personal cuando se
utiliza según las instrucciones. Sin embargo, si se usa de forma inadecuada se corre el
riesgo de recibir una descarga eléctrica o de causar incendio. Por favor, lea todas las
instrucciones de seguridad y funcionamiento de la unidad antes de instalarla y usarla, y
manténgalas a mano para referencia posterior. Preste atención a todas las advertencias
en estas instrucciones y en la unidad.
1. Lea estas instrucciones. Antes de usar este aparato deberá leer todas las
instrucciones de seguridad y de operación.
2. Guarde estas instrucciones. Es preciso guardar las instrucciones de seguridad y de
operación para futura referencia.
3. Preste atención a todas las advertencias. Es indispensable adherirse a las
indicaciones en las advertencias en el aparato y en las instrucciones de operación.
4. Siga todas las instrucciones. Es preciso seguir las instrucciones de uso y de
operación.
5. No utilice este aparato cerca del agua. Este aparato no debe usarse cerca del agua,
por ejemplo, cerca de bañeras, lavamanos, lavatrastos, lavadoras, sótanos
húmedos, o piscinas.
6. Límpielo únicamente con un paño seco. Limpie el aparato únicamente como lo
recomienda el fabricante.
7. No obstruya las rejillas de ventilación. Instálelo según las instrucciones del
fabricante. El aparato deberá estar colocado de manera que su ubicación o posición
no interfiera con una ventilación adecuada. Por ejemplo, no coloque el aparato
sobre la cama, un sofá, alfombra o superficies similares que pudieran obstruir las
rejillas de ventilación; tampoco lo coloque en instalaciones empotradas, como
libreras o gabinetes que pudieran impedir el flujo de aire por las rejillas de
ventilación.
8. No lo instale cerca de fuentes de calor, como radiadores, registros de calefacción,
estufas u otros aparatos que generan calor (incluyendo amplificadores).
9. El adaptador AC se utiliza como dispositivo de desconexión y deberá mantenerse
operable durante el uso adecuado del aparato. Para desconectar el aparato
completamente de la red de distribución, debe desenchufar completamente el
adaptador AC del tomacorriente.
10. Use únicamente los complementos/accesorios especificados por el fabricante.
11. Use únicamente con la carretilla, trípode, soportes, o mesa
especificados por el fabricante, o que se venden junto con
el aparato. Cuando utilice una carretilla, tenga cuidado al
trasladar el conjunto de apara to y carretilla para evitar
lesiones a causa de vuelcos.
- SP 2 -
Table of contents
Languages:
Other Jensen Docking Station manuals

Jensen
Jensen JiMS-211i User manual

Jensen
Jensen JiSS-585 User manual

Jensen
Jensen JiMS-60 User manual

Jensen
Jensen JiSS-600i User manual

Jensen
Jensen JISS-300I User manual

Jensen
Jensen JiMS-525 - HD / AM User manual

Jensen
Jensen JiPS-200i User manual

Jensen
Jensen JiMS-190 User manual

Jensen
Jensen JIMS-225 User manual

Jensen
Jensen JiSS-115 User manual

Jensen
Jensen JIMS-125I User manual

Jensen
Jensen JiMS-120 User manual

Jensen
Jensen JiMS-100 User manual

Jensen
Jensen banshee JiSS-550 User manual

Jensen
Jensen JIMS-225 User manual

Jensen
Jensen JiSS-20 User manual

Jensen
Jensen JiMS-182 User manual

Jensen
Jensen JiMS-215i User manual

Jensen
Jensen JiSS-20 User manual

Jensen
Jensen JIMS-225 User manual