www.johnsonlevel.com/manuals
DUAL-AXIS SLOPE MODE
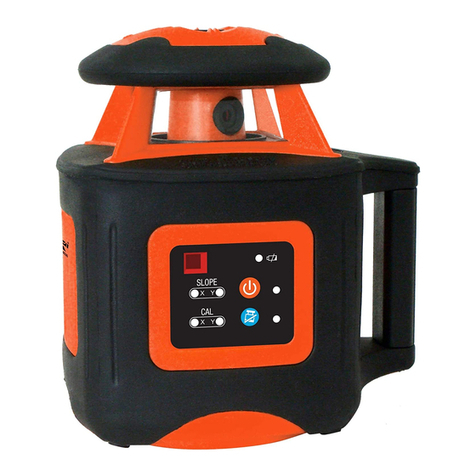
Dual-axis slope mode angles the laser beam in X and Y directions,
for example when sloping a concrete slab towards a single corner.
Dual-slope mode may be used in both horizontal and vertical
modes. Vertical slope mode can speed up the process of estab-
lishing reference lines.
When in dual-slope mode, the tilt indocator will not function.
Ensure the laser is not bumped while in dual-slope mode.
To enter dual-slope mode:
1. Tap on the laser or remote to start dual-slope mode.
2. The X axis indicator will blink. Use and to adjust the
slope in the X axis. Tap for minor adjustments, or press and hold
for larger adjustments.
3. Tap on the remote to toggle axes and set slope in the Y
direction. The Y-axis indicator will blink. Use and to adjust
the slope in the Y-axis.
4. If the laser exceeds its slope range, the rotation will stop, the
laser will flash, and the alarm will sound. If this happens, reduce
the slope in either axis until the laser resumes operation.
5. Exit dual slope mode by holding for 3 seconds. The laser
will self level and begin to spin horizontally or vertically.
Pro Tip: Establish a vertical reference line between two distant
points easily by using slope mode. Typically a two-person job,
slope mode simplifies this to a quick one-person setup.
1. With the laser vertical, position the laser over the near point,
and aim it close to the far point.
2. Stand at the far point with the remote, and adjust the slope
until the laser passes directly through the far point.
3. Use the detector to lay our your interim points like normal.
SCAN MODE
Scan mode can be used to simulate a laser line or to emit a laser
dot. Both modes increase the visibility of the laser when working
without a detector.
While the laser is rotating, press to change from a rotational
laser to a long laser line, short laser line, or dot.
Rotate the line or dot using or .
To exit scan mode, press . The laser will begin to rotate
normally.
USING A DETECTOR
A laser detector locates the beam when your eye can’t. This is
extremely useful outdoors, over long distances, or whenever your
eye can’t see the laser. Your laser may have included a detector,
or you can use any Johnson rotary laser detector appropriate for
your color laser.
Specific operation of each Johnson laser detector varies,
although all detectors work on a similar operating principle.
Consult your operator’s manual for specific details on your par-
ticular model, or use the guide below for a general detector
overview.
1. Mount the detector and power it on.
2. As the laser beam passes over the detecting window, the
detector will indicate on grade, above grade, or below grade
using lights, audio, and/or the LCD display.
3. Move the detector as indicated by the arrow on the display to
find grade.
4. The detector will alert you to on-grade with audio or visual
cues - typically a green light or a solid tone.
5. Respect the published range of your laser! Beyond the
published range, the detector may not provide an accurate
reading.
We want to get you up and running as quickly as possible - but this quick start guide is not a replacement for reading and understanding your operator’s
manual! For complete safety & operating instructions, refer to the operator’s manual included with your rotary laser, or scan the QR code.
