5
Safety Warnings and Tool Installation
Sicherheitshinweise und Inbetriebnahme
Säkerhetsvarningar och installation
Instructions de sécurité et mise en service
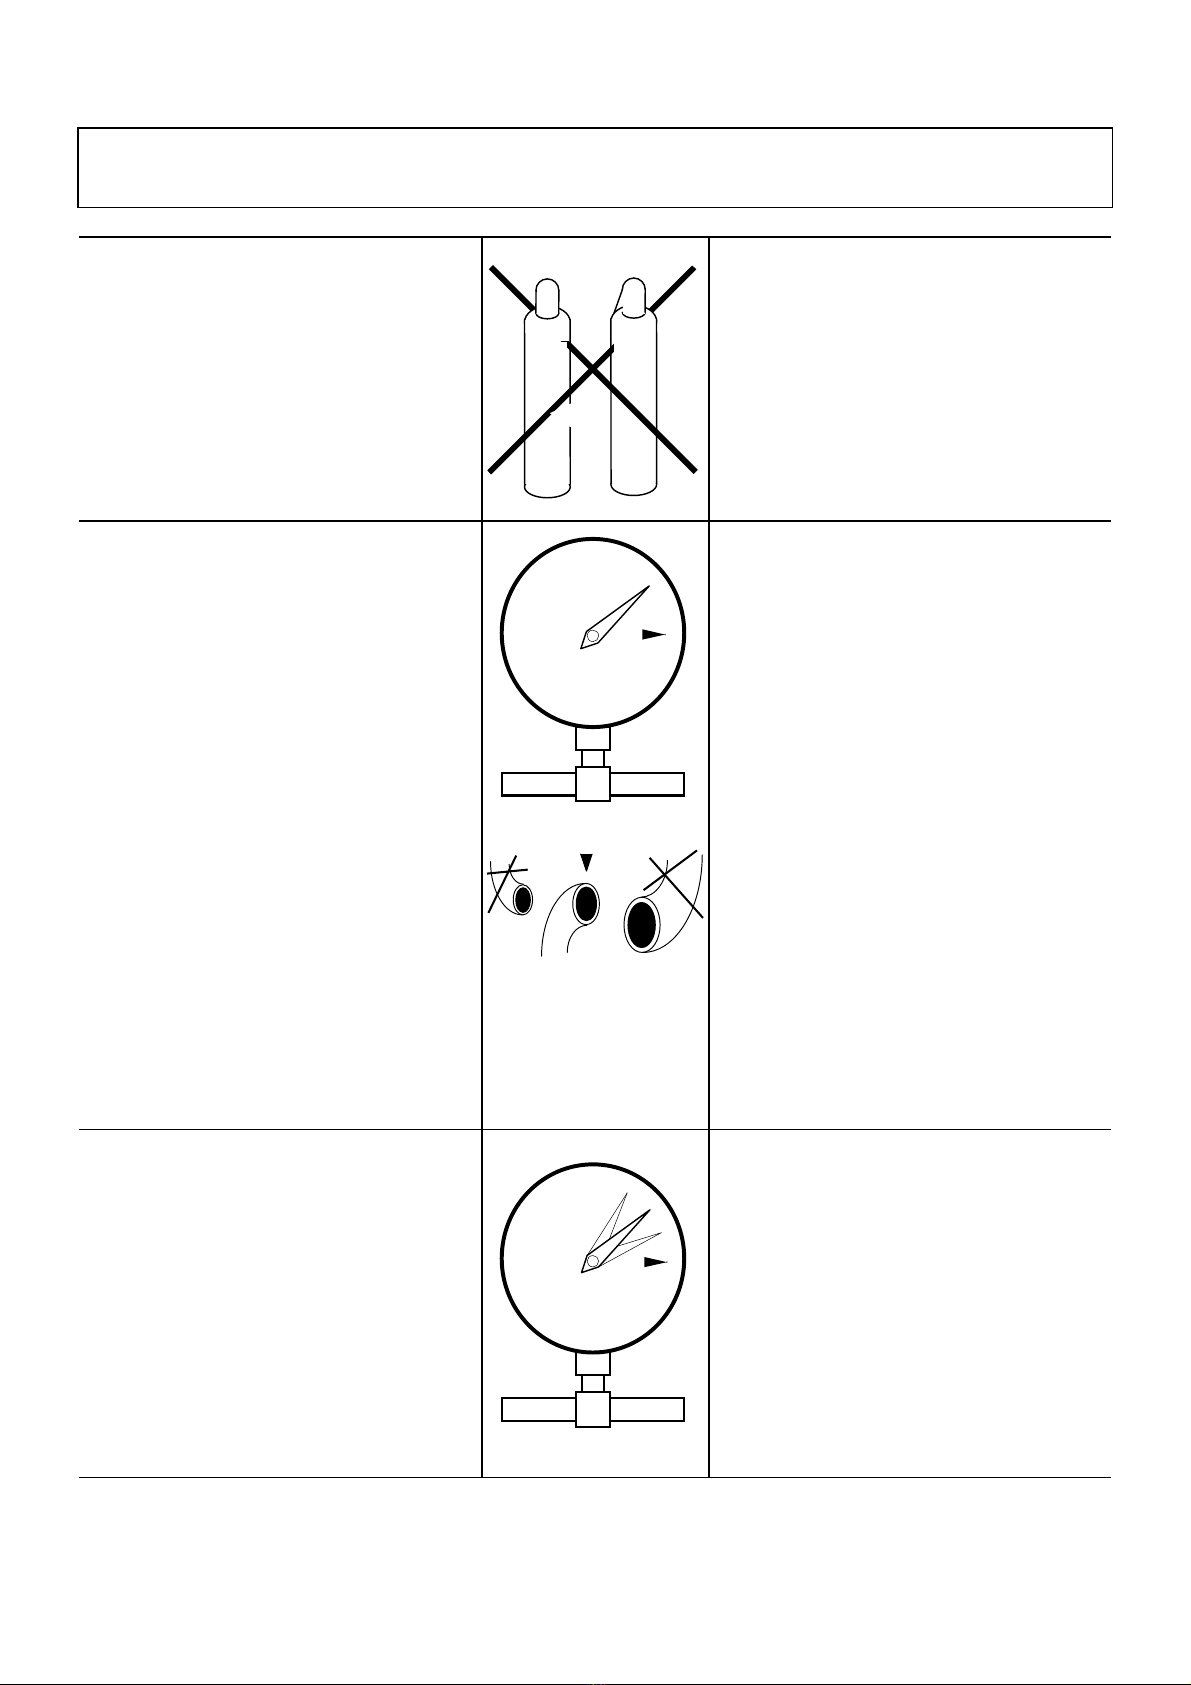
ENever use oxygen, combustible gases, CO2,
steam or high pressure gas tanks as power sources
for the PN-version of this tool; the tool may
explode and cause serious injury.
Use only dry, clean, pressure regulated com-
pressed air to drive the tool.
DNiemals Sauerstoff, Brenngase, CO2oder
Hochdruckgase als Energiequelle für die PN-
Version dieses Gerätes benutzen; dies kann zu
Explosionsverletzungen führen.
Benutzen Sie ausschließlich trockene, reine,
geregelte Druckluft
SAnvänd aldrig syrgas, brännbar gas, CO2, ånga
eller gas från högtryckstuber för att driva PN-
versionen av detta verktyg; det kan då explodera
och förorsaka svåra skador.
Använd endast torr, ren, reglerad tryckluft till
verktyget.
FN’utilisez jamais d’oxygène, de gaz inflam-
mable, CO2, ou de gaz haute pression pour le
modèle PN de cet outil. Ils peuvent causer une
explosion et des accidents graves.
Utilisez seulement d’air comprimé sec, pur et
réglé.
EConnect the tool to the compressed air system
before the fastener unit is loaded. The maximum
permitted air pressure for the tool is 8 bar (116 psi).
The maximum supply pressure is 8.78 bar (127
psi).
Ensure that the minimum internal diameter of the
air hose is 10 mm (3/8’’) and that of the nipple is
a minimum of 5 mm (6/32’’). This is to avoid
incorrect operation due to excessive pressure
drop.
The tool and its hose shall be equipped with a
connection nipple that automatically exhausts air
from the tool after it has been disconnected.
DVor dem Laden des Befestigungselements das
Gerät an das Druckluftsystem anschließen.
Der maximal zulässige Luftdruck für das
Gerät beträgt 8 bar (116 psi), der maximale
Speisedruck 8,8 bar (127 psi).
Beachten, dass die Innendurchmesser von
Druckluftleitung und Nippel mindestens 10 mm
(3/8’’) bzw. 5 mm (6/32’’) betragen. So wird eine
mangelhafte Funktion aufgrund eines zu großen
Druckabfalls vermieden.
Gerät und Leitung müssen mit einem Anschluss-
nippel versehen sein, der das Gerät automatisch
entlüftet, wenn es vom Druckluftsystem getrennt
wird.
∅10 mm (3/8")
SKoppla verktyget till tryckluftsystemet innan
infästningselement laddas. Högsta tillåtna luft-
tryck till verktyget är 8 bar (116 psi).Maximalt
matartryck är 8,8 bar (127 psi).
Se till att luftslangen är minimum 10 mm (3/8’’)
och nippeln minimum 5 mm (6/32’’) invändig
diameter. Detta för att undvika felaktig funktion
på grund av för stort tryckfall.
Verktyget och slangen skall vara försedda med en
anslutningsnippel, som automatiskt avluftar verk-
tyget när det kopplas bort.
F Connectez l’outil au système d’air comprimé
avant de charger l’élément de fixation. La
pression d’air comprimé maximale autorisée est
de 8 bars (116 psi). La pression d’alimentation
maximale est de 8,8 bars (127 psi).
Vérifiez que le tuyau d’air est d’au moins 10 mm
(3/8’’) et le raccord d’au moins 5 mm (6/32’’) de
diamètre intérieur. Ceci permet d’éviter un
dysfonctionnement dû à une chute de pression
trop forte.
L’outil et le tuyau doivent être équipés d’un
raccord qui purge automatiquement l’outil dès
qu’il est déconnecté.
EAdjust the air pressure to the lowest one that will
bend the staples correctly. Start at approx. 5.0 bar
and raise this by 0.5 bar increments until the
correct pressure for the job in hand is found.
Never exceed 8 bar.
A low air pressure will give low maintenance
costs!
DStellen sie keinen höheren Luftdruck ein als für
das richtige Umbiegen der Klammern nötig ist.
Beginnen Sie dabei mit ca. 5.0 bar und erhöhen
Sie den Druck in 0,5 bar Stufen bis der richtige
Arbeitsdruck gefunden ist.
Gehen Sie aber niemals über 8 bar hinaus.
Ein niedriger Luftdruck führt auch zu niedrigen
Wartungskosten
SStäll in lägsta möjliga lufttryck som viker
klammern rätt. Börja med ungefär 5.0 bar och höj
sedan trycket i steg om 0,5 bar tills ett korrekt
resultat uppnåtts.
Överstig dock aldrig 8 bar.
Ett lågt lufttryck bidrar till att hålla under-
hållskostnaderna nere!
FLa pression d’air est à régler au minimum né-
cessaire pour que la courbure des agrafes soit
correcte. Commencez à environ 5.0 bar et aug-
mentez chaque fois de 0,5 bar pour arriver au
résultat satisfaisant.
N’excédez jamais les 8 bar.
Une pression modérée vous donne des frais
d’entretien réduits!
CO2Oxy
7
4
1
2
35
6
8
0
bar
max
7
4
1
2
35
6
8
0
bar
max