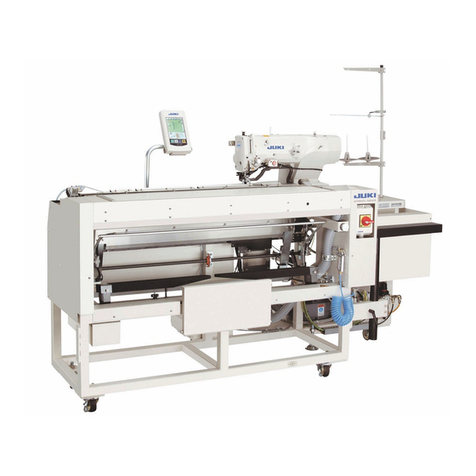
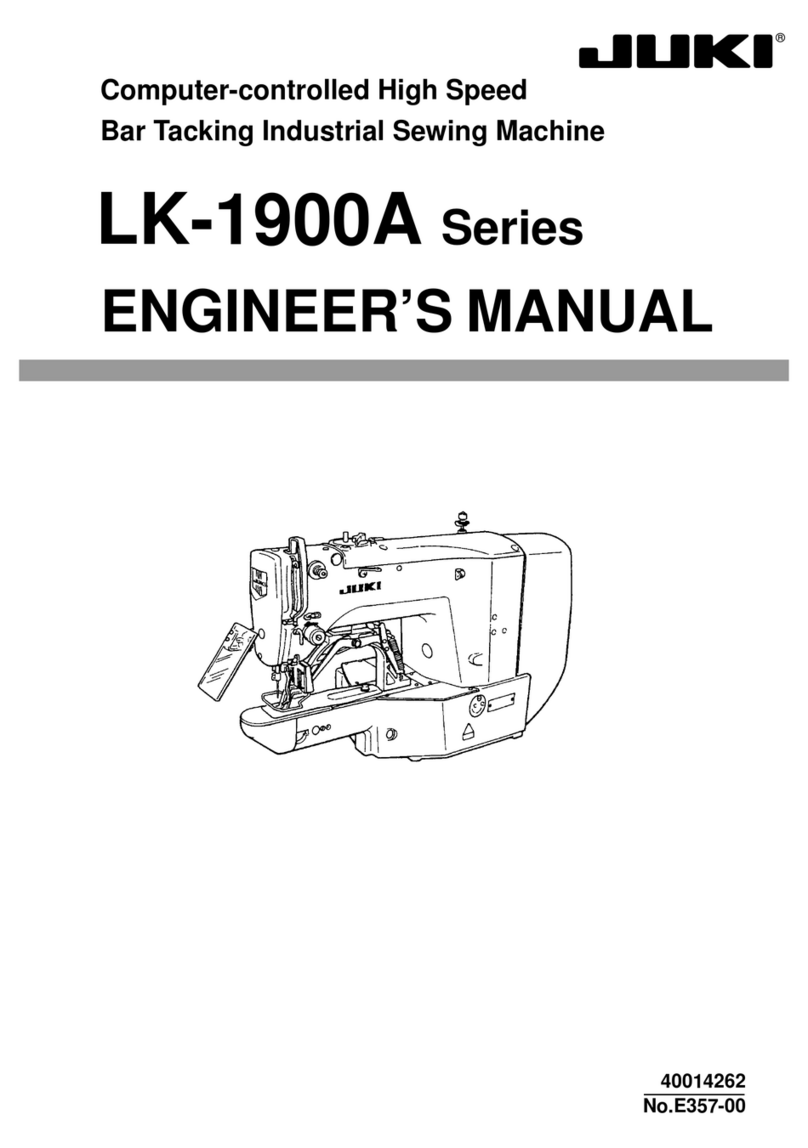
JUKI AMS-224EN-4530 Manual

1
INSTRUCTION MANUAL
AMS-224EN / IP-420
No.02
40117504
* "CompactFlash(TM)" is the registered trademark of SanDisk Corporation, U.S.A.

i
CONTENTS
I.
MECHANICAL SECTION (WITH REGARD TO THE SEWING MACHINE)
.. 1
1. SPECIFICATIONS ................................................................................................................. 1
2. CONFIGURATION................................................................................................................. 2
3. INSTALLATION ..................................................................................................................... 3
3-1. Installing the throat plate auxiliary cover.................................................................. 3
3-2. Table position adjustment: Only for 6030 ................................................................. 4
3-3. Installing the panel...................................................................................................... 6
3-4. Installing the thread stand.......................................................................................... 6
3-5. Installing the air hose.................................................................................................. 7
3-6. Installing the eye protection cover ............................................................................ 7
3-7. Changing the height of the table and stand.............................................................. 8
4. PREPARATION OF THE SEWING MACHINE...................................................................... 9
4-1. Lubrication ................................................................................................................... 9
4-2. Attaching the needle ................................................................................................... 9
4-3. Threading the machine head.................................................................................... 10
4-4. Installing and removing the bobbin case................................................................ 10
4-5. Installing the bobbin ................................................................................................. 10
4-6. Adjusting the thread tension.................................................................................... 11
4-7. Intermediate presser height ..................................................................................... 11
4-8. Adjusting the thread take-up spring........................................................................ 12
5. OPERATION OF THE SEWING MACHINE ........................................................................ 12
5-1. Sewing ........................................................................................................................ 12
5-2. Needle thread clamp device ..................................................................................... 13
5-3. How to use the plastic blank (supplied with the machine as an accessory)....... 14
II. OPERATION SECTION (WITH REGARD TO THE PANEL) ................ 15
1. PREFACE ............................................................................................................................ 15
2. WHEN USING IP-420 .......................................................................................................... 19
2-1. Name of each section of IP-420................................................................................. 19
2-2. Buttons to be used in common ................................................................................. 20
2-3. Basic operation of IP-420........................................................................................... 21
2-4. LCD display section at the time of sewing shape selection................................... 23
(1) Sewing shape data input screen ................................................................................................23
(2) Sewing screen ............................................................................................................................ 25
2-5. Performing sewing shape selection ......................................................................... 27
2-6. Changing item data .................................................................................................... 29
2-7. Checking pattern shape ............................................................................................. 31
2-8. Performing modication of needle entry point........................................................ 32
(1) Editing the thread tension........................................................................................................... 32
(2) Editing the intermediate presser height ...................................................................................... 33
2-9. How to use temporary stop ....................................................................................... 34
(1) To continue performing sewing from some point in sewing ........................................................ 34
(2) To perform re-sewing from the start............................................................................................35
2-10.
When setting of sewing product is difcult because of interruption of needle tip
... 36
2-11. Winding bobbin thread............................................................................................. 37
(1) When performing winding bobbin thread while performing sewing ............................................37

ii
(2) When performing winding bobbin thread only ............................................................................37
2-12.Using counter ............................................................................................................ 38
(1) Setting procedure of the counter ................................................................................................38
(2) Count-up releasing procedure .................................................................................................... 40
(3) How to change the counter value during sewing........................................................................ 40
2-13.Performing new register of users’ pattern .............................................................. 41
2-14.Naming users’ pattern............................................................................................... 42
2-15.Performing new register of pattern button ............................................................. 43
2-16.LCD display section at the time of pattern button selection................................. 44
(1) Pattern button data input screen ................................................................................................44
(2) Sewing screen ............................................................................................................................ 46
2-17.Performing pattern button No. selection................................................................. 48
(1) Selection from the data input screen .......................................................................................... 48
(2) Selection by means of the shortcut button .................................................................................49
2-18.Changing contents of pattern button ...................................................................... 50
2-19.Copying pattern button............................................................................................. 51
2-20.Changing sewing mode ............................................................................................ 52
2-21.LCD display section at the time of combination sewing ....................................... 53
(1) Pattern input screen ...................................................................................................................53
(2) Sewing screen ............................................................................................................................ 55
2-22. Performing combination sewing ............................................................................. 57
(1) Selection of combination data ....................................................................................................57
(2) Creating procedure of the combination data ..............................................................................58
(3) Deleting procedure of the combination data............................................................................... 59
(4) Deleting procedure of the step of the combination data ............................................................. 59
(5) Setting of the skip of steps .........................................................................................................60
2-23. Using the simple operation mode ........................................................................... 60
2-24. LCD display when the simple operation is selected ............................................. 61
(1) Data input screen (individual sewing)......................................................................................... 61
(2) Sewing screen (individual sewing) .............................................................................................64
(3) Data input screen (combination sewing) ....................................................................................67
(4) Sewing screen (combination sewing) ......................................................................................... 69
2-25. Changing memory switch data................................................................................ 71
2-26. Using information ..................................................................................................... 72
(1) Observing the maintenance and inspection information.............................................................72
(2) Releasing procedure of the warning........................................................................................... 73
2-27. Using communication function ............................................................................... 74
(1) Handling possible data ...............................................................................................................74
(2) Performing communication by using the media..........................................................................74
(3) Performing communication by using USB .................................................................................. 74
(4) Take-in of the data ......................................................................................................................75
(5) Taking in plural data together......................................................................................................76
2-28. Performing formatting of the media........................................................................ 78
2-29. Using 2-step stroke function ................................................................................... 79
(1) Setting of 2-step stroke function ................................................................................................. 79
(2) Setting of 2-step stroke position .................................................................................................79
(3) Motion of 2-step stroke function .................................................................................................81
2-30. Operation at the time of X/Y motor position slip ................................................... 83
(1) When the error is displayed during sewing.................................................................................83
(2) When the error is displayed after end of sewing ........................................................................84
iii
(3) When the rest switch is not displayed ........................................................................................84
3. MEMORY SWITCH DATA LIST........................................................................................... 85
3-1. Data list....................................................................................................................... 85
3-2. Initial value list........................................................................................................... 91
4. ERROR CODE LIST............................................................................................................ 93
5. MESSAGE LIST ................................................................................................................ 100
III. MAINTENANCE OF SAWING MACHINE.......................................... 103
1. MAINTENANCE ................................................................................................................ 103
1-1. Adjusting the height of the needle bar (Changing the length of the needle) .... 103
1-2. Adjusting the needle-to-shuttle relation................................................................ 103
1-3. Adjusting the timing of main shaft and hook driving shaft ................................ 105
1-4. Adjusting the height of the feeding frame ............................................................ 106
1-5. Adjusting the vertical stroke of the intermediate presser................................... 106
1-6. The moving knife and counter knife...................................................................... 106
1-7. Needle thread clamp device ................................................................................... 107
1-8. Thread breakage detector plate ............................................................................ 107
1-9. Draining waste oil.................................................................................................... 108
1-10.Amount of oil supplied to the hook ....................................................................... 108
1-11. Replacing the fuse................................................................................................... 108
1-12.Changing the voltage of 100 ⇔200V..................................................................... 109
1-13.Replenishing the designated places with grease................................................. 110
(1) Points to be applied with JUKI Grease A...................................................................................111
(2) Points to be applied with JUKI Grease B.................................................................................. 112
1-14.Troubles and corrective measures (Sewing conditions)..................................... 113
2. OPTIONAL ........................................................................................................................ 115
2-1. Table of Needle hole guide ..................................................................................... 115
2-2. Silicon oil tank ........................................................................................................ 115
2-3. Bar code reader ....................................................................................................... 116

– 1 –
1. SPECIFICATIONS
I. MECHANICAL SECTION (WITH REGARD TO THE SEWING MACHINE)
1 Sewing area X (lateral) direction Y (longitudinal) direction
AMS-224EN-4530 : 450 mm × 300 mm
AMS-224EN-6030 : 600 mm × 300 mm
2 Max. sewing speed 2,500 sti/min (When sewing pitch is 3 mm or less)
3 Settable stitch length 0.1 to 12.7 mm (Min. resolution : 0.05 mm)
4
Feed motion of feeding frame
Intermittent feed (2-shaft drive by stepping motor)
5 Needle bar stroke 41.2 mm
6 Needle DP x 17
7 Lift of feeding frame Max. 30mm
8
Intermediate presser stroke
4 mm (Standard) (0 to 10 mm)
9 Lift of intermediate
presser
20 mm
10 Intermediate presser
DOWN position
variable
Standard 0 to 3.5 mm (Max. 0 to 7.0 mm)
11 Shuttle Double-capacity semi-rotary hook
12 Lubricating oil New Defrix Oil No. 2 (Supplied by oiler)
13 Memory of pattern
data
• Main body : Max. 999 patterns (Max. 50,000 stitches/pattern)
• External media : Max. 999 patterns (Max. 50,000 stitches/pattern)
14 Temporary stop facility Used to stop machine operation during a stitching cycle.
15 Enlarging / Reducing
facility
Allows a pattern to be enlarged or reduced on the X axis and Y axis independently
when sewing a pattern. Scale : 1% to 400% times (0.1% steps)
16 Enlarging / Reducing
method
Pattern enlargement / reduction can be done by increasing / decreasing either stitch
length or the number of stitches. (Increasing/decreasing stitch length only can be
performed when pattern button is selected.)
17
Max. sewing speed
limitation
200 to 2,500 sti/min (Scale : 100 sti/min steps)
18 Pattern selection
facility
Pattern No. selection method
19 Bobbin thread counter UP/DOWN method (0 to 9,999)
20 Sewing counter UP/DOWN method (0 to 9,999)
21 Memory back-up In case of a power interruption, the pattern being used will automatically be stored in
memory.
22 2nd origin setting
facility
Using jog keys, a 2nd origin (needle position after a sewing cycle) can be set in the
desired position within the sewing area. The set 2nd origin is also stored in memory.
23 Sewing machine motor Servo-motor
24
Dimensions AMS-224EN-4530 :
1,703mm (W) x 1,370mm (L) x 1,200mm (H)
(Excluding thread stand)
AMS-224EN-6030 :
1,923mm (W) x 1,370mm (L) x 1,200mm (H)
(Excluding thread stand)
25 Mass (gross mass) AMS-224EN-4530 : 401 kg
AMS-224EN-6030 : 410 kg
26 Power consumption 550 VA
27
Operating temperature
range
5˚C to 35˚C
28
Operating humidity range
35 % to 85 % (No dew condensation)
29 Line voltage Rated voltage ±10% 50 / 60 Hz
30 Air pressure used AMS-224EN-4530 : 0.5 to 0.55 MPa (Max. 0.55 MPa)
AMS-224EN-6030 : 0.5 to 0.55 MPa (Max. 0.55 MPa)
31 Air consumption 1.8 dm3 / min (ANR)
32 Needle highest
position stop facility
After the completion of sewing, the needle can be brought up to its highest position.
33 Noise - Equivalent continuous emission sound pressure level (LpA) at the workstation :
A-weighted value of 83.5 dB ; (Includes KpA = 2.5 dB) ; according to ISO 10821- C.6.3
-ISO 11204 GR2 at 2,500 sti/min.
- Sound power level (LWA) :
A-weighted value of 92.5 dB ; (Includes KWA = 2.5 dB) ; according to ISO 10821- C.6.3
-ISO 3744 GR2 at 2,500 sti/min.

– 2 –
Air regulator
2. CONFIGURATION
Machine head
Wiper switch
Temporary stop switch
Feeding frame
Intermediate presser
Thread stand
Operation panel (IP-420)
Power switch
(also used as the emergency stop switch)
Control box
Foot pedal

– 3 –
3. INSTALLATION
3-1. Installing the throat plate auxiliary cover
1. The throat plate auxiliary cover is very heavy and perform the installing work with two
persons or more.
2.Thestayandthelikearesettothethroatplateauxiliarycoverandthettingscrewsand
washers to the bed are packed together with the accessories at the time of delivery.
3. When using the cover sheet supplied as accessories, paste it to the throat plate auxiliary
cover before installing.
1) Move the cloth feed base to the rear and place throat plate auxiliary cover (asm.) from between
lower plate and throat plate .
At this time, be careful not to bend lower plate .
2) Temporarily x throat plate auxiliary cover (asm.) with throat plate auxiliary cover support set-
screws and washers .
3) Temporarily x throat plate auxiliary cover support to the machine bed with setscrews (M6) .
4) Fix throat plate auxiliary cover (asm.) on the machine bed with two counter-sunk screws
.
5) Insert spacer between cloth feed base cover and throat plate auxiliary cover (asm.) and x it
with setscrew .
6) Securely tighten setscrews
.
7)
Fix throat plate auxiliary cover setscrew .
8) Referring to the caution below, perform positioning of the throat plate auxiliary cover. When the po-
sitioning is not performed enough, perform the positioning after loosening once throat plate auxiliary
cover setscrew and throat plate auxiliary cover base setscrews .

– 4 –
Within 0.3 mm
1. Fix the throat plate auxiliary
cover so that is higher
than the throat plate (within
0.3 mm). When it is lower
than the throat plate , nee-
dle breakage or the like due
to the defective feed will be
caused.
2.Conrmbyputtingaruleror
the like that the throat plate
auxiliary cover is horizon-
tally installed. If not, throat
plate auxiliary cover and
lower plate come in con-
tact partially with each other,
and abnormal worn-out will
be caused.
L
R
3-2. Table position adjustment: Only for 6030
For the 6030, the table has been retracted from the normal position in the factory in prior to shipment.
After unpacking, be sure to carry out the following steps 1) through 9).
Position adjustment for the
left table Lis described as an
example. Adjust the position of
the right table Rin the similar
manner.
[Accessories to be used]
A: Table xing bolt cover
HX00326000B x 2
B: Power switch setscrew
SK3512001SE x 2
(Four setscrews are used for the table of the
machine for JE.)
1) Remove screws and to remove the cover.
* When removing screw , take care not to lose
the nut secured on the underside of the table.
A
B

– 5 –
175mm
A
D, E
AMS-224EN-4530 AMS-224EN-6030
* The following steps 3) through 7) are the re-as-
sembly procedure of the table.
3) Shift the table to adjust so that it laterally pro-
trudes from the end of the table stand by 175
mm. For the longitudinal direction, also adjust so
that the table protrudes equally (approximately 3
mm on each side) from the end of table stand.
* If the table is not correctly positioned in the
longitudinal direction, the throat plate auxiliary
cover may not be removed.
4) Temporarily x table xing bolts at two loca-
tions from the table stand side.
5) Tighten screws and to mount the cover.
* If the cover and tapped hole do not align, align them
by moving the table.
* Tighten screw after mounting the nut from the
underside of the table.
6) Securely tighten the table xing bolts at two
locations from the table stand side. (For refer-
ence: Tightening torque: 6 N•m)
7) After mounting the cover, attach the table xing
bolt cover (accessory A) in position.
9) Secure the operation panel stoppers (accessory
D) in the punched locations at near side of the
right table using wood screws (accessory E).
8) AMS-224EN-4530
Secure the switch mount-
ing plate on the table
stand using countersunk
head screw (accessory
B). Then, x the power
switch using sems screw.
AMS-224EN-6030
Secure the power switch
at the punched location
on the lower right part of
the table using female
screw (accessory C).
2) Remove table xing bolts which are mounted
at two locations of the table stand.
B
C

– 6 –
3-3. Installing the panel
1) Open cover and remove cable once.
Then connect it again to the panel on the top
surface of the table after passing it through the
hole in the table.
2) Fix operation panel installing plate to an op-
tional place on the table with two wood screws
.
Install the panel at the position where
X-move cover or head grip does not
interfere with it since breakage of the
panel will be caused.
1) Installing the IP-420
3-4. Installing the thread stand
1) Assemble the thread stand. Then, put it in thread-stand mounting hole Aor Bin the machine table.
2) Tighten locknut to x the thread stand.
3) When ceiling wiring is possible, pass the power cord through spool rest rod .
4) If thread sags, use thread stand guide arm (asm.) .
A
B
Table

– 7 –
3-5. Installing the air hose
1) Connecting the air hose
Connect the air hose to the regulator .
2) Adjustment of air pressure
Open air cock , pull up and turn air adjust-
ment knob and adjust so that air pressure
indicates 0.5 to 0.55 MPa (Max. 0.55 MPa).
Then lower the knob and x it.
* Close air cock to expel air.
3-6. Installing the eye protection cover
WARNING :
Be sure to attach this cover to protect the eyes from the disperse of needle breakage.
Use eye protection cover after securely attach-
ing it on face plate cover with screw .
To prevent interference with the feed-
ing frame, be sure to install the thread
stand guide arm (asm.) with the eye
protection cover pressed in the direc-
tion of A.
Close
Open

– 8 –
A
A
3) Loosen bolts of through .
4) Lift the claw of forklift, release bolts of , and from the regulating grooves, move stands ,
and in the directions of both arrow marks, and lower the claw of forklift at the positions where
the respective groove positions meet with one another.
At this time, make sure that bolts of , and have been securely set in the grooves.
5) Securely tighten bolts of through with tightening torque of 45 ± 2 N•m.
3-7. Changing the height of the table and stand
1) Insert the claw of forklift up to the transverse beam Ain front of the upper stand from the position as
shown in the gure in the rear of the sewing machine.
2) Lift the claw of the forklift up to the position where the claw of forklift comes in contact with the bot-
tom surface of the upper stand and the upper stand does not fall.
* Take care not to allow the forklift claw to crush the cable.
Regulating grooves
WARNING :
Turn OFF the power before starting the work so as to prevent accidents caused by abrupt start of
the sewing machine.
Theheightofthetable(measuredfromtheoortothetable)isadjustabletosixdifferentheights.
870mm 897mm 922mm 945mm 967mm 988mm
It has been factory-adjusted to at the time of delivery.

– 9 –
4. PREPARATION OF THE SEWING MACHINE
4-1. Lubrication
WARNING :
Turn OFF the power before starting the work so as to prevent accidents caused by abrupt start of
the sewing machine.
1) Check that the place between lower line Band upper line Ais
lled with oil. Fill there with oil using the oiler supplied with the
machine as accessories when oil is short.
1. Do not lubricate to the places other than the oil tank and the hook of Caution 2 below.
Trouble of components will be caused.
2. Whenusingthesewingmachineforthersttimeorafteranextendedperiodofdisuse,
use the machine after lubricating a small amount of oil to the hook portion. (For removing
the shuttle, see "III-1-2. Adjusting the needle-to-shuttle relation" p.103.)
3. Do not put your foot or climb on the sewing machine table or table stand during lubrica-
tion.
2) Apply one drop of oil to the
hook race part to spread
on it.
The oil tank to lubricate is for lubricating to the hook portion and the gear box portion.
For the hook portion, the oil amount can be decreased when the number of revolutions used is
low and the oil amount is large. (Refer to "III-1-10. Amount of oil supplied to the hook" p.108 .)
4-2. Attaching the needle
WARNING :
Turn OFF the power before starting the work so as to prevent accidents caused by abrupt start of
the sewing machine.
Loosen setscrew and hold needle with the long
groove facing toward you. Then fully insert it into the
hole in the needle bar, and tighten setscrew .
When tightening setscrew , be sure
to use the screwdriver (Part No. :
40032763) supplied as accessories.
Do not use L-shaped hexagon wrench
key. There is a danger of breaking set-
screw .
1.5 mm
A
B
A
B

– 10 –
4-3. Threading the machine head
WARNING :
Turn OFF the power before starting the work so as to prevent accidents caused by abrupt start of
the sewing machine.
4-4. Installing and removing the bobbin case
WARNING :
Turn OFF the power before starting the work so as to prevent accidents caused by abrupt start of
the sewing machine.
1) Open hook cover .
2) Raise latch of bobbin case , and remove
the bobbin case.
3) When entering bobbin case, insert it with the
latch tilted until "click" sounds.
If it is not fully inserted, bobbin case
may slip off during sewing.
Threading of L-type thread
guide in case of large return
of twist.
4-5. Installing the bobbin
WARNING :
Turn OFF the power before starting the work so as to prevent accidents caused by abrupt start of
the sewing machine.
1) Set the bobbin into bobbin case in the direction
shown in the gure.
2) Pass the thread through thread slit of bobbin case
, and pull the thread as it is. By so doing, the thread
will pass under the tension spring and be pulled out
from thread hole .
3) Pass the thread through thread hole of the horn section,
and pull out the thread by 2.5 cm from the thread hole.
If the bobbin is installed in the bobbin case ori-
enting the reverse direction, the bobbin thread
pulling out will result in an inconsistent state.
2.5 cm

– 11 –
4-6. Adjusting the thread tension
If thread tension controller No. 1 is turned
clockwise, the length of remaining thread on the
needle after thread trimming will be shorter. If it is
turned counterclockwise, the length will be longer.
Shorten the length to an extent that the thread is
not slipped off.
Adjust needle thread tension from the operation
panel and bobbin thread tension with .
Longer
Shorter
[Adjusting the needle thread tension]
1) Select THREAD TENSION button
in the sewing screen.
2) Set needle thread tension with SCROLL
button . There is a setting range of 0
to 200. When the set value is increased,
the tension becomes higher.
* When the set value is 50 at the time of
standard delivery, the thread tension is
adjusted to 2.35N (spun thread #50).
(When thread tension No. 1 is released)
4-7. Intermediate presser height
Press INTERMEDIATE PRESSER SET-
TING button and adjust with TEN keys
so that the clearance between the
bottom end of intermediate presser and the
cloth is 0.5 mm (thickness of thread used).
1. Setting range of the intermediate presser is up to the standard of 3.5 mm.
However, the setting range can be changed up to max. 7 mm with memory switch U112.
2. When increasing the height of intermediate presser or making the needle size thicker, con-
rmtheclearancebetweenthewiperandthecomponents.Wipercannotbeusedunless
the clearance is secured. Turn OFF the wiper switch. Besides, note that the wiper is set so
as to sweep at the position where the intermediate presser is in the lowest position in spite
of the setting of intermediate presser height at the time of delivery. (Memory switch U105)
When raising the intermediate presser height, turn the pulley by hand to lower the needle bar,
andconrmthattheneedlebardoesnotinterferewiththeintermediatepresser.
0.5 mm

– 12 –
4-8. Adjusting the thread take-up spring
1) Adjusting the stroke
Loosen setscrew , and turn thread tension asm.
.
Turning it clockwise will increase the moving
amount and the thread drawing amount will
increase.
2) Adjusting the pressure
To change the pressure of the thread take-
up spring
, insert a thin screwdriver into the
slot of thread tension post
while screw
is
tightened, and turn it. Turning it clockwise will
increase the pressure of the thread take-up
spring. Turning it counterclockwise will de-
crease the pressure.
Decrease
Increase
5. OPERATION OF THE SEWING MACHINE
1) 2)
3)
5-1. Sewing
[In case of the mechanical valve pedal]
1) Set a workpiece under the feeding frame and
depress pedal of the pedal switch. Then the
feeding frame comes down.
When the foot is detached, the feeding frame
returns to its home position.
The lowering speed of the feeding frame
changes according to the depressing amount.
This is used when positioning the parts.
2) When positioning the workpiece and depress-
ing pedal , the feeding frame comes down to
the bottom and holds the workpiece.
3) Depress pedal when the feeding frame
comes down to the bottom and sewing starts.
[For the 2-step stroke pedal (PK47)]
* Refer to "II-2-29. Using 2-step stroke function" p.79.

– 13 –
5-2. Needle thread clamp device
By actuating the needle thread clamp device, trouble of sewing at the high-speed start (needle thread
slip-off, stitch skipping or needle thread stain) is prevented, and can reduce gathering (bird's nest) of
needle thread on the wrong side of cloth while keeping stable sewing. When mounting the IP-420,
changeover of motion ON/OFF is performed with key.
When the needle thread clamp device is OFF, the machine automatically operates at slow-start.
When memory switch No. 35 is : prohibited, the thread clamp does not work. In addi-
tion, key is ineffective.
* Matters that demand special attention when using the needle thread clamp device
Refer to the list below for the contents of memory switches where the thread clamp unit can be set.
Sewing
machine type
Thread clamp
unit type
Memory switch
U69 U70
AMS-224ENHS H type 1 : H type thin thread (standard) (#50 to #8)
2 : H type intermediate (#20 to #5)
3 : H type thick thread (#5 to #2)
0 : Front
1 : Rear (standard)
[Regarding thread clamp unit]
Change the set value of memory switch U69 according to the thickness of needle thread. The value has
been set to 1 : Thin thread at the time of delivery.
Commendable value is Set value : 1 for thread count #50 to #8, Set value : 2 for thread count #20 to
#5, and Set value : 3 for thread count #5 to #2. (The value will change in accordance with the kind and
thickness of the actual thread and the kinds of materials to be sewn. Set the value by adjusting to the
state of needle thread on the wrong side of materials.) In addition, it is possible to select the thread
clamp position by means of memory switch U70. If the sewing material is tucked in or set in at the be-
ginning of sewing in case of using thicker thread such as yarn count #5 to #2 or in any other occasion,
select rear position of thread clamp by means of Memory switch U70.
Use the set value of the memory switch which is adjusted to the thread clamp unit type.
When the setting is wrong, the thread clamp fails to properly function. So, be careful.

– 14 –
(2) When the thread clamp is used, and bobbin thread at the sewing start appears on the right side of
material, reduce thread tension at the sewing start (2 to 3 stitches) and bobbin thread becomes less
conspicuous.
[Example of setting]
Tension of 1 to 2 stitches at the sewing start is “20” when sewing tension setting is “35”.
* For setting of tension at the start of sewing, see of "II-2-8(1) Editing the thread tension" p.32.
1. Thread at the start of sewing may be rolled in case of some patterns. When thread is rolled
in even after performing adjustment of (1) or (2), use the sewing machine with thread
clamp OFF.
2. Thread clamp failure may occur in the state that thread waste is jammed in the thread
clamp device. Remove the thread waste referring to
"III-1-7. Needle thread clamp device" p.107.
5-3. How to use the plastic blank (supplied with the machine as an accessory)
1) Machine the plastic blank supplied with the
machine according to the stitching shape.
2) Attach the plastic blank to the feeding frame as
illustrated in the gure.
Use a sponge sheet or rubber sheet
supplied with the machine in combi-
nation with the plastic blank, if neces-
sary.
4530 6030
❶Plastic blank 40072147 40072148
❷Feeding frame 40072138 40072139
❸Setscrew SM1041401SN SM1041401SN
❹Washer WP0430801SC WP0430801SC
❺Nut NM6040001SC NM6040001SC
❻Positioning screw SM4040501SN SM4040501SN
❺
❹
❷
❶
❻
❸
When needle thread is excessively long at the time of using the thick thread, the end of nee-
dle thread held with the needle thread clamp is rolled in the seams, and slip of position of
material may occur or needle breakage may be caused.
(1) When with thread clamp (motion), use the sewing machine after adjusting the needle thread length
at the start of sewing to 40 to 50 mm. When the needle thread length is too long, the needle thread
end held with the needle thread clamp may be rolled in the seams.
40 to 50 mm
1) In case of with the needle thread clamp, the
standard of the length of needle thread is 40 to
50 mm.
2) When needle thread is long after replacing
thread or the like or sewing while holding
needle thread by hand, turn OFF the THREAD
CLAMP key .
3) When needle thread held with the needle
thread clamp is rolled in the seams, when error
has occurred, or when needle thread is held
entangled with the needle thread clamp, do not
forcibly draw the cloth, but cut the connected
needle thread with scissors or the like. The
seams cannot be broken because of the nee-
dle thread at the start of sewing.
1)
3)

– 15 –
1. PREFACE
The media supplied with the unit contains the following service patterns.
The operation panel for the AMS-224EN comes in the following three types.
1) Kind of sewing data handled with IP-420
Sewing data that each panel handles are as shown below.
Pattern name
Users' pattern
Vector format data
M3 data
Sewing standard
format
Description
Pattern that can be stored in the body.
Max. 999 patterns can be registered.
File that extension is ".VDT"
Read from media. Max. 999 patterns can be used.
Pattern data of AMS-210D series
Used by copying from oppy disk of AMS-210D series to media.
Max. 999 patterns can be used.
File that extension is ".DAT"
Read from media. Max. 999 patterns can be used.
2) Using the data (M3 data) of AMS-210D series with AMS-224EN
There are two ways to use M3 data with AMS-224EN.
Reading by using IP-420
Use PC (personal computer) and copy le (¥AMS¥AMS00xxx.M3) of M3 from oppy disk of AMS-
210D to ¥AMS of media. Insert the media to IP-420, and select Pattern No.xxx from M3 data.
Changing to vector format data using PM-1
Change to the vector format data with PM-1. (For the details, refer to Help of PM-1.)
Copy the changed vector format data to ¥VDATA folder of the media.
Insert the media to IP-420 and select Pattern No.
ø 60 Pitch 3.6mm
Pattern No. 101
H Type, G Type
(Vinyl leather)
H Type, G Type
(Denim) H Type, G Type
ø 60 Pitch 3 mm
Pattern No. 102
ø 60 Pitch 2.5 mm
Pattern No. 103
Area
Kind
4530
6030
II.
OPERATION SECTION (WITH REGARD TO THE PANEL)

– 16 –
3) Folder structure of the media
Store each le in the folders below of the media.
Data that are not stored in the directories above cannot be read. So, be careful.
Media drive
Store sewing standard data.
Store M3 data.
Store vector format data.
SD00 . DAT
SD00 . DAT
AMS00 . M3
AMS00 . M3
VD00 . VDT
VD00 . VDT
Vector format data :
Store in ¥VDATA.
M3 data :
Store in ¥AMS.
Sewing standard
format :
Store in ¥SDATA.
VDATA
AMS
SDATA
4) CompactFlash (TM)
1) Turn the label side of the CompactFlash(TM)
to this side (place the notch of the edge to
the rear. ) and insert the part that has a small
hole into the panel.
2) After completion of setting of the media, close
the cover. If the cover cannot be closed since
the memory media comes in contact it, check
the following:
・ Check that the media is securely pressed
until it goes no further.
・ Check that the inserting direction of the
media is proper.
1. When the inserting direction is wrong, panel or media may be damaged.
2. Do not insert any item other than the CompactFlash (TM).
3. The media slot in the IP-420 accommodates to the CompactFlash (TM) of 2 GB or less.
4. The media slot in the IP-420 supports the FAT16 which is the format of the CompactFlash
(TM). FAT32 is not supported.
5.
Be sure to use the CompactFlash (TM) which is formatted with IP-420. For the formatting pro-
cedure of the CompactFlash (TM), see "II-2-28. Performing formatting of the media" p.78.
Media
Inserting the CompactFlash (TM)
This manual suits for next models
2
Table of contents
Other JUKI Sewing Machine manuals

JUKI
JUKI DDL-9000B User manual

JUKI
JUKI TNU-243 User manual

JUKI
JUKI AMS-210EN/IP-420 User manual

JUKI
JUKI DDL 227 User manual

JUKI
JUKI MO-655N User manual

JUKI
JUKI HZL-F series User manual

JUKI
JUKI MS-1261 User manual

JUKI
JUKI PLK-J10050R3 User manual

JUKI
JUKI 36200UA52 Datasheet

JUKI
JUKI DDL-5600N Series User manual
Popular Sewing Machine manuals by other brands

Siruba
Siruba 700K Instruction book

Singer
Singer 246-12 instructions

Baby Lock
Baby Lock Valiant BMV10 Quick reference guide

DURKOPP ADLER
DURKOPP ADLER 745-35-10 B operating instructions

ELNA
ELNA 8300 - LEAFLET Supplementary Instruction Booklet

Baby Lock
Baby Lock Tiara II BLTR16-2 Instruction and reference guide