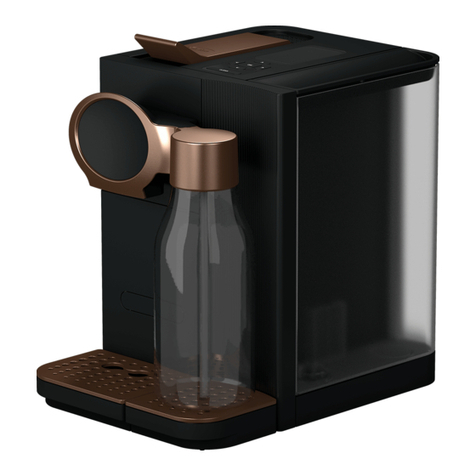
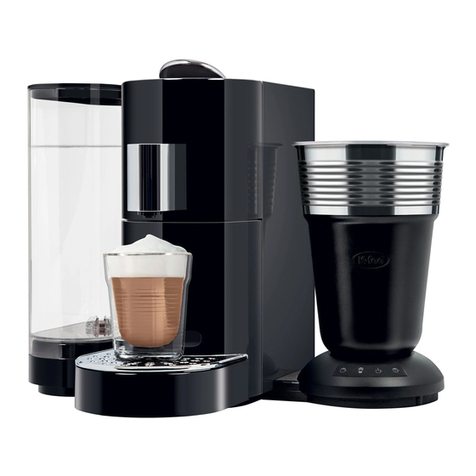
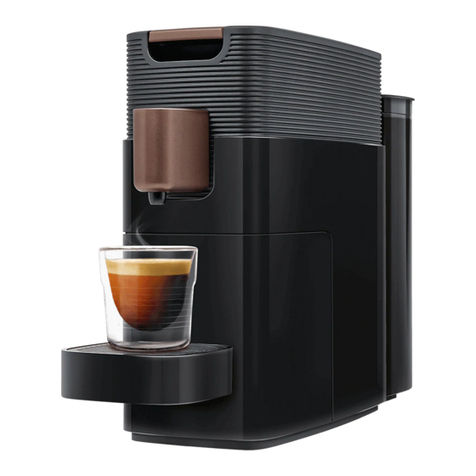
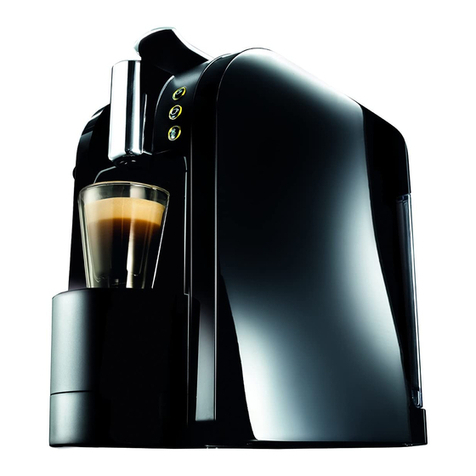
K-FEE TWINS II User manual

TWINS II
OPERATING MANUAL / MANUEL D‘UTILISATION

3
We congratulate you on the purchase of the high-quality TWINS II brewer from
K-fee® – your system. Use it to create a wonderful variety of coffee specialities in barista
quality conveniently at home or in the office. Look forward to tasty cappuccino, flat white
and latte but of course also excellent espresso and a nice cup of coffee, just as delicious
as in a café.
The quality and design will delight you every day, as well as the large selection of finest
pods for coffee, tea and more from the K-fee® – your system portfolio. Thanks to the
innovative “Smart Brew” technology with up to 19 bar pump pressure, each drink always
develops its full exquisite aroma. To customise your enjoyment, you can set the pour size
of your favourite drinks exactly according to the cup sizes. Feel like a barista and bring your
creativity to life, cup for cup .
Ourrecommendationforcontinuoustop-qualitycoffeeenjoyment:alwaysusefreshdrinking
waterandfreshK-fee®– yoursystempods.Clean anddescalethe machine in accordance
with the instructions.
Beforyoubegin,pleasereadthismanualandallinstructionsincludingimportantsafeguards
to get the most out of your new brewer.
We wish you great pleasure with your TWINS II.
Your K-fee® – your system team
Congratulations!
EN

54
WARNING
WARNING
WARNING TO USERS
AND PARENTS
DO NOT permit children
to use the appliance unless
there is adult supervision.
Safety Information.................................................................................................................................................. 4
Important Safeguards......................................................................................................................................... 4–5
Special Safety Instructions ................................................................................................................................. 6–7
Overview................................................................................................................................................................. 8
Overview of LED Symbols ....................................................................................................................................... 8
Setting up (priming the brewer)........................................................................................................................9–10
Preparing Beverages ........................................................................................................................................11-16
Programming Pour Size Settings ......................................................................................................................... 17
Daily Maintenance (after the last time you use the brewer) ........................................................................... 18-19
System Cleaning..............................................................................................................................................20-21
System Descaling.............................................................................................................................................22-23
Resetting to Factory Settings ............................................................................................................................... 24
Evaporating Residual Water (periods of absence/frost protection)................................................................25-26
FAQ/Troubleshooting............................................................................................................................................ 27
Specifications........................................................................................................................................................ 28
Disposal Instructions............................................................................................................................................ 28
5. Do not touch hot surfaces. Use handles or knobs
when available.
6. Never use a damaged or deformed pod. Only use
beverage pods suitable for this appliance.
7. Never lift the appliance by its handle.
8. Never open or close the handle with excess force.
9. Neveropentheapplianceorinsertobjectsintothe
appliance openings.
10.Do not overfill the water tank with water.
11. Use only fresh and cold drinking water in this
appliance. Do not put any other liquids or foods in
the water tank except as directed in the cleaning
and descaling instructions in this manual.
12.The use of accessory attachments not recom-
mended by the appliance manufacturer may
result in fire, electric shock or injury to persons.
13. Donot placeonornearahotgasorelectricburner,
or in a heated oven.
14. Do not place near water, e.g., kitchen sink.
15.Do not use outdoors.
16. Donotoperatetheappliancefromwithincupboards.
17. To protect against fire, electric shock and injury,
do not immerse appliance, cord or plug in water
or any other liquid.
18. Thisapplianceisequippedwithapowercordhaving
agroundingwirewithagroundingplug.Onlyplug
the applianceintoagrounded3-pinwall outlet.In
the event of an electrical short circuit, grounding
reducestheriskofelectricalshock.Checkthatpower
supplyratingsmatchtheelectricalratingsspecified
ontheproduct’snameplate.Thewarrantybecomes
null and void if the appliance is plugged into an
incorrect power supply.
19. Do not, under any circumstances, cut or remove
the third (ground) prong from the power cord or
use an adapter that converts a 3-prong plug to
a 2-prong plug. Consult a qualified electrician if
the grounding instructions are not completely
understood, or if doubt exists as to whether the
appliance is properly grounded.
20.Turn off and unplug from outlet when not in use
andbeforecleaning.Allowtocoolbefore putting
on or taking off parts, and before cleaning the
appliance.
21. Do not operate appliance with a damaged cord
or plug or after the appliance malfunctions in
any manner. Please find the contact details on
page 28 to report any malfunction or damage
to the appliance and receive instructions for any
return for examination, repair, or adjustment.
22.Do not let cord hang over the edge of the table or
the counter, or touch hot surfaces.
23.Todisconnect,alwaysturnanycontrolto“off”first,
then remove plug from wall outlet.
24. Closesupervision is necessarywhen thisappliance
isusedbyornearchildren.Storetheapplianceand
all its accessories outside the reach of children.
25.Refer to the instructions for use of all cleaning
and descaling agents before use and comply with
the safety regulations. Do not turn off appliance
during rinsing or descaling process.
26.Apart from normal use—cleaning, descaling and
external cleaning—all other work such as repairs
orreplacingthepowercordshouldonlybecarried
out by an authorized Customer Service company
in order to avoid hazards.
27. In case of long periods of absence, vacation, etc.,
the appliance must be emptied, cleaned and the
plug must be removed from the outlet.
28.If appliance has been exposed to temperatures
below freezing, allow at least three hours for the
appliance to reach room temperature before
startup. A frozen or extremely cold appliance
may not operate properly.
SAVE THESE
INSTRUCTIONS
• Read ALL instructions before use to avoid injury.
• Pay attention to the warning in this Manual.
• Keep this Manual in a safe place for future reference.
• For use by adults only.
• Be diligent about emptying, cleaning and
descaling as described in this Manual.
• Designed for beverage pods that bear the
K-fee® – your system logo.
Whenusingelectricalappliances,basicsafetyprecautions
must always be followed, including the following:
1. Read all instructions and use only in accordance
with these instructions.
2. Theapplianceisdesignedforbrewingvarioustypes
ofcoffeeasdescribedintheinstructions.Donotuse
the appliance for other than intended use.
3. Never place your fingers under the spout
whiletheapplianceisoperating—thismay
resultinscalding. Neverinsertyourfingers
inthepodopening—thismayresultininjury.
4. Never open the handle on the appliance
during the brewing, rinsing, cleaning or
descalingprocesses.Alwayskeepthehandle
in the closed/down position while brewer
is operating.
IMPORTANT SAFEGUARDS
EN Contents
Safety Information

76
WARNING
RISK OF FIRE OR
ELECTRIC SHOCK
DO NOT OPEN
WARNING: TO REDUCE THE RISK OF FIRE OR
ELECTRIC SHOCK, DO NOT REMOVE THE BOTTOM
COVER. NO USER SERVICEABLE PARTS ARE INSIDE.
REPAIR SHOULDBE DONE BY AUTHORIZED SERVICE
PERSONNEL ONLY.
EN Special Safety Instructions
WARNING
Avoid risk of electric shock
• Keep the appliance away from moisture and
splashing water.
• Do not clean appliance under running water or
with a water jet.
• Neverpouranytypeofliquidontopoftheappliance.
• Never unplug the appliance by pulling the
power cord.
• No user serviceable parts inside.
• Do not, under any circumstances, cut or remove
the third (ground) prong from the power cord or
use an adapter that converts a 3-prong plug to a
2-prong plug.
CAUTION
IMPORTANT POD USE INFORMATION
• Pods are for single use only. Never reuse.
• Use espresso pod only with espresso brew cycle.
• Use brewed coffee pods only with brewed coffee
brew cycle.
• Use milk pods only with milk cycle.
• Misuse of pods can damage machine.
WARNING
WARNING: Make sure the handle is closed
completelyduringuse.Extremelyhotwaterruns
throughtheappliancewhenoperating(brewing,
descaling,cleaning,rinsing).Toavoidtheriskof
scaldingorotherinjury,alwayskeepthehandle
in the closed/down position while machine is
operating.Donotreachunderthespoutorremove
the drip tray while the appliance is operating.
• Take care when emptying the drip tray. The water
can be very hot.
• There is a danger of scalding when evaporating
theresidual water(the steamtemperature canbe
as high as 248 °F / 120 °C).
CAUTION
Hygiene and cleaning
• Only use pods with a best-by date that has not
yet expired.
• Store pods in a suitable location.
• It is recommended to rinse the appliance five
timesbeforefirstusetoprime machineand
once after your last beverage of the day to
rinse the system. Read the instructions under
“Daily Maintenance“ on page 18–19.
• Cleantheapplianceperiodicallyandinaccordance
withtheoperatingmanualtopreventhygienerisks.
• Onlyusecleaning/descalingagentsthataresuitable
for the appliance.
• Carefully read the user instructions about the
cleaning and descaling agents and comply with
the safety instructions.
Short cord instructions
Ashortpower-supply cord isprovidedtoreducerisks of
entanglementortrippingoveralonger cord.Extension
cords may be used if care is exercised in their use. If a
longer power supply or extension cord is used, 1) The
markedelectricalratingoftheextensioncordshouldbe
atleastasgreatastheelectricalratingofthe appliance,
2) If the appliance is a grounded type, the extension
cordshould bea groundedtype3-wirecord,and 3)The
longercord should bearrangedsoitwill notdrape over
the counter top or table top where it can be pulled on
by children or tripped over.
Information on Energy-Saving Mode
and Power Off
Thebrewerreturnstoenergy-savingmodeifitisunused
for more than5 minutes(factorysetting). Thebrewer
uses considerably less energy (less than 0.5 W/h) in
this mode.
CAUTION
CAUTION: There are four sharp needles that
puncture the K-fee® – your system pods inside
the pod opening. To avoid risk of injury, do not
put your fingers in the pod opening.
FOR
HOUSEHOLD USE
ONLY
WARNING SYMBOLS AND WORDS
The warning triangle appears in these instructions where failure to comply with
the safety instructions may result in risks to the user or the appliance.
WARNING: Extremely hot water.
WARNING: Electric shock.
DONT'S: Do not reach inside.
PROHIBITED: Do not drink.

98
CAUTION: There are four sharp needles that puncture the K-fee® – your system pods inside the pod
opening. To avoid risk of injury, do not put your fingers in the pod opening.
CAUTION WARNING
WARNING: Make sure the handle is closed completely
during use. Extremely hot water runs through the
brewer when operating (brewing, descaling, cleaning,
rinsing). To avoid the risk of scalding or other injury,
always keep the handle in the closed/down position
while machine is operating. Do not reach under
the spout and do not remove the drip tray while
appliance is operating.
Take care when emptying the drip tray and pod
container. Residual water can be very hot.
WARNING: Electric shock.
Remove water tank, fill it up
with fresh drinking water and
return it to the brewer.
Plug in the brewer, press
the lever down to the closed
position, and place a heat-safe
cup under the spout.
1. Water tank lid
2. Water tank
3. Pod opening
4. Handle
5. Controls
6. Spout
7. Used pod container
8. Front cover/drip tray holder
9. Drip tray grate
10. Drip tray
When all
buttons
blink white,
please wait.
The brewer is
heating up.
When all
buttons are
illuminated
white, the
brewer is
ready for
operation.
ON/OFF button
Milk pod
Rinse
Hot water
Espresso pod
Brewed pod
If Brewed button blinks red during drink preparation, please descale the brewer.
If Brewed button blinks red permanently and quickly, see page 28 for
customer care hotline and service contact.
When one
button is
blinking
white, the
brewer is
executing an
operation.
Overview of LED Symbols
1
2
MAX
34
25
7
1
9
8
10
6
EN Overview EN Setting up (priming the brewer)

1110
Do not remove the top foil lid or puncture
the pod.
Rinse the machine before making each
beverage by placing an empty cup
on the drip tray and pushing the Rinse
button once, then discarding hot water.
WARNING: Extremely hot water.
PROHIBITED: Do not reach inside—
injury hazard.
NOTE: You can stop the brewing
process by pressing any of the buttons.
Once brewer has heated up
buttons stop blinking, press
the Rinse button.
Repeat Step 4 four more
times, discarding liquid in
heat-safe cup as needed.
Your brewer is now primed,
and ready to brew.
IMPORTANT: The brewer must be primed (as outlined in steps 1-5) before first
use and any time the unit is run dry or is without water for an extended period of time.
Press ON/OFF button (the
button symbols will blink as
the appliance heats up)
Adjust drip tray to the desired
height, and place heat-safe
cup under the spout
slot above slot below without drip tray
5
4
3
EN Preparing Beverages: Espresso
max
5.9 in /
150 mm
max
4.1 in /
105 mm
max
3.0 in /
75 mm
1

1312
NOTE: You can stop the brewing process
by pressing any of the buttons.
WARNING: Extremely hot water.
PROHIBITED: Do not reach inside—
injury hazard.
Lift handle and insert
Espresso pod.
Press Espresso button to
begin brewing. Beverage
will begin pouring.
Lift handle to eject pod.
Reclose handle, and remove
your finished beverage.
For larger cups,
remove drip tray.
Adjust drip tray to the desired
height, and place heat-safe
cup under the spout
For larger cups,
remove drip tray.
3
4a
4b 5
2
EN Preparing Beverages: Brewed Coffee
slot above slot below without drip tray
max
5.9 in /
150 mm
max
4.1 in /
105 mm
max
3.0 in /
75 mm
1
2

1514
NOTE: You can stop the brewing process
by pressing any of the buttons.
WARNING: Extremely hot water.
PROHIBITED: Do not reach inside—
injury hazard.
Lift handle
and insert
Brewed
pod.
IMPORTANT: Just before brewing,
remove the pressure tab from the
bottom of the pod.
Press Brewed button to
begin brewing. Beverage
will begin pouring.
Lift handle to eject pod.
Reclose handle, and remove
your finished beverage.
Adjust drip tray to the desired
height, and place heat-safe
cup under the spout
For larger cups,
remove drip tray.
slot above slot below without drip tray
3
5a
5b 6
4
max
5.9 in /
150 mm
max
4.1 in /
105 mm
max
3.0 in /
75 mm
1
2
EN Preparing Beverages: Milk Pod

1716
Programmable values
10.1 fl oz
7.0 fl oz 210 ml
Brewed Coffee
Hot Water
Espresso
Milk
Programmable values
1.5 fl oz
1.0 fl oz
Programmable values
7.0 fl oz
5.1 fl oz
210 ml
150 ml
Recommended
setting
1.7 fl oz 50 ml
Programmable values
4.7 fl oz
4.6 fl oz
4.4 fl oz
30 ml
Recommended
setting
45 ml
135 ml
Recommended
setting
140 ml
130 ml
300 ml
Recommended
setting
Your brewer has preset pour sizes (approximate
values) that can be reprogrammed to your cup size.
Programmed volumes for each button remain saved
as the new default (even if power is interrupted).
To reset the pour size settings back to the manufac-
turer recommended settings, see page 24.
Press and hold desired beverage button (Espresso,
Brewed, Hot Water) for at least 3 seconds to start
programming. Release button. When the liquid
reaches the desired level, press button again. Brewer
automatically saves this new setting.
To reprogram a button setting:
Lift handle and insert Milk pod.
Press Milk button to
begin brewing. Beverage
will begin pouring.
Lift handle to eject pod.
Reclose handle, and remove
your finished beverage.
3
4a
4b 5
hold for at least
3 seconds Stop
EN Programming Pour Size Settings

1918
WARNING
WARNING: Make sure the handle is closed completely
during use. Extremely hot water runs through the
brewer when operating (brewing, descaling, cleaning,
rinsing). To avoid the risk of scalding or other injury,
always keep the handle in the closed/down position
while machine is operating. Do not reach under the
spout and do not remove the drip tray while appliance
is operating.
Take care when emptying the drip tray and pod
container. Residual water can be very hot.
WARNING: Extremely hot water.
RISK OF DAMAGE: Only use water, dish
soap and a mild cloth. Never use scouring
agents or aggressive cleansing agents.
Never wash appliance components in the
dishwasher.
Turn off the brewer by
pressing ON/OFF button.
Press Rinse
button,
and discard
liquid in
cup.
Place heat-safe
cup under spout.
1 2
3
Remove drip tray, used pod
container, and water tank.
Empty all containers.
Clean and reassemble
all parts.
5
Take care when emptying the
drip tray and pod container.
Residual water can be very hot.
4b
4a
EN Daily Maintenance (after the last time you use the brewer)

2120
PROHIBITED: Do not drink.
WARNING: Extremely hot water.
WARNING: Electric shock.
PROHIBITED: Do not reach inside—
injury hazard.
Only use liquid cleaners which are
suitable for K-fee® – your system
brewer. For further information
regarding product suitability please visit
www.k-fee.us. For health reasons, it
is recommended to clean the machine
every month with a cleaning agent.
Carefully read the instructions for using
the cleaning agent and comply with all
safety instructions.
Lift handle to eject pod from
pod chamber.
Reclose handle and remove
water tank (note: If using
water filter; it must be
removed before cleaning). Clean water tank.
Fill
water
tank
with
water
only.
Fill water tank with cleaner
and water according to the
cleaning agent manufac-
turer's directions. Insert water
tank and place heat-safe cup
under spout.
1
2
Wipe down
machine
surface.
Press Rinse button and rinse
until water tank is empty.
Empty cup as needed.
Rinse until
water is
empty.
Empty cup
as needed.
MAX
56
8
7
4
13.5 fl oz
400 mL
3
3.4 fl oz
100 mL
EN System Cleaning

2322
PROHIBITED: Do not drink.
WARNING: Extremely hot water.
WARNING: Electric shock.
PROHIBITED: Do not reach inside—
injury hazard.
If Brewed button blinks red during drink
preparation, please descale the brewer.
Only use descaling agents which are
suitable for K-fee® – your system
brewer. For further information
regarding product suitability please visit
www.k-fee.us
Carefully read the instructions for using
the descaling agent and comply with all
safety instructions. Press Brewed button
once to begin the
descaling process.
Brewer will fully cycle
through all water
in the tank. Empty
cup under spout as
needed.
Lift handle to eject pod from
pod chamber.
Reclose handle and remove
water tank.
1
2
Clean water tank.
Fill
water
tank
with
water
only.
Fill water tank with descaler
and water according to the
cleaning agent manufactu-
rer's directions. Insert water
tank and place heat-safe cup
under spout.
Press and hold
Brewed button
3 seconds to
exit descale
mode, and wipe
down surface of
machine.
Press
Brewed
button once
to rinse the
brewer, until
water tank is
empty.
MAX
56
4b
8
7
4a
3
With brewer in OFF mode, press and hold down
Brewed button and ON/OFF button simultaneously.
3 sec.
13.5 fl oz
400 mL
3.4 fl oz
100 mL
EN System Descaling

2524
This Operation returns the “Programmable button pour sizes” to their original factory settings. WARNING: When steaming out, hot steam
(up to 250 °F / 121 °C) and hot water are
produced—scalding hazard. Never reach
under the spout. The collecting container
under the spout contains extremely hot
water—please handle carefully.
WARNING: Extremely hot water.
PROHIBITED: Do not reach inside—
injury hazard.
If you leave the brewer unused for long
periods, germs can cause health hazards.
Additionally, if subjected to freezing
temperatures, residual water can damage
the brewer. To prevent these hazards, you
should empty the appliance by steaming
out the residual water.
RISK OF DAMAGE: Only use water, dish
soap and a mild cloth. Never use scouring
agents or aggressive cleansing agents.
Turn brewer off.
Press and hold down Milk and
Espresso buttons together.
While keeping both buttons
pressed, press ON/OFF until
all illuminated buttons
blink once.
1
2
3
Turn brewer off. Empty water
tank, and replace a heat-safe
container under the spout.
Press and hold Hot Water and
Espresso buttons together.
1
2
EN Resetting to Factory Settings EN Evaporating Residual Water (periods of absence/frost protection)

2726
Why is there a delay before the drink is dispensed?
The brewer is adjusting to the right temperature to make your beverage.
Why does the brewer switch off automatically after not being in use for more than 5 minutes?
The brewer goes into automatic standby mode after 5 minutes to conserve energy.
How do I remove the pod container if it is jammed/overfilled?
Gently move the pod container back and forth while removing the container.
What should I do if the handle cannot close completely after pod has been inserted?
First, ensure that there are no used pods in the brewing chamber, and that the pod collection
container is empty. Ensure that the new pod you have inserted is in the correct position.
Why does the Brewed button blink red and Espresso button blink white at the same time?
The brewer is overheated. Switch the appliance off, unplug and allow the brewer to cool down.
After this, plug in the brewer and switch on.
Why does the Brewed button blink red during drink preparation?
The brewer should be descaled (refer to the section "System Descaling").
Why isn't the beverage dispensing properly?
Ensure the handle is pressed down completely. If necessary, descale the brewer (refer to the
section "System Descaling").
Why isn’t the beverage hot enough?
The machine may need to be descaled (refer to the section "System Descaling").
Why is the brewer delivering a smaller beverage volume?
The system may be calcified (refer to the section "System Descaling"). If the problem continues to occur,
please check the cup filling capacity you have programmed. If required, reset the appliance to the factory
setting, and reprogram as desired (see instructions in section "Programming Pour Size Settings").
While keeping both buttons
pressed, press ON/OFF until
Hot Water button blinks.
The brewer will now steam
all the residual water out,
and automatically switch to
OFF after steaming. Carefully
empty heat-safe container.
Remove drip tray and pod
container and empty them.
Clean and dry all components
before returning them to the
brewer.
5
6
4
3
EN FAQ/Troubleshooting

328
EN Specifications/Service
Plug: 120 V, 60 Hz, maximum 1450 W
Cord: 39.4 in / 1 m
Pressure: maximum 275 psi / 19-bar
Tank: 77.7 fl oz / 2.3L
Weight: approx. 7.7 lb / 3.5 kg
Dimensions:
A = approx. 7.6 in / 194 mm
B = approx. 12.9 in / 328 mm
C = approx. 11.0 in / 280 mm
(13.8 in / 350 mm with open lever)
Max clearance: 5.9 in / 150 mm
Temp: 50 °F – 113 °F/10 °C – 40 °C
Beverage Temp: 199 °F / 93 °C
Packaging is recyclable.
Follow your local guidelines
when recycling.
Contact us if you have any questions or suggestions:
BATES Enterprises South
1315 Upper Asbury Ave
Charlotte, NC 28206
USA
Hotline (+1) 833-475-9113
e-mail: customer_service@k-fee.us
Félicitations pour l’achat de votre machine à café de grande qualité TWINS II de chez
K-fee® – your system. Créez de sublimes cafés comme un vrai barista, à la maison comme au
bureau.Dégustezundélicieuxcappuccino,unmerveilleuxvoileblanc,unréconfortantcaféaulait,
un excellent espresso ou une bonne tasse de café filtre... comme dans un petit café de quartier.
La qualité et le design de l’appareil vous raviront au quotidien, tout comme la vaste sélection de
capsulesdecafé,thé,etc.ducatalogueK-fee®–yoursystem.Grâceàlatechnologieinnovante
« Smart Brew » disposant d’une pompe à pression pouvant atteindre 19 bars, chaque boisson
développera ses meilleurs arômes. Pour un plaisir gustatif sur mesure, décidez de la taille de
remplissage en fonction de la taille de votre tasse. Plongez-vous dans la peau d’un barista et
laissez votre créativité s’exprimer, tasse après tasse.
Pour un café de qualité, utilisez toujours de l’eau fraîche et des capsules neuves K-fee® – your
system. Suivez les instructions pour nettoyer et détartrer la machine.
Avant de commencer, veuillez lire ce manuel ainsi que toutes les instructions qui s’y trouvent, y
comprislesprécautionsimportantes,pourtirerlemeilleurpartidevotrenouvellemachineàcafé.
Nous vous souhaitons beaucoup de plaisir avec votre TWINS II.
Votre équipe K-fee® – your system
Félicitations!
P
AB
C
Disposal Instructions
FR

54
AVERTISSEMENT
AVERTISSEMENT
AVERTISSEMENT POUR LES
UTILISATEURS ET LES PARENTS
NE PERMETTEZ PAS aux enfants
d’utiliser l’appareil à moins qu’ils ne le
fassent sous la surveillance d’un adulte.
Information sur la sécurité ..................................................................................................................................... 4
Précautions importantes .................................................................................................................................... 4–5
Consignes de sécurité......................................................................................................................................... 6–7
Aperçu du système ................................................................................................................................................. 8
Survol des symboles DEL........................................................................................................................................ 8
Réglage de votre système (préparation à la première utilisation) ...................................................................9–10
Préparation des boissons .................................................................................................................................11-16
Programmation du format des boissons.............................................................................................................. 17
Entretien quotidien (après la dernière utilisation).......................................................................................... 18-19
Nettoyage du système.....................................................................................................................................20-21
Détartrage du système....................................................................................................................................22-23
Réinitialiser aux paramètres d’usine.................................................................................................................... 24
Évaporation de l’eau résiduelle (périodes d’absence/protection contre le gel).............................................25-26
Foire aux questions/Dépannage .......................................................................................................................... 27
Caractéristiques techniques................................................................................................................................. 28
Instructions pour la mise au rebut ....................................................................................................................... 28
fermée(verslebas)lorsquel’appareilfonctionne.
5. Ne touchez pas les surfaces chaudes. Utilisez les
poignées lorsqu’elles sont disponibles.
6. N’utilisez jamais une capsule endommagée ou
déformée. N’utilisez que des capsules de boissons
qui conviennent à cet appareil.
7. Ne soulevez jamais l’appareil par son levier.
8. Ne relevez ni n’abaissez jamais le levier de force.
9. Ne démontez jamais l’appareil et n’insérez jamais
d’objet dans les ouvertures de l’appareil.
10. Ne remplissez pas trop le réservoir avec de l’eau.
11. N’utilisez que de l’eau potable douce et froide
danscetappareil!Nemettezpasd’autresliquidesou
aliments dans leréservoir d’eau, sauf tel qu’indiqué
dans les instructions de nettoyage et de détartrage
contenues dans ce manuel.
12. L’utilisation d’un accessoire non recommandé par
lefabricantdel’appareilpeutentraînerunincendie,
une électrocution ou des blessures corporelles.
13. Ne placez pas l’appareil sur le dessus ni près d’un
brûleur à gaz ou électrique, ni dans un four chaud.
14. Neplacezpasl’appareilàproximitéd’unesourced’eau,
par exemple un évier de cuisine.
15. N’utilisez pas ce produit à l’extérieur.
16. N’utilisez pas l’appareil s’il se trouve dans unplacard
ou une armoire.
17. N’immergez pas l’appareil, le cordon d’alimentation
ni lafiche dansl’eau ou tout autre liquide pour éviter
les incendies, les électrocutions et les blessures.
18. Cet appareil est équipé d’un cordon d’alimentation
comportant un fil de mise à la terre avec une prise
équipéed’unemiseàlaterre.Nebranchezl’appareil
que dans une prise murale à trois broches. La mise
à la terre réduit le risque d’électrocution dans le cas
d’un court-circuit électrique. Vérifiez si la tension
d’alimentation en courant correspond bien aux
caractéristiques techniques inscrites sur la plaque
signalétique.Lagarantiedevientnulleetnonavenue
si l’appareil est branché sur une prise secteur dont
l’alimentation en courant est incorrecte.
19. Vousnedevezpas,enaucunecirconstance,couperou
enleverlatroisièmebroche(miseàlaterre)ducordon
d’alimentationniutiliserunadaptateuràdeuxbroches.
Consultezunélectricienqualifiésilesinstructionsde
mise à laterrenesontpascomplètementcomprises
ou si un doute existe quant à savoir si l’appareil est
correctement mis à la terre.
20. Mettezhorstensionetretirezlafichedelapriselorsque
vousn’utilisezpasl’appareilouavantdeprocéderàun
nettoyage.Laissezrefroidirl’appareilavantdemettre
ou d’enlever des pièces et avant de le nettoyer.
21. N’utilisez pas un appareil qui ne fonctionne pas
convenablement ou dont le cordon ou la fiche est
en mauvais état. Veuillez trouver les coordonnées
à la page 28 pour signaler tout dysfonctionnement
ou dommage de l’appareil et connaître la marche à
suivrepourrenvoyerl’appareilafinqu’ilsoitexaminé,
réparé ou ajusté.
22. Ne laissez pas le cordon d’alimentation pendre du
rebord d’une table ou d’un comptoir ni toucher des
surfaces chaudes.
23. Pour débrancher l’appareil, mettez-le toujours hors
tension(«off»)avantderetirerlafichedelaprisemurale.
24. Unesupervisionétroiteestrequisesicetappareilest
utilisé par un enfant ou est à proximité d’un enfant.
Rangez l’appareil et tous ses accessoires hors de
portée des enfants.
25. Reportez-vous aux instructions d’utilisation de tous
les agents de nettoyage et de détartrage avant de
lesutiliseretconformez-vousauxrèglesdesécurité.
N’éteignez pas l’appareil pendant le processus de
rinçage ou de détartrage.
26. Hormis l’utilisation normale – ce qui comprend le
nettoyage,ledétartrageetlenettoyageexterne–tous
lestravauxtelsquelaréparationouleremplacement
ducordond’alimentationnedevraientêtreeffectués
queparuneentreprisedeserviceàlaclientèleautorisée
afin d’éviter les dangers.
27. L’appareil doit être vidé et nettoyé et la fiche doit
être retirée de la prise en cas de longues périodes
d’absence, de vacances, etc.
28. Sil’appareilaétéexposéàdestempératuresinférieuresau
pointdecongélation,attendezaumoinstroisheuresavant
ledémarrageafindepermettreàl’appareild’atteindre
la température ambiante. Un appareil congelé ou très
froid peut ne pas fonctionner adéquatement.
CONSERVEZ CES
INSTRUCTIONS
• Lisez TOUTES les instructions avant l’utilisation
pour éviter les blessures.
• Portez attention aux avertissements
contenus dans ce manuel d’utilisation.
• Conservez ce manuel d’utilisation dans un endroit
sûr pour vous y référer ultérieurement.
• Pour une utilisation par des adultes seulement.
• Ne tardez pas à procéder à la vidange, au
nettoyage et au détartrage comme décrit dans
ce manuel d’utilisation.
• Conçu pour les capsules de boissons qui
portent le logo du K-fee® – your system.
Respecteztoujourslesmesuresdesécuritédebaselorsde
l’utilisationd’appareilsélectriques,notammentlessuivantes:
1. Lisez toutes les instructions et utilisez uniquement
l’appareil conformément à ces instructions.
2. Cet appareil a été conçu pour préparer différents
types de café, comme indiqué dans les instructions.
Ne l’utilisez pas à d’autres fins que celles prévues.
3. Neplacezjamaisvosdoigtssouslebecverseur
lorsquel’appareilestenmarche—vouspourriez
vousébouillanter.Nemettezjamaisvosdoigts
danslecompartimentàcapsule—vouspourriez
vous blesser.
4. Nesoulevezjamaislelevierdel’appareilpendant
l’infusion, le rinçage, le nettoyage ou le détar-
trage. Maintenez toujours le levier en position
PRÉCAUTIONS IMPORTANTES
FR Table des matières
Information sur la sécurité

76
AVERTISSEMENT
RISQUE D’INCENDIE
OU D’ÉLECTROCUTION
NE PAS OUVRIR
AVERTISSEMENT:AFIN DERÉDUIRE LES RISQUES
D’INCENDIE OU D’ÉLECTROCUTION, NE RETIREZ
PAS LE COUVERCLE INFÉRIEUR. IL N’Y A AUCUNE
PIÈCERÉPARABLEPAR L’UTILISATEURÀL’INTÉRIEUR.
LES RÉPARATIONS DOIVENT ÊTRE EFFECTUÉES PAR
LE PERSONNEL AGRÉÉ SEULEMENT.
FR Consignes de sécurité
SYMBOLES ET MOTS D’AVERTISSEMENT
Le triangle d’avertissement apparaît dans ces instructions lorsque le défaut de se
conformer aux consignes de sécurité peut entraîner des risques pour l’utilisateur
ou l’appareil.
AVERTISSEMENT: Eau extrêmement
chaude.
AVERTISSEMENT: Électrocution.
CE QU’IL NE FAUT PAS FAIRE:
Ne pas mettre la main à l’intérieur.
INTERDIT: Ne pas boire.
AVERTISSEMENT
Éviter les risques d’électrocution
• Gardez l’appareil loin de l’humidité et des
éclaboussures.
• Ne nettoyez pas l’appareil sous l’eau courante ni
avec un jet d’eau.
• Neversezjamaisdeliquidesurledessusdel’appareil.
• Ne débranchez jamais l’appareil en tirant sur
le cordon d’alimentation.
• Il n’y a aucune pièce réparable par l’utilisateur à
l’intérieur.
• Vousnedevezpas,enaucunecirconstance,couper
ouenlever la troisième broche(miseà laterre)du
cordon d’alimentation ni utiliser un adaptateur à
deux broches.
MISE EN GARDE
INFORMATIONSIMPORTANTESSURL’UTILISATION
• Les capsules sont à usage unique. Ne réutilisez
jamais les capsules.
• N’utilisez les capsules à espresso qu’avec le cycle
Espresso.
• N’utilisezlescapsulesàcaféinfuséqu’aveclecycle
Infusion.
• N’utilisezles capsules delait qu’aveclecycle Lait.
• Lamauvaiseutilisationde capsulespeut endom-
mager l’appareil.
AVERTISSEMENT
AVERTISSEMENT: Assurez-vous que le levier est
complètementabaissépendantl’utilisation.De
l’eau extrêmement chaude traverse l’appareil
lorsqu’il fonctionne (infusion, détartrage,
nettoyage, rinçage). Pour éviter les risques de
brûlure ou d’autres blessures, gardez toujours
le levier abaissé (en position fermée) lorsque
l’appareil est en marche. Ne mettez pas la main
souslebecverseuretneretirezpaslebacd’égout-
tement lorsque l’appareil est en marche.
• Faitesattentionlorsdelavidangedubacd’égout-
tement. L’eau peut être très chaude.
• Il y a un danger de brûlure lors de l’évaporation
de l’eau résiduelle (la température de la vapeur
peut atteindre 120 °C [248 °F]).
MISE EN GARDE
Hygiène et nettoyage
• N’utilisez que des capsules non périmées.
• Rangez les capsules dans un endroit approprié.
• Ilestrecommandéderincerl’appareilcinqfois
avantlapremièreutilisationetunefoisàla
fin de son utilisation quotidienne. Lisez les
instructions de la section « Entretien quotidien »
à la page 18–19.
• Nettoyezl’appareilrégulièrementetenrespectant
lesconsignesdumanueld’utilisationpourprévenir
les risques liés à l’hygiène.
• N’utilisez que des agents de nettoyage ou de
détartrage appropriés pour l’appareil.
• Lisez attentivement les instructions d’utilisation
des agents de nettoyage et de détartrage et
conformez-vous aux consignes de sécurité.
Instructions concernant le cordon
d’alimentation court
Un cordon d’alimentation court est fourni pour réduire
lesrisquesd’enchevêtrementoudetrébuchementque
causeraituncordond’alimentationpluslong.Lapuissance
électriquedelarallongedoitêtreaumoinségaleàcelle
del’appareil.Encasd’utilisationd’uncordond’alimentation
plus long ou d’une rallonge: 1) la puissance électrique
marquéesurlarallongedoitêtreaumoinségaleàcelle
de dl’appareil, 2) si l’appareil est un modèle avec prise
deterre,lecordondelarallongedoitêtreàtroisfilsavec
mise à la terre; et 3) le cordon d’alimentation doit être
disposé de manière à ne pas reposer sur le comptoir
ou la table où un enfant pourrait s'en saisir et à éviter
tout trébuchement.
Informations sur le mode économie d’énergie
et l’arrêt automatique
L’appareilsemetenmodeéconomied’énergies’iln’est
pautilizépendantplusde5minutes(réglagedel’usine).
L’appareilconsomméconsidérablementmoinsd’énergie
(moins de 0,5 W/h) lorsqu’il est dans ce mode.
MISE EN GARDE
MISEENGARDE:Quatreaiguillespointuesservent
à percer les capsules du système K-fee® – your
systemàl’intérieurducompartimentàcapsule.
Nemettezpasvosdoigtsdanslecompartiment
à capsule pour éviter tout risque de blessure.
USAGE
DOMESTIQUE
UNIQUEMENT

98
Lorsque tous
les voyants
lumineux
clignotent,
veuillez
patienter.
L’appareil se
réchauffe.
Lorsque
tous les
voyants
lumineux
s’allument,
l’appareil
est prêt à
être utilisé.
Bouton de mise
sous tension
Lait
Rinçage
Eau chaude
Espresso
Infusion
Si le voyant Infusion clignote en rouge lors de la préparation de la boisson,
veuillez détartrer l’appareil.
Si le voyant Rinçage clignote en rouge rapidement sans s'arrêter, pour savoir
comment contacter notre ligne d'assistance ou notre service à la clientèle, allez
à la page 28.
Lorsqu’un
voyant
clignote,
l’appareil
prépare une
boisson.
MISE EN GARDE: Quatre aiguilles pointues servent à percer les capsules du système K-fee® – your system à
l’intérieur du compartiment à capsule. Ne mettez pas vos doigts dans le compartiment à capsule pour éviter tout
risque de blessure.
MISE EN GARDE AVERTISSEMENT
Survol des symboles DEL
FR Aperçu du système FR Réglage de votre système (préparation à la première utilisation)
AVERTISSEMENT: Assurez-vous que le levier est
complètement abaissé pendant l’utilisation. De l’eau
extrêmement chaude traverse l’appareil lorsqu’il
fonctionne (infusion, détartrage, nettoyage, rinçage).
Pour éviter les risques de brûlure ou d’autres blessures,
gardez toujours le levier abaissé (en position fermée)
lorsque l’appareil est en marche. Ne mettez pas la main
sous le bec verseur et ne retirez pas le bac d’égout-
tement lorsque l’appareil est en marche.
Faites attention lors de la vidange du bac d’égout-
tement et du réceptacle à capsules. L’eau résiduelle
peut être très chaude.
AVERTISSEMENT: Électrocution.
Retirez le réservoir d’eau,
remplissez-le d’eau potable
douce et froide puis réinsé-
rez-le dans le support de
l’appareil.
Branchez l’appareil, abaissez
le levier et placez une tasse
résistant à la chaleur sous le
bec verseur.
1. Couvercle du réservoir d’eau
2. Réservoir d’eau
3. Compartiment à capsule
4. Levier
5. Boutons de commande
6. Bec verseur
7. Réceptacle à capsules utilisées
8. Couvercle frontal/support du
bac d’égouttement
9. Grille du bac d’égouttement
10. Bac d’égouttement
1
2
MAX
34
25
7
1
9
8
10
6

1110
N’enlevez pas l’opercule et ne percez pas
la capsule.
Rincez l’appareil avant de préparer chaque
boisson en plaçant une tasse vide sur le
bac d’égouttement et en appuyant une
fois sur le bouton, puis jetez l’eau chaude.
AVERTISSEMENT: Eau extrêmement
chaude.
INTERDIT: Ne pas mettre la main à
l’intérieur—risque de blessure.
REMARQUE: Vous pouvez arrêter le
processus d’infusion en appuyant sur
n’importe quel bouton.
Lorsque l’appareil est prêt et
que tous les voyants ont cessé
de clignoter, appuyez sur le
bouton de rinçage.
Répétez l’étape 4 quatre fois
de plus, en vidant la tasse
résistant à la chaleur au
besoin. Votre appareil est
maintenant prêt à être utilisé.
IMPORTANT: : L’appareil doit être préparé avant la première utilisation et chaque fois que
l’appareil sèche ou manque d’eau pendant une longue période.
Appuyez sur le bouton ON/
OFF (les voyants lumineux
qui clignotent indiquent que
l’appareil se réchauffe).
Ajustez le bac d’égouttement
à la hauteur souhaitée, puis
placez une tasse résistante à
la chaleur sous le bec verseur.
Fente du dessus Fente du dessous Sans bac d’égouttement
5
4
3
FR Préparation des boissons: Espresso
max
5,9 in /
150 mm
max
4,1 in /
105 mm
max
3,0 in /
75 mm
1

1312
REMARQUE: Vous pouvez arrêter le
processus d’infusion en appuyant sur
n’importe quel bouton.
AVERTISSEMENT: Eau extrêmement
chaude.
INTERDIT: Ne pas mettre la main à
l’intérieur—risque de blessure.
Soulevez le levier et insérez
une capsule à espresso.
Appuyez sur le bouton
Espresso pour initier
l’opération. La boisson
s’écoule.
Soulevez le levier pour éjecter
la capsule. Rabaissez le levier.
Votre boisson est maintenant
prête.
Si vous utilisez une
grande tasse, retirez le bac
d’égouttement.
Ajustez le bac d’égouttement
à la hauteur souhaitée, puis
placez une tasse résistante à
la chaleur sous le bec verseur.
Si vous utilisez une
grande tasse, retirez le bac
d’égouttement.
3
4a
4b 5
2
FR Préparation des boissons: Infusion
Fente du dessus Fente du dessous Sans bac d’égouttement
max
5,9 in /
150 mm
max
4,1 in /
105 mm
max
3,0 in /
75 mm
1
2
Table of contents
Languages:
Other K-FEE Coffee Maker manuals

K-FEE
K-FEE EXPRESSI Operating instructions

K-FEE
K-FEE EXPRESSI User manual

K-FEE
K-FEE Wave User manual

K-FEE
K-FEE TWINS User manual

K-FEE
K-FEE Expressi Wave 583 User manual

K-FEE
K-FEE EXPRESSI User manual

K-FEE
K-FEE Grande Installation instructions

K-FEE
K-FEE ONE User manual

K-FEE
K-FEE Grande User manual

K-FEE
K-FEE Lattensia User manual

K-FEE
K-FEE Wave User manual

K-FEE
K-FEE LATTENSIA+ User manual

K-FEE
K-FEE TWINS II & LATTE User manual

K-FEE
K-FEE ONE User manual

K-FEE
K-FEE Expressi Empire 582 User manual

K-FEE
K-FEE TWINS II & LATTE User manual

K-FEE
K-FEE ESPRESTO SQUARE ID2 User manual

K-FEE
K-FEE Espresto Preferenza User manual

K-FEE
K-FEE LATTENSIA+ User manual

K-FEE
K-FEE SQUARE User manual