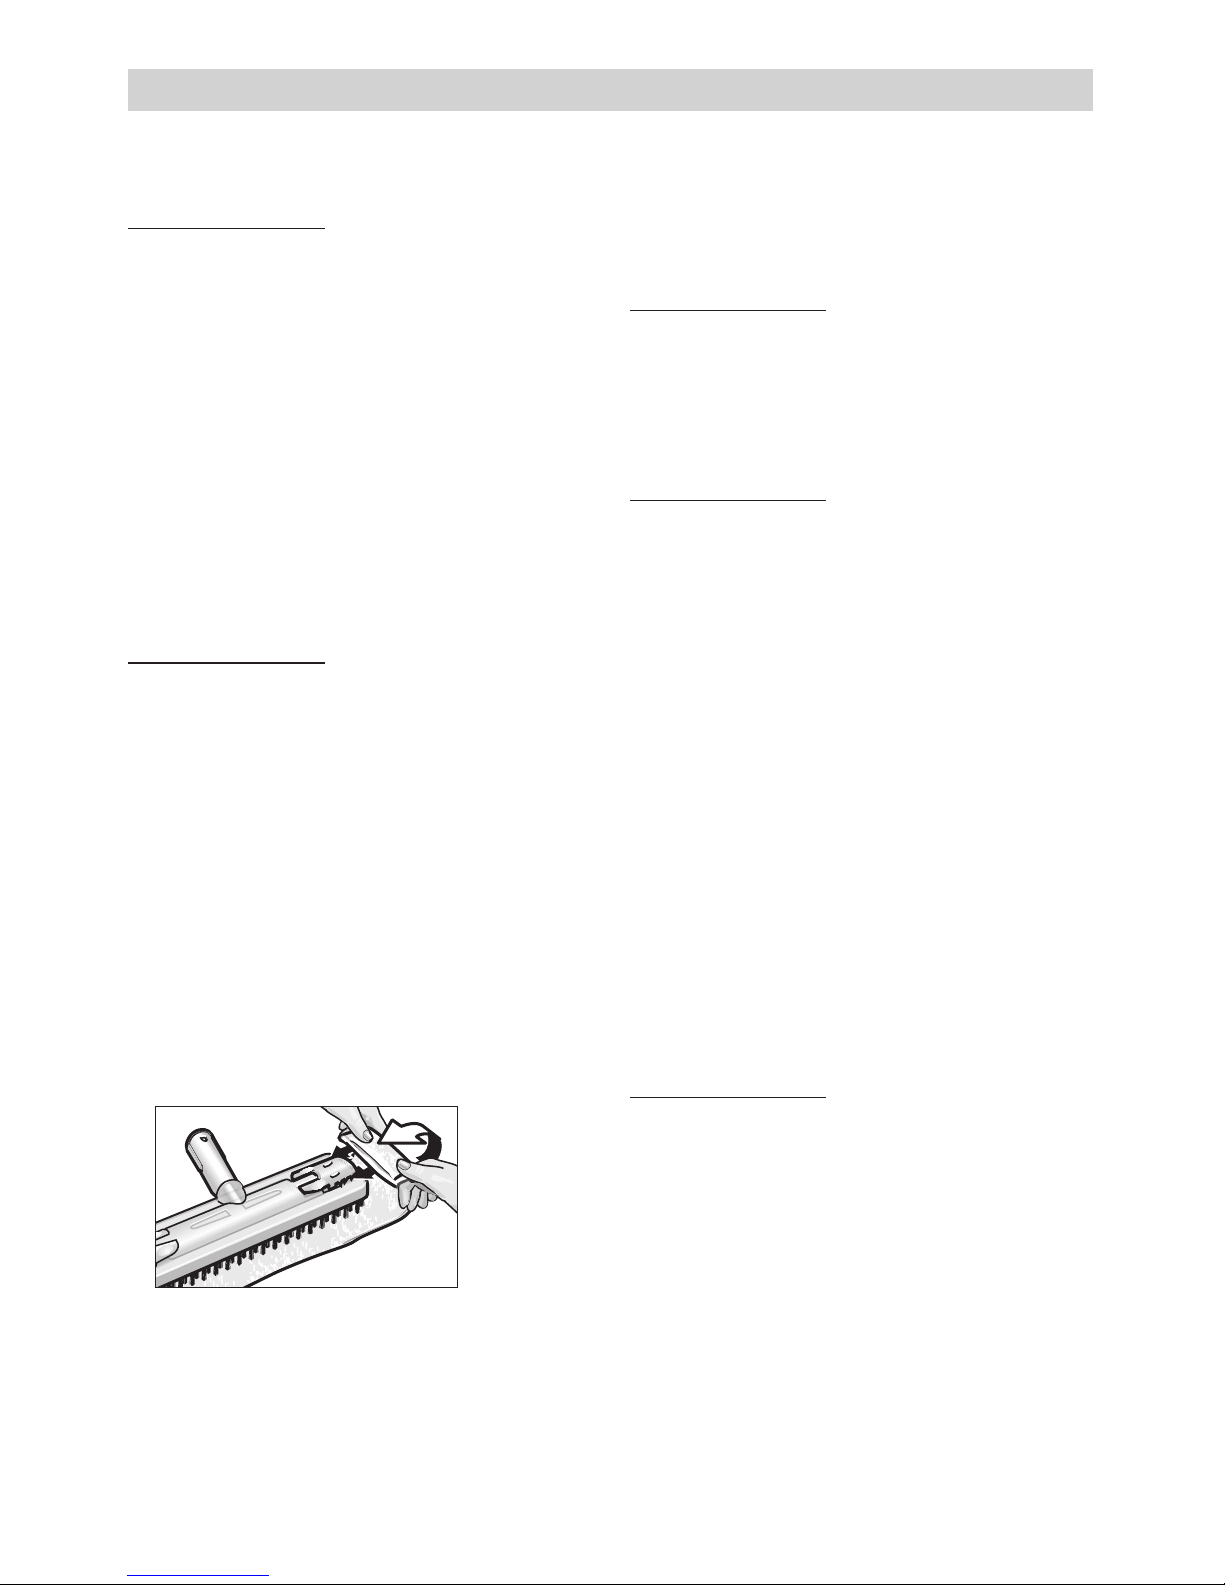
Kärcher K 1405 User manual

CAUTION
DO NOT USE THIS PRODUCT ON DELICATE FABRICS
INCLUDING DRALON, ANY ITEMS PROTECTED BY
SCOTCH GUARD OR ANY SIMILAR SUBSTANCE.
BEFORE CLEANING UPHOLSTERY TEST ON A
SECTION NOT NORMALLY VISIBLE.
Contents
1. Equipment features .................. 2
2. SAFETY INSTRUCTIONS ......... 3
3. Getting started ......................... 6
4. Information on usage ............... 8
5. How to use the accessories ..... 8
6. Maintenance ........................... 11
7. Safety devices ........................ 12
8. General information ................ 12
9. Accessories and
replacement parts .................. 13
10. Technical specifications ......... 14
11. Spare Parts List ...................... 15
K 1405
5.960-851
04/03/2005041

2
A1 Cover on main unit socket
A2 Safety cap
A3 Funnel inlet for filling boiler
A4 Rotary knob for steam control
A5 Indicator lamp
– heater switch (orange)
A6 Indicator lamp – heater (orange)
A7 Indicator lamp
– steam supply switch (orange)
A8 Indicator lamp
– low water warning (red)
A9 Heater switch
A10 Steam supply switch
A11 Accessory compartment
C1 Steam gun
C2 Release button
C3 Steam switch
C4 Locking mechanism (child lock)
C5 Steam hose
C6 Modular accessory plug
C7 Handwheel for steam control
D1 Extension tube
D2 Release button
E1 Spot nozzle
E2 Circular brush
F1 Hand nozzle
F2 Terry-towelling slip-on
G1 Floor nozzle
G2 Retaining clips
G3 Large floor cloth
H1 Window nozzle
J1 Accessory storage adaptor
(compatible with D1 and G1)
1. Equipment features

3
PLEASE READ THIS LEAFLET CAREFULLY BEFORE OPERA-
TING YOUR UNIT.
!
IMPORTANT SAFETY NOTES
ELECTRICAL CONNECTION AND SUPPLY
WARNING - THIS APPLIANCE MUST BE EARTHED
The supply voltage must be the same as that shown on the rating plate.
Important : if a new plug is to be fitted
– the wires in the mains lead are coloured in accordance with the following
code : Green and yellow - Earth / Blue - Neutral / Brown - Live
– as the colours of the wires in the mains lead of this appliance may not
correspond with the markings identifying the terminals in your plug, pro-
ceed as follows :
– the wire which is marked with the letter „E“ or by the earth symbol or
coloured green and yellow
– the wire which is coloured blue must be connected to the terminal which
is marked with the letter „N“ or coloured black
– the wire which is coloured brown must be connected to the terminal which
is marked with the letter „L“ or coloured red
– each wire must be properly connected to the appropriate terminal pin of a
suitable plug and the outer sheath of the mains lead securely retained by
the cable clamp arrangement of the plug
– If a 13 Amp BS 1363 plug is used it should be fitted with a 13 Amp fuse
If any doubt, contact your nearest Karcher Authorised Agent
or Qualified Electrician
2. SAFETY INSTRUCTIONS

4
Steam Cleaner
• If you notice any transport damage while
unpacking the unit, notify your dealer im-
mediately.
• The warning and information decals atta-
ched to the unit feature provide important
details for safe operation.
• In addition to the information provided in
the Operating Instructions, the general
safety regulations and accident preventi-
on ordinances imposed by official autho-
rities must be observed.
Electrical Connection
• Connect the unit only to properly ground-
ed mains receptacles supplying the volta-
ge indicated on the rating plate.
• Devices certified in compliance with
Protection Class I must be operated on
properly earthed power sources.
• In high-humidity environments, such as
bath installations, the unit may be opera-
ted only in conjunction with an approved
protective ground-fault circuit interruptor.
Please obtain the advice of an electrical
specialist.
• The unit must be operated with the power
supply cord or cable as specified by the
manufacturer. No substitutions are per-
mitted. Observe the maintenance instruc-
tions. Refer to the Operating Instructions
for part number and original equipment
designation.
• Never touch the power plug with wet
hands.
• The power cord and/or extension cord
must not be subjected to of mechanical
damage by vehicle tyres, or to lateral or
longitudinal distress (squeezing, pinching
or pulling).
• The extension cord must have the cross-
section specified in the Operating Instruc-
tions, and must be spray-water protected.
The cable coupling must not be placed in
water.
• When replacing couplings on power or ex-
tension cords, the splash protection and
mechanical strength must be maintained.
Observe the maintenance instructions.
Operating Specifics
• Prior to each use, the unit and its attach-
ments must be inspected for proper con-
dition and operational safety. If the unit is
found to be in unsatisfactory or unsafe
condition, its use is prohibited.
• Please check especially the safety cap
and the electrical power connection.
• The steam hose must be free of damage
(scalding hazard!). A damaged steam
hose must be replaced without delay.
• Only hoses and connecting elements ap-
proved by the manufacturer may be used.
• Refer to the Operating Instructions for or-
der number and original equipment desi-
gnation.
• Never fill the boiler with solvent-bearing li-
quids or undiluted acids! This particularly
includes cleaning agents, petrol or paint
thinner. EXPLOSION HAZARD! Also, do
not use acetone, undiluted acids and sol-
vents, because they attack the materials
of which the unit is constructed.
• In the event that the unit is used at petrol
stations and in other hazardous areas, the
appropriate safety regulations must be
observed. Operation of the unit in explo-
sive environments is prohibited.
• The unit must be placed securely on a firm
surface.
• During operation, the steam control
switch must not be wedged open.
• Use extreme caution when filling water
into the boiler while it is still hot. Sudden
steam pressure could expel hot water
from the boiler and cause severe scalding
injury!
2. SAFETY INSTRUCTIONS

5
Cleaning of electrical appliances
• When cleaning electrical appliances
(including electric cookers), they must be
cut off from the mains (switch off circuit
breakers or remove the fuse). Before
returning them to normal operation, the
appliances must be allowed to dry thorou-
ghly.
• Please observe the instructions of the
respective appliance manufacturers!
• Steam cleaning is prohibited on all elec-
trical appliances, i.e., hair dryers, electri-
cal heaters, etc. that allow direct steam
contact with electrical wiring and swit-
ches. The steam could enter into the elec-
trical components and, on condensing,
cause an electrical defect.
• Never touch the steam jet with your hand,
or direct it at persons or animals (scalding
hazard).
• Materials containing asbestos and other
items known to contain hazardous sub-
stances must not be steam-cleaned.
Operating the Unit
• The operator may use the unit only as de-
scribed in the Operating Instructions. He
is obligated to observe local conditions
and, while working with the unit, take into
account the presence of third persons,
and especially children.
• The unit may be operated only by persons
who have been thoroughly instructed in its
use, or who have provided proof of their
ability to operate the unit, and who have
been expressly charged with operating
the unit. The unit may not be operated by
children or adolescents.
• The unit must never be without supervisi-
on while it is operating.
Moving the Unit
• The unit must be switched OFF and secu-
rely fastened while moving it between
locations.
Maintenance
• Prior to performing cleaning and mainte-
nance procedures, and before replacing
parts, the unit must be switched OFF, and
the power plug must be disconnected.
• Repair and service procedures may only
be performed by authorised customer
service depots or by experts who are
thoroughly familiar with all applicable
safety regulations.
Accessories and Spare Parts
• Only accessories and spare parts appro-
ved by the manufacturer may be used.
Original accessory and original spare
parts ensure a safe a trouble-free operati-
on of the unit.
• Please use only the original safety cover!
2. SAFETY INSTRUCTIONS

6
3. Getting started
3.1 Unpacking the cleaner
While you are unpacking the cleaner, check
that all accessories have been included. If any
items are missing, please contact your dealer.
If you notice any damage that has been caused
in transit, please inform your dealer immedia-
tely.
Do not dispose of the packaging materials as
domestic refuse. They can be recovered for
use again. Take the packaging to an official
collection point for recycling.
3.2 Attaching the accessories
• Firmly insert the modular accessory plug
(C6) into the socket (A1) above the handle
on the main unit. Both lugs on the plug must
lock into the cover for the main unit socket.
• Attached the required accessory – spot
nozzle (E1), hand nozzle (F1) or floor nozzle
(G1) – to the steam gun (C1) by pushing the
tubular end of the accessory onto the steam
gun. Push the accessory onto the steam gun
as far as necessary for the release button
(C2) on the steam gun to lock into place.
• Use the extension tubes (D1) if required.
Attach one or both tubes onto the end of the
steam gun. Push the required accessory
onto the free end of the extension tube.
• To detach the accessories, press the release
button and pull the items apart.
• The circular brush (E2) can be attached to
the spot nozzle to obtain better cleaning
results.Line up both grooves in the circular
brush with the lugs on the spot nozzle and
turn the brush clockwise as far as it will go.
• To detach the circular brush from the spot
nozzle, turn the brush anti-clockwise and pull
it off the nozzle.
Hot water can drip out of accessories while
you are detaching them. Do not detach
accessories while steam is being discharged
– danger of scalding!
3.3 Filling up with water
• Unscrew the safety cap (A2) on the main
unit.
• Pour a maximum of 2 litres of tap water into
the boiler. With the cleaner standing on a
horizontal surface, the boiler can be filled up
to approx. 2 cm below the edge of the filler
neck. Heating-up time can be shortened by
using hot water.
Do not add pour any detergents or other ad-
ditives into the boiler.
• Screw the safety cap back onto the cleaner.
3.4 Switching the cleaner ON
Do not switch the cleaner on if there is no
water in the boiler, otherwise it could over-
heat. As a safety measure, the cleaner’s
heater switches off automatically and the
low-water warning lamp illuminates. In order
to be able to use the cleaner again, wait ap-
prox. 10 minutes for it to cool down and then
fill the boiler with water (see 3.3 “Filling up
with water”).
• Plug the cleaner into a mains socket. Switch
both the steam supply switch (A10) and the
heater switch (A9) to ON.
The indicator lamps (A5, A6, A7) should illu-
minate.

7
3. Getting started
• When the orange lamp for the heater (A6)
goes out again, the cleaner is ready for use.
When the appliance is switched on, do
NOT place in a vertical position. To pre-
vent the appliance from overheating, a built-
in safety device isolates the appliance and all
indicator lights switch off. Place the ap-
pliance back in its original horizontal positi-
on. The indicator lights switch on again and
you can continue working.
• Switch off the heater before moving the cle-
aner.
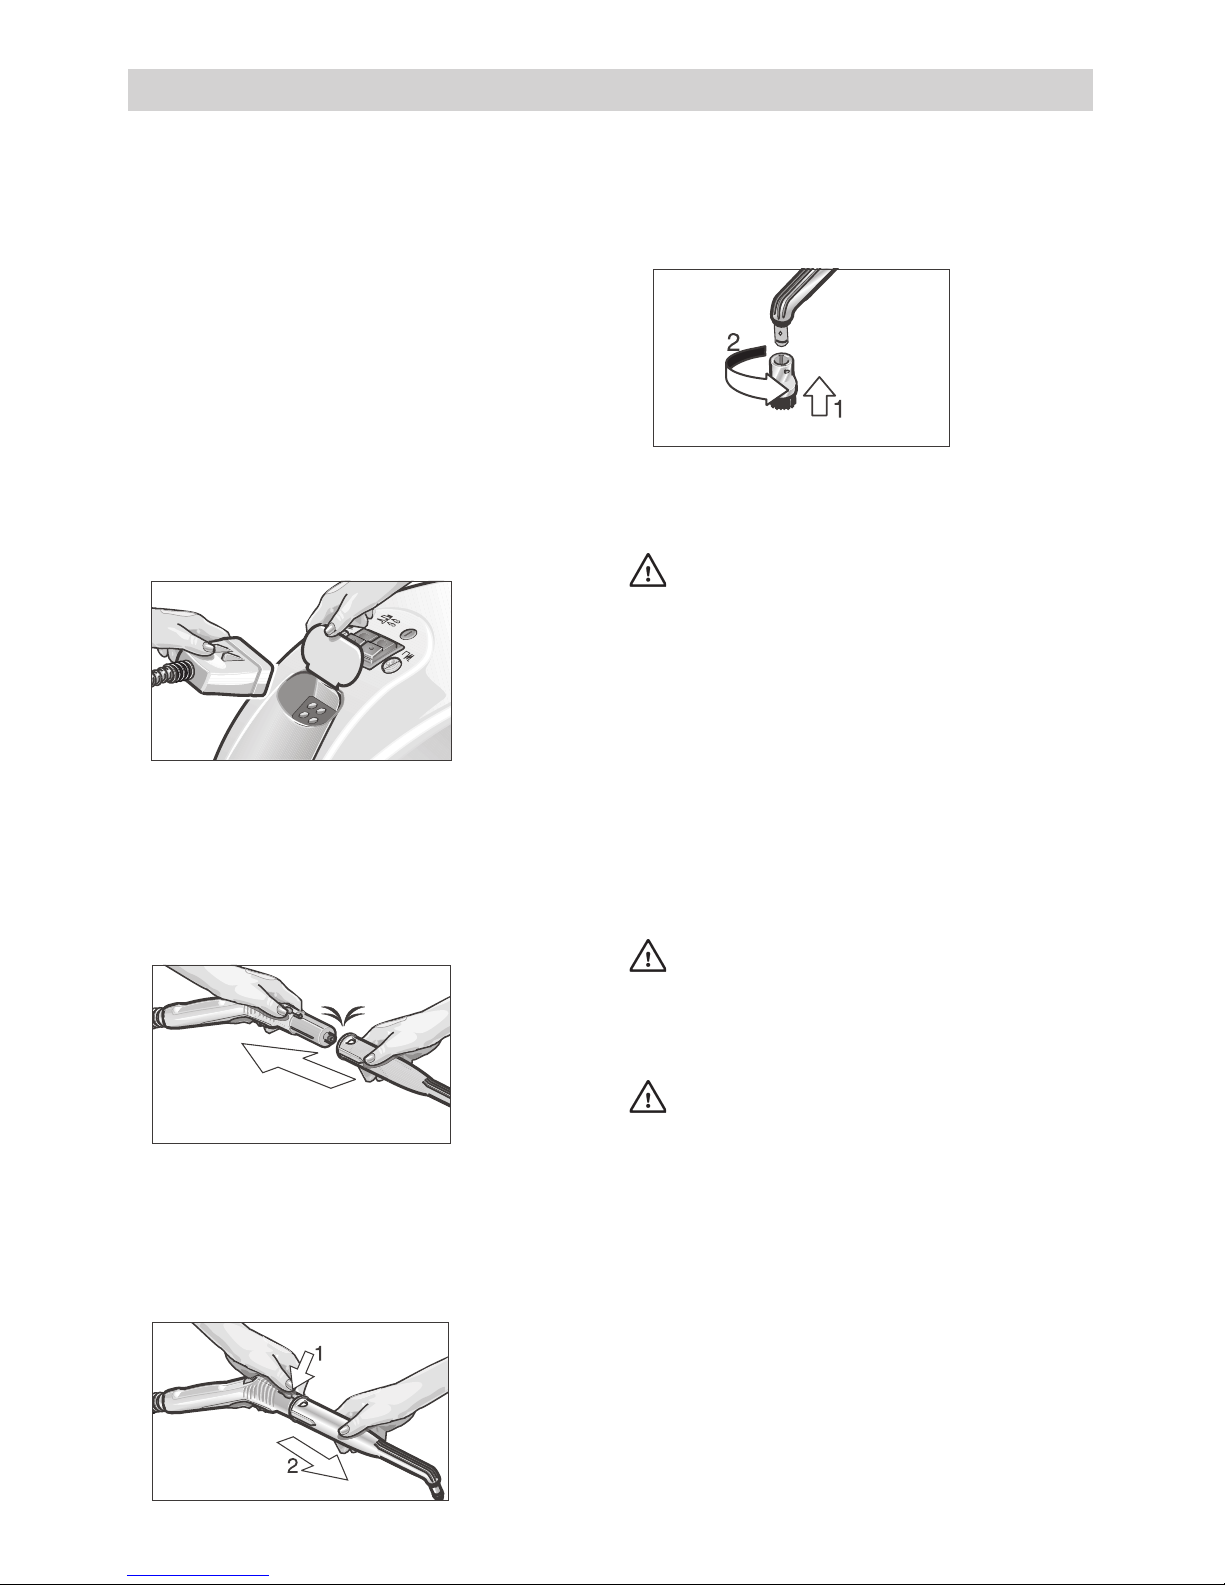
• When you are ready to start work with the
cleaner, you must first release the locking
mechanism (child lock (C4)) on the steam
gun (C1), otherwise you will not be able to
operate the steam switch (C3). Slide the
locking mechanism forwards and you will
then be able to press the steam switch.
Note:
Slide the locking mechanism towards the
rear to engage the child lock whenever you are
not using the steam gun.
• When you press the steam switch, steam is
discharged from the nozzle. Begin by poin-
ting the steam gun at a cloth until a steady
flow of steam comes out of the nozzle.
• The heater is repeatedly switched on while
you are using the cleaner, in order to main-
tain the pressure inside the boiler. At the
same time the orange indicator lamp (A6) il-
luminates.
3.5 Regulating the volume of steam
Rotary knob for steam control (A4)
• You can adjust the steam quantity continuo-
sly by turning the rotary knob (A4).
Handwheel for steam control (C7)
• At first, set the rotary knob (A4) to the maxi-
mum steam quantity.
• The amount of steam can be regulated ac-
cording to requirement by adjusting the
handwheel (C7) on the steam gun. When the
wheel is turned forwards, a large amount of
steam is discharged; when it is turned to-
wards the rear, a small amount of steam is
discharged.
Note:
When the handwheel is set for minimum
steam, it is possible that steam will continue to
be discharged briefly after the steam switch
(C3) has been released, until the pressure in
the steam hose has dropped. You can accele-
rate this process by briefly turning the handw-
heel (C7) forwards.
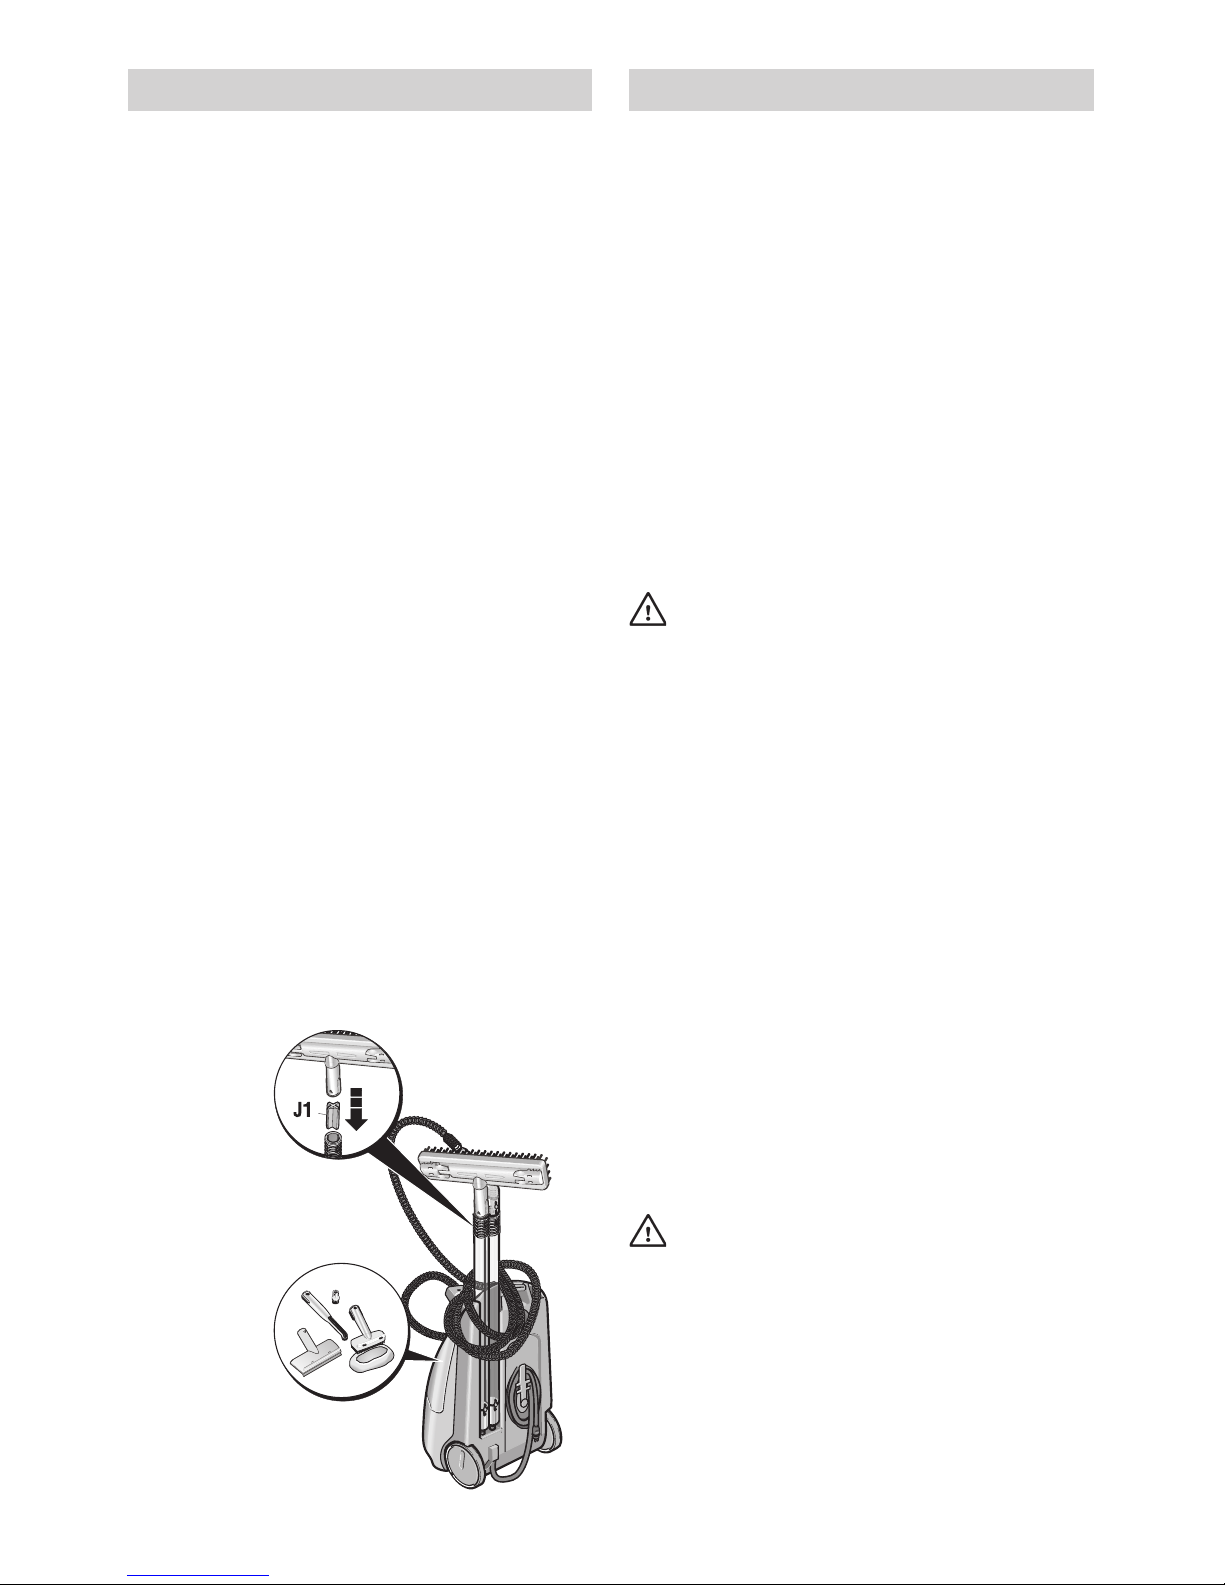
3.6 Refilling with water
Note:
When the water in the boiler has been
used up, the red low-water warning lamp (A8)
will illuminate. The safety cap (A2) cannot be
opened while there is any pressure at all in the
boiler.
• Turn off the heater switch but leave the steam
supply switch on.
• Press the steam switch on the steam gun
and hold it pressed until steam is no longer
discharged from the nozzle. There will then
be no pressure inside the boiler.
• Unscrew the safety cap from the cleaner.
If the cleaner has been in continuous use for
a long time, the safety cap (A2) may be hot!
Caution: Never lift the cleaner by the handle
unless the safety cap is in place!
• Pour a maximum of 2 litres of tap water into
the boiler.
If the boiler is still hot, there is a risk that water
will be squirted back while it is being poured
into the boiler and cause scalding.
• Firmly screw the safety cap back onto the
cleaner. Turn on the heater switch again.
When the heater indicator lamp goes out,
the cleaner is ready for use again.
3.7 Switching the cleaner OFF
• Switch off both the heater and steam supply
switches.
• Unplug the cleaner from the mains.
• Lift up the cover on the main unit socket (A1)
and pull out the modular accessory plug
(C6).
• Any remaining water can be left inside the
cleaner.

8
4. Information on usage
4.1 Cleaning textiles
Before you use the steam cleaner on textiles
including delicate fabrics like Dralon, velvet, lea-
ther and items protected by Scotch Guard or
any similar substance, you should always test
that the material is resistant to steam by app-
lying it to a section not normally visible.
Apply steam to the concealed section and then
leave it to dry. Check to see that the colour and
shape have not been affected before moving to
a visible area. In case of doubt it is always bet-
ter to consult your steam cleaner dealer.
Use only the steam gun without attachments to
apply steam from 30- 45 cm on these delicate
fabrics, then wipe off with a cotton cloth.
4.2 Cleaning hard surfaces
Do not direct steam onto glued edges of ob-
jects, otherwise the edge strip could be beco-
me detached. Do not use the steam cleaner
on wood or parquet floors that have not been
sealed.
Some surfaces can change colour and texture
when treated with steam. Consult the manufac-
turers recommendations first, and always test in
a non visible place and then let it dry, to see whe-
ther changes in colour or textures occur. In case
of doubt and on sensitive materials like coated or
painted surfaces, wood, waxed marble etc. it is
always better to ask your steam cleaner dealer
for advice.
If steam is applied for too long, wax, furniture po-
lish, plastic coating or paint could be lifted off or
marks could be caused. You should therefore
clean these types of surface with a separate cloth
to which steam has been applied or very briefly
with a double layer of cloth attached to the
nozzle.
4.3 Cleaning glass surfaces
Do not apply steam jet directly to the sealed
parts of the window round the frame, otherwi-
se the seal could be damaged.
When the outside temperature is low, especially
in winter, warm the window pane by applying a
small amount of steam across the whole surface
of the glass. This will even out any differences in
temperature and avoid stresses in the glass. This
is important because glass surfaces that are hea-
ted by varying amounts can shatter.
3. Getting started
3.8 Transporting the unit
•If you have been working with the extension
tubes (D1) and the floor nozzle (G1), it is qui-
te easy to transport the unit, e.g. up and
down stairs.
•Turn the heater OFF with switch (A9), stand
the unit upright, and attach the extension
tube to the retaining bracket on the undersi-
de of the main unit.
Note: The extension tube can only be attached
if the mains cable has not already been wound
round the holder on the main unit.
3.9 Storing the unit
•Place the hand nozzle, window nozzle, spot
nozzle and other small parts into the acces-
sory compartment (A11).
•Wind the cable around the holder on the
base of the main unit. Insert both extension
tubes individually into the recesses in the
base of the unit. Stick the floor nozzle with
the accessory storage adaptor (J1) on a ex-
tension tube.
•Ensure that the brushes are allowed to cool
down without the bristles becoming defor-
med in the process.
Important: If you wish to leave the unused
water in the boiler until the next use, do not
store the unit in the vertical position (safety cap
may become stuck due to furring). If you wish
to store the unit for a longer period of time or in
the vertical position, please drain the water off
completely.

9
5. How to use the accessories
• If there are traces of detergent or polish on
the surface that you are cleaning (e.g. wax,
liquid polish, etc.), this could result in st-
reaks. As a rule these streaks disappear af-
ter the steam cleaner has been used several
times.
Typical applications:
– all washable wall and floor coverings, e.g. stone
floors, tiles and PVC floors.
5.4 Hand nozzle (F1)
Pull the terry-towelling slip-on (F2) over the
hand nozzle (F1).
Typical applications:
– smaller, washable areas, such as kitchen surfaces
made from plastic, tiled walls
– windows, mirrors
– furniture fabrics
– vehicle interiors, windscreens
– bath-tubs
5.5 Window nozzle (H1)
• Before you clean a glass surface with the win-
dow nozzle for the first time, go over it with
the hand nozzle (F1) and terry-towelling slip-
on (F2) to remove any traces of grease.
• Apply steam evenly to the glass surface from
a distance of approx. 20 cm. When you have
done this, push the locking mechanism on the
steam gun towards the rear (child lock) (C4)
so that the steam switch (C3) cannot be pres-
sed inadvertently. Squeegee the glass sur-
face in straight lines from top to bottom. Wipe
the rubber lip and the bottom edge of the win-
dow dry after each pass.
Typical applications:
– windows
– mirrors
– other glass surfaces
5.1 Steam gun (C1)
The steam gun can be used without any additio-
nal accessories.
Typical applications:
– eliminating odours and creases in clothing:
hang the item of clothing up and apply steam from
a distance of 10–20 cm.
– removing dust from plants:
maintain a distance of 20–40 cm.
– dusting objects with a damp cloth:
apply a small amount of steam to a cloth and wipe
over the furniture.
5.2 Spot nozzle (E1)
The closer you hold the nozzle to the object
being cleaned, the easier it is to remove the dirt.
Temperature and pressure are at their greatest
immediately the steam is discharged from the
nozzle.
Typical applications:
– locations that are difficult to access, such as cor-
ners and joints
– taps, drains
wash-basins, WC, shower cabins
– blinds, radiators
– stainless steel, enamel surfaces
– dissolve stains
Apply vinegar to stubborn stains caused by scale
and leave it to soak for approx. 5 min.
5.3 Floor nozzle (G1)
• Attach the floor cloth (G3) to the floor nozzle
(G1). Fold the cloth lengthways and place the
floor nozzle on top. Pull the ends of the cloth
one after the other under the retaining clips
(G2).
• To remove the cloth, press down on the retai-
ning clips and pull it out.
• Turn the floor cloth over or replace it regular-
ly. This will enable you to wipe up more dirt.
• Work on heavily soiled areas at a slower
speed so that the steam has more time to act
on the dirt.

10
5. How to use the accessories
5.7 Wallpaper remover
The wallpaper remover is available
as a special accessory - see page 12
• Place the entire face of the wallpaper remo-
ver along the edge of a sheet of wallpaper.
Switch on the steam supply (C3) and allow
the steam to penetrate the wallpaper until it is
soaked through (approx. 10 seconds).
• Move the wallpaper remover to the next sec-
tion to be removed, keeping the steam switch
(C3) pressed. Use a putty knife to lift the loo-
sened wallpaper and pull it off the wall. Move
the wallpaper across the wall a section at a
time and pull the paper off in strips.
• The steam may not be able to readily pene-
trate woodchip wallpaper that has been
painted over several times. In this case we
recommend that you go over the wallpaper
with a spiked roller before steam is applied.
5.8 Steam-rotary nozzle
The rotary nozzle is available as a
special accessory - see page 12
• The rotary nozzle can be attached directly or
with the extension tubes to the steam hand-
gun, as required.
• Use the rotary nozzle for loosening stubborn
dirt over large areas.
5.5 Household iron
The household iron is available as a
special accessory - see page 12
• Firmly insert the modular accessory plug on
the iron connecting cable into the socket
(A1) above the handle on the main unit. Both
lugs on the plug must lock into the cover for
the main unit socket (A1).
Steam-ironing:
• We recommend that you use the Kärcher
Ironing Board with active steam extraction.
The ironing board has been designed to
match your new cleaner and it makes iron-
ing considerably easier and faster to do. In
any case, you should use an ironing board
which is covered with a mesh-type underlay
that enables steam to pass through.
• The temperature control should be set to at
least ••• (steam mode) for ironing all types of
material. The steam that is then discharged
prevents the material from becoming too hot.
• The iron is ready for use as soon as the indi-
cator lamp goes out. The face of the iron
must be hot so that the steam does not con-
dense to water and drip onto the item being
ironed.
• When you press the switch on the iron,
steam is discharged out of holes in the face
of the iron. To set the iron so that steam is
discharged continuously, push the switch
towards the rear until it locks in place. If you
briefly push the switch forwards, a shot of
steam is discharged from the iron.
• Begin by directing the steam onto a piece of
cloth until there is regular flow of steam out
of the iron.
• The iron can be held upright to apply steam
to curtains, dresses, etc.
Dry-ironing:
• If you wish to iron without using steam,
switch the heater switch to OFF. The steam
supply switch must remain ON.
• Set the temperature control according to the
type of fabric that you are going to iron. The
symbols on the control have the following
meanings: – Synthetic fibres: •
– Wool: ••
– Linen: •••

11
In order to avoid damage to the cleaner, only
use products that have been approved by
Kärcher.
• Fully dissolve the contents of one bag of
Kärcher Biological Decalcifier RM 511 in one
litre of warm water.
• Pour this solution into the boiler and leave it
to react for approx. 8 hours.
Do not screw the safety cap (A2) onto the cle-
aner while you are descaling the boiler. Do
not use the cleaner if there is any descaling
liquid left inside the boiler.
• After the period of soaking, pour the des-
caling solution out of the boiler. A small
amount will remain inside, therefore you
should flush the boiler out with cold water
two or three times in order to remove all tra-
ces of the decalcifying agent.
• The steam cleaner is now ready for use
again.
6.2 Care of accessories
• Allow all accessories to dry out thoroughly
before you store them for use another time.
• Do not stand the floor nozzle (G1), hand
nozzle (F1) and circular brush (E1) on their
bristles while they are cooling down and
drying out, otherwise they could become
deformed.
• Floor cloth and terry-towelling slip-on have
been pre-washed and can be used immedia-
tely with the steam cleaner.
• Dirty floor cloths and terry-towelling slip-ons
can be placed in a washing machine at 60 °C
and dried in a tumble dryer. Do not use a li-
quid softener as this would impair the ability
of the cloths to pick up dirt.
6.3 What to do if a problem occurs
• If a problem occurs with your steam cleaner,
contact your local Kärcher service agent
(see address list on backside).
6.1 Cleaning the boiler
Note:
If you always use demineralised or distil-
led water, it will not be necessary to clean the
boiler.
Rinsing out the boiler:
Rinse out the steam generator at most after
every 5th fill-up if the hardness of water proves
to be more than 1.8 mmol/l (corresponds to
10° dH). You can enquire about the hardness
of water in your area from your water supply
company or municipal public works.
• Fill the boiler with water and shake the cleaner
vigorously. This will loosen any scale that has
settled at the bottom of the boiler. Tilt the clea-
ner towards the corner with the funnel inlet
(A3) and pour out the water.
Descaling the boiler:
As scale also builds up on the walls of the boi-
ler, we recommend that you descale your
steam cleaner at the following intervals.
Remove lime-scale deposits after the given
number of tank fillings (TF).
FTfoeergeD
ssendrah
Hd°l/lomm
001I tfos7–03.1–0
09IImuidem41–75.2–3.1
57IIIdrah12–418.3–5.2
05VIdrahyrev12>8.3>
• Unplug the cleaner from the mains electrici-
ty supply before you descale the boiler.
• Make sure that all traces of water are drai-
ned from the boiler.
• We recommend you use Kärcher Biological
Decalcifier RM 511 to descale the boiler.
This biological decalcifying agent is based
on citric acid and is therefore entirely biolo-
gically degradable.
6. Maintenance

8. General information
8.1 Warranty
The applicable warranty conditions in different
countries are issued by the respective national
distributor of KÄRCHER products. During the
warranty period, any malfunctions of the unit
caused by a material or manufacturing defect
will be repaired free of charge.
In the event of a warranty claim, please take
the cleaner and accessories, with proof of
purchase, to your original dealer or to the nea-
rest authorised customer service centre. We
will not be liable for damages occurring as a
consequence of improper handling of the clea-
ner or of failure to observe the information con-
tained in the operating instructions.
8.2 Disposal information
This appliance has been manufactured in ac-
cordance with VDI Directive 2243 concerning
recycling. When the cleaner is no longer requi-
red for use, the materials used in its manufac-
ture can be recovered for re-use.
7. Safety devices
This steam cleaner is equipped with several
safety devices which provide multiple levels of
safety. The most important safety devices are
described below.
7.1 Pressure controller
The pressure controller maintains the level of
pressure inside the boiler as constant as pos-
sible. When the maximum operating pressure
inside the boiler of 3.2 bar is reached, the hea-
ter is switched off. When steam is drawn off
and the pressure drops, the heater is switched
on again.
7.2 Low-water thermostat
As the water in the boiler is used up, the tem-
perature of the heater increases. The low-wa-
ter thermostat switches the heater off and the
red low-water warning lamp illuminates. The
heater is prevented from switching on again
until the boiler has either cooled down or has
been refilled with water.
7.3 Safety thermostat
If the low-water thermostat fails and the clea-
ner overheats, the safety thermostat will switch
off the cleaner. Contact your local Kärcher ser-
vice agent so that the safety thermostat can be
reset.
7.4 Safety cap
The safety cap seals in the steam pressure as
it builds up inside the boiler. If the pressure
controller is defective and the steam pressure
inside the boiler rises above 5.7 bar, an over-
pressure valve opens inside the safety cap and
steam is discharged into the open. Contact
your local Kärcher service agent before you
attempt to use the cleaner again.

Only accessories and replacement parts ap-
proved by the manufacturer may be used with
this cleaner. Original accessories and original
replacement parts guarantee that the cleaner
remains safe and reliable to operate.
On the last page of these operating instructions
there is a picture of the cleaner with the order
numbers for the individual parts.
seirosseccalaicepS.onredrO
elzzonyratoR 490-368.2
noridlohesuoH 060-268.4
pirtseegeeuqS 041-372.6
revomerrepapllaW 260-368.2
:teshsurbralucriC
elzzontopsrof).scp4(
850-368.2
:teshsurberiw-ssarbralucriC
htiw:elzzontopsrof).scp3(
gnivomerrofseltsirberiw-ssarb
tridnrobbutsylralucitrap
160-368.2
:IteshtolC
,shtolcgnipiwegral2
sno-pilsgnillewot-yrret3
910-069.6
:IIteshtolC
sno-pilsgnillewot-yrret5
099-073.6
:IIIteshtolC
htolcgnipiwegral3
753-963.6
:teshtolcerbiforciM
-yrret1,htolcgnipiwegral1
ylhgiheratahtno-pilsgnillewot
pukcipotelbadnatnebrosba
tridfostnuomaegral
129-509.6
reificlacedlacigoloiB :115MR
hcaeg001fosgab3
932-092.6
9. Accessories and replacement parts

14
10. Technical specifications
Voltage.................................................220-240 V
Type of current ...................... single phase, 50 Hz
Voltage in hand-gun ..................................... 24 V
Heater power consumption ...................... 2250 W
Max. operating pressure ............................. 3.2 bar
Permissible operating pressure .................. 5.7 bar
Heating time (per litre of water) ..... approx. 4.5 min
Max. steam volume ...................................... 82 g /min
Weight without accessories......................... 5.5 kg
Max. water capacity ..................................... 2.0 l
Boiler capacity ............................................. 2.4 l
Width ........................................................... 305 mm
Length ......................................................... 480 mm
Height ......................................................... 265 mm
10.1 Circuit diagram
S1 Heater switch
S2 Steam supply switch
S3 Pressure switch
S4 Safety thermostat
S5 Low-water thermostat
S7 Steam switch – steam gun
S8 Steam switch – household iron
H1 Indicator lamp – heater
H2 Indicator lamp – low-water
H3 Indicator lamp – heater switch
H4 Indicator lamp – steam supply
E1 Heating element 1500 W
E2 Heating element 750 W
MV1 Solenoid valve
T1 Transformer
F1 Fuse

15
11. Spare Parts List

Kärcher (U.K.) Ltd.
Kärcher House, Beaumont Road
Banbury Oxon, OX16 1TB
(01295- 752000; 09066800632
EU Declaration of Conformity
We hereby declare that the equipment described below conforms to the relevant fundamental
safety and health requirements of the appropriate EU Directives, both in its basic design and
construction as well as in the version marketed by us.This declaration will cease to be valid if
any modifications are made to the machine without our express approval.
Product: Steam cleaner Model: 1.058-xxx
Relevant EU Directives:
EU Low-Voltage Equipment Directive (73/23/EEC) amended by 93/68/EEC.
EU Machinery Directive (89/392/EEC) amended by 91/368/EEC, 93/44/EEC, 93/68/EEC.
EU Directive on Electromagnetic Compatibility (98/37/EEC).
Harmonised standards applied:
DIN EN 55014-1:2000+A1:2001
DIN EN 55014-2:1997
DIN EN 60335-1
DIN EN 60335-2-79
DIN EN 61000-3-2:2000
DIN EN 61000-3-3:1995+A1:2001
National standards applied:
TRD 801
Appropriate internal measures have been taken to ensure that series-production units
conform at all times to the requirements of current EU Directives and relevant standards.The
signatories are empowered to represent and act on behalf of the company management.
Alfred Kärcher GmbH & Co.
Cleaning Systems
Alfred-Kärcher-Str. 28–40
P.O. Box 160
D-71349 Winnenden S. Reiser
H. Jenner
Table of contents
Other Kärcher Steam Cleaner manuals

Kärcher
Kärcher SC 3 User manual

Kärcher
Kärcher SC 1502 User manual

Kärcher
Kärcher K 55 User manual

Kärcher
Kärcher SG 4 4 User manual

Kärcher
Kärcher SC 3 Premium User manual

Kärcher
Kärcher 1102 BS User manual

Kärcher
Kärcher SC 5.850 C User manual

Kärcher
Kärcher SV 1902 User manual

Kärcher
Kärcher Vaporapid 1201 User manual

Kärcher
Kärcher K50 User manual

Kärcher
Kärcher 1105 VAPORAPID User manual

Kärcher
Kärcher WV 70 plus User manual

Kärcher
Kärcher SC 1.030 User manual

Kärcher
Kärcher SC 1 User manual

Kärcher
Kärcher K 55 User manual

Kärcher
Kärcher SC 1.020 User manual

Kärcher
Kärcher SC 2.600 C User manual

Kärcher
Kärcher SC 1122 User manual

Kärcher
Kärcher SC 1.020 User manual

Kärcher
Kärcher SC 2 User manual