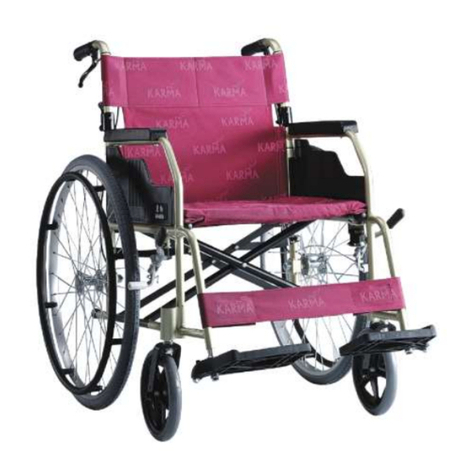
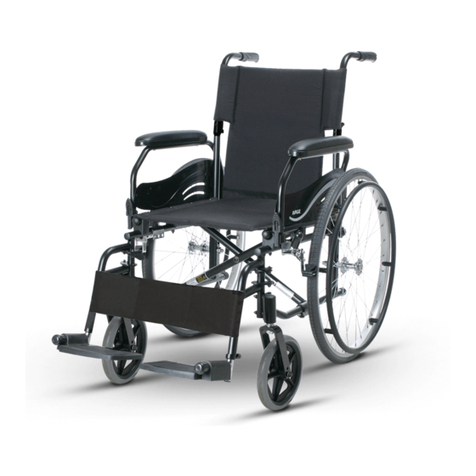
Karma KM 7520 User manual


KARMA Manual Wheelchairs
KARMA MEDICAL PRODUCTS CO., LTD
THE
KARMA
KM7520 SERIES:
Karma Products has produced this user guide to help you make the best of your
Karma wheelchair.
We recommend that you use this guide to become completely familiar with your chair.
Please pay particular attention to section 1 “Wheelchair Operation”..
In addition, note what you have to do to make sure it is maintained in good order to give you
efficient and reliable service, see section 2 for details.
This chair has been designed to carry users up to 100kg in weight.
This chair will operate over most surfaces encountered in an urban area. Avoid difficult surfaces,
such as grass, gravel, ruts, wet slippery surfaces, etc..
Please take extra care when traveling up or down or across slopes, the maximum safe limit for
traveling over slopes is 10 degrees.
As a guide, limits of static stability are detailed in section 3
IMPORTANT
Do not attempt to use the chair before a qualified person has explained to your satisfaction how to
operate the chair without risk to yourself and others.
Do not attempt to use the chair before you have read and fully understood this guide.

KARMA
Km7520 Series
Self propelled & Attendant
Indoor/Outdoor Wheelchair
TABLE OF CONTENTS :
0. INTRODUCTION : .......................................................................................1
0.1 Model KM 7520 Wheelchairs :............................................................1
0.2. Safety and Consumer Information :......................................................1
1. WHEELCHAIR OPERATION :.....................................................................3
1.1 PREPARING FOR USE :....................................................................3
1.2 GETTING IN AND OUT :....................................................................4
1.3 GENERAL USE : ................................................................................5
2. Fault checking and maintenance : ...............................................................8
3. SPECIFICATION : .......................................................................................9
3.1 Model Reference KM 7520 Q20 .........................................................9
3.2 Model Reference KM 7520 Q22 .......................................................10

1
0. INTRODUCTION :
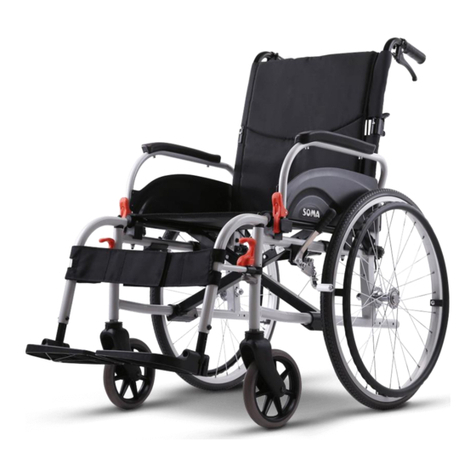
Model KM 7520 is self-propelled chairs which can either be pushed by an attendant or by patients
themselves, shown in figure1
0.1 Model KM 7520 Wheelchairs :
The chair consist of an aircraft specification aluminum alloy frame. The seat andbackrest material is
polyester coated canvas. These wheelchairs are suitable for users of up to 100kgs in weight. Parking brakes
are provided for both rear wheels these chairs can be folded for transport in vehicles. It is rust proof and has pneumatic tries for
traction and comfort.
Regular maintenance is required has an extremely durable aluminum alloy frame and tough ac-
cessories and does not suffer in dramatic extremes of temperature (neither user nor attendant need
touch metal parts in normal use ).
This chair is designed for both indoor and outdoor use. It can be used in a broad spectrum of weather and
ground conditions.
The front castors are solid for greater durability, pneumatic castors are available on request. The
footrests can be adjusted for height and will swing away for convenience.
Rear wheels are 20 or 22inches in diameter and 1-3/8 inches in width with solid puncture proof tires.
Rain, snow, wind and other environmental extremes (within reason) are acceptable provided the
user and attendant exercise the necessary caution and are not physically too uncomfortable.
0.2. Safety and Consumer Information :
0.2.1 General
0.2.2 Using the KM 7520
0.2.3 Notes for attendants and users
0.2.4 General misuse
0.2.1 GENERAL :
ONLY MAINTENANCE AND SERVICE AS DESCRIBED IN THIS MANUAL CAN BE
CARRIED OUT. USE ONLY GENUINE REPLACEMENT PARTS.
0.2.2 USING THE KM 7520 Series
Always make sure BOTH brakes are applied before getting in or out of the chair.
Never stand on the foot plates when getting in out of the chair.
Always take care when climbing curbs or turning on slopes.
Never go down steps forwards.
Never carry more than one passenger.
0.2.3 NOTES FOR ATTENDANTS AND USERS :
Do ensure that the brakes are always on when the chair is not being pushed.
Always make sure that both feet are safely on the foot plates and that clothing is safely tucked out

2
of the way and cannot catch in the wheel.
Always use both hands on the push handles to control the chair.
Always look well ahead to anticipate hazards such as furniture, doors or pot- holes.
Always avoid steep or uneven surfaces because the chair may tip over.
Always avoid soft surfaces because the wheelchair may get bogged down.
Always be careful not to go too fast or turn quickly and try to achieve a smooth steady ride.
PLEASE keep in contact with the person in the chair. If you stop to look in shop windows or talk
to people remember to turn the chair so that the person in the chair does not have to turn.
NEVER put on the user brakes too suddenly or too firmly as this may tip the user out of the chair.
0.2.4 GENERAL MISUSE :
Please note that our “USER GUIDE”contains a number of cautions -- any vehicle can cause
injury if misused -- use within our guidelines and with reasonable care and your safety will be
ensured.
Your wheelchair will give years of safe use if used sensibly and carefully.
Be aware that careless use endangers your own safety as well as that of others.
ALWAYS follow the highwaycode when outdoors and the guidelines written in this manual.
FIGURE 1.1 KM 7520 Q-20

3
1. WHEELCHAIR OPERATION :
1.1 Preparing for use
1.2 Getting in and out
1.3 General use
1.1 PREPARING FOR USE :
1.1.1 Unfolding the chair :
Step 1. With the chair in front of you and facing away take hold of both handles and pull up in
positions. i.e. so that the spring lever is locked.
Take hold of both armrest pads and pull them apart until the backrest is Almost com-
pletely open.
Step 2. Take hold of both handles and pull them apart until the backrest is almost completely open
(about 30 cm).
Step 3. Place hands on the seat with fingers pointing inwards and push down until the seat is
completely open.
Step 4. Attach the Velcro of backrest upholstery to under side of seat upholstery.
Step 5. Swing the footrest arms around to the forward facing position -- makesure that the spring
latch is engaged, then turn the foot plates down.
Alternatively you can stand at the side of the chair and complete step2 by pulling the nearest
armrest toward you and pushing the other one away.
CAUTION: When completing step 3 never put your fingers around the sides or under the chair as
they can be trapped between the seat and the frame.
1.1.2. Folding the chair :
Step 1. Turn the foot plates up then unlock the spring latch at the top of the footrestarms.
Step 2. Pull off the Velcro of backrest upholstery under seat upholstery.
Step 3. Put fingers under the middle of the seat at both front and rear, grasp and give a sharp pull
upwards until the chair is 1/2 to 3/4 closed. Never grasp from the sides.
Step 4. Push the armrests together.
Step 5. Folding is completed by releasing the spring lever and dropping back the backrest frame.
1.1.3 Footrest :
Footrest Removal and Refitting
To remove the footrest push/pull the release lever and rotate the footrest until it faces outwards.
To refit locate the footrest unit onto the frame plug (at about 93 degrees to the side of the frame )
and rotate inwards until the unit locks into place.
Foot Plate Height Adjustment
1. To adjust foot plate height use tool provided to loosen the head of screw found at the very
bottom of the footrest arm. Then tap the nut from underneath to ease movement.
2. Adjust to required height and tighten.

4
1.1.4 Armrests :
To adjust height of armrest pad .
1. Pull the locking button and adjust the arm pad to the desired height.
2. Release the locking button and ensure that it engages into the nearest hole.
3. To lift armrest for sideways transfer, depress the release latch and pull arm towards the back
of wheelchair. To remove, pull-up on armrest. Pin securing armrest will automatically re-
lease. To return armrest to operating position, push arm pad down until it locks firmly into
place.
1.1.5 Rear Wheels :
Real wheel position
The rear wheel can be mounted at different positions on the frame to alter the seat height and
overall stability of the chair.
Changing the wheel position should be carried out by your approved repairer or Therapist.
1.16 Removing push handle (by order made):
This function allows user could adjust the push handle height according to individual to have
comfortable seating desired.
Adjust procedures
1.Take out the fixing screws push handle connecting block.
2.Adjust the push handle height as desired.
3.Reinstall and tighten the screws according the reverse procedures as above.
4.Attach the Velcro of backrest upholstery to under side of seat upholstery.
1.1.7To adjust overall chair height for KM-7520
Step 1: Aastors: Loosen the three side bolts with tool provided. Adjust castor angle with the two
rear facing bolts. Tighten side bolts.
Step 2: Support the weight of the chair with one hand by holding the push handle. Depress the
hub cover and hold down the quick release mechanism and remove the wheel.
Step 3: One rear wheel at a time. Remove axle block nuts.
Havingdecided desired seat height and angle, then position axle block and replace the
nuts in the relevant holes,
There are three possible settings for the rear wheel height.
The choice of setting for the of the seat wheels controls rear height and front to rear an-
gle.
Step 4: Finally, after replacing rear wheels, ensure that the upper part of the castor fork is set in
the vertical; there are a total of five nuts attaching the castor to the frame; if a change
need to be made.
(I) Loosen all nuts.
(ii)Thecastorblock pivots around the center nut of the three nuts. When the upper
part of the forks is at 90 degrees to the ground tighten all these three nuts.
(iii) Tighten the remaining two nuts to lock the assembly in place.
1.2 GETTING IN AND OUT :
1.2.1 Getting in :
Step 1. Engage both parking brakes.

5
Step 2. Turn up the foot plates and swing to the side when necessary.
Step 3. The user lowers themselves into the seat using the armrest for support.
Step 4. Turn the foot plates back down and the user places their feet on them - ensure that
the feet rest against the heel loops (or leg belt as applicable ) to prevent contact with
the castors.
Step 5. Release parking brake.
CAUTION: NEVER STAND ON THE FOOT PLATES WHEN GETTING INTO
(OR OUT OF ) THE CHAIR.
Always ensure that the front castors are in line with the rear wheels and pointing
forwards and that the back of the chair is secure either against a wall or firmly held
by an attendant.
1.2.2 Getting out :
Step 1. Make sure that the chair is near your final destination.
Step 2. Back the chair sufficiently to ensure that the castors are pointing forward
i.e. in line with the rear wheels and usually with the castor forks pointing forward.
Ensure that where possible the rear of the chair is against a wall or, if not, it must
be firmly held by an attendant.
Step 3. Engage both parking brakes.
Step 4. Turn up the foot plates and swing to the side where necessary.
Step 5. Slide forward on the seat.
Step 6. Place one foot firmly on the ground with the knee at a right angle and the other foot
slightly apart and further back.
Step 7. Place your hands on the front of the armrests and moving your weight forward,
bring your head and shoulders up over your knees as you push yourself up.
1.2.3 Transferring sideways:
Step 1. Maneuver the chair close to the final destination.
Step 2. Turn up the foot plates and swing to the side.
Step 3. Move the chair flush against the destination and engage both parking brakes.
Step 4. Move forwards in the chair.
Step 5. Remove the relevant armrest.
Step 6. Place one hand on the remaining armrest, the other hand and most of your weight on
the place you are moving to.
Step 7. Leaning slightly forwards, push upwards and slide sideways.
1.3 GENERAL USE :
1.3.1 Attendant pushing and self-propelled pushing
1.3.2 Tilting by attendant
1.3.3 Tilting by user
1.3.4 Going down curbs
1.3.5 Going up curbs

6
1.3.6 Steps
1.3.1 Attendant pushing and self-propelled pushing :
Do ensure that the brakes are always on when the chair is not being pushed.
Always make sure that both feet are safely on the foot plates and that clothing is safely tucked out
of the way and so cannot catch in the wheels.
Always use both hands on the push handles to control the chair.
Always look well ahead to anticipate hazards such as furniture, doors or pot- holes.
Always avoid steep or uneven surfaces because the chair may tip over.
Always avoid soft surfaces be cause the castors may get bogged down.
Always be careful not to go too fast or turn too quickly and try to achieve a smooth steady ride.
PLEASE keep in contact with the person in the chair. If you stop to look in shop windows or talk
to people remember to turn the chair so that the person in the chair does not have to turn.
NEVER put on user or attendant brakes too suddenly or too firmly as this may tip the user out of
the chair.
Never use the brakes to stop the chair. The brakes are for parking purposes only.
1.3.2 Tilting by attendant :
Step 1. Make sure both the user's feet are on the foot plates and will not slip off (Make sure the
hand grips are secure and not slip off.)
Step 2. Where necessary release both brakes.
Step 3. Grasp both push handles firmly.
Step 4. Put your stronger foot on the relevant tipping lever at the back of the chair by the wheel.
At the back of the chair.
Step 5. Tell the person in the chair that you are about to tilt the chair backwards.
Step 6. Pull back with both hands and push down and forwards with the foot. This will bring the
chair onto the back wheels.
CAUTION: When a chair is tilted to about 25 degrees it will balance on it’s rear wheels and be
easy to hold. If it is tilted further back it will be difficult to hold and the person in
the chair will feel unsafe.
Lowerwithastraightback,keepyour foot on the tipping lever and lower the chair
slowly forwards to the ground withoutabump.
1.3.3 Tilting by user :
CAUTION: THIS METHOD SHOULD ONLY BE ATTEMPTED BY PEOPLE
EXPERIENCED IN WHEELCHAIR USE, AND STRONG ARMS ARE ALSO
NECESSARY. IT IS ALWAYS BETTER TO HAVE THE HELP OF AN
ATTENDANT
Step 1. Make sure both the user's feet are on the foot plates and will not slip off.
Step 2. Release both brakes.
Step 3. Grasp both rear wheel hand-bars and give a firm, sudden forward push immediately


7
before the obstacle, continue the momentum ( be ready to keep pushing ) until the obsta-
cle is mounted.
CAUTION: Leaning backwards causes the casters to rise higher BUT it is much safer to lean
forwards.
1.3.4 Going down curbs :
Please note: It is always better to avoid curbs or to use ramped curbs or opes..Where possible the
operation is best attempted with the aid of an attendant.
Going down curbs forwards with attendant:
CAUTION: This is the more difficult method and can jar the user but allows a better view of
traffic.
NEVER ALLOW THE CHAIR TO TIP FORWARDS WHEN GOING DOWN A CURB.
Step 1. Position the chair so that the front castors are near edge of the curb and make sure that
the road is clear.
Step 2. Tilt the chair as described above.(Tilting by an attendant)
Step 3. Move the chair slowly and carefully forwards. Be ready to take the weight when the rear
wheels cross the curb edge. Ensure that both rear wheels touch the ground at the same
time to avoid tipping the chair.
Step 4. Gently lower the front castors.
TRYTOAVOIDJARRINGTHEUSER.
Going down curbs backwards with an attendant:
CAUTION: This is the easier and smoother method BUT it requires the attendant to step back-
wards into the road and sensible Highway Code precautions must be taken.
Step 1. Back the chair to the curb edge and be careful that the back wheels are equally near the
edge.
Step 2. Grasping the push handles, gently lower the rear wheels onto the road. Be prepared to
control the weight as it descends and ensure that the back wheels touch ground at the
same time.
Step 3. Tilt the chair back slightly and pull the tilted chair far enough into the road so that the
castors and footrests can be lowered clear of the curb.
1.3.5 Going up curbs :
Please note: This operation is best attempted with the aid of an attendant and the best method is to
go up curbs forwards as this maintains direction of travel and is physically less demanding of the
attendant.
Going up curbs forwards with attendant:
Step 1. As the toes or footrests approach the curb .
Step 2. The chair should be tilted just high enough to allow the front castors to roll smoothly

8
onto the pavement.
Step 3. Push the chair forward until the rear wheels are touching the curb then, continuing the
movement, lift at the push handles while moving the chair forwards.
Going up curbs backwards with attendant:
PLEASE NOTE: FOR SAFETY'S SAKE WE RECOMMEND AGAINST
USING THIS METHOD.
BECAUSE THE USER MAY FALL OUT OF THE WHEELCHAIR
1.3.6 Steps :
PLEASE NOTE: AVOID FLIGHTS OF STEPS PARTICULARLY IF NO
EXTRA HELP IS AVAILABLE. USE RAMPS OR LIFTS IF AVAILABLE.
Down steps or up steps:
Two attendants are necessary, each capable of carrying at least half of the combined weight of the
person and the wheelchair.
Each helper should bend at the knees and grip the main frame: with the front hand just under the
front of the seat, with the back hand holding the push handles. (See figure 1.1 )
NEVER HOLD ON TO MOVABLE PARTS.
ALL LIFTING SHOULD BE DONE WITH A STRAIGHT BACK.
Straighten legs to lift the chair. Carefully carry it up or down steps; be aware of how you place
your feet -- do not cross them and trip yourself up.
2. Fault checking and maintenance :
Maintaining the chair in its correct working order is essential; the frame is of an extremely durable
aluminum alloy and the accessories are designed for strength, however checks should still made to
ensure long term performance.
Below is a list of checks and the frequency with which we recommend they should be made,
following these guide lines and exercising common sense prevent problems before they arise.
Replace worn or damaged parts, wash fabrics.
''A'' checks should be carried out every month.
''B'' checks should be carried out every week.
''C'' checks should be carried out every time the chair is used.
Frequency Open the chair--all movements should be free throughout the Folding Range
A Examine the seat & backrest covers for wear, damage or staining.
A Examine retaining screws for tightness and general condition.
Replacement of fabrics should be carried out by your approved repairer.

9
A Examine armrests for ease of movement -- elevating.
A Examine armrest locking assembly for damage or wear and check that the armrest is
securely retained.
A Make sure foot plate adjustment screws are securely tightened.
A Examine heel loops or leg belt for damage or excessive wear-- Particularly the strength
of the leg belt's adhesive pads.
A Examine the backrest release lever for effective locking.
A Open/unfold the chai
r
-- this operation should be easy and smooth.
A Examine upholstery retaining screws for tightness and general Condition
Replacement of fabrics should be carried out by approved technician.
A Examine calf strap for damage or excessive wear - particularly the strength of the
Velcro pads.
A Examine the footrest release lever for effective locking.
A Examine the armrest release lever for effective locking.
A Check pivot point for undue slackness due to loose nuts or worn parts.
A Examine the frame structure for damage.
A Check castors for free rotation of castor wheel and castor assembly.
A Examine castors for wear in the bearings/mountings and for trie wear or damage.
Replacement of castors should be carried out by your approved repairer.
Frequency Lift the Front of the Chair and the Push Handles on the Floor
A Examine each spindle for bending at the location in the frame.
A Check rear wheels for free rotation and for wear in the bearing/mountings.
A Check trie tread depth. Recommended minimum depth is 1mm.
B Check trie pressure. Failure to keep tries at the correct pressure will reduce the braking
efficiency. trie pressures are located on the trie wall.
C Examine brakes, checking for wear and damage and misalignment.
Replacing or adjusting the brakes should be carried out by your approved repairer.
C Check that the hand grips are not damaged and are securely bonded to the push handle.
C Check tipping lever pads or anti-tips are not damaged and are securely bounded to the
tipping levers.
C Where fitted, check that the anti-tipping bars/wheels are not damaged and are securely
mounted.
C Check the tipping lever pads are not damaged and are securely bonded to the tipping
levers.
3. SPECIFICATION :
3.1 Model Reference KM 7520 Q20
Features
~ Aluminum alloy frame.
~ PU tire or Pneumatic tire.

10
~ Solid castor
~ Seat & backrest material - padded polyester coated canvas.
~ Detachable / height adjustable armrest.
~ Swing - aside / detachable / height adjustable foot rests.
~ Backrest wallet.
~ Drop back for storage.
~Calfstrap.
~ Large hand grips.
~anti-tipdevice
General
1 Weight of wheelchair complete 14.5 kg.
2 Maximum weight of occupant 100kg.
3 Frame construction Folding
4 Framecolor
5 Wheel Quickrelease.22''diaor20''dia,1-3/8''wide
6 Castor 6''dia
7 Braking (parking only) Manualonreartire.
8 Length of chair (footrest swivel) 81 or 87 (62 or 67)cm
9 Height of chair (backrestfolded) 91(84)cm
10 Width of chair (chair folded ) 51or 53(33)cm
11 Armrestheight 17~23 cm(7 position)
12 Foot plate Plasticswivelaside
13 Seat Widths 34or30or28cm
14 SeatDepth 34 or 31 or 28 cm
15 Seat height at front edge 46cm
16 Backheight 41cm
Stability
17 Static stability uphill Max.14 degree
18 Static stability downhill Max. 10degree
19 Static stability sideways Max. 5 degree
Accessories(option items)
20 Tray
21 Elevating leg rests
3.2 Model Reference KM 7520 Q22
Features
~ Aluminum alloy frame.
~ PU tire or Pneumatic tire.
~ Solid castor
~ Seat & backrest material - padded polyester coated canvas.

11
~ Detachable / height adjustable armrest.
~ Swing - aside / detachable / height adjustable foot rests.
~ Backrest wallet.
~ Drop back for storage.
~Calfstrap.
~ Large hand grips.
~anti-tipdevice
General
1 Weight of wheelchair complete 14.7 kg.
2 Maximum weight of occupant 100kg.
3 Frame construction Folding
4 Framecolor
5 Wheel Quickrelease. 22''dia or 20''dia,1-3/8''wide
6 Castor 6''dia
7 Braking (parking only) Manualonreartire.
8 Length of chair (footrest swivel) 81 or 87 (62 or 67)cm
9 Height of chair (backrest folded) 91(84)cm
10 Width of chair (chair folded ) 51or 53 or 56(33)cm
11 Armrestheight 17~23 cm(7 position)
12 Foot plate Plasticswivelaside
13 Seat Widths 34or30or28cm
14 SeatDepth 34 or 31 or 28 cm
15 Seat height at front edge 46cm
16 Backheight 41cm
Stability
17 Static stability uphill Max.14 degree
18 Static stability downhill Max. 10degree
19 Static stability sideways Max. 5 degree
Accessories(option items)
20 Tray
21 Elevating leg rests

KARMA MANUAL WHEELCHAIRS
IMPORTANT DO’S & DON’TS
DO Maintain your chair well, in particular check the tire pressures since this affects the efficien-
cy of the brakes.
DO Make sure both brakes are applied before getting in or out of the chair.
DO Make sure both brakes are applied when the chair is not being pushed or used.
DO Take care when climbing curbs or turning on slopes.
DO Avoid steep or uneven surfaces that may cause the chair to tip over.
DO Avoid soft surfaces because the castors may become bogged down.
DO Drive smoothly in all conditions.
DO Look well ahead to anticipate hazards such as furniture, doors, potholes, etc.
DO Make sure that both feet are safely on the footrests and that clothing is safely tucked out of
the way so that it cannot catch in the wheels.
DO Take care when traveling up or down or across inclines.
DO If ''attending'', keep both hands on the push handles to control the chair.
DO Pay attention to keep chair in balance..
DO After warranty period, check frame and components regularly refer to user guide.
DO When upholstery is loose, tie it or replace with a new part.
DO Lubricate bearings regularly.
DO Equip with sea
t
-
b
elt for disabled people.
DO Equip with “neck supports”for disabled people.
DO Clean both hands after oiling the wheelchair.
DOT Go too fast or turn too quickly.
DOT stand on the foot plates when getting in or out of the chair.
DOT Go down steps forward if “attending”.
DOT Overload the chair in any circumstance.
DOT Hang anything heavy on the back of the chair which could cause the chair to become unsta-
ble, particularly when negotiating inclines.
DOT Allow any more than one user at a time.
DOT Use with an unconscious patien
t
DOT Use other transport to pull the wheelchair.
DOT Do “wheely”, as you my fall or tip over back and suffer a severe injury.
THERAPIST APPROVED REPAIRED
Name
Address
Tel :
Name
Address
Tel :

110404000005 104-40018 Rev:05 2017.09
Table of contents
Other Karma Wheelchair manuals

Karma
Karma Morgan M MGNM-SLN User manual

Karma
Karma MORGAN User manual

Karma
Karma KP12 Series User manual

Karma
Karma KM-9000 User manual

Karma
Karma KM-2000 Series User manual

Karma
Karma KM-5000 recliner Series User manual

Karma
Karma KM-1000 Series User manual

Karma
Karma EVO Altus User manual

Karma
Karma 8020 Self Propelling User manual

Karma
Karma KM-BT10 User manual

Karma
Karma KM-8000 Series User manual

Karma
Karma EvO Lectus User manual

Karma
Karma SME Series User manual

Karma
Karma Ergo Lite KM-2501 User manual

Karma
Karma Flexx Series User manual

Karma
Karma S-Ergo 105 User manual

Karma
Karma KM-BT10 User manual

Karma
Karma KP-45.3 User manual

Karma
Karma Morgan Series User manual

Karma
Karma VIP 505 User manual