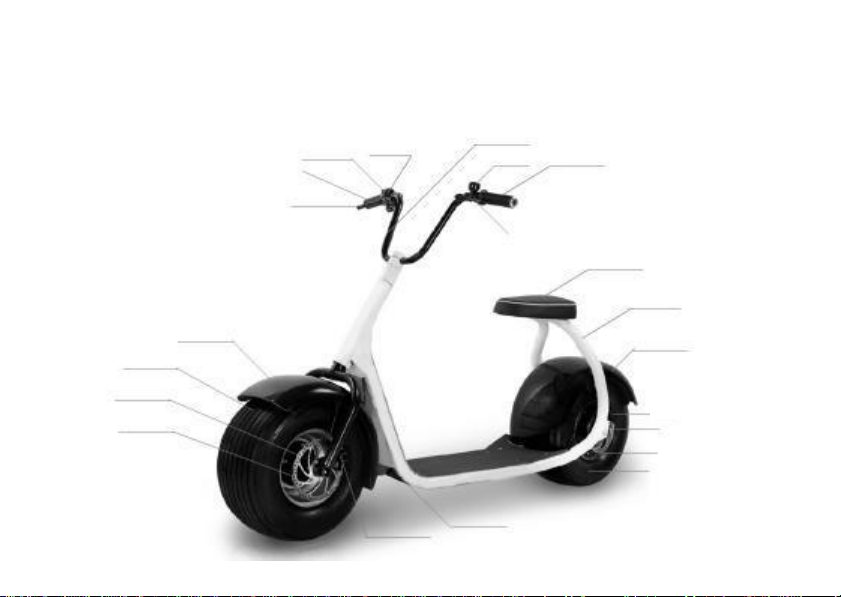
Chapter I Introduction to the Product
The electric bike is adopted with 3D technology design, which is characterized by pleasant modeling,
fashionable and casual appearance, unique style, really simple but extraordinary structure, and noble
and amiable nature, and it is believed that you will love it at first sight! The main characteristics are as
follows:
1. Lithium battery: The product has passed safety tests of UL and CE certification standards, which is
safe and reliable. Its service life is 3 times of that of the lead-acid battery service life, therefore, it is
unnecessary to change it-its service life is ultralong; its weight is 1/3 of that of the lead-acid battery,
which has light weight. The product has high voltage, powerful gradeability and quick acceleration-
high energy; it also recognized as a green energy, which will bring no any pollution during the whole
production and use process.
2. Battery compartment: In the center below the pedal, which has balanced force, small and light
volume, and high safety and secrecy.
3. Motor: It is applied with the optimal magnetic steel material, high quality silicon steel sheet, thicker
coil, precision bearing, thick and large motor shaft, which is powerful and strong and has high bearing
capacity and high durability.
4. Tyre: The 3D virtual design and assembly, fully automatic numerical control bending pipe with
advanced technology, and automatic welding of robot are coherent. And, with the oversized pedal with
polishing and anti-skidding natures, you can feel safe and free in case of sitting or standing and enjoy
convenient cargo carrying;