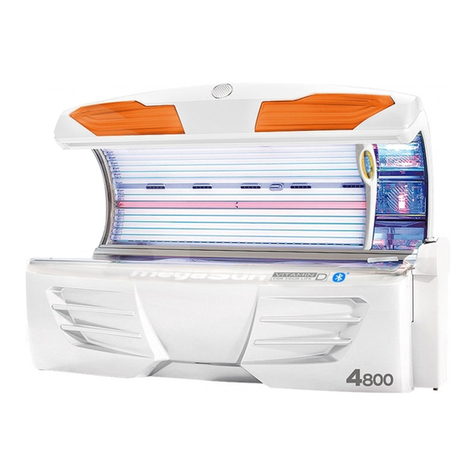
KBL megaSun 4500 Super Installation guide

Operation and
Maintenance
megaSun 4500
BA4500EN_C (0606)

2
Operation and Service megaSun 4500
Printed in Germany
© Copyright 2005 KBL-Solarien AG
This documentation covers only products manufactured by KBL-
Solarien AG. This documentation must not be duplicated, pho-
tocopied, translated or stored on any electronic medium or in a
machine-readable form, neither in whole or in part, without prior
written consent by KBL-Solarien AG.
Up-to-date manuals are available under http://www.kbl-support.de
is a registered trademark of KBL-Solarien AG.
Certified according to DIN ISO 14001
Only original spare parts – especially tubes and burners – have
to be used, otherwise operating authorization and terms of
guarantee will become invalid.
KBL-Solarien AG ·
Ringstraße 24-26 · 56307 Dernbach · Germany
fon +49(0)2689.9426-0 · Fax +49(0)2689.9426-66
Copyright und Warenzeichen

3
Operation and Service megaSun 4500
Table of content
1. General safety information .................................................................................5
2 Operating during the tanning session...............................................................6
2.1. Operating panel.....................................................................................................................6
2.2. Functions...............................................................................................................................8
3. Maintenance of the unit.....................................................................................11
3.1. Cleaning and care ............................................................................................................... 11
3.2. Dismantling the acrylic panes.............................................................................................. 11
3.3. Filter panes .........................................................................................................................14
3.4. Tubes and facial tanners .....................................................................................................16
3.5. Removing the burners .........................................................................................................17
3.6. Unit lighting..........................................................................................................................18
3.7. Canopy drive .......................................................................................................................20
3.8. Filter mats............................................................................................................................22
3.9. Cooling and exhaust air.......................................................................................................23
3.10. Air-conditioning unit.............................................................................................................24
3.11. Condensate pump ...............................................................................................................25
4. Technical data ....................................................................................................26
4.1. Data that is common to all unit models................................................................................26
4.2. Views...................................................................................................................................27
4.3. megaSun 4500 Super..........................................................................................................27
4.4. megaSun 4500 Super Power ..............................................................................................28
4.5. megaSun 4500 Ultra Power ...............................................................................................28
4.6. megaSun 4500 XXL Super Spaghetti..................................................................................29
4.7. megaSun 4500 XXL Super Power Spaghetti ......................................................................29
4.8. megaSun 4500 XXL Ultra Power Spaghetti ........................................................................29
5. Wiring diagrams.................................................................................................30
5.1. Mains voltage ......................................................................................................................30
5.2. External audio signal ...........................................................................................................31
5.3 Music Preselection ..............................................................................................................32
5.4 External Timer .....................................................................................................................33
6. Service mode - inductive ..................................................................................34
6.1. Service level I - inductive.....................................................................................................35
6.2. Service level II - inductive....................................................................................................36
7. Service Mode CPI...............................................................................................36
7.1. General information and structure.......................................................................................36
7.3. Service level I - CPI.............................................................................................................40
7.4. Service level II - CPI............................................................................................................45
7.5. Error messages ...................................................................................................................46
8. Tanning instructions .........................................................................................47
8.1. General tanning instructions ...............................................................................................47
8.2. megaSun 4500 Super, ind. / CPI, UV type 3 .......................................................................48
8.3. megaSun 4500 Super Power, UV type 4.............................................................................48
8.4. megaSun 4500 Super Power, ind. / CPI, UV type 3............................................................49
8.5. megaSun 4500 Ultra Power, UV type 4..............................................................................49
8.6. megaSun 4500 Ultra Power, ind. / CPI, UV type 3..............................................................50
8.7. megaSun 4500 XXL Super Spaghetti, UV type 4................................................................50
8.8. megaSun 4500 XXL Super Power Spaghetti, UV type 4.....................................................51
8.9 megaSun 4500 XXL Ultra Power Spaghetti, UV type 4.......................................................51
9. Index ...................................................................................................................52

4
Operation and Service megaSun 4500

5
Operation and Service megaSun 4500
1. General safety information
Please observe the following safety information:
Tanning times
Timer
Disconnecting
Facial tanners
Technical parame-
ters
Mechanical parts
Cleaning
Never exceed the recommended duration of a tanning session.
See Section 8 Tanning Instructions
The tanning units may only be operated by a safety timer that
complies with any applicable standards.
KBL-Solarien AG recommends the following timer model:
megaTimer KBL article no. 9100025000
Before opening the unit switch off the fuses to disconnect the
system from the voltage supply!
Do not operate the tanning system if a filter pane is defective.
Section 3.3 Filter panes
The data indicated in the tanning schemes are based on the
assumption that both tubes and burners are replaced at regular
intervals.Sere Section 3.4 Tubes and facial tanners
With regard to tube replacement remember to reset the control
and the working hour counter of the tubes.
See Section: 6.1 Service level I in inductive mode
The canopy drive has to be serviced regularly with each tube re-
placement.This includes the replacement of the drive rope after
3,000 hours of operation.
See Section 3.7 Canopy drive
Do not use any cleansing agents other than the ones approved
by KBL Solarien AG.
See Section 3.1 Cleaning and care

6
Operation and Service megaSun 4500
2 Operating during the tanning session
The start of the tanning program depends on the studio control
system. If a simple coin-operated system has been installed,
the tanning program is started by inserting coins or tokens. After
the warm-up time has elapsed, the tanning lamps are turned on
automatically.If the touch key „Start“ is pressed during the warm-
up time, the lamps turn on immediately. The facial tanners are
always switched on after a certain delay.
Fig. 2-1: Operation with processor KBL /5, which means the
sunbed is inductively controlled an has no optional features ex-
cept external music (with or without channel selection)
Fig. 2-2: Operation with processor KBl/4, which means the
sunbed is inductively or electronically controlled (CPI) and
has - beside external music (with or without channel selection)
- several optional features: megaVoice, mp3-sound-box and air
conditioning unit.
General
2.1. Operating panel

7
Operation and Service megaSun 4500
A running text is displayed prior to starting the tanning program.
Otherwise, the operating panel displays the symbols explained
below.
As soon as the unit has been enabled by the corresponding
signal from the coin-operated studio control system, the tanning
bed is ready to be operated by touching the respective sensor
field. Any input is confirmed by a beep tone.The elapsed tanning
time is permanently indicated on the numerical display (count up
to total tanning time released).
A function is switched on by pressing the plus sensor; this sen-
sor is also used for increasing the value step by step. To set
the maximum value (e.g. fan speed), the sensor field has to be
pressed repeatedly until the maximum value appears.
A function is switched off by pressing the minus sensor; this
sensor is also used for decreasing the value step by step. To set
a lower value (e.g. volume), the sensor field has to be pressed
repeatedly until the desired value is reached.
You can use this touch key to switch on the apparatus during
the warm-up time.
If the tanning session has been interrupted by means of the
„Stop“ key, it can be continued after touching the „Start“ key
once again, provided the coin-operated counter has not run
down yet.
The numerical display shows the tanning time.
When the tanning time is over, the running text will appear
again.
By pressing this touch field for at least 2 seconds you can
terminate the tanning session prematurely.
Run time While the tanning program is running, the run time is indicated in
this field.In case the volume of the audio system is adjusted, the
value set – between 0 and 99% - is displayed here for a short
time.In case the fan speed is adjusted, the value set - between
20 and 99% - is displayed here for a short time.

8
Operation and Service megaSun 4500
This function is only displayed in case a music / audio system
with channel selection is provided with the system or if the next
track of the MP3 player is to be chosen (KBL/4). In this case, the
function can be found in the next menu level (double arrows).
You can adjust the volume of the music by touching the „+“ and
„–“ fields. When adjusting the volume, the current setting is dis-
played in the numerical field as a value between 0 and 99% for
a short time.Press the respective sensor key several times until
the desired value is reached.
To switch off the music, set the volume to 20% and press for
some time the „-“-button until the music is off.
During a tanning session the air-conditioning unit is switched on
and off by pressing the „+“ or „–“ sensor fields. Once being swit-
ched off, the air-conditioning unit cannot be switched on again
until 3 minutes have elapsed. To confirm, a small star symbol is
being displayed. If the request to switch on the system is made
earlier, it is registered (big star symbol) and then executed auto-
matically after the 3 minutes have passed.
Exception In case the unit has been switched off via the coin-
box system, it may be switched on again immediately.
Channel selection
Volume
Air conditioning
unit
2.2. Functions
These double arrows point to some more menus if the sunbed
is operated with processor KBL/4. The following menus are
explained in more detail below:

9
Operation and Service megaSun 4500
The power of the body fan can be increased or reduced step-
wise (by 10 % each) by touching the „+“ or „–“ fields. The initial
value after turning on the unit is set to 30%.When changing the
value, the current setting is displayed as a two-digit number bet-
ween „20“ (minimum) and „99“ (maximum) in the numerical field
for a short time.In order to switch off the body fan completely,
press the „–“ field several times until the value of 20% appears.
After that press the „–“ key once again and keep it pressed for
0.5 sec. After a time lag the body fan is eventually switched off.
The body fan can be switched on again at any time simply by
touching the „+“ field.
Level II Once the tanning program has been started, the
tannersare automatically switched on at maximum setting.
Level I To reduce the output to level I, use the „–“ field.
This step is not available with megaSun 4000 Super, Super Po-
wer and Ultra Power UV type 3.
Level 0 To switch off the facial tanners completely, touch
the „–“ field again for at least 3 seconds. Touching the „+“ key,
you can switch the facial tanners on again, or increase their po-
wer.After having switched the facial tanners off, there is a time
lag (depends of its temperature) before they may be turned on
again.
„Spahetti“ tubes in XXL tanning beds:Touching the „-“ key, you
can switch off every second “Spaghetti” tubes in the facial area.
(Switch on by touching „+“ key)Touching the „-“ key again, you
can switch off the rest of the “Spaghetti” tubes in the tanning
bed. (Switch on by touching „+“ key).
Body fan
Facial tanner

10
Operation and Service megaSun 4500
The option „aroma“ is controlled by a clock relay.
Ton = 12 s
Toff = 60 s
The time adjustment will be done at the relay (see pict. at the
left hand side).
On the upper counter, the scope is set for Ton,
here 6 .. 60 s.
With the potentiometer below the factor is set here 2.
So you get the time for Ton = 6 s *2 = 12 s.
Accordingly the time is set for Toff: The scope Toff is 6...60 s
too, the factor is set to 10.
So you get the time for Toff = 6 s *10 = 60 s.
During time Ton the compressor is on and air is blown through
the aroma box. The fragrance comes out at the foot of the bed.
The air stream leads the fragrance over the body to the face so
that it can be perceived intensively.
The relay is mounted on a plate at the left foot in the front.
The client cannot switch off or on the aroma function by the dis-
play.
aroma box
clock relay
compressor
left foot
If the aroma box is empty, lift the top and open it. Replace the
empty box with a new one and close the top.
The submenu P = program exists when equipped with internal
and external music. The client can choose betweenden readyly
configured music sources wellness, pop or external music (stu-
dio system). While toggling through the channels, the chosen
one is displayed for a short time.
aroma with
clock relay
Submenu P
= Program

11
Operation and Service megaSun 4500
3. Maintenance of the unit
Preparatory works
Plastic parts
Note
Acrylic panes
„megaClean“
Chromed parts
Dismantling the
pane in canopy
Before opening the unit, switch off the fuses to disconnect it
from the mains supply!Never operate the tanning unit without
the bulkhead plates, acrylic panes or with the bed section
opened, for otherwise the tanner areas will become overheated.
This will destroy the filter panes!
The major plastic parts consist of solid high-grade ABS material.
The surfaces and the acrylic panes must not be cleaned with
concentrated disinfectants or solvents or other liquids that
contain alcohol!The manufacturer cannot be held liable for any
damage caused by chemically active agents such as unsuitable
cleaning agents.To clean the varnished or plastic surfaces, use a
damp soapy cloth.Make sure that there is no cleaning fluid run-
ning inside the appliance. This has to be avoided at any rate!
Unsuitable cleaning or disinfecting agents may damage the
surface of the acrylic panes (base pane) and further materials,
particularly if there are drops of perspiration in addition to that.
The cleaning and disinfecting agent “megaClean“, to be purcha-
sed from KBL, has specifically been developed for use on acry-
lic surfaces and is regarded as safe. It is diluted in water at a
ratio of 1:13.
Clean only with a damp (not wet) washleather and a plexiglass
cleaner (antistatic). The cleaning agent must be applied onto the
cleaning cloth and not directly onto the chromed parts.
The acrylic panes of both the canopy and the bed are held in
place by means of aluminium profiles. Two pan-head screws
secure the base pane.
3.1. Cleaning and care
3.2. Dismantling the acrylic panes

12
Fig. 3-1 Opening the front swivel hinge
profile using a hexagon recess wrench
(Allen key) of 8 mms (1 and 2)
Fig. 3-2 Turning the profile (3.
Fig. 3-3 Rear pane profile
Operation and Service megaSun 4500
Step Procedure Reference
1 Open the system by lifting up the canopy.
2 Turn the right-hand / left-hand lock (with 8 mm hexagon so-
cket) carefully to the right / left and swing the front swivel
hinge profile downwards. If necessary, pull a little bit in the
middle. Once the canopy pane may be moved, tilt it down-
wards and place it on the bed section (arrange for padding).
Fig. 3-1
Fig. 3-2
3 When the pane is in the lower position, you can lift it out of the
swivel hinge profile, if necessary. For cleaning the pane, this
is not required
Fig. 3-3
4 Mount the panes in reverse order. Ensure that the pane is cor-
rectly positioned in the hinge. Relock the swivel hinge profile.

13
Operation and Service megaSun 4500
The following table describes the cleaning of the base pane and
the ducting pane.
The electronic parts installed underneath the bed must not get in
contact with any moisture.Therefore, in order to clean the un-
dersurface of the base pane and the inner base section, use a
slightly damp cloth only.
Base pane and
ducting pane
Fig. 3-4 Undo the two screws of the base
pane
Step Procedure Reference
1 Open the system by lifting up the canopy.
2 Undo the two pan-head screws on the right-hand and on
the left-hand side of the base pane
Fig. 3-4
3 Pull the base pane out of the rear hinge profile. Put the
pane in a safe place.
4 Clean the underside of the base pane.
5 In case there is a ducting pane in the base section (for tan-
ning systems equipped with air-conditioning unit), it can be
lifted out for cleaning purposes.
6 Re-insert the base pane, clean its upper surface and fasten
the base pane by means of the two screws.Hint: Lift the
base pane a little bit when mounting.

14
Operation and Service megaSun 4500
3.3. Filter panes
The facial tanners are equipped with an additional safety func-
tion. Behind each of the filter panes, there is a safety cutout
switch that will switch off the burner in the case of a missing or
broken pane.
Never operate the tanning system with a defective filter pane.
Carry out visual inspections regularly!
Filter panes may only be replaced by ones of the same type!
The filter panes may be dismantled and replaced by trained ex-
pert staff only.
After having dismantled the frame carrying the filter pane (see
below), clean the filter pane with a household glass cleaning
agent and a soft cloth or chamois leather.
Filter pane in the frame
Safety function
Filter panes
Figure 3-5 Cover of the filter frame Figure 3-6 Remove the filter frame
1
23
Step Procedure Reference
1 Dismantle the acrylic pane of the canopy. see 3.2
2 Undo the screw fixing the filter pane frame (1), swing the
frame downwards (2) and pull out the frame including the
filter pane (3).
Fig. 3-5
Fig. 3-6
3 After cleaning, mount the filter pane again by following the
reverse order.

15
6.
Operation and Service megaSun 4500
Filter panes with clamping springs
Abb. 3-7 Filter pane covering Abb. 3-8 Clamping springs retaining the
filter panes
1.
2.
3. 4.
5.
Step Procedure Reference
1 Undo the screw fastening the filter pane covering (1). Sw-
ing the covering towards yourself (2) and pull it out (3).
Fig. 3-7
2 Press carefully the filter pane downwards using both hands
(4) until the pane is released by the upper springs (5). Take
the filter pane out of the clamping springs that retain it.
Fig. 3-8
3 After cleaning (use any household glass-cleaning agent)
mount the filter pane again.

16
Operation and Service megaSun 4500
3.4. Tubes and facial tanners
In order to be able to clean or replace the tubes or the facial
tanners, please carry out the procedure described below:
To make sure that the tanning effect is maintained, we recom-
mend cleaning the tubes and UV burners with warm water and a
chamois leather after approx. every 200 hours of operation. Do
not use any aggressive or alcoholic cleaning agents.
The coloured filter (Sec. 5.7 Unit lighting) has to be replaced at
the latest when replacing the tanning tubes.
Tubes, facial tanners and starters may only be replaced by ones
of the same type! When installing the tubes, make sure that the
inscription is visible, which means that the reflector of the tube is
at the rear side.
For units equipped with CPI technology, it is vital to carry out a
reset after each tube replacement! see
For units operated with inductive technology, also install new
starters with each tube replacement. Remember to set the wor-
king hours counter to zero. (see 6.1)
Dismantling
Unit lighting
Step Procedure Reference
1 Dismantle the canopy pane and the base pane Section 3.2
2For units equipped with burners: You will have to remove
the filter panes for access to the burners in case you need
to replace them.
Section 3.3
3 When installing the tubes, make sure that the inscription is
visible, which means that the reflector is at the rear side.
4 When replacing the tubes, remember to install new starters!
All units with
burners
Inductive
units
CPI units
with facial tanners without facial tanners
Burner Tubes and
starters
Mode
Eco Power Eco Power
500 - 600 hrs 500 – 600 hrs 800 hrs 500 hrs 1000 hrs 800 hrs
Zero setting - see section 6.1 Carry out a reset! See section 7.1

17
Operation and Service megaSun 4500
3.5. Removing the burners
The burners may be installed or removed by trained expert staff
only.
Figure 3-9 Pushing the burner
towards the side
Figure 3-10 Pulling the burner
out towards the front
Dirt accumulation and incorrect positioning may result in dama-
ge to lamps and sockets when the system is running. Therefore,
on inserting the burners, you must ensure that the contact sur-
faces of both sockets and burners are clean. Insert the burners
straight into their sockets.After being inserted into the socket,
the little metal shackle in the centre of the reflector should face
the reflector.
Installing the bur-
ners
Abb. 311 Burner KBL 3230 355 00
Step Procedure Reference
1 Remove the canopy pane and the filter pane frame. Section 3.2
and 3.3
2 Hold the burners with a soft cloth, then push them to one
side and pull them out towards the front.
Fig. 3-9 and
Fig. 3-10
3 You must not touch the burner glass with your bare hands.
If necessary, clean the bulb with an alcohol-containing clea-
ning agent..

18
Operation and Service megaSun 4500
3.6. Unit lighting
Coloured filter
Replacing the
lighting system in
the lateral part and
in the base part
The coloured filter has to be replaced at the latest when repla-
cing the tanning tubes.
One tube (8 watts) each is installed in the side frames (see Fi-
gure 3-6-2), another tube (58 watts) is installed in the lower front
section (see Figure 3-6-3) and in the canopy‘s front there are
two 42 W compact fluorescent lamps.
Fig. 3-6-1 Fixing screw at the interior
lateral covering
Fig. 3-6-2 Lighting tube in the lateral part,
including starter
Starter
Step Procedure Reference
1Side frames: Undo the screw fixing the interior lateral
panel. Remove the panel and the coloured tube covering.
Now you may replace both tube and starter.
Fig. 3-6-1 and
Fig. 3-6-2
2 Re-install all parts in reverse order.
3Bench: The lighting tube is installed behind the front profile
and may be easily exchanged. The starter is located at the
left-hand socket.
4Canopy
Take off one of the chromed faceplate which is fastened
with hook and loop tape.
Unscrew the the mounting plate‘s four screws and
remove the mounting plate.
Pull out the illuminant carefully. While replacing it, see
that the connector is in the correct position.
Attach the mounting plate. See that the edge of the
dispersion plate is beneath the mounting plate. Attach
the chromed faceplate. Repeat the procedure on the
other side.
•
•
•
•
Fig. 3-6-4
Fig. 3-6-5
Fig. 3-6-6
Fig. 3-6-7

19
Operation and Service megaSun 4500
Fig. 3-6-3 Unit lighting in the lower base section, the
starter at the left hand side
Fig. 3-6-4 Chromed faceplate Fig. 3-6-5 Mounting plate
Fig. 3-6-6 Mounting plate removed Fig. 3-6-7 Correct position of the connector

20
Operation and Service megaSun 4500
3.7. Canopy drive
In order to ensure a trouble-free operation of the drive, check
and service it each time the tubes are replaced (see table be-
low).If the canopy does not remain safely in the upper position
any more, the spring must be re-tensioned.
While tensioning or relaxing the spring, fix it against torsion.
Regular mainte-
nance
Tension the spring
Figure 3-15 Spring compressor The
spring has to be secured against torsion
while tensioning and relaxing.
Figure 3-16 Return pulley
Figure 3-17 Upper rope covering
Step Procedure Reference
1 Check the spring rope for wear. Should individual wires of
the rope be spliced, replace the rope.
2 Lubricate the rope in the return-pulley area by using HHS
2000 spray lubricant.
Fig. 3-16
3 Tension the spring in such a way that the canopy remains
stable in any position. The spring-compressor is kept below
the bed, at the front left-hand side
Fig. 3-15
4 The rope has to be replaced after 3,000 hours of use:·
- Completely relax the spring.
- Remove the upper covering of the attachment fitting of
the rope.
- Undo the bolt and remove the used rope, paying attention
to the position of the bolt.
- Hinge the lubricated new rope, fix the bolt and tension the
spring.
Fig. 3-17
Fig. 3-18
spray lubricant
HHS 2000
5 Test the canopy drive: If it is working properly, you can ea-
sily open and close the canopy, and it remains stable when
in its upper position.
This manual suits for next models
5
Table of contents
Other KBL Tanning Bed manuals

KBL
KBL megaSun space 2000 User manual

KBL
KBL megaSun 5600 User guide

KBL
KBL MegaSun 7000a User manual

KBL
KBL MegaSun 4800 User manual

KBL
KBL MegaSun 4800 User manual

KBL
KBL megaSun Tower Optima User manual

KBL
KBL Tower mon amie User manual

KBL
KBL mon amie User manual

KBL
KBL MegaSun 4800 User manual

KBL
KBL megaSun pureEnergy 5.0 User manual

KBL
KBL mon amie User manual

KBL
KBL mon amie User manual

KBL
KBL megaSun Tower Optima User manual

KBL
KBL megaSun 5600 User manual

KBL
KBL megaSun 5600 User manual

KBL
KBL megaSun 5600 User manual

KBL
KBL MegaSun 4800 User manual

KBL
KBL megaSun 5800 User manual

KBL
KBL megaSun space 3000 User manual

KBL
KBL megaSun K9S User manual