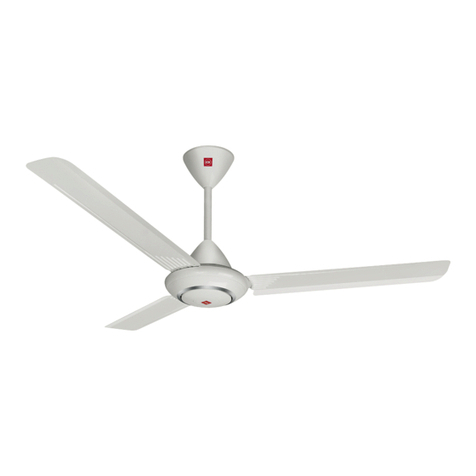
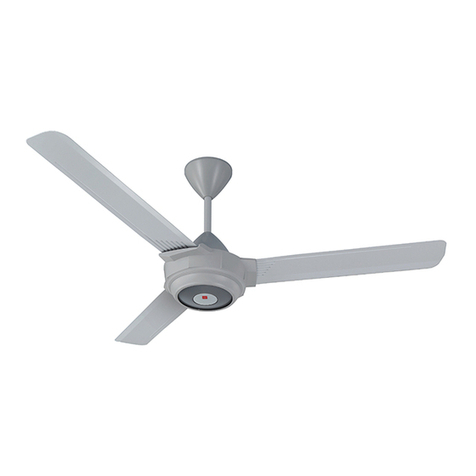
KDK PL30H User manual

2
6
8
11
.....................................
.......................................
............................................
.........................
PL30H
型號
30cm 起居室電風扇 說明書
30cm Living Fan Operating Instructions
Model No.
電 風 扇
Electric Fan
Thank you for purchasing this KDK product.
多謝閣下選購本
KDK 產品。
在使用本產品之前,請仔細閱讀使用說明書,並將使用說明書妥為保管,以備將來需要時之用。
●
Before operating this product, please read the instructions carefully, and save this manual for future use.
●
頁數
Page
目錄
Contents
安全注意事項
如何裝配
使用方法
清潔 / 規格
Safety precautions
How to assemble
How to operate
Cleaning / Specifications
本產品只可在室內使用
This product is for indoor use only.

2
安全注意事項
Safety precautions
■切勿擅自拆散、修理或改造。
會引致火災或觸電。
禁止拆散
若本品故障時請找經銷商修理。
■不可接上220-230V∼,50Hz以外的電源。
否則可能會引起火警。
■裝配或拆除扇葉或保護網
時不可按高度調節按紐。
馬達及柱部可能會快速升高而擊傷使用者。
■確定電源插頭完全插入插座。
若插頭插得不好,可能會引致觸電或
插頭過熱而造成火災。
不要使用已損壞的插頭或鬆脫的插頭。
Never try to take apart, repair
or modify this product.
It may cause fire or
electric shock.
Do not take apart
Contact the dealer for repairing
this product.
Do not connect this unit to power
supply other than 220-230V∼, 50Hz.
Otherwise it may cause fire.
禁止
Prohibited
禁止
Prohibited
Do not push the height
adjustment button during
assemble or remove blade
and guards.
Motor and pole may rise rapidly and
cause injury.
Make sure power plug is fully inserted into
socket.
Loose engagement of plug and socket
may cause electric shock or fire due to
overheat of plug.
Do not use damaged plug or loosen socket.
為了避免對您自己或其他人造成可能的傷害或財物損害,請務必注意以下安全注意事項。
The following symbols differentiate the levels of danger and injury that may result if the product is
not used specifically as instructed.
■無視或錯誤理解這些標誌,會產生下列兩種情況。
These safety precautions are provided for your protection. Please read and follow them carefully to
avoid unnecessary injury and damage to the product itself or other properties.
■
■
This symbol indicates that improper handling may cause a risk of death or
serious injury.
This symbol indicates that improper handling may cause a risk of injury or
damage to the product or to your properties.
This symbol indicates an action that
must not be performed.
This symbol indicates an action that
must be performed.
WARNING
CAUTION
■務必遵守的內容分類,用標誌區分說明如下:
本標誌所表示的內容為“可能造成人員重傷或死亡”。
本標誌所表示的內容為“可能造成人身傷害或其
他
物品損害”。
此標誌表示為禁止事項。 此標誌表示為強制事項。
注意
警告
This manual uses a number of other symbols to indicate additional information for a particular item.
(The symbols given below are examples.)
請務必遵守
Always observe these precautions

3
PL30H
■勿令電線或插頭損壞。
■清潔本機前,請勿拔出電源插座。
引致受傷、觸電、甚至因短路引起火災。
■手濕時切勿接觸電源插頭。
可能會引致觸電。
■要定期清除電源插頭及插座上之灰塵。
如果電源插頭上積聚了灰塵,天氣潮濕時會
容易引致絕緣不良而導致火災。
請將電源插頭拔出,用干布抹淨。
Do not damage power cord or power plug.
Be sure to disconnect the power plug before
cleaning the unit
Causing injury, electric shock or even
fire due to shock circuit.
The unit may start operating unexpectedly
and electric shock may occur.
為免造成傷亡,如電源線損壞必須送交其製造商或製造商指定的維修代理或類似的合資格人士作更換。
If the supply cord is damaged, it must be replaced by the manufacturer or its service agent or a similarly
qualified person in order to avoid a hazard.
禁止
Prohibited
手濕不可觸碰
No wet hand
拔掉插頭
Unplug
Never touch the plug if your hands are wet.
May cause electric shock.
Wipe off dust on the plug and socket periodically.
Accumulation of dust on plug in humid
season may cause poor insulation and
may result in fire.
Disconnect from power supply and use a piece of dry
cloth to clean the plug.
若長時期不使用風扇,請將電源插頭拔出。
Unplug the fan if it will not be used for a while.
例如對其加工、放在發熱器具附近,不正常地折曲或扭曲、
強行拉長、負重、把電線捆成一扎。
e.g. modify, put near heat generating appliance,
abnormally twist or bend, forcefully elongate, pull heavy
weight, bundle up power cord.
■扇葉或保護網未裝好時切勿開機。
引致受傷
■不可讓風扇沾水。
引起火災或觸電。
禁止沾水
禁止
Prohibited
Do not turn on the unit if blade or
guard is not installed properly.
Causing injury
Do not contact with water.
Causing fire or electric shock.
Avoid water
WARNING
警告
本機可能會無預期地開始運作,
且可能引致觸電。

4
WARNING
警告
■移動時切勿拉扯電源線。
可能損壞電線內部,
導致火災或觸電事故。
■切勿在電風扇運作時拉緊電線。
可能導致短路或折斷電線內的
金屬線,這樣可能會發生火災
或觸電。
■切勿將電風扇放近熱源。
塑膠零件可能會
熔化並導致火災。
禁止
Prohibited
禁止
Prohibited
禁止
Prohibited
禁止
Prohibited
Do not pull on the power cord when
carrying the unit.
It may damage the wires
inside the cord, and fire or
electric shocks may occur.
■請勿擠壓電源線。
若未能注意這種情況,
電源線可能發生短路或破損,
並可能導致火災或電擊。
禁止
Prohibited
Do not clamp the power cord.
If this is not observed, short-circuits
or breakages may occur in the cord,
and fire or electric shocks may result.
Do not stretch the power cord while
the unit is in use.
It may cause shortcircuits or
broken wires which may cause
in fire or electric shocks to occur.
Do not place the unit near a heat source.
Plastic parts may melt
and cause fire.
Do not do anything that may damage
the power cord or power plug.
● Power cord must not be damaged,
modify, bend excessively, pull, twist or wrap into a bundle.
Also, do no place heavy objects on top of it or clamp in.
(If damaged power cord is being used, electric shock or
fire may occur.)
● Consult with distributors to carry out any repairs.
● If the supply cord is damaged, it must be replaced by
the manufacturer, its service agent or similarly qualified
persons in order to avoid a hazard.
■切勿損壞電源線或插座。
˙切勿割劃、改裝、過度扭曲、拉扯、扭轉和擰絞電源線。
切勿在電源線上放置重物或擠壓。
(使用已破損的電源線可能會導致觸電或火災事故。)
˙要修理時,請與商戶聯繫。
˙如果機器的電源線損壞了,必須找該機器的廠商,
維修服務中心或合資格技術人員替您更換以防危險發生。
安全注意事項
Safety precautions
請務必遵守
Always observe these precautions

5
PL30H
■不要在以下場所使用風扇:接近氣體爐具;
有易燃氣体的地方;有雨淋或容易被滴水的地方。
可能會吹熄爐火,引致漏氣及爆炸;
引致觸電、短路、火災。
■不要把風扇放置在不平坦的地方或障礙物周圍。
容易引致風扇倒下而導致受傷。
禁止
Prohibited
禁止
Prohibited
Do not use under the following situations:
Near to gaseous fuel cooker; place full of inflammable gas;
Place exposes to rain fall or water pour.
Don’t place the fan on unstable surface or nearobstacles.
Risk on injury by falling fan.
May cause gaseous fuel leakage and explosion;
Leading to electric shock, over heat, fire and
explosion.
■不要長時間把風扇吹著身體。
導致身體不適。
禁止
Prohibited
Avoid continuously exposure of direct wind from the fan.
■切勿用手指插入網罩中或各可動部分。
■請勿在直接日照、雨淋風吹的位置使用。
引致受傷。
禁止接觸
don’t touch
Do not put your fingers into the guard or any
moving part of the fan.
It may cause discomfort.
Causing injury.
■要拔出電源插頭時,必須抓住電源插頭來拔,
不能拉電源線。
■將機桿牢固地插入底座之前,切勿操作機組。
可能會造成電線短路或
斷線而引致火災或觸電。
Hold the plug when disconnect from
main supply, never pull the cord.
Do not operate the set before the
pole is firmly inserted onto the base.
May cause shock circuit or damage of
power supply cord and leading to fire
or electric shock.
注意 Notice
Do not put the fan at a place where near insecticide, oil corrosive solvent (bad effect in quality and causing damages).
Do not put the fan in high temperature, high humidity or dusty place (bad effect in quality and causing damages).
■不要把風扇放在接近殺蟲劑、油或腐蝕性物品的地方使用 (引致風扇變質或損壞)。
■不要把風扇放在高溫、濕度高或塵埃多的地方使用 (引致風扇變質或損壞)。
禁止
Prohibited
禁止
Prohibited
Being unstable, may cause the fan to fall.
This appliance is not intended for use by persons (including children) with reduced physical, sensory or mental capabilities,
or lack of experience and knowledge, unless they have been given supervision or instruction concerning use of the appliance
by a person responsible for their safety.
Children should be supervised to ensure that they do not play with the appliance.
■本產品不適合有殘障、智障或精神障礙的人士、或缺乏經驗、常識者 (包括兒童) 維護使用、除非負責他們安全的人士的看護
或指導下使用。
兒童在維護保養期間、應該有人進行看護、以防將產品當作玩具。
如果風扇狀態不穩定,則可能會倒下。
Do not use in places which are exposed to
direct sunlight, rain or wind.
The unit may overheat, and fire or electric shocks may occur.
本機可能會過熱、著火或引致觸電。

6
如何裝配 How to assemble
裝上後保護網
除下套管
逆時針方向擰下
Assemble Rear Guard
Remove Shaft Tube
除下套管
Remove
Shaft Tube
Turn anti-clockwise
to release
Assemble Blade
Blade slot
Pin
扇葉的安裝
凹位
扇葉固定針
Assemble Front Guard
安裝前保護網
If guard ring falls out from front guard
Clip on all remaining notches
Front Guard
Place the “Marked spot” directly
under the notch
Guard Ring
Notch
Marked Spot
■如果保護網套環由前保護網脫落
將「配合標記」扣入爪部
將餘下的爪全部扣上
保護網套環
爪
配合標記
前保護網
Installing the base
Insert the projection on the stand into the
hole in the base, and then push the stand
into the base until it clicks into place.
Projection
Hole
Hold the main unit so that it is facing
downward as shown in the illustration,
and then turn the nut clockwise to secure
the stand to the base.
Tighten the nut
securely so that
it will not loosen.
Nut
When removing the stand from the base
Remove the nut, and then slide the two tabs
of the base in the directions of the arrows to
remove the base.
Tabs
調整片
移除螺帽,然後將底座的兩個調整片朝箭頭的
方式移動來移除底座。
從底座移除架子時
螺帽
Nut
螺帽
牢牢地鎖緊螺帽,
讓螺帽不致鬆脫。
握住主機體,讓它面朝下 (如圖例所示),
然後以順時針方向旋轉螺帽,
將架子固定到底座。
孔洞
凸桿
將架子的凸桿插入底座的孔洞中,
然後將架子推入底座中,
直到卡入定位為止。
安裝底座
Motor
Control panel
Projections
(3 places)
Pin
Height adjustment
button
Motor shaft (wipe off oil)
Power plug
Stand
Power cord
Base
馬達
凸桿 (3個位置)
馬達軸 (擦去油料)
Motor shaft (wipe off oil)
馬達軸 (擦去油料)
電源插座
架子
電源線
底座
操作面板
Align the pin on the motor shaft with the groove in the fan.
將馬達軸上的固定針對齊風扇中的凹槽。
後保護網
保護網固定螺母
(以順時針方向旋轉)
旋蓋
(
逆時針方向轉
)
前保護網
鉤子
扣
鉤子
鎖緊
鎖緊
孔洞 (3 個位置)
標記
Rear Guard
Guard Set Nut
(Turn clockwise)
Spinner
(Turn anti-clockwise)
Front guard
Hook
Clip
扣
Clip
Hook
鉤子
Hook
Tighten
Tighten
Mark
Holes (3 places)
Note on installation method for front guard
Insert in order from top
to bottom
(all the way around)
Securely engage the clip in the
position shown in the illustration
at right.
Push in until it clicks into place.
Engage the clip.
前保護網安裝方法之注意事項
以由上到下的順序插入
(一路到底)
將扣固定在右圖所示的位置。
推入扣,直到卡入定位為止。
使用扣。
搖頭控制手柄
Oscillation knob
扇葉
固定針
高度調節按鈕
注意 Notice
請確保擰緊保護網固定螺母和旋蓋以防在使用中鬆脫。
Please tighten the guard set nut and spinner firmly
to prevent them from loosening.
Blade
扇葉
Match front and rear guards
Rear Guard
前後保護網對位 後保護網
請不要扔掉套管,以便收藏風扇時套回 (有助防止馬達軸氧化)。
Please keep the plastic tube for future storing
(Prevent motor shaft from rusting).

7
PL30H
裝上後保護網
除下套管
逆時針方向擰下
Assemble Rear Guard
Remove Shaft Tube
除下套管
Remove
Shaft Tube
Turn anti-clockwise
to release
Assemble Blade
Blade slot
Pin
扇葉的安裝
凹位
扇葉固定針
Assemble Front Guard
安裝前保護網
If guard ring falls out from front guard
Clip on all remaining notches
Front Guard
Place the “Marked spot” directly
under the notch
Guard Ring
Notch
Marked Spot
■如果保護網套環由前保護網脫落
將「配合標記」扣入爪部
將餘下的爪全部扣上
保護網套環
爪
配合標記
前保護網
Installing the base
Insert the projection on the stand into the
hole in the base, and then push the stand
into the base until it clicks into place.
Projection
Hole
Hold the main unit so that it is facing
downward as shown in the illustration,
and then turn the nut clockwise to secure
the stand to the base.
Tighten the nut
securely so that
it will not loosen.
Nut
When removing the stand from the base
Remove the nut, and then slide the two tabs
of the base in the directions of the arrows to
remove the base.
Tabs
調整片
移除螺帽,然後將底座的兩個調整片朝箭頭的
方式移動來移除底座。
從底座移除架子時
螺帽
Nut
螺帽
牢牢地鎖緊螺帽,
讓螺帽不致鬆脫。
握住主機體,讓它面朝下 (如圖例所示),
然後以順時針方向旋轉螺帽,
將架子固定到底座。
孔洞
凸桿
將架子的凸桿插入底座的孔洞中,
然後將架子推入底座中,
直到卡入定位為止。
安裝底座
Motor
Control panel
Projections
(3 places)
Pin
Height adjustment
button
Motor shaft (wipe off oil)
Power plug
Stand
Power cord
Base
馬達
凸桿 (3個位置)
馬達軸 (擦去油料)
Motor shaft (wipe off oil)
馬達軸 (擦去油料)
電源插座
架子
電源線
底座
操作面板
Align the pin on the motor shaft with the groove in the fan.
將馬達軸上的固定針對齊風扇中的凹槽。
後保護網
保護網固定螺母
(以順時針方向旋轉)
旋蓋
(
逆時針方向轉
)
前保護網
鉤子
扣
鉤子
鎖緊
鎖緊
孔洞 (3 個位置)
標記
Rear Guard
Guard Set Nut
(Turn clockwise)
Spinner
(Turn anti-clockwise)
Front guard
Hook
Clip
扣
Clip
Hook
鉤子
Hook
Tighten
Tighten
Mark
Holes (3 places)
Note on installation method for front guard
Insert in order from top
to bottom
(all the way around)
Securely engage the clip in the
position shown in the illustration
at right.
Push in until it clicks into place.
Engage the clip.
前保護網安裝方法之注意事項
以由上到下的順序插入
(一路到底)
將扣固定在右圖所示的位置。
推入扣,直到卡入定位為止。
使用扣。
搖頭控制手柄
Oscillation knob
扇葉
固定針
高度調節按鈕
注意 Notice
請確保擰緊保護網固定螺母和旋蓋以防在使用中鬆脫。
Please tighten the guard set nut and spinner firmly
to prevent them from loosening.
Blade
扇葉
Match front and rear guards
Rear Guard
前後保護網對位 後保護網
請不要扔掉套管,以便收藏風扇時套回 (有助防止馬達軸氧化)。
Please keep the plastic tube for future storing
(Prevent motor shaft from rusting).

8
使用方法 How to operate
1 2 3
注意 Notice
SPEED Button
Press this button to change wind speed.
Light on
Properly adjust wind speed and activate oscillation can
enhance the cooling effect.
OFF·ON Button
Press to toggle OFF·ON
The speed is “1” at the first time after connecting to
power supply.
Other buttons will not functioning when the fan turned off.
Memory function
When turn on the fan, it operates at previously set mode,
No memory function for “Timer”
Memory will be cleared when cut off power
Using with air-conditioner can save energy
In order to save energy, disconnect unit from power source if it will not be used for a period.
(The fan consumes about 1W power even at “OFF” mode)
When the button is pressed there will be a sound that indicates the operation.
To avoid the possibility of causing injury to users or damage properties, please follow all the explanation
written below.
The manufacturer is not responsible for accidents and injuries caused by defective or deficient installation.
The fan may vibrate and make a loud noise if the supporting surface is not flat or level. If this happens,
please move the fan a little bit or adjust its height until the vibration and noise stop.
風量掣
按此鍵切換風量
亮燈
適當地調節風力及啟動風扇搖頭能增強涼快感覺
開關鍵
每按鍵一次切換開關狀態
記憶功能
第一次接通電源後,開始是慢檔
風扇未開時其他按掣沒有作用
開機後再次開機,運轉狀態和開機前相同
時間掣並無記憶功能
切斷電源後記憶會消失
與空調配合使用能有效節能
若長時間不使用風扇時拔掉電源插頭以節省能源 (即使在關機狀態風扇仍會消耗若1W的電能)
按下按鈕時,會響起操作指示聲。
有時風扇會因承托面凹凸不平而震動並發出雜聲,這時請略為移動風扇的位置或調較風扇的高度直到風扇
不再震動及發出雜聲。
請根據以下書面說明操作,以避免使用者受傷或損害財物。
製造商無須對因安裝瑕疵或安裝不完全所造成的事故或傷害負責。
注意 Notice
Use different combinations of speed,
timer setting and rhythm function to
achieve most comfortable feeling.
RHYTHM Button
Press to toggle “Rhythm” or “Continuous” operation
The wind strength is automatically changed at about 4 sec.
intervals. (Speed indicating light will blink when rhythm mode
is activated)
善用不同的風量、時間掣和自然
風的組合能令使用者倍感舒適。
自然風掣
按此鍵以切換自然風或連續運轉模式
自然風就是每隔4秒自動改變風速 (自然風模式啟動時風速指
示燈會閃爍)
1 2 4
Proper use of Timer can save energy
and prevent user from discomfort.
TIMER Button
Press this button to set the timer as shown below.
Light on
Indicating lamp will change accordingly as remaining
time reduces.
Cancel
適當地使用時間掣既可省電又可避免
睡著時著涼
每按一次時間掣如下圖所示變換時間掣的設定
時間掣
取消
亮燈
指示燈會隨剩餘時間減少而改變

9
PL30H
1 2 3
注意 Notice
SPEED Button
Press this button to change wind speed.
Light on
Properly adjust wind speed and activate oscillation can
enhance the cooling effect.
OFF·ON Button
Press to toggle OFF·ON
The speed is “1” at the first time after connecting to
power supply.
Other buttons will not functioning when the fan turned off.
Memory function
When turn on the fan, it operates at previously set mode,
No memory function for “Timer”
Memory will be cleared when cut off power
Using with air-conditioner can save energy
In order to save energy, disconnect unit from power source if it will not be used for a period.
(The fan consumes about 1W power even at “OFF” mode)
When the button is pressed there will be a sound that indicates the operation.
To avoid the possibility of causing injury to users or damage properties, please follow all the explanation
written below.
The manufacturer is not responsible for accidents and injuries caused by defective or deficient installation.
The fan may vibrate and make a loud noise if the supporting surface is not flat or level. If this happens,
please move the fan a little bit or adjust its height until the vibration and noise stop.
風量掣
按此鍵切換風量
亮燈
適當地調節風力及啟動風扇搖頭能增強涼快感覺
開關鍵
每按鍵一次切換開關狀態
記憶功能
第一次接通電源後,開始是慢檔
風扇未開時其他按掣沒有作用
開機後再次開機,運轉狀態和開機前相同
時間掣並無記憶功能
切斷電源後記憶會消失
與空調配合使用能有效節能
若長時間不使用風扇時拔掉電源插頭以節省能源 (即使在關機狀態風扇仍會消耗若1W的電能)
按下按鈕時,會響起操作指示聲。
有時風扇會因承托面凹凸不平而震動並發出雜聲,這時請略為移動風扇的位置或調較風扇的高度直到風扇
不再震動及發出雜聲。
請根據以下書面說明操作,以避免使用者受傷或損害財物。
製造商無須對因安裝瑕疵或安裝不完全所造成的事故或傷害負責。
注意 Notice
Use different combinations of speed,
timer setting and rhythm function to
achieve most comfortable feeling.
RHYTHM Button
Press to toggle “Rhythm” or “Continuous” operation
The wind strength is automatically changed at about 4 sec.
intervals. (Speed indicating light will blink when rhythm mode
is activated)
善用不同的風量、時間掣和自然
風的組合能令使用者倍感舒適。
自然風掣
按此鍵以切換自然風或連續運轉模式
自然風就是每隔4秒自動改變風速 (自然風模式啟動時風速指
示燈會閃爍)
1 2 4
Proper use of Timer can save energy
and prevent user from discomfort.
TIMER Button
Press this button to set the timer as shown below.
Light on
Indicating lamp will change accordingly as remaining
time reduces.
Cancel
適當地使用時間掣既可省電又可避免
睡著時著涼
每按一次時間掣如下圖所示變換時間掣的設定
時間掣
取消
亮燈
指示燈會隨剩餘時間減少而改變

10
使用方法 How to operate
36° 36°
14°
14°
Oscillation
搖頭
Adjustment of Wind Direction
風向調節
Height Adjustment
高度調節
搖頭角度85°
按下搖頭 拉上停止
搖頭控制手柄
可左右自由調節 可上下調節
高度調節按鈕
升高:按下調節鈕,將升降桿提高至所
需位置後放開按鈕。
下降:將升降桿按下至所需位置。
Oscillation angle 85º
Push down to
oscillate
Pull up to stop
Oscillation knob
Adjust
horizontally
Adjust vertically
Height adjustment button
Elevating: Push and hold the adjustment
button, pull up the slide pole to
desired position, then release
the button.
Lowering: Push down the slide pole to
desired position.
須知 Notice
清潔 Cleaning
Specifications
防止刮花塑膠部份,請不要用乾布大力擦拭。
防止機身變質、變色,請不要用稀釋劑、石油精、酒精、去污粉、鹼性清潔劑等清洗。
使用化學抹布時,請先詳閱其使用說明。
去污粉
鹼性清潔劑
石油精
酒精 稀釋劑
規格
電壓
50 36 1040 200220
230
43
50 38 1050 202 44
2 3.5
高H 690∼875
闊W 367
深D 350
0°, 80°
頻率 轉速 搖頭角度 電線長度 重量 尺寸風速 風量耗電量
Be sure to disconnect the power plug before cleaning the unit.
Rubbing too heavy with dry cloth may scratch the surface of plastic parts.
Do not use thinner, benzine, alcohol, cleaning powder, alkaline detergent, etc.
When using chemically treated cloth, following its instructions.
Cleaning
powder
Benzine Thinner
Alkaline
Detergent
Alcohol
Voltage
(V~)
Frequency
(Hz)
Power
(W)
Cord Length
(m)
Weight
(kg)
Dimension
(mm)
r.p.m.
(r/min.)
Air Velocity
(m/min.)
OscillationAir Volume
(m3/min.)
扣環
扇葉
升降桿
控制面板
底座
Rear guard
Guard ring
Front guard
Blade
Slide pole
Control panel
Base
清潔本機前,請勿拔出電源插座。
後保護網
前保護網
Stand
架子
Dampen a cloth, wring it out firmly, and then use it to wipe the
outside of the main unit.
· For stubborn stains, use water mixed with a small amount of
diluted kitchen detergent.
弄濕抹布,用力扭乾,然後用來抹拭主機外圍。
˙要清除頑固污漬,可用水混合少量稀釋的廚房清潔劑一起清洗。

11
PL30H
清潔 / 規格 Cleaning / Specications
36° 36°
14°
14°
Oscillation
搖頭
Adjustment of Wind Direction
風向調節
Height Adjustment
高度調節
搖頭角度85°
按下搖頭 拉上停止
搖頭控制手柄
可左右自由調節 可上下調節
高度調節按鈕
升高:按下調節鈕,將升降桿提高至所
需位置後放開按鈕。
下降:將升降桿按下至所需位置。
Oscillation angle 85º
Push down to
oscillate
Pull up to stop
Oscillation knob
Adjust
horizontally
Adjust vertically
Height adjustment button
Elevating: Push and hold the adjustment
button, pull up the slide pole to
desired position, then release
the button.
Lowering: Push down the slide pole to
desired position.
須知 Notice
清潔 Cleaning
Specifications
防止刮花塑膠部份,請不要用乾布大力擦拭。
防止機身變質、變色,請不要用稀釋劑、石油精、酒精、去污粉、鹼性清潔劑等清洗。
使用化學抹布時,請先詳閱其使用說明。
去污粉
鹼性清潔劑
石油精
酒精 稀釋劑
規格
電壓
50 36 1040 200220
230
43
50 38 1050 202 44
2 3.5
高H 690∼875
闊W 367
深D 350
0°, 80°
頻率 轉速 搖頭角度 電線長度 重量 尺寸風速 風量耗電量
Be sure to disconnect the power plug before cleaning the unit.
Rubbing too heavy with dry cloth may scratch the surface of plastic parts.
Do not use thinner, benzine, alcohol, cleaning powder, alkaline detergent, etc.
When using chemically treated cloth, following its instructions.
Cleaning
powder
Benzine Thinner
Alkaline
Detergent
Alcohol
Voltage
(V~)
Frequency
(Hz)
Power
(W)
Cord Length
(m)
Weight
(kg)
Dimension
(mm)
r.p.m.
(r/min.)
Air Velocity
(m/min.)
OscillationAir Volume
(m3/min.)
扣環
扇葉
升降桿
控制面板
底座
Rear guard
Guard ring
Front guard
Blade
Slide pole
Control panel
Base
清潔本機前,請勿拔出電源插座。
後保護網
前保護網
Stand
架子
Dampen a cloth, wring it out firmly, and then use it to wipe the
outside of the main unit.
· For stubborn stains, use water mixed with a small amount of
diluted kitchen detergent.
弄濕抹布,用力扭乾,然後用來抹拭主機外圍。
˙要清除頑固污漬,可用水混合少量稀釋的廚房清潔劑一起清洗。

© Panasonic Ecology Systems Co., Ltd. 2012
Head office : 4017,Takaki-cho,Kasugai,Aichi,Japan
KDK Company, Division of PES
Table of contents
Other KDK Fan manuals
Popular Fan manuals by other brands

BOX Plus
BOX Plus 9694052 instruction manual

Kenmore
Kenmore 27.32600310 Use & care guide

Atlas fan company
Atlas fan company Irene YG432-MG Installation and use

emerio
emerio TFN-214473.4 instruction manual

Kichler Lighting
Kichler Lighting Bronson instruction manual

Monzana
Monzana Deuba MZTV001 instructions

Remington Solar
Remington Solar SF20 manual

AEG
AEG VL 5606 WM instruction manual

Hunter
Hunter Clyde Hill 50599 installation manual

Bathology
Bathology Atmospheric 310 Installation and operation manual

Monte Carlo Fan Company
Monte Carlo Fan Company 3AVLR54 Series Owner's guide and installation manual

Ferrari
Ferrari EF Series Warnings and instructions for use