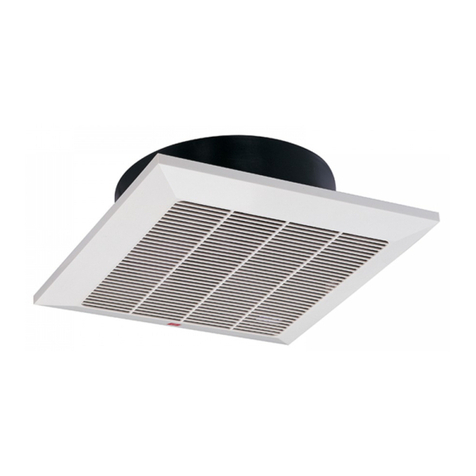
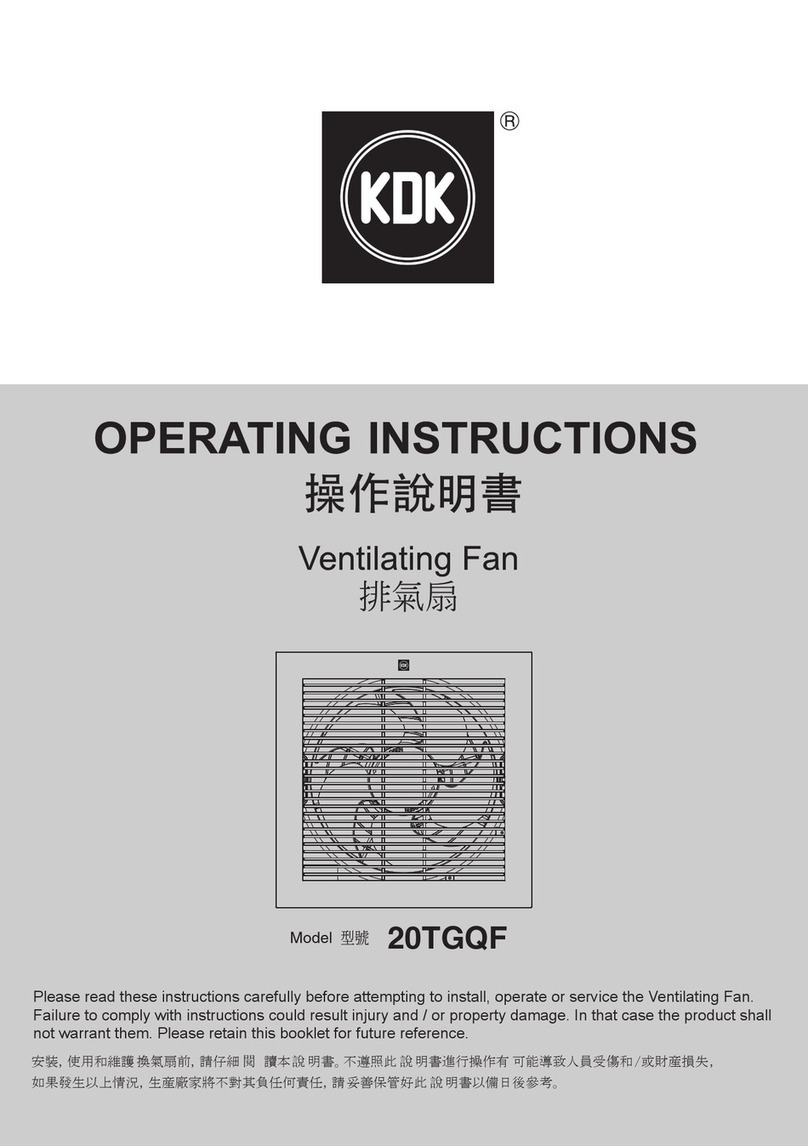
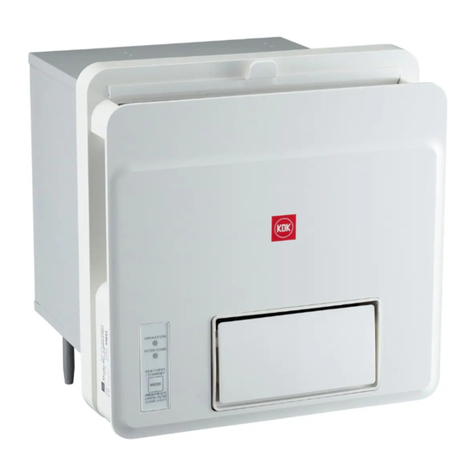
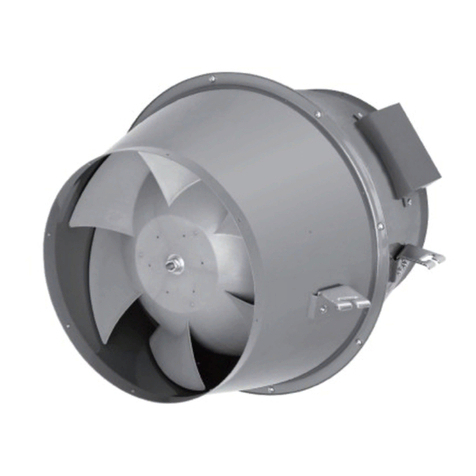
KDK 17CUH User manual

Please read these instructions especially “Safety Instructions” and “Installation Cautions”
carefully before attempting to install, operate or service the KDK product. Failure to comply
with instructions could result in personal injury or property damage.
Please explain to users how to operate and maintain the product after the installation, and
this booklet should be presented to users.
Please retain this booklet for future reference.
READ AND SAVE THESE INSTRUCTIONS
Thank you very much for purchasing this KDK product.
17CUH 24CUH
24CDH 24CHH
KDK
KDK
Ventilating Fan
换气扇
Installation and Operating Instructions
安装使用说明书
Model No.
型号

SAFETY INSTRUCTIONS
安全指引
产品必须安装在足够坚固的天花板上,如果天花板不够坚固,则必须加固以使其足够坚固。
Disconnect the power supply until blade is stationary before cleaning and maintenance.
本设备不适合身体、感官或精神能力下降,或缺乏经验和知识的人员(包括儿童)使用,除非负责其
安全的人员对其使用设备进行了监督或指导。应监督儿童确保其不玩耍本设备。
This appliance is not intended for use by persons (including children) with reduced physical, sensory
or mental capabilities, or lack of experience and knowledge, unless they have been given supervision
or instruction concerning use of the appliance by a person responsible for their safety. Children should
be supervised to ensure that they do not play with the appliance.
If the supply cord is damaged, it must be replaced by the manufacturer or its service agent or a
similarly qualified person in order to avoid a hazard.
The product must be mounted on to the ceiling which is enough strong, If the ceiling is not enough
strong it must be reinforced for it to be strong enough.
Please observe strictly
2

SAFETY INSTRUCTIONS
安全指引
产品必须安装在足够坚固的天花板上,如果天花板不够坚固,则必须加固以使其足够坚固。
Disconnect the power supply until blade is stationary before cleaning and maintenance.
本设备不适合身体、感官或精神能力下降,或缺乏经验和知识的人员(包括儿童)使用,除非负责其
安全的人员对其使用设备进行了监督或指导。应监督儿童确保其不玩耍本设备。
This appliance is not intended for use by persons (including children) with reduced physical, sensory
or mental capabilities, or lack of experience and knowledge, unless they have been given supervision
or instruction concerning use of the appliance by a person responsible for their safety. Children should
be supervised to ensure that they do not play with the appliance.
If the supply cord is damaged, it must be replaced by the manufacturer or its service agent or a
similarly qualified person in order to avoid a hazard.
The product must be mounted on to the ceiling which is enough strong, If the ceiling is not enough
strong it must be reinforced for it to be strong enough.
Please observe strictly
The following explanations must always be observed in order to prevent harm to users or other people
and prevent damage to property.
需要遵守的详情类型进行了分类,并在以下插图显示中进行了说明。(以下为插图显示系列)
The following displays are classified and explained to what extent harm or damage occurs when the
display details are ignored and the unit in question is wrongly used.
This indication means : Must be treated seriously that this may
result in death or serious injury.
Warning
This indication means : Must be treated seriously that this may result
in injury or physical damage.
The types of details to be observed are classified and explained in the following illustrated displays.
(Below are the series of illustrated displays)
This type of pictorial symbol indicates a “Prohibited” action that must
be avoided.
This type of pictorial symbol indicates a “Compulsory” action that
must be performed.
SAFETY INSTRUCTIONS
安全指引
Caution
Please observe strictly
警 告
注 意
3

INSTALLATION CAUTIONS
安装注意事项
器具应按照国家布线规则进行安装。
Installation should be done by authorized person.
The product should be installed firmly.
Otherwise, the product any fall down
and it may cause injury.
否则产品可能会掉落,导致受伤。
必须由专业人员进行安装,必须牢固地安装产品。
Otherwise, it may cause fire.
否则可能会导致火灾。
Wiring is required to follow the local wiring
regulations.
The product must be grounded.
Otherwise, it may cause a short circuit,
thus resulting a fire.
必须接地。
Do not install the power switch in bathroom.
禁止将电源开关安装在浴室内。
否则可能会导致短路,导致火灾。
Do not install the product as the method
which is not approved in the instruction.
Otherwise, the product may fall down and
it may cause injury.
禁止使用本说明书指定以外的方法进行安装。
否则产品可能会掉落,导致受伤。
Otherwise, it may cause electric shock
when there is any trouble or electric leakage.
当出现故障或漏电时,可能会触电。
Do not operate the product other than the
voltage in name plate.
禁止使用额定电压以外的电源。
Otherwise, it may damage the product or
cause fire.
否则可能会导致损坏本产品,导致火灾。
禁止将换气扇安装于窗外或墙壁外。
否则产品可能会淋雨,导致短路。
Please install an all-pole switch which the contact
separation is more than 3 mm (all-pole switch).
安装时,须在供电线路中安装其触电
开距不少于3
mm的全极断开装置(全极开关)。
否则可能会导致短路,导致火灾。
Warning
警告
Do not install the fan out of the window and wall.
Otherwise, the product may get wet in the rain
and cause short circuit.
Otherwise, it may cause a short circuit, thus
resulting a fire.
INSTALLATION CAUTIONS
The product must be installed tightly.
Otherwise, it may cause fire.
机体安装必须牢固。
Do avoid the back-flow of gas into the room
from the open flue of flammable gas or other
open-fire appliances.
必须避免气体从敞开的气道或其他明火设
备回流进室内。
否则可能会导致火灾。
Otherwise, it may injure person caused by
product's falling off.
The lowest surface of this product should be
installed above 2.3 m from the floor after
installation.
安装完成后产品最底面至地面的距离必须大于
2.3
m。
Do not reconstruct this product.
禁止对本产品进行改造。
Otherwise, it may cause damage to the product
or injury.
否则可能会导致产品损伤或人身伤害。
否则机体可能会掉落,导致受伤。
Avoiding any accident
>2.3 m
防止意外
The special-purpose or dedicated parts,
such as mounting fixtures, must be used if
such parts are provided.
Otherwise, the product may fall down
and it may cause injury.
有安装五金件等专用零部件时,应使用专用
零部件。
否则产品可能会掉落,导致受伤。
Otherwise, it may injure person caused by
product's falling off.
否则部品可能会掉落,导致受伤。
Components must be installed tightly.
部品安装必须牢固。
注意
Caution
安装注意事项
4

INSTALLATION CAUTIONS
The product must be installed tightly.
Otherwise, it may cause fire.
机体安装必须牢固。
Do avoid the back-flow of gas into the room
from the open flue of flammable gas or other
open-fire appliances.
必须避免气体从敞开的气道或其他明火设
备回流进室内。
否则可能会导致火灾。
Otherwise, it may injure person caused by
product's falling off.
The lowest surface of this product should be
installed above 2.3 m from the floor after
installation.
安装完成后产品最底面至地面的距离必须大于
2.3
m。
Do not reconstruct this product.
禁止对本产品进行改造。
Otherwise, it may cause damage to the product
or injury.
否则可能会导致产品损伤或人身伤害。
否则机体可能会掉落,导致受伤。
Avoiding any accident
>2.3 m
防止意外
The special-purpose or dedicated parts,
such as mounting fixtures, must be used if
such parts are provided.
Otherwise, the product may fall down
and it may cause injury.
有安装五金件等专用零部件时,应使用专用
零部件。
否则产品可能会掉落,导致受伤。
Otherwise, it may injure person caused by
product's falling off.
否则部品可能会掉落,导致受伤。
Components must be installed tightly.
部品安装必须牢固。
注意
Caution
安装注意事项
5

Please observe the following requirement. Otherwise, it may cause the product aging and breakdown.
请遵守以下安装要求事项,否则有可能会导致机体老化或发生故障。
Do not install the product where
there is steam.
请勿安装在有蒸汽的场所。
Do not install the product in places with high
temperature.
请勿安装在高温场所。
Be sure to provide an appropriate
opening for air intake.
请设置通风口。
Within 500 mm
500
mm以内
Above 40 ˚C
高于40
℃
Please set a square inspection
hole of at least 45 cm.
请设置一个45
cm以上的方形
点检口。
Do not install the product where it is
exposed to oil fumes.
请勿安装在油烟过多的场所。
Do not install onto slanting ceiling.
请勿安装在倾斜的天花板上。
Prevent the water condensed in the
duct pipe flow back into the body.
防止水通过安装管道倒流。
INSTALLATION REQUIREMENTS
安装要求
Please don’t carry out the following ductworks.
请勿执行以下管道系统。
Ductwork (1), (2), and (3) will increase the duct resistance, and ductwork (4) will cause turbulence and airflow collisions.
These ductwork configurations may cause the product to operate under a condition where the inlet and/or outlet openings
arealmost blocked. This may not only increase levels of vibration and noise but also reduce the air volume and adversely
affect the motor.
管道系统(1)、(2)和(3)会增大管道阻力,而管道系统(4)会造成湍流和气流碰撞。这些管道系统
配置可能会造成产品在进气口和/或出气口几乎完全堵塞的情况下运行。这不仅会增大振动和噪音,
还会降低风量,并对电机产生不利影响。
Do not install the product in the place with many dust.
请勿安装在灰尘较多的场所。
The product is not provided with, all-pole switch and leakage protection switch. Please purchase them in market.
本产品没有附带电源全极开关和漏电保护开关,需用户另购。
(1)
Bending extremely
严重弯曲
(2) Bending repeatedly
反复弯曲
(3) Making duct diameter
too small
使管道直径太小
(4) Bending very near to the adaptor
弯曲非常靠近接头
Separate 1m or more from the adaptor.
从接头分开1
m或以上。
Bellows
Adaptor 波纹管
接头
6

Please observe the following requirement. Otherwise, it may cause the product aging and breakdown.
请遵守以下安装要求事项,否则有可能会导致机体老化或发生故障。
Do not install the product where
there is steam.
请勿安装在有蒸汽的场所。
Do not install the product in places with high
temperature.
请勿安装在高温场所。
Be sure to provide an appropriate
opening for air intake.
请设置通风口。
Within 500 mm
500
mm以内
Above 40 ˚C
高于40
℃
Please set a square inspection
hole of at least 45 cm.
请设置一个45
cm以上的方形
点检口。
Do not install the product where it is
exposed to oil fumes.
请勿安装在油烟过多的场所。
Do not install onto slanting ceiling.
请勿安装在倾斜的天花板上。
Prevent the water condensed in the
duct pipe flow back into the body.
防止水通过安装管道倒流。
INSTALLATION REQUIREMENTS
安装要求
Please don’t carry out the following ductworks.
请勿执行以下管道系统。
Ductwork (1), (2), and (3) will increase the duct resistance, and ductwork (4) will cause turbulence and airflow collisions.
These ductwork configurations may cause the product to operate under a condition where the inlet and/or outlet openings
arealmost blocked. This may not only increase levels of vibration and noise but also reduce the air volume and adversely
affect the motor.
管道系统(1)、(2)和(3)会增大管道阻力,而管道系统(4)会造成湍流和气流碰撞。这些管道系统
配置可能会造成产品在进气口和/或出气口几乎完全堵塞的情况下运行。这不仅会增大振动和噪音,
还会降低风量,并对电机产生不利影响。
Do not install the product in the place with many dust.
请勿安装在灰尘较多的场所。
The product is not provided with, all-pole switch and leakage protection switch. Please purchase them in market.
本产品没有附带电源全极开关和漏电保护开关,需用户另购。
(1)
Bending extremely
严重弯曲
(2) Bending repeatedly
反复弯曲
(3) Making duct diameter
too small
使管道直径太小
(4) Bending very near to the adaptor
弯曲非常靠近接头
Separate 1m or more from the adaptor.
从接头分开1
m或以上。
Bellows
Adaptor 波纹管
接头
Louver
Installation and operating instructions
6
1
1
1
2
3
面罩
安装使用说明书
SUPPLIED ACCESSORIES
包装附件清单
The following attachments are enclosed in the packing box of ventilating fan. Be sure to check if they are
complete after unpacking, and if anything is missed, contact our After-Sales Service Center or the dealer.
随换气扇产品包装箱有以下附件,开箱后请清点是否齐全,如不齐全,请于客户咨询服务中心或经销商
联系。
Drawing
图样
Quantity
数量
Name and purpose
名称及用途
No.
序号
Self-tapping screw
(use to fix the frame and adaptor assembly)
自攻螺丝
(用于固定框架和接头组合)
A B C D E F G
ø100
214
ø100
194 84 164 170 230
13
278 255 140 175 233 300
13
17CUH
24CUH
24CDH
24CHH
Model No.
型号
Duct size
管道尺寸
Part name
部件名
No.
序号
Blade
扇叶
Louver
面罩
Adaptor Assembly
接头组合
Fan body
机身
Casing
护套
Wiring cover
接线罩
Motor
马达
1
2
3
4
5
6
7
Part name
部件名
No.
序号
Unit: mm
单位: mm
PARTS NAME AND DIMENSIONS
部件名称及尺寸
ø98
G D
□E
□F
□A
B
C
6-5×9 holes
6-5X9 孔
6
2
1
4
7
3
5
7

Wooden frame
木框 Adaptor assembly
接头组合
Self-tapping screw
Φ4.2x20 (2 PCS)
自攻螺丝φ4.2x20(2颗)
Remove the
hexagon screw
去掉螺丝
Fan body
机体
Adaptor
assembly
接头组合
Ceiling
天花板
At least 20 mm
不小于20
mm
Fan body
机体
17CUH
177±2 240±2
24CUH
24CDH
24CHH
A Size (Square)
A尺寸(正方形)
Unit : mm
单位:
mm
30 mm
25~30 mm
□A
Wooden joist
木龙骨
Wooden frame
木框
Model No.
型号
HOW TO INSTALL
安装方法
Adaptor assembly should not fix at an angle.
固定接头组合时要注意不能和木框之间有角度
IMPORTAN
重要
Wooden frame
木框
1 Construct the wooden frame and attach it
horizontally to the wooden joist. (Fig.1)
1.机体的安装 方法一 使用木龙骨安装
在木龙骨上水平搭建木框(图1)。
3 Fix the adaptor assembly on wooden frame with 2
self-tapping screws of Φ4.2x20. (Fig.4)
按图示将接头组合紧靠木框固定,
并用自攻螺丝φ4.2x20(2颗)固定(图4)。
1. Fan body installation Method 1 install
with wooden joist.
The distance between the top of fan body and
ceiling should not be less than 20 mm. (Fig.2)
注意应保持机体顶部和天花板的距离不小于20 mm
(图2)。
Fig.1 / 图1
Fig.2 / 图2
Fig.3 / 图3
Fig.4 / 图4
2 Remove one hexagon screw that is fixed adaptor
assembly and fan body, then remove the adaptor
assembly. (Fig.3)
取下固定接头组合和机体的一颗螺丝,
按图示方法拆下接头组合(图3)。
Lead wire from
power source
PVC coated cord
(60227 IEC 53) ;
3x0.75 mm2
供电电源线
Power cord
电源线
Fan body
机体
Check whether the
hook is secure
检查钩环是否保护到位
Check whether it inserts firmly
检查是否插入牢固
Adaptor
assembly
接头组合
Adaptor assembly
接头组合
Power cord
电源线
Wooden frame
木框
Neutral(N)
零线
■ It is required to use terminal (not supply)
that complies IEC 60998.
■ Make sure all connections are fastened firmly
after wiring is finished.
Blue(N)
蓝
Live(L)
火线
Power
supply
Fan body
要求使用符合IEC60998的接线端子座(另购)。
接线完成后,必须检查所有连接是否牢固。
机体
供电电源线
4 Connect the power cord (included earth) of fan
body to lead wire in accordance with the wiring
diagram. (Fig.5)
根据接线示意图,将机体电源线 (包括地线)
连接到供电电源线上(图5)。
5 Make the power cord pass through the wooden
frame, push the fan body into wooden frame, to
fix the fan body and adaptor assembly. (Fig.7)
将电源线穿过木框,将机体推入木框,
使机体与接头组合固定(图7)。
Wiring should be firmly connected without any loose.
Connection example. (Fig.6)
电源线连接处必须牢固,不能有松动。
电源连接方法(图6)。
Fig.5 / Gb.5
Power cord
of the fan body
机体电源线
Green/Yellow
(Earth)
绿/黄(地线)
Terminal
(not supply)
接线端子座
(另购)
Earth
地线
Power
supply cord
供电电源线
Brown(L)
棕
■ Power cord should reserve more than 400 mm,
otherwise main body is hard to disassembly
when maintenance.
■ When the fan body is pushed into the wooden
frame, be careful not to pinch the power cord.
电源线要有400 mm以上的预留,否则维修时机
体难以拆卸。
机体推入木框时,请注意不要夹伤电源线。
HOW TO INSTALL
安装方法
Notice
提示事项
Notice
提示事项
Fig.6 / 图6
Fig.7 / 图7
Fan body
机体
8

Wooden frame
木框 Adaptor assembly
接头组合
Self-tapping screw
Φ4.2x20 (2 PCS)
自攻螺丝φ4.2x20(2颗)
Remove the
hexagon screw
去掉螺丝
Fan body
机体
Adaptor
assembly
接头组合
Ceiling
天花板
At least 20 mm
不小于20
mm
Fan body
机体
17CUH
177±2 240±2
24CUH
24CDH
24CHH
A Size (Square)
A尺寸(正方形)
Unit : mm
单位:
mm
30 mm
25~30 mm
□A
Wooden joist
木龙骨
Wooden frame
木框
Model No.
型号
HOW TO INSTALL
安装方法
Adaptor assembly should not fix at an angle.
固定接头组合时要注意不能和木框之间有角度
IMPORTAN
重要
Wooden frame
木框
1 Construct the wooden frame and attach it
horizontally to the wooden joist. (Fig.1)
1.机体的安装 方法一 使用木龙骨安装
在木龙骨上水平搭建木框(图1)。
3 Fix the adaptor assembly on wooden frame with 2
self-tapping screws of Φ4.2x20. (Fig.4)
按图示将接头组合紧靠木框固定,
并用自攻螺丝φ4.2x20(2颗)固定(图4)。
1. Fan body installation Method 1 install
with wooden joist.
The distance between the top of fan body and
ceiling should not be less than 20 mm. (Fig.2)
注意应保持机体顶部和天花板的距离不小于20 mm
(图2)。
Fig.1 / 图1
Fig.2 / 图2
Fig.3 / 图3
Fig.4 / 图4
2 Remove one hexagon screw that is fixed adaptor
assembly and fan body, then remove the adaptor
assembly. (Fig.3)
取下固定接头组合和机体的一颗螺丝,
按图示方法拆下接头组合(图3)。
Lead wire from
power source
PVC coated cord
(60227 IEC 53) ;
3x0.75 mm2
供电电源线
Power cord
电源线
Fan body
机体
Check whether the
hook is secure
检查钩环是否保护到位
Check whether it inserts firmly
检查是否插入牢固
Adaptor
assembly
接头组合
Adaptor assembly
接头组合
Power cord
电源线
Wooden frame
木框
Neutral(N)
零线
■ It is required to use terminal (not supply)
that complies IEC 60998.
■ Make sure all connections are fastened firmly
after wiring is finished.
Blue(N)
蓝
Live(L)
火线
Power
supply
Fan body
要求使用符合IEC60998的接线端子座(另购)。
接线完成后,必须检查所有连接是否牢固。
机体
供电电源线
4 Connect the power cord (included earth) of fan
body to lead wire in accordance with the wiring
diagram. (Fig.5)
根据接线示意图,将机体电源线 (包括地线)
连接到供电电源线上(图5)。
5 Make the power cord pass through the wooden
frame, push the fan body into wooden frame, to
fix the fan body and adaptor assembly. (Fig.7)
将电源线穿过木框,将机体推入木框,
使机体与接头组合固定(图7)。
Wiring should be firmly connected without any loose.
Connection example. (Fig.6)
电源线连接处必须牢固,不能有松动。
电源连接方法(图6)。
Fig.5 / Gb.5
Power cord
of the fan body
机体电源线
Green/Yellow
(Earth)
绿/黄(地线)
Terminal
(not supply)
接线端子座
(另购)
Earth
地线
Power
supply cord
供电电源线
Brown(L)
棕
■ Power cord should reserve more than 400 mm,
otherwise main body is hard to disassembly
when maintenance.
■ When the fan body is pushed into the wooden
frame, be careful not to pinch the power cord.
电源线要有400 mm以上的预留,否则维修时机
体难以拆卸。
机体推入木框时,请注意不要夹伤电源线。
HOW TO INSTALL
安装方法
Notice
提示事项
Notice
提示事项
Fig.6 / 图6
Fig.7 / 图7
Fan body
机体
9

Flange
法兰
Ceiling board
天花板嵌板
Keep the gap in the
range of 2~3 mm
间隙保持在2~3
mm
范围内
Gloves
手套
Groove
沟槽 Fixed spring
固定弹簧
Louver
面罩
Self-tapping screw
Φ4.2x20 (4 PCS)
自攻螺丝φ4.2x20
(4颗)
Fan body
机体
Screwdriver
螺丝刀 Gloves
手套
Hexagon screw
六角螺丝
HOW TO INSTALL
安装方法
6 Fix fan body firmly with 4 self-tapping screws
Φ4.2x20. (Fig.8)
用自攻螺丝φ4.2x20(4颗)将机体牢固的固定
(图8)。
■After finishing installation, please confirm whether
fan body and adaptor assembly are installed firmly.
用步骤②中拆下的螺丝将机体与接头组合牢固的
固定起来(图9)。
7 Fix adaptor assembly and fan body firmly with
hexagon screw removed in step ②. (Fig.9)
安装完成后,请确认机体与接头是否完全安装牢固。
Fig.8 /图8
Fig.9 /图9
Fig.10 /图10
Fig.11 /图11
8 Connect duct. refer to page 12
2. Connect duct
连接管道。→参考第12页
2. 管道连接
9 Install ceiling board, keep the gap of flange and
ceiling board in the range of 2~3 mm. (Fig.10)
安装天花板嵌板,使法兰与天花板嵌板的间隙
保持在2~3
mm范围内(图10)。
将面罩组合上的固定弹簧装入沟槽内,
将面罩装在机体上(图11)。
10 Insert the fixed spring of louver assembly into the
groove, install the louver to the fan body. (Fig.11)
10

Flange
法兰
Ceiling board
天花板嵌板
Keep the gap in the
range of 2~3 mm
间隙保持在2~3
mm
范围内
Gloves
手套
Groove
沟槽 Fixed spring
固定弹簧
Louver
面罩
Self-tapping screw
Φ4.2x20 (4 PCS)
自攻螺丝φ4.2x20
(4颗)
Fan body
机体
Screwdriver
螺丝刀 Gloves
手套
Hexagon screw
六角螺丝
HOW TO INSTALL
安装方法
6 Fix fan body firmly with 4 self-tapping screws
Φ4.2x20. (Fig.8)
用自攻螺丝φ4.2x20(4颗)将机体牢固的固定
(图8)。
■After finishing installation, please confirm whether
fan body and adaptor assembly are installed firmly.
用步骤②中拆下的螺丝将机体与接头组合牢固的
固定起来(图9)。
7 Fix adaptor assembly and fan body firmly with
hexagon screw removed in step ②. (Fig.9)
安装完成后,请确认机体与接头是否完全安装牢固。
Fig.8 /图8
Fig.9 /图9
Fig.10 /图10
Fig.11 /图11
8 Connect duct. refer to page 12
2. Connect duct
连接管道。→参考第12页
2. 管道连接
9 Install ceiling board, keep the gap of flange and
ceiling board in the range of 2~3 mm. (Fig.10)
安装天花板嵌板,使法兰与天花板嵌板的间隙
保持在2~3
mm范围内(图10)。
将面罩组合上的固定弹簧装入沟槽内,
将面罩装在机体上(图11)。
10 Insert the fixed spring of louver assembly into the
groove, install the louver to the fan body. (Fig.11)
Ceiling
天花板
Washer
垫圈
Anchor bolt
地脚螺栓
Suspension bracket
(not supply)
悬吊支架
(另购)
At least 20 mm
不小于20
mm
Tapping screw
ST4. 2×8
自攻螺丝
ST4. 2×8
Screw mounting
position
螺丝安装位置 23 mm
23 mm
Suspension
bracket
悬吊支架
Vibration-resitance rubber piece
(If necessary)
防震橡皮件
(如有必要)
Gloves
手套
Louver
面罩
Groove
沟槽 Fixed spring
固定弹簧
Rubber Washer
No.1 and No.2
(If necessary)
防震垫圈
No.1和No.2
(如有必要)
将机体安装在地脚螺栓(M8-M10另购)上。
注意应保持机体顶部和天花板的距离不小于20
mm
(图13)。
Model No.
型号
Net weight
净重
1. Fan body installation Method 2 install
with anchor bolt
1.机体的安装 方法二 使用地脚螺栓安装
17CUH
24CUH
24CDH
24CHH
1. 7 2.1
[k ]
HOW TO INSTALL
安装方法
Fig.12 /图12
Fig.13 /图13
Fig.14 /图14
1 Secure the suspension bracket (not supply) with
screws (not supply) (Fig.12).
用螺丝(另购)固定悬吊支架(另购)(图12)。
2 Install the fan body on the anchor bolt.
The distance between the top of fan body and
ceiling should not be less than 20 mm. (Fig.13)
Anchor bolt (M8-M10, not supply) refer to the
following form.
Suspension bracket must be made of metal with
sufficient strength.
悬挂支架必须由具有足够强度的金属制成。
The screw length is 8 mm.
自攻螺丝长度为8mm。
连接电源线→参考第9页
1.机体的安装方法一 使用木龙骨安装 ④
3 Connect power cord. refer to page 9
1. Fan body installation Method 1 install with
wooden joist ④.
将面罩组合上的固定弹簧装入沟槽内,进而安装在
机体上(图14)。
4 Insert the fixed spring of louver assembly into the
groove, install the louver to the fan body. (Fig.14)
Notice
提示事项
11

HOW TO INSTALL
安装方法
Vent cap
管盖
Adhesive tape
(not supply)
胶带(另购)
Inside
内侧 Outside
外侧
Gradient
斜度
Wall
墙壁
Duct (not supply)
管道(另购) 1
100
1
50
Pipe hood
(not supply)
管罩(另购)
1 Insert the duct (not supply) into the adaptor and secure it with adhesive tape (not supply) tightly.
Suspend the duct from the ceiling so that no force is applied to the fan body. Install the duct
horizontally with a gradient downwards to the outside. And the outlet of duct shall be located to avoid
the rain ingress.
将管道(另购)装入接头组合上,然后用胶带(另购)粘紧密闭,防止漏风。将管道悬挂在天花板上,
以防止外力施加于机体。管道水平向下倾斜的安装到外侧,其出口应设置在避免雨水进入的地方。
2. Connect duct
2.管道连接
The minimum diameter of the wall hole :
ø116 mm
墙壁的最小开口尺寸为:116 mm。
2 Insert the pipe hood or vent cap
(optional accessories) on the outer wall.
将管盖或管罩(需要另外选购)安装到墙外。
Notice
提示事项
MCX100K
VCX100K
Pipe hood
管罩
12

HOW TO INSTALL
安装方法
Vent cap
管盖
Adhesive tape
(not supply)
胶带(另购)
Inside
内侧 Outside
外侧
Gradient
斜度
Wall
墙壁
Duct (not supply)
管道(另购) 1
100
1
50
Pipe hood
(not supply)
管罩(另购)
1 Insert the duct (not supply) into the adaptor and secure it with adhesive tape (not supply) tightly.
Suspend the duct from the ceiling so that no force is applied to the fan body. Install the duct
horizontally with a gradient downwards to the outside. And the outlet of duct shall be located to avoid
the rain ingress.
将管道(另购)装入接头组合上,然后用胶带(另购)粘紧密闭,防止漏风。将管道悬挂在天花板上,
以防止外力施加于机体。管道水平向下倾斜的安装到外侧,其出口应设置在避免雨水进入的地方。
2. Connect duct
2.管道连接
The minimum diameter of the wall hole :
ø116 mm
墙壁的最小开口尺寸为:116 mm。
2 Insert the pipe hood or vent cap
(optional accessories) on the outer wall.
将管盖或管罩(需要另外选购)安装到墙外。
Notice
提示事项
MCX100K
VCX100K
Pipe hood
管罩
TEST RUN
试运转
Please check whether all kinds of anomalies below happen after connecting power.
(When motion sensor is detected, fan runs)
If anomalies happen, please check whether the installation is right.
• Blades doesn't run properly.
• Blades is clockwise rotation.
• Blades have abnormal vibration or noise.
在接通电源后,检查一下是否发生以下各种异常现象。
(当动作传感器感应到用户运动时,扇叶开始运转)
扇叶不正常的运转。
扇叶顺时针旋转。
发生不正常的声音或震动。
若出现异常现象,请检查是否安装正确。
Do not directly spray this product with
water and other liquids.
禁止用水及其他液体直接喷射、清洁本
产品。
Otherwise, it may cause short circuitor
electric shock.
否则可能会导致短路或触电。
否则可能会损坏本产品或导致火灾。
Otherwise, it may damage the
product or cause fire.
Do not let water flow into the motor.
禁止让水进入电动机。
Once flammable gas leaks, do not start
any function of this product.
Otherwise, it may generate sparkle and
this leads to explosion.
当发生煤气泄漏时,禁止开启本产品的任何功能。
否则可能会产生电火花而引起爆炸。
Warning
警告
MAINTENANCE
日常使用及维修
If you will not use this product any more,
remove the product.
如果以后不打算再使用本产品,不得放置不管,
而应予以拆除。
Otherwise, the product may fall down and it
may cause injury.
万一掉落,可能会导致受伤。
Power switch
电源开关
13

Please wear the gloves when cleaning
the product.
清洁时请带上手套。
Awas 注意
Caution
MAINTENANCE
日常使用及维修
Otherwise, it may cause damage.
否则可能会导致受伤。
This product is applicable to living rooms,
washrooms and other places where the
humidity is not too high.
Otherwise, it may lead to short circuit
or electric shock.
否则可能会引起短路或触电。
本产品须安装在起居室、卫生间等湿度
不太高的场所。
Never immerse blade or other resin parts in hot water over 60 °C.
请勿把塑料部品浸入高于60 ℃的水中。
Never use petrol, benzene thinner or any other such chemicals for cleaning the product.
请勿使用汽油、苯、稀释剂或其他诸如此类的化学品擦拭换气扇。
Cleaning Precautions
清洁提示事项
Warning
警告
14

Please wear the gloves when cleaning
the product.
清洁时请带上手套。
Awas 注意
Caution
MAINTENANCE
日常使用及维修
Otherwise, it may cause damage.
否则可能会导致受伤。
This product is applicable to living rooms,
washrooms and other places where the
humidity is not too high.
Otherwise, it may lead to short circuit
or electric shock.
否则可能会引起短路或触电。
本产品须安装在起居室、卫生间等湿度
不太高的场所。
Never immerse blade or other resin parts in hot water over 60 °C.
请勿把塑料部品浸入高于60 ℃的水中。
Never use petrol, benzene thinner or any other such chemicals for cleaning the product.
请勿使用汽油、苯、稀释剂或其他诸如此类的化学品擦拭换气扇。
Cleaning Precautions
清洁提示事项
Warning
警告
Gloves
手套
Vacum cleaner
吸尘器
Gloves
手套
Gloves
手套
Groove
沟槽
Louver
面罩
Louver
面罩
Groove
沟槽 Fixed spring
Pegas
固定弹簧
Louver
面罩
Gloves
手套
Fixed spring
Pegas
固定弹簧
1 Remove the louver. (Fig.15)
拆下面罩(图15)。
MAINTENANCE
日常使用及维修
Clean product
清洁产品
Fig.15 /图15
Fig.16 /图16
Fig.17 /图17
Fig.18 /图18
Fig.19 /图19
2 Clean Louver. (Don’t put into hot water.
Use non-abrasive kitchen detergent, wipe dry with
clean cloth) (Fig.16)
The Louver should be dry after cleaning.
用水冲洗面罩,干净的面罩请用柔软的干布擦干或
风干(图16)。
3 Clean the dirt of blades with vacuum cleaner.
(Fig.17)
使用吸尘器清除扇叶上的污物(图17)。
4 Wipe the dust off the fan body with a soft cloth
moistened with kitchen detergent, and then clear
it with a clean soft cloth. (Fig.18)
使用软布沾上厨房用洗涤剂后擦掉扇叶上的污物,
再用干净软布擦净(图18)。
5 Finally, install the louver again. (Fig.19)
最后,重新装上面罩(图19)。
15

WIRING DIAGRAM
电气原理图
17CUH 24CUH 24CDH 24CHH
Red
Thermal fuse
(In motor)
Green/Yellow
L
N
Capacitor
Double
pole
switch
Brown Brown
BlueBlack
Red
Thermal fuse
(In motor)
115 °C 134 °C
Green/Yellow
L
N
Capacitor
Double
pole
switch
Brown Brown
Black
BlueWhite
SPECIFICATIONS
规格
■ Insulation class B IP code :IPX2
The above specification may be changed without further notice.
上述参数如有变动,恕不另行通知。■B级绝缘 IP代码: IPX2
Voltage
17CUH
220
230
240
230
230
220
230
240
230
220
240
230
220
230
240
24CUH
24CDH
24CHH
[V]
电压
Net weight
1. 7
2.7
2.7
2.7
[k ]
净重
230
Frequency
50
50
50
60
60
50
50
50
60
50
50
60
50
50
50
[Hz]
频率
50
Power
consumption
7. 5
8.5
9.5
10.0
22.5
10.5
11. 0
12.0
13.5
13.5
16.5
19.0
16.5
18.0
19.5
[W]
耗电量
15.0
Noise
23.0
24.5
26.0
24.0
34.0
25.0
26.0
27.0
26.5
28.5
31.5
31.0
32.0
34.0
35.0
[dB]
噪音
30.0
Air delivery
85
85
90
85
200
140
150
160
150
170
190
180
200
210
210
[m3/h]
风量
180
Static pressure
110
110
110
130
135
100
100
100
130
100
100
140
100
100
110
[Pa]
静压
100
Model No.
型号
16

MEMO
WIRING DIAGRAM
电气原理图
17CUH 24CUH 24CDH 24CHH
Red
Thermal fuse
(In motor)
Green/Yellow
L
N
Capacitor
Double
pole
switch
Brown Brown
BlueBlack
Red
Thermal fuse
(In motor)
115 °C 134 °C
Green/Yellow
L
N
Capacitor
Double
pole
switch
Brown Brown
Black
BlueWhite
SPECIFICATIONS
规格
■ Insulation class B IP code :IPX2
The above specification may be changed without further notice.
上述参数如有变动,恕不另行通知。■B级绝缘 IP代码: IPX2
Voltage
17CUH
220
230
240
230
230
220
230
240
230
220
240
230
220
230
240
24CUH
24CDH
24CHH
[V]
电压
Net weight
1. 7
2.7
2.7
2.7
[k ]
净重
230
Frequency
50
50
50
60
60
50
50
50
60
50
50
60
50
50
50
[Hz]
频率
50
Power
consumption
7. 5
8.5
9.5
10.0
22.5
10.5
11. 0
12.0
13.5
13.5
16.5
19.0
16.5
18.0
19.5
[W]
耗电量
15.0
Noise
23.0
24.5
26.0
24.0
34.0
25.0
26.0
27.0
26.5
28.5
31.5
31.0
32.0
34.0
35.0
[dB]
噪音
30.0
Air delivery
85
85
90
85
200
140
150
160
150
170
190
180
200
210
210
[m3/h]
风量
180
Static pressure
110
110
110
130
135
100
100
100
130
100
100
140
100
100
110
[Pa]
静压
100
Model No.
型号
17

MEMO
MEMO
18

MEMO
19

17CUH4061A
V1222-1063
Head office: 4017, Takaki-cho, Kasugai, Aichi, Japan
Other manuals for 17CUH
2
This manual suits for next models
3
Table of contents
Other KDK Fan manuals
Popular Fan manuals by other brands

Harbor Breeze
Harbor Breeze TIEMPO E-TM52BNK5CS installation guide

Quimipol
Quimipol M Series instructions

Kichler Lighting
Kichler Lighting ETL instruction manual

Helios
Helios KWL EC 60 Eco Installation and operating instructions

KICE
KICE KF Series Operator's manual

Titon
Titon HRV1.25 Q Plus ECO Warnings and safety instructions