Kidde GSA-CC1 Assembly instructions

© 2017 United Technologies Corporation 1 / 6 P/N P-047550-1802-EN • REV 05 • ISS 03FEB17
GSA-CC1 Single Input Signal Module
Installation Sheet
Description
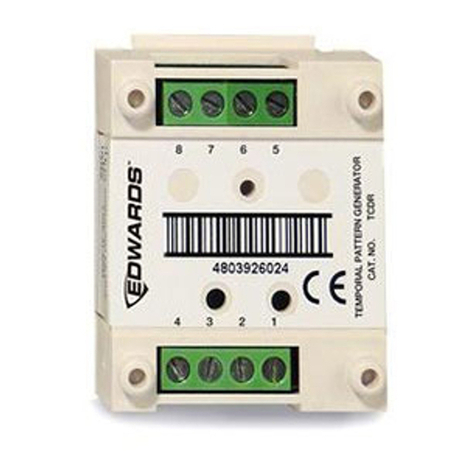
The GSA-CC1 Single Input Signal Module is an addressable
module that is used to connect the following circuits:
• Audible and visible notification appliance circuits
(synchronized or unsynchronized)
• Speaker circuits
• Two-way telephone communication circuits (three-state or
four-state)
Upon command from the loop controller, the module connects
supervised Class B signal or telephone circuits to the
respective riser input. The riser input can be 24 VDC (to
operate polarized audible and visible signal notification
appliances), 25 or 70 VRMS (to operate audio evacuation
speakers), or firefighter telephones.
The module does not provide signal synchronization. To meet
UL 864 requirements for horn and strobe signal
synchronization, you must install a Genesis Signal Master
module.
The GSA-CC1 module requires one address on the signaling
line circuit (SLC). Addresses are assigned electronically. There
are no address switches.
Diagnostic LEDs provide visible indication of the state of the
module through the cover plate:
• Normal: Green LED flashes
• Alarm/active: Red LED flashes
Personality codes
The module requires the loop controller to download the
personality code that determines how the module operates.
Use the personality codes described below to configure the
GSA-CC1. See Table 1 for listing information.
Table 1: Personality code listing information
Code Description UL 864 CAN/ULC-
S527
5 Signal - supervised
output (Class B)
Yes Yes
6 Telephone - three-state
(Class B)
No No
26 Telephone - four-state
(Class B)
Yes Yes
Personality code 5: Signal - supervised output (Class B).
Configures the GSA-CC1 module as a riser selector for audible
and visible notification appliance circuits or for
single-channel audio circuits. The output circuit is monitored for
open or shorted wiring. If a short exists, the module will not
activate in order to prevent shorting the riser. The module will
activate once the short is cleared.
Personality code 6: Telephone - three-state (Class B)
Configures the module as a riser selector for a three-state
firefighter telephone. When a telephone handset is plugged
into its jack or lifted from its hook, the module generates its
own ring-tone signal, making a separate ring-tone riser
unnecessary. The module sends this signal to the control panel
to indicate the presence of an off-hook condition, and waits for
the system operator to respond to the call. When the system
operator responds, the ring-tone signal is disabled.
Personality code 26: Telephone - four-state (Class B).
Configures the module as a riser selector for a four-state
firefighter telephone. Operation is the same as Personality
code 6 except that the module can distinguish when a
telephone is off-hook and when the circuit is shorted, which
causes a trouble condition.

2 / 6 P/N P-047550-1802-EN • REV 05 • ISS 03FEB17
Installation
Notes
• The module is shipped from the factory as an assembled
unit; it contains no user-serviceable parts and should not
be disassembled.
• This module does not operate without electrical power. As
fires frequently cause power interruption, discuss further
safeguards with the local fire protection specialist.
Install in accordance with all applicable local codes and
standards and the local authority having jurisdiction.
To install the module:
1. Wire in accordance with “Wiring” below.
2. Write the address assigned to the module on the label
provided, and then apply the label to the module. Remove
the serial number label from the detector and, and then
attach it to the project documentation.
3. Using the screw provided, mount the wall plate on the
module. See Figure 1 for mounting details.
4. Using the screws provided, mount the wall plate (with the
module attached) on one of the compatible electrical
boxes listed in “Specifications” on page 6.
Figure 1: Mounting the GSA-CC1 module
(1) Compatible electrical box
(2) 2-gang ring cover (if required)
(3) Module
(4) Wall plate, (dual-gang)
(5) #6-32 × 5/8 screw (4X)
(6) #4 × 1/2 self-tapping screw
Protection from transient spikes
For installations in which the output circuit connects to
electromechanical bells or horns, install a Bipolar Transient
Protector (P/N 235196P) to prevent inductive loads from
causing transient spikes.
To install a bipolar transient protector:
1. Install the transient protector on the output of the module.
Fit the transient protector into the electrical box with the
module. See Figure 2.
Figure 2: Bell circuit showing bipolar transient protector
placement
1. Normal state 2. Active state
Wiring
Wire in accordance with applicable requirements of the latest
editions of the local codes and standards and the local
authority having jurisdiction.
Strip 1/4 in. (about 6 mm) from the ends of all wires that
connect to the terminal block of the module.
Note: When stripping wire ends, exposing more wire may
cause a ground fault; exposing less wire may result in a faulty
connection.
General wiring notes
• Refer to the Signature loop controller installation sheet for
SLC wiring specifications. Refer to the firefighter phone
installation sheet for additional details.
• Each terminal on the module is limited to a single
conductor.
• Test resistors are supplied with the GSA-CC1 to prevent
trouble signals on unused circuits during installation.
When connecting field wires, remove the test resistors and
install a UL/ULC Listed 47 kΩEOLR at the end of the
circuit.
• The module does not support conventional smoke
detectors.
Riser notes
• For maximum line impedance, refer to the installation
manual for the fire alarm panel. Maximum circuit
capacitance is 0.1 µF.
• If the riser is used for more than one notification zone,
install in accordance with the survivability from attack by
fire requirements in NFPA 72 National Fire Alarm and
Signaling Code.
• Circuit and riser wiring is different when four-state
firefighter telephones are installed on three-state circuits.
Before replacing a GSA-CC1 module, tag the wires to
ensure correct reconnection.
• The GSA-CC1 module does not supervise the riser; the
fire alarm control panel provides this function.
(
1
)
(2)
(3)
(4)
(5)
(6
)
10 9
(
1
)
(
2
)

P/N P-047550-1802-EN • REV 05 • ISS 03FEB17 3 / 6
To wire the module:
1. Verify that all field wiring is free of opens, shorts, and
ground faults.
2. Make all the connections as shown in Figure 3 through
Figure 5.
Figure 3: Wiring diagram for NAC (personality code 5)
(1) Signal polarity is shown when the circuit is in supervisory state.
Polarity reverses when the circuit is active.
(2) Supervised.
(3) Power-limited unless connected to a nonpower-limited source. If
the source is nonpower-limited, eliminate the power-limited mark
and maintain a minimum of 0.25 in.
(6.4 mm) space from power-limited wiring. For other mounting
methods, see enclosure and bracket installation sheets to
maintain separation of power-limited and nonpower-limited
wiring. The wire size must be capable of handling fault current
from nonpower-limited source.
— or —
Use type FPL, FPLR, FPLP, or permitted substitute cables,
provided these power-limited cable conductors extending beyond
the jacket are separated by a minimum of 0.25 in. (6.4 mm)
space or by a nonconductive sleeve or nonconductive barrier
from all other conductors. Refer to the NFPA 70 National
Electrical Code for more details.
(4) If using a G1-P Genesis series horn while connected to a
compatible fire alarm control panel, a CDR-3 Bell Coder must
be used to comply with NFPA 72 standard alarm evacuation
signal.
(5) 47 kΩEOLR.
(6) Signaling line circuit (SLC) to next device.
(7) AUX riser (to next module or riser supervisory device).
(8) Power-limited regulated, power supply UL/ULC Listed for fire
protective signaling systems.
(9) AUX riser (from previous device).
(10) Signaling line circuit (SLC) from previous device. Supervised
and power-limited.
(6)
+
+
(7)
+
+
(1)(2)(3)(4)
(
3
)(
8
)
(9)
(10)
+(5)

4 / 6 P/N P-047550-1802-EN • REV 05 • ISS 03FEB17
Figure 4: Wiring diagram for audio (personality code 5)
(1) Signal polarity shown when the circuit is in supervisory state.
Polarity reverses when the circuit is active.
(2) Supervised.
(3) Power-limited unless connected to a nonpower-limited source. If
the source is nonpower-limited, eliminate the power-limited mark
and maintain a minimum of 0.25 in.
(6.4 mm) space from power-limited wiring. For other mounting
methods, see enclosure and bracket installation sheets to
maintain separation of power-limited and nonpower-limited
wiring. The wire size must be capable of handling fault current
from nonpower-limited source.
— or —
Use type FPL, FPLR, FPLP, or permitted substitute cables,
provided these power-limited cable conductors extending beyond
the jacket are separated by a minimum of 0.25 in. (6.4 mm)
space or by a nonconductive sleeve or nonconductive barrier
from all other conductors. Refer to the NFPA 70 National
Electrical Code for more details.
(4) Unshielded twisted pair.
(5) 47 kΩEOLR (P/N EOL-47).
(6) Signaling line circuit (SLC) to next device.
(7) Audio riser (to next module or supervisory end of line device).
(8) Unshielded twisted pair. Use shielded twisted pair when
installed in the same conduit as with a telephone riser.
(9) Audio riser (from previous device).
(10) Signaling line circuit (SLC) from previous device. Supervised
and power-limited.
(5)
(1)(2)(3)(4)
+
+
+
+
(6)
(7)
(9)
(10)

P/N P-047550-1802-EN • REV 05 • ISS 03FEB17 5 / 6
Figure 5: Class B telephone (personality codes 6 and 26)
Three-state telephone circuit (personality code 6)
Four-state telephone circuit (personality code 26)
(1) Telephone circuit. The plus and minus symbols indicate
signal polarity.
(2) Supervised.
(3) Power-limited unless connected to a nonpower-limited
source. If the source is nonpower-limited, eliminate the
power-limited mark and maintain a minimum of 0.25 in.
(6.4 mm) space from power-limited wiring. For other
mounting methods, see enclosure and bracket installation
sheets to maintain separation of power-limited and
nonpower-limited wiring. The wire size must be capable of
handling fault current from nonpower-limited source.
— or —
Use type FPL, FPLR, FPLP, or permitted substitute cables,
provided these power-limited cable conductors extending
beyond the jacket are separated by a minimum of 0.25 in.
(6.4 mm) space or by a nonconductive sleeve or
nonconductive barrier from all other conductors. Refer to
the NFPA 70 National Electrical Code for more details.
(4) Required if the distance from the GSA-CC1 to the phone is
greater than 5 ft. Shield must be continuous, insulated, and
isolated from ground, except for the connection to chassis
ground in the control panel.
(5) 47 kΩEOLR (P/N EOL-47).
(6) Signaling line circuit (SLC) to next device.
(7) Telephone riser (to next module or end-of-line supervisory
device).
(8) Use shielded twisted pair. Shields must be continuous and
grounded at the panel end.
(9) Telephone riser (from previous device).
(10) Signaling line circuit (SLC) from previous device.
Supervised and power-limited.
(1)(2)(3)
(10)
(9)
(6)
(7)
(5
)
(4)
(3)(8)
(1)(2)(3)
(10)
(9)
(6)
(7)
(5
)
(4)
(
3
)(
8
)

6 / 6 P/N P-047550-1802-EN • REV 05 • ISS 03FEB17
Specifications
Operating voltage range 15.20 to 19.95 VDC
Current
Standby
Activated
310 µA
135 µA
Maximum line impedance Refer to the control panel installation
manual
Ground fault impedance 10 kΩ
Output ratings (special
applications)
24 VDC
25 VRMS audio
70 VRMS audio
EOL resistor value
Circuit resistance
Circuit capacitance
2 A
50 W
35 W
47 kΩ
Refer to the control panel installation
manual
0.1 µF max.
EOLR 47 kΩ(P/N EOL-47)
Circuit designation
Signaling line circuits
Telephone riser circuits
Notification line circuits
Class A, Style 6 or Class B, Style 4
Class B, Style 4
Class B, Style Y
Compatible electrical boxes 2-1/2 in. (64 mm) deep dual-gang box;
4 in. square box 1-1/2 in. (38 mm)
deep box with a dual-gang cover
Wire sizes 12 to 18 AWG wire (0.75 to 2.5 mm²)
Operating environment
Temperature
Relative humidity
32 to 120°F (0 to 49°C)
0 to 93%, noncondensing
Storage temperature range −4 to 140°F (−20 to 60°C)
Regulatory information
FCC compliance This device complies with part 15 of the FCC
Rules. Operation is subject to the following two
conditions: (1) This device may not cause
harmful interference, and (2) this device must
accept any interference received, including
interference that may cause undesired operation.
North American
standards
CAN/ULC-S527, UL 864
Contact information
For contact information, see www.kiddelifesafety.com.
This manual suits for next models
1
Table of contents
Other Kidde Control Unit manuals

Kidde
Kidde CTM City Tie Assembly instructions

Kidde
Kidde AEGIS User manual

Kidde
Kidde Alarmline II User manual

Kidde
Kidde GSA-UM Assembly instructions

Kidde
Kidde FX-IDCWS Assembly instructions

Kidde
Kidde AEGIS 84-732001-001 User manual

Kidde
Kidde FX-2WIRE Assembly instructions

Kidde
Kidde GSA-REL Product manual

Kidde
Kidde ARIES User manual

Kidde
Kidde FX-IDC1A Assembly instructions