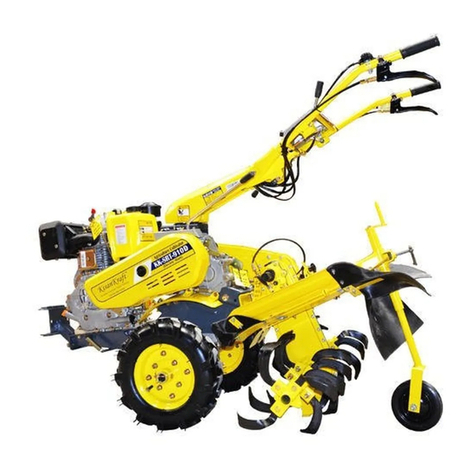
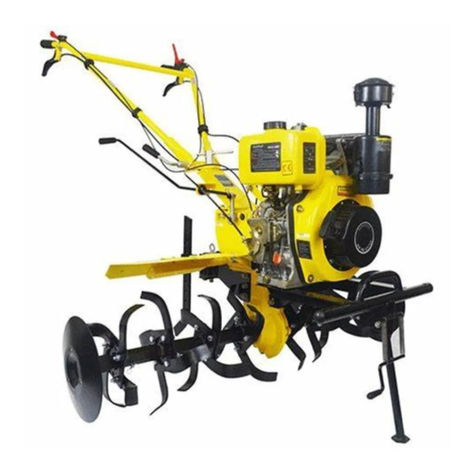
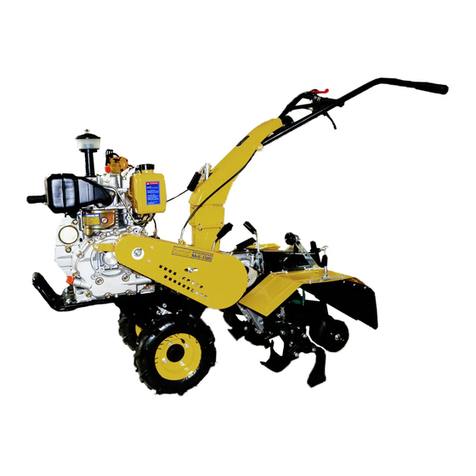
KISANKRAFT KK-CRT-550D User manual

KisanKraftTM
Warranty Certificate
(DEALER COPY)
This warranty is null & void, if you fail to register the warranty with
KisanKraft by sending the KisanKraft Copy with dealer’s stamp.
KisanKraft Machine Tools Private Limited
: www.kisankraft.com
: [email protected]om
: +91.80. 22178200
Page 1 of 80
Product Diesel Intercultivator /
Rotary Weeder
KisanKraftTM
Invoice Date
Brand KisanKraft KisanKraftTM
Invoice No.
Model
KK-IC-300D
KK-IC-350D
KK-CRT-550D
WARRANTY
PERIOD 6MONTHS
F
OR THE SPECIFIED PERIOD FROM THE
DATE OF SALE OR DELIVERY WHICHEVER
IS EARLIER.
Dealer’s
Invoice Date Dealer’s Invoice
No.
Buyer’s Info (Name, Address, Phone, etc.):
Dealer’s Stamp (Address, Phone, TIN,
etc.):
Buyer’s Sign Dealer’s Sign
What is covered: KisanKraft Machine Tools Private Limited and its manufacturers
warrant this product to be free from defects in material or workmanship. All parts
defective in material and workmanship are covered.
This warranty will only cover defects arising under normal usage.
This warranty is limited to repair or replacement by KisanKraft Machine Tools Private
Limited or its manufacturers at the premises of Authorized Dealers, of such parts as
appear to KisanKraft or its manufacturers, upon inspection, to be defective in material
and/or workmanship. KisanKraft or its manufacturers make no warranty with respect to
trade accessories not manufactured or sold by them.
What is not covered: The warranty shall become null and void and neither KisanKraft
Machine Tools Private Limited nor any of its manufacturers, nor its authorized dealers
assumes any responsibility, if the failure was caused by the following:
(1) Operation of product with incorrect fuel or lubricants, (2) Incorrect usage of machine
or misuse, (3) Lack of maintenance, (4) Negligence, (5) Accident or physical damage,
(6) Repairs made by unauthorized parties and/or with unauthorized parts, (7) Improper
set up, adjustments, tampering or altered products.

KisanKraftTM
Warranty Certificate
(DEALER COPY)
This warranty is null & void, if you fail to register the warranty with
KisanKraft by sending the KisanKraft Copy with dealer’s stamp.
KisanKraft Machine Tools Private Limited
: www.kisankraft.com
: [email protected]om
: +91.80. 22178200
Page 2 of 80
Important: (1) Normal maintenance and adjustments to the product is the responsibility
of the customer. (2) Normal wear and tear is not covered under warranty
(3) Rubber/plastic parts and consumables such as blades, clutch and clutch-bell, spark-
plugs, nylon line, air-filters, fuel-filters, oil seals etc. are not covered under the warranty.
No Warranty On Electrical Motor / Electrical Parts Etc.
Incidental / Consequential Loss: KisanKraft Machine Tools Private Limited or its
manufacturers will not be liable for general damages, including bodily injuries, or for
incidental or consequential damages including, but not limited to, loss of use, loss of
profits, loss of production, expense of substitute equipment or other commercial loss or
damage.
Limitation of Liability: This limited warranty is in lieu of all other express warranties,
obligations, or liabilities. Any implied warranties, obligations or liabilities, including, but
not limited to, any implied warranty of merchantability shall be limited in duration to the
applicable warranty period. Any action for breach of any warranty hereunder, including,
but not limited to, any implied warranty of merchantability must be brought within the
applicable warranty period.
Modifications of Warranty: No agent, representative, dealer, or employee of
KisanKraft Machine Tools Private Limited or any of its manufacturers has the authority
to increase or alter the obligations of this warranty.
Assignment / Transfer of warranty: The warranty cannot be assigned and shall not
transfer if the product is resold by the first buyer. The above warranties are extended to
the first end user (original purchaser), and no warranty is made, nor authorized to be
made assignable on resale by the first end user.
What you must do to obtain limited warranty service: To obtain performance of any
obligation under this warranty for failure during the applicable warranty period, deliver
the defective product, to the nearest Authorized Dealer. KisanKraft Machine Tools
Private Limited, its manufacturers and its dealers reserve the right to inspect the claimed
defective part(s) to determine if the malfunction is the result of a defect covered by this
warranty. Please note that the decision of KisanKraft Machine Tools Pvt Ltd with respect
to any warranty claim is final.
Receipt is required for availing warranty services
Jurisdiction: All disputes are subject to Bangalore court’s jurisdiction.
Our
Products
ChainsawsBrush Cutters and AccessoriesHarvesters
Engines and Water PumpsHand ToolsGarden Tools
Cultivators and AccessoriesSprayers and Accessories
Transplanter and Post Hole Digger Milking Machines
KisanKraftTM
DIESEL INTERCULTIVATOR/
ROTARY WEEDER
KK-CRT-550D -- KK- IC- 300D/350D
: www.kisankraft.com
: [email protected]om
: +91.80. 22178200
Page 3 of 80
Operation Manual
KK-IC-350D/KK-CRT-550D KK-IC-300D
KisanKraft Machine Tools Pvt. Ltd.
Sri Huchhanna Tower, #4, 1st Main, 7-A Cross, Maruthi Layout,
Dasarahalli, HAF Post, Hebbal, Bangalore 560024, Karnataka, INDIA
♦Bangalore (HO) ♦ Ahmedabad ♦ Bhopal ♦ Bhubaneswar ♦ Coimbatore ♦
♦Ernakulam ♦ Guwahati ♦ Mandi-HP ♦ Hinudpur ♦ Hubli ♦ Hyderabad ♦
♦Jaipur ♦ Karnal ♦ Kolkata ♦ Lucknow ♦ Nagpur ♦ Patna ♦ Pune ♦ Raipur ♦

KisanKraftTM
DIESEL INTERCULTIVATOR/
ROTARY WEEDER
KK-CRT-550D -- KK- IC- 300D/350D
: www.kisankraft.com
: [email protected]om
: +91.80. 22178200
Page 4 of 80
CONTENTS
Before Getting Started............................................................................7
Application .............................................................................................7
Safety Instructions..................................................................................7
Overview-KK-IC-350D/KK-CRT-550D .......................................................9
Overview-KK-IC-300D ........................................................................... 10
Scope- KK-IC-350D/KK-CRT-550D .......................................................... 11
Scope- KK-IC-300D ................................................................................ 11
Assembly - KK-IC-350D/KK-CRT-550D ................................................... 12
Unpacking Assembly ................................................................................................. 12
Installation and adjustment of cables ........................................................................ 13
Adjustments.............................................................................................................. 13
Assembly –IC-300D ............................................................................... 16
Assembly drawing of safety protection guard installation.......................................... 17
Installation and Adjustment for cable: Please See Figure 5 and 6 below. .................... 17
Checks and Refueling: ............................................................................................... 19
Connection of Auxiliary Devices & Tools .................................................................... 20
Before Operating an Engine .................................................................. 21
Starting the Engine ............................................................................... 22
Operation ............................................................................................. 23
Maintenance & Service......................................................................... 26
Troubleshooting ................................................................................... 28
Technical Specifications ........................................................................ 37
Parts Diagram & List- Engine................................................................. 39
Parts Diagram -Body-KK-CRT-550D/KK-IC-350D .................................... 47
Parts Diagram - Body IC-300D ............................................................... 65

KisanKraftTM
Warranty Certificate
(CUSTOMER COPY)
This warranty is null & void, if you fail to register the warranty with
KisanKraft by sending the KisanKraft Copy with dealer’s stamp.
KisanKraft Machine Tools Private Limited
: www.kisankraft.com
: [email protected]om
: +91.80. 22178200
Page 5 of 80
Product Diesel Intercultivator /
Rotary Weeder
KisanKraftTM
Invoice
Date
Brand KisanKraft KisanKraftTM
Invoice No.
Model
KK-IC-300D
KK-IC-350D
KK-CRT-550D
WARRANTY
PERIOD 6MONTHS
F
OR THE SPECIFIED PERIOD FROM THE
DATE OF SALE OR DELIVERY WHICHEVER
IS EARLIER.
Dealer’s
Invoice
Date
Dealer’s Invoice
No.
Buyer’s Info (Name, Address, Phone, etc.):
Dealer’s Stamp (Address, Phone, TIN,
etc.):
Buyer’s
Sign Dealer’s Sign
What is covered: KisanKraft Machine Tools Private Limited and its manufacturers
warrant this product to be free from defects in material or workmanship. All parts
defective in material and workmanship are covered.
This warranty will only cover defects arising under normal usage.
This warranty is limited to repair or replacement by KisanKraft Machine Tools Private
Limited or its manufacturers at the premises of Authorized Dealers, of such parts as
appear to KisanKraft or its manufacturers, upon inspection, to be defective in material
and/or workmanship. KisanKraft or its manufacturers make no warranty with respect
to trade accessories not manufactured or sold by them.
What is not covered: The warranty shall become null and void and neither KisanKraft
Machine Tools Private Limited nor any of its manufacturers, nor its authorized dealers
assumes any responsibility, if the failure was caused by the following:
(1) Operation of product with incorrect fuel or lubricants, (2) Incorrect usage of
machine or misuse, (3) Lack of maintenance, (4) Negligence, (5) Accident or physical
damage, (6) Repairs made by unauthorized parties and/or with unauthorized parts, (7)
Improper set up, adjustments, tampering or altered products

KisanKraftTM
Warranty Certificate
(CUSTOMER COPY)
This warranty is null & void, if you fail to register the warranty with
KisanKraft by sending the KisanKraft Copy with dealer’s stamp.
KisanKraft Machine Tools Private Limited
: www.kisankraft.com
: [email protected]om
: +91.80. 22178200
Page 6 of 80
Important: (1) Normal maintenance and adjustments to the product is the
responsibility of the customer. (2) Normal wear and tear is not covered under warranty.
(3) Rubber/plastic parts and consumables such as blades, clutch and clutch-bell,
spark-plugs, nylon line, air-filters, fuel-filters, oil seals etc. are not covered under the
warranty.
No Warranty On Electrical Motor / Electrical Parts Etc.
Incidental / Consequential Loss: KisanKraft Machine Tools Private Limited or its
manufacturers will not be liable for general damages, including bodily injuries, or for
incidental or consequential damages including, but not limited to, loss of use, loss of
profits, loss of production, expense of substitute equipment or other commercial loss
or damage.
Limitation of Liability: This limited warranty is in lieu of all other express warranties,
obligations, or liabilities. Any implied warranties, obligations or liabilities, including, but
not limited to, any implied warranty of merchantability shall be limited in duration to the
applicable warranty period. Any action for breach of any warranty hereunder,
including, but not limited to, any implied warranty of merchantability must be brought
within the applicable warranty period.
Modifications of Warranty: No agent, representative, dealer, or employee of
KisanKraft Machine Tools Private Limited or any of its manufacturers has the authority
to increase or alter the obligations of this warranty.
Assignment / Transfer of warranty: The warranty cannot be assigned and shall not
transfer if the product is resold by the first buyer. The above warranties are extended
to the first end user (original purchaser), and no warranty is made, nor authorized to
be made assignable on resale by the first end user.
What you must do to obtain limited warranty service: To obtain performance of
any obligation under this warranty for failure during the applicable warranty period,
deliver the defective product, to the nearest Authorized Dealer. KisanKraft Machine
Tools Private Limited, its manufacturers and its dealers reserve the right to inspect the
claimed defective part(s) to determine if the malfunction is the result of a defect
covered by this warranty. Please note that the decision of KisanKraft Machine Tools
Pvt Ltd with respect to any warranty claim is final.
Receipt is required for availing warranty services
Jurisdiction: All disputes are subject to Bangalore court’s jurisdiction.
Our
Products
ChainsawsBrush Cutters and AccessoriesHarvesters
Engines and Water PumpsHand ToolsGarden Tools
Cultivators and AccessoriesSprayers and Accessories
Transplanter and Post Hole Digger Milking Machines

KisanKraftTM
DIESEL INTERCULTIVATOR/
ROTARY WEEDER
KK-CRT-550D/ KK-IC-300D/350D
: www.kisankraft.com
: [email protected]om
: +91.80. 22178200
Page 7 of 80
Before Getting Started
Thank you for purchasing our Inter-cultivator.
This manual can guide you to solve the problems when you are installing,
manipulating and repairing the machine. With the continuous innovation and
improvement of the products, the contents in the instruction manual may differ
slightly from the actual situations, your understanding and pardon is highly
appreciated. If you find some problems or have some good suggestions, please
do not hesitate to contact your dealer.
No part of this publication may be reproduced without written permission.
This manual should be considered a permanent part of the cultivator and remain
with it if it is resold.
Application
This machine is small, lightweight, multi-functional, and with a high efficiency for cultivation.
It can climb hills, run in water, walk over the field ridges and ditches, move freely and change
the directions easily, and it is especially applicable to various works in hilly area, dry land,
paddy field, orchard, vegetable garden and greenhouse, etc. Cultivating, ditching & ridging,
and transport are the machine’s basic functions. Moreover, after being equipped with
relative devices and tools, it may be used to pump water, spray water and pesticide, reap
the crops, generate electricity, fertilizer, implant seeds, threshing, cut tendrils, grind
something, etc. The machine has a simple structure, can be easily repaired and its fuel
consumption is less. It is your ideal micro agricultural machine.
NOTE: KK-IC-350D and KK-CRT-550D have similar function. Additionally, KK-IC-350D
can work as a DITCHER.
Safety Instructions
Read the instructions carefully. Be familiar with the controls and the proper use
of the equipment.
Never allow children or people unfamiliar with these instructions to use the
machine.
Never work while people, especially children, or pets are nearby.
Operator or owner is responsible for accidents or hazards to other people or their
property.
Before starting the machine:
Ensure sufficient engine oil.
Press clutch during gear shifting.
Load after idling the machine for 5 minutes.
Close the choke for cold start
Keep the choke half open for hot start.
Before starting the machine, set shifting bar to the neutral position.
When the machine is working, pay attention to the safety!
Be careful not to be hurt by the rotary blades!
While grasping the reverse handle, the shifting bar must be set to the neutral
position.
Fuel and lubricant must be clean.

KisanKraftTM
DIESEL INTERCULTIVATOR/
ROTARY WEEDER
KK-CRT-550D/ KK-IC-300D/350D
: www.kisankraft.com
: [email protected]om
: +91.80. 22178200
Page 8 of 80
Clutch must be broken off when changing the shift.
Please read the contents of nameplate on the handle bar carefully before using
the machine.
Must install the safety protecting board on the machine before using machine or
after maintenance.
Muffler is a high
temperature spare part,
do not touch the Inter-
cultivator in work or out of
work freshly.
When the Inter-cultivator
is working, keep an eye
on the rotary parts, do not
be too close to the
machine to avoid being
hurt by the rotary blades.
Keep the components of
oil box away from fire and
smoke.
Keep this machine stable
before use and read the
instruction carefully
Please refuel on time
Please pay attention to
warning signs

KisanKraftTM
DIESEL INTERCULTIVATOR/
ROTARY WEEDER
KK-CRT-550D/ KK-IC-300D/350D
: www.kisankraft.com
: [email protected]om
: +91.80. 22178200
Page 9 of 80
Overview-KK-IC-350D/KK-CRT-550D
1. Hand control Assy
2. Trailer
3. Mud fender
4. Rotary cultivating equipment
5. Cultivating box Assy
6. Gear box Assy
7. Diesel engine
8. Chain transmission Assy
9. Bumper
10. Belt cover
11. Front tire
12. Rear wheel
13. Clutch handle
14. Throttle handlebar
15. Steering column

KisanKraftTM
DIESEL INTERCULTIVATOR/
ROTARY WEEDER
KK-CRT-550D/ KK-IC-300D/350D
: www.kisankraft.com
: [email protected]om
: +91.80. 22178200
Page 10 of 80
Overview-KK-IC-300D
1. Handle Bar
2. Gear-box Assy.
3. Adjustment Screw
4. Fender
5. Deep Furrowing Resistance
Stick
6. Rotary Blade
7. Side Disc
8. Stepped Box Assy.
9. Diesel Engine
10. Bumper
11. Throttle Switch
12. Battery base
13. Safety Device (Dead-man
Handle)
14. Locked Handle (Up & Down)
15. Locked handle (left & right)
16. Shifting Bar

KisanKraftTM
DIESEL INTERCULTIVATOR/
ROTARY WEEDER
KK-CRT-550D/ KK-IC-300D/350D
: www.kisankraft.com
: [email protected]om
: +91.80. 22178200
Page 11 of 80
Scope- KK-IC-350D/KK-CRT-550D
Rotary Cultivating:
Assemble cultivating blades on output shaft of cultivating gear box gear, and fix it with pin
and clip. Finally we change rear wheel to resistance rod to do cultivating work as given
below.
Rotary cultivating device mode
(Two + One) group
3 pcs
Rotary blades
3×6
Rotary cultivating scope
420-650mm
Ditching:
Take away resistance rod, install rear wheels, change cultivating blades into ditching
blades (look at table 3), and adjust the height of rear wheel. Finally we can do ditching
work
Ditching device
Standard accessories
Optional accessories
One group
One group
One group
5 pcs
4 pcs
6 pcs
Rotary blades
5×2
4×2
4×2
Rotary cultivating
scope
290-320mm 210-240mm 440-470mm
Multi- functional work: Take away rear wheels or resistance rod, match the relative tools
and accessories and carry out multifunctional work, such as covering mulch, reaping, and
chemical spraying
Scope- KK-IC-300D
Cultivating: Applicable to garden, tea plantation, orchard, sugarcane, corn land,
vegetables land, greenhouse etc., for rotary assignments.
Fix the tines onto the left and right side of the transmission shaft of the running part of the
Inter-cultivator, then use two M8×55 screw bolts for axial positioning. After that, the machine
can start cultivating. (See following table 2 and figures 2, 3)
Form of Tines
Four groups Five groups
3 blades 4 blades 3 blades 4 blades
No. of blades 3×8 4×8 3×10 4×10
Width of cultivation
(mm) 1050 1050 1350 1350
Applicable Soil
Paddy field without
too much water and
with Earth of high
moisture
Hard
earth
Wet
earth
after rain
Dry land or
with long
stump from
long-stem.
Crop.

KisanKraftTM
DIESEL INTERCULTIVATOR/
ROTARY WEEDER
KK-CRT-550D/ KK-IC-300D/350D
: www.kisankraft.com
: [email protected]om
: +91.80. 22178200
Page 12 of 80
Figure 2. Cultivating device
Figure 3. Ditching device
Ditching & Ridging: Knock down the adjustment screw before the ditcher is fixed. Subject
to the adjustment of the width and height for ditcher, the ditching can be conducted. (See
figure 3)
Short Distance Transport: When fixing the forearm of the wagon box on the trailer and
wheels on the transmission shaft of the running part, the machine can be used for
transportation. The rated load is 250kg, under normal rotation speed of the diesel engine,
speed of the fast shift is about 10km/h and that of the slow shift is about 5 km/h.
Multi-Functional Working: Dismount protection cover of the gear-box (No.2 in Figure 1),
unscrew the bolts away from the rear part of the main shaft, and take the cover for keys
out of the shaft, fasten the self-contained belt pulley or coupling onto the gear-box’s main
shaft’s rear part with screws. Type A of common V belt is adopted for belt pulley’s cross
section. Rated rpm of the belt pulley is 3000 rpm. When the corresponding devices are
equipped, pumping water, spraying, threshing, reaping, generating electricity, etc. are
realized. (Above additional implements are in exploration process.
Assembly - KK-IC-350D/KK-CRT-550D
Note: Two gear boxes are provided. One for tyre rotation and another one for tines
rotation. Both the gear boxes have two speeds High and low. Air filter is provided with 2-
stage (primary and secondary) filtration.
Unpacking Assembly
1. Take out rotary cultivator and accessories.
2. Fix the body of rotary cultivator, install walking wheels, then use pin 8×40 and clip to
fix them. Install rear wheels in the appropriate height, then use lock bolt to fix it.
3. Cultivating/ditching blades installation: install cultivating blades or ditching blades on
both sides of output shaft, edge towards forward, and then use pinM8×40 and clip to
fix it.
4. Mud fender (or narrow mud fender) and side mud fender installation: Install left and
right mud fenders on the cultivator, fixing with bolt M6×12 (8 pcs) and locknut M6 (8
pcs), and screw up by spanner. The adjustable part of mud fender place is as the
picture. Then install side mud fender on both sides and screw up small handles.
5. Handle bar installation: assemble handle bar components on cultivator. The handle
bar frame position is symmetrical accordingly for the cultivator, then use the locked pin
to fix the frame.

KisanKraftTM
DIESEL INTERCULTIVATOR/
ROTARY WEEDER
KK-CRT-550D/ KK-IC-300D/350D
: www.kisankraft.com
: [email protected]om
: +91.80. 22178200
Page 13 of 80
Installation and adjustment of cables
Adjustment of clutch cable (Look at picture 1)
1. Unlock nuts on the screw rod.
2. Instantaneously rotate the screw rod to show the shortest part of the handle bar.
3. Connect the clutch cable head into clutch plug behind the gear box assy, thread the
cable into axis pin M6×20, and fix with jump ring.
4. Properly pull down the clutch cable and fix the clutch cable head to handle bar
bottom.
5. Rotate out the screw rod and clip it repeatedly, unlock the clutch handlebar until
spring force of clutch can reset the bar, finally fasten the nuts.
Picture 1
Adjustments
1.1 Adjustment of handle bar height.
Loosen the regulating handle, adjust the
handle frame to suitable position, screw
into the regulating handle, and tighten the
wing nut.
Loosen the locked handlebar and
standpipe, standpipe and handle frame
can be rotated in 330 °, which has 18
positions. Then tighten the locked handle,
operate the rotary cultivator through
adapting to different position.
1.2 Adjustment of cultivating depth
Adjust resistance rod downwards, cultivating depth will increase. Adjust resistance
rod upwards, cultivating depth will decrease.
1.3 Usage and adjustment of clutch.
Control power output of engine by clutch.
When clutch handle is loosen, clutch is opened, the engine stops inputting power
to cultivator, cultivator blades stop rotating (Look at picture 5)
When we clench the handle lock, clutch is connected. In this condition, power is
transmitted to cultivator, blades begin to work. (Look at picture 6)
Throttle cable
Throttle switch
Lock nut
Shut down switch
Clutch handle
bar
Clutch cable
Screw rod

KisanKraftTM
DIESEL INTERCULTIVATOR/
ROTARY WEEDER
KK-CRT-550D/ KK-IC-300D/350D
: www.kisankraft.com
: [email protected]om
: +91.80. 22178200
Page 14 of 80
Picture 5
Picture 6
1.4 Gear Choice
Gear box has 5 shifts, including neutral position. The gears are optional as given
below.
Gear box
Cultivating box(Using with chain box
together)
Transmission speed(km/h)
Blades rotary speed (rpm)
Forward
Stop
Back
Fast
Stop
Slow
Slow
Fast
Neutral
Slow
Fast
High
Low
Neutral
High
Low
2.55
4.83
1.82
3.45
553
299
311
168
Changing the gear
Counterclockwise turn the throttle switch to the right position (mini).
Clench clutch handlebar, and make clutch open.
Change shift lever to the gear you need.
Loosen clutch handlebar, make machine into the changed gear, then open the
throttle to increase the speed into the work.
If necessary, we may start engine to check if clutch is working.
2 Pay attention to the following while using rotary cultivator
2.1 When using cultivator, you should pay attention to the working situation and the
sound, check the connection. If there is abnormal situation, you should stop the
rotary cultivator and check.
2.2 Never carry out work in heavy load condition if cultivator has not been used for
some time, especially for the new ones or the repaired ones.
2.3 Pay attention to the oil level of diesel engine and gear box. Please refuel oil in
insufficient condition.
2.4 Never cool the diesel engine in the way of water-pouring.
2.5 Prevent rotary cultivator from falling down when cultivating.
2.6 Never install mini cultivator with rotary blades work on sand or stone to avoid
damaging blades.
2.7 After cultivating, pay attention to clear away dirtiness in the rotary cultivator, such
as mud, grass and oil stain.
2.8 Frequently wash the sponge in the air filter and change oil more often.
2.9 Ridging or weeding: Assemble ridging or weeding blades to the cultivating box, turn
handlebar to the direct of engine. When cultivating, cultivating box is front and gear
box is rear. According to the falling soil position, we adjust mud fender or side mud
fender.

KisanKraftTM
DIESEL INTERCULTIVATOR/
ROTARY WEEDER
KK-CRT-550D/ KK-IC-300D/350D
: www.kisankraft.com
: [email protected]om
: +91.80. 22178200
Page 15 of 80
3. Adjustment of belt tension
3.1 Normal range of belt tension
degree is 25mm or so, when we
loosen brake handle, tension pulley
moves upward to press tightly belt
and transmission begins to work,
when we clench clutch handle,
tension pulley moves down to make
belt loosen, engine stops to input
transmission to gear box.
Loosing condition of clutch handlebar
3.2 If belt tension degree is not in
the normal range, it’s necessary to
adjust. To loosen the four fixed
bolts of the engine, if the belt is too
loose, we make the engine move
forward, if the belt is too tight, we
make the engine move backward,
until tension level is in the normal
range. Tighten the four fixed bolts of
the engine.
Clenching condition of clutch handlebar

KisanKraftTM
DIESEL INTERCULTIVATOR/
ROTARY WEEDER
KK-CRT-550D/ KK-IC-300D/350D
: www.kisankraft.com
: [email protected]om
: +91.80. 22178200
Page 16 of 80
Assembly –IC-300D
1. Fix the main machine; insert the hexagonal output shaft onto stepped box’s
output casing’s hexagonal hole.
2. Fix the hexagonal stop casing onto the hexagonal output shaft with M6×6 socket
head screws, and make sure the hexagonal shaft does not move axially.
3. Wheel fixing: fix the wheels at the two sides of the Hexagonal output shaft, and
fix them with two M8×55 bolts and M8 nuts.
4. Trailer fixing: Fix the link group onto the trailer, use the link shaft assembly for
connection, insert the split pin ¢3×26 and insert the velocity adjustment screw
into square groove of the link group, and fix it with M8×55 bolts and nuts.
5. Handle bar fixing: Two gear discs of the handle bar support aim at the discs of
the handle bar support base, and adjust the positions. Fix them with M16×140
bolts, flat gasket 16 and spring gasket16.
6. Shifting bar assembly: Get the shifting bar through the groove of shift support
in the handle bar support base, and insert it into the hole of the shift casing, then
fix it with split pin ¢3.2 ×16. Set the shifting bar in neutral position.

KisanKraftTM
DIESEL INTERCULTIVATOR/
ROTARY WEEDER
KK-CRT-550D/ KK-IC-300D/350D
: www.kisankraft.com
: [email protected]om
: +91.80. 22178200
Page 17 of 80
Assembly drawing of safety protection guard installation.
1. Bracket of collision bumper(left)
2. Bracket of collistion
bumper(front)
3. Bolt m8 (bg5781-86)
4. Bracket of collision
bumper(right)
5. Nut m8(gb41-86)
6. Spring washer ¢8(gb93-87)
7. Washer ¢8(gb95-85)
8. Stand (diesel)
9. Bracket(right)
10. Nut m6(gb41-86)
11. Spring washer ¢6(gb93-87)
12. Washer ¢6(gb95-85)
13. Bolt m6×10(gb5781-86)
14. Fender for paddy field (right)
15. Fixty of safety protection guard
16. Safety protection guard(right)
17. Safety protection guard(left)
18. Fender for paddy field(left)
19. Dowel
20. Connecting plate
21. Bolt m8×50(gb5781-86)
22. Connector jointing assembly
23. Deep furrowing resistance stick
24. Bolt m8×25(gb5781-86)
25. Bulling set (trough comp
16mm)
26. Bracket of fender comp
27. Bracket (left)
ATTENTION: After maintenance the safety protection guard installment must be fixed on
the Inter-cultivator wholly.
Installation and Adjustment for cable: Please See Figure 5 and 6
below.
1. Unscrew the locknut of the tie rod.
2. Spin the tie rod clockwise until the exposed handle support is the shortest.
3. Get the joint of cable into the clutch wire socket of rear part of the gear-box
assembly, and ensure the joint of cable goes into the hole of the socket.
4. Get the wire into the M8 hole on base of the clutch fork arm, properly press the
fork arm of the clutch, and put the joint of cable into the wire socket.
5. Unscrew the tie rod, grasp and loosen the clutch handle until the spring force in
the clutch can reset the handle, then screw the locknut.

KisanKraftTM
DIESEL INTERCULTIVATOR/
ROTARY WEEDER
KK-CRT-550D/ KK-IC-300D/350D
: www.kisankraft.com
: [email protected]om
: +91.80. 22178200
Page 18 of 80
Figure 5
Figure 6
Adjustment of the reversing gear cable: (See Figure 5 and 6)
1. Unscrew the locknut of the tie rod.
2. Spin the tie rod clockwise until the bare handle support is the shortest.
3. Get the cable into the reversing fork shaft besides the gear-box, and ensure the
joint of cable goes into the hole of the fork shaft.
4. Properly pull the reversing fork shaft counterclockwise, get the cable into the
narrow gap of the reversing wire socket besides the gear-box, and ensure the
pipe head goes into the hole of the wire socket.
5. Unscrew the tie rod, grasp and loosen the clutch handle until the spring force in
the clutch can reset the handle, then screw the locknut.

KisanKraftTM
DIESEL INTERCULTIVATOR/
ROTARY WEEDER
KK-CRT-550D/ KK-IC-300D/350D
: www.kisankraft.com
: [email protected]om
: +91.80. 22178200
Page 19 of 80
Adjustment of the throttle cable:
(See Figure 7 )
Shift the throttle switch
clockwise to minimum
positioning.
Get wire of the throttle cable
into the threading base and firm
base on
Top of the throttle adjustment
board of the diesel engine.
Tighten the wire, screw the
binding bolts on the firm base.
Adjust the throttle switch
repeatedly until the throttle
handle on the oil valve
adjustment board can reach
the maximum and minimum
position.
Checks and Refueling:
1. Check whether all the connection bolts are tight or not, and fix the connection bolts
according to the moment of force listed in table 3. (Refer to the instruction manual
for diesel engine for the screwing moment of force bolt and nut respectively)
Name of parts
Moment of force
(N.M)
Flange and the diesel engine
20-25
Flange and the gear-box
35-40
Binding bolts of end of driving shaft of gear-box
10-12
Binding bolts of reversing gear shaft of gear-box
26-40
Binding bolts between engine support and traveling
mechanism
35-40
Binding bolts of cover of the traveling mechanism
10.6-15
Binding bolts of trailer of the traveling mechanism
50-60
Connection bolts between traveling mechanism and gear-
box
35-40
Trailer unit
45-60
Set bolts of the diesel engine base
35-40
Set bolts of the handle support base
35-40
2. Check each handle of the manipulation system (throttle switch, clutch, shifting bar
and reversing bar) to see whether they can move freely or not. If they are out of the
right positions, make them at the right positions.
3. Pull shift bar of the gear-box to the neutral position.

KisanKraftTM
DIESEL INTERCULTIVATOR/
ROTARY WEEDER
KK-CRT-550D/ KK-IC-300D/350D
: www.kisankraft.com
: [email protected]om
: +91.80. 22178200
Page 20 of 80
4. Refilling the engine oil:
Refill the SAE10W-40 lubricant into the
crankcase of
The diesel engine. See Figure 9 for
details Make the whole machine stable
and horizontal, and refilling 20 # lubricant
engine oil into the gear-box from oil hole
at the top of the gear-box .when check
the oil level, put the oil dipstick into the
oil. (Note: not to turn the dipstick around),
the oil level should be between the two
limits of the oil dipstick. (refer to figure 8)
Select the appropriate lubricant for the diesel
engine according to the environmental
temperature. (See figure 9).
Fill in machine oil when diesel engine is placed
level, and checking the oil level only needs a poke
by dipstick rather than a rotation of dipstick.
Lubricant Oil grade shall be grade CC or CD.
5. Knock down the lower cover of the air cleaner, refill about 0.1 liter 20# engine oil
into the air cleaner.
Important Note: Do not exceed the mark when refilling.
Connection of Auxiliary Devices & Tools
1. When cultivating is needed: Knock down the wheels, fix the hexagonal union of
the cultivating device onto two ends of the hexagonal shaft of the running part, and
axially fix them with M8×55 bolt. Note: cultivating blades are divided into two groups,
namely, the left and the right. Fixing the blades should guarantee that when the
machine is running, the blade edge should work first. After fixing the blades, also fix
the left and right protection board for safety purpose. Depth of the cultivating can be
realized by adjusting height of the velocity adjustment screw and angles between
the lever and the ground (refer to table 4).
2. Cultivation of paddy field: When the submerged depth of human’s feet in the
paddy field is less than 25cm, bent blades for wet land can be directly used for the
cultivation of paddy field.
This manual suits for next models
2
Table of contents
Other KISANKRAFT Tiller manuals

KISANKRAFT
KISANKRAFT KK-SRT-910D User manual

KISANKRAFT
KISANKRAFT KK-IC-8626 User manual

KISANKRAFT
KISANKRAFT KK-IC-520 User manual

KISANKRAFT
KISANKRAFT KK-IC-650D User manual

KISANKRAFT
KISANKRAFT KK-IC-750RT User manual

KISANKRAFT
KISANKRAFT KK-IC-210P User manual

KISANKRAFT
KISANKRAFT KK-IC-410P User manual

KISANKRAFT
KISANKRAFT KK-SRT-910D User manual

KISANKRAFT
KISANKRAFT KK-IC-400D User manual

KISANKRAFT
KISANKRAFT KK-IC-100P User manual