Warranty Certificate
(DEALER COPY)
This warranty is null & void, if you fail to register the warranty with
KisanKraft by sending the KisanKraft Copy with dealer’s stamp.
KisanKraft Limited (formerly known as KisanKraft Machine Tools P Ltd)
Page 2 of 48
Important: (1) Normal maintenance and adjustments to the product is the responsibility
of the customer. (2) Normal wear and tear is not covered under warranty
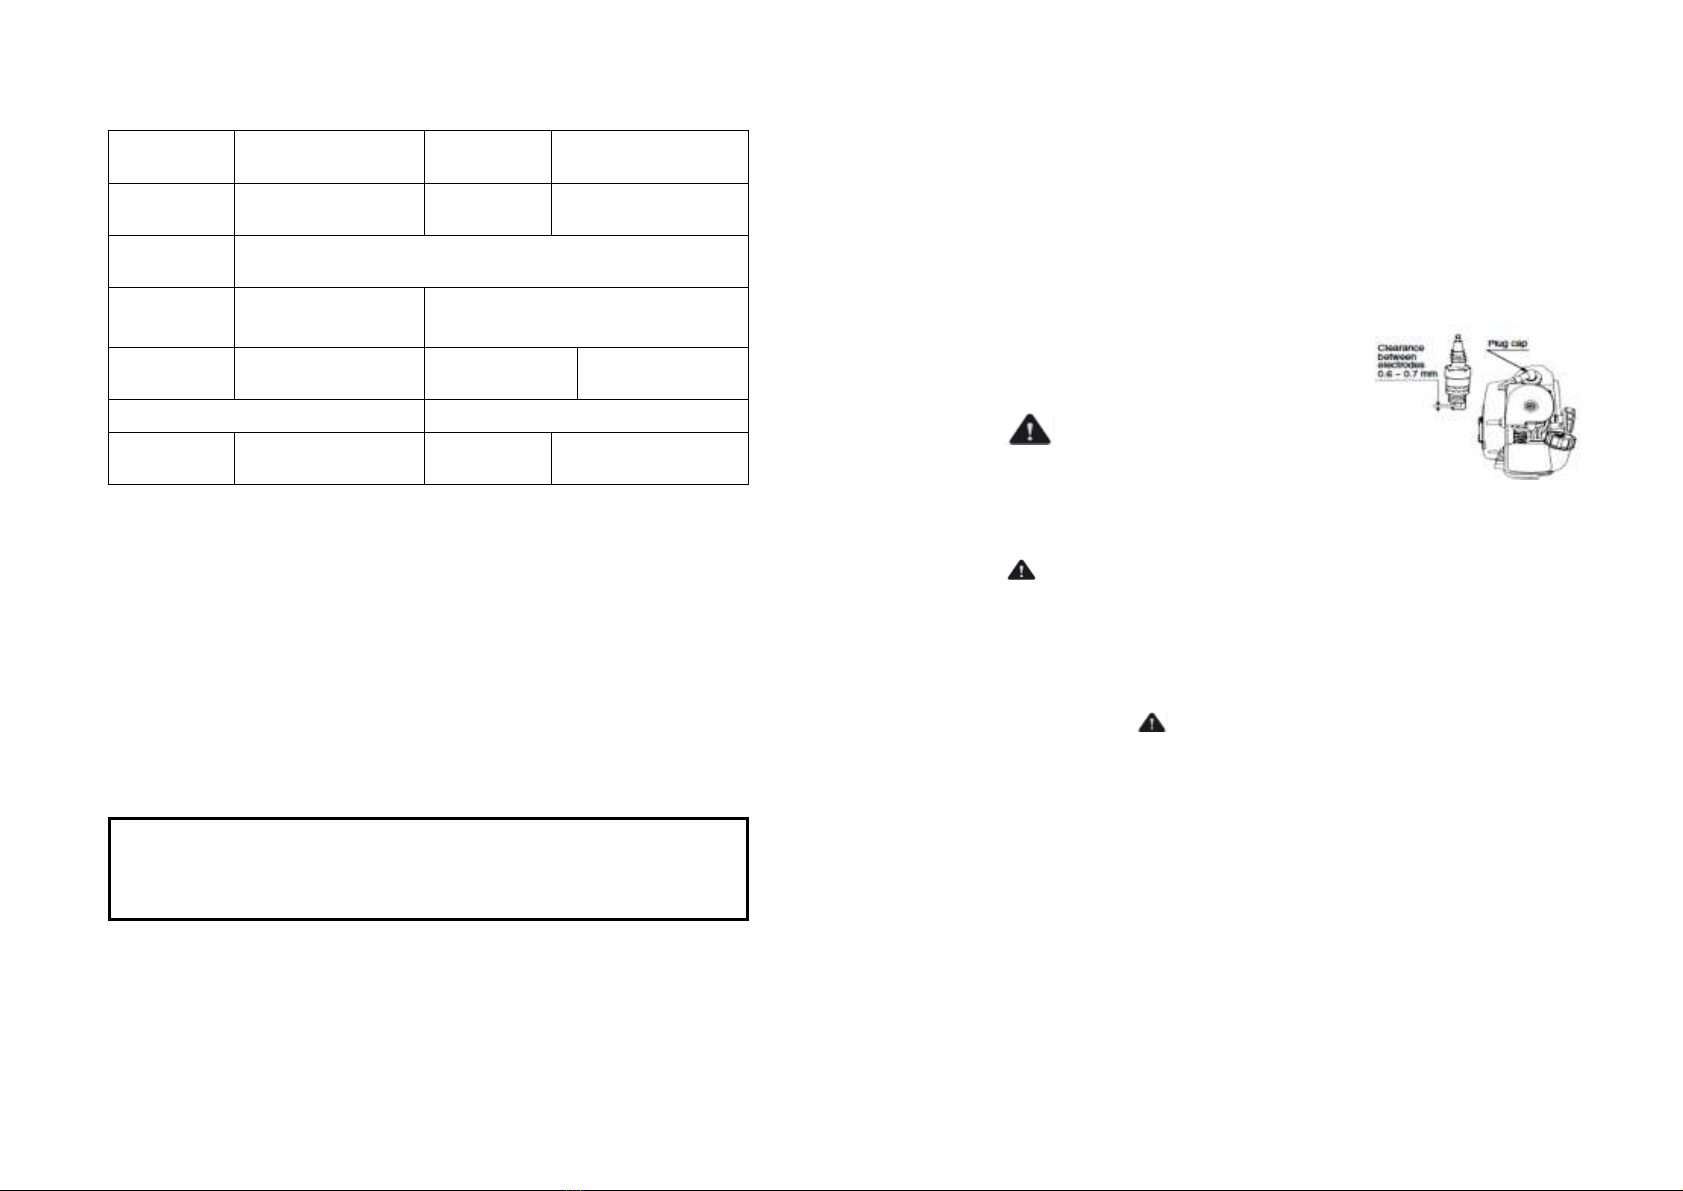
(3) Rubber/plastic parts and consumables such as blades, clutch and clutch-bell, spark-
plugs, nylon line, air-filters, fuel-filters, oil seals etc. are not covered under the warranty.
No Warranty On Electrical Motor / Electrical Parts / Battery Etc.
Incidental / Consequential Loss: KisanKraft Limited or its manufacturers will not be
liable for general damages, including bodily injuries, or for incidental or consequential
damages including, but not limited to, loss of use, loss of profits, loss of production,
expense of substitute equipment or other commercial loss or damage.
Limitation of Liability: This limited warranty is in lieu of all other express warranties,
obligations, or liabilities. Any implied warranties, obligations or liabilities, including, but
not limited to, any implied warranty of merchantability shall be limited in duration to the
applicable warranty period. Any action for breach of any warranties hereunder,
including, but not limited to, any implied warranty of merchantability must be brought
within the applicable warranty period.
Modifications of Warranty: No agent, representative, dealer, or employee of
KisanKraft Limited or any of its manufacturers has the authority to increase or alter the
obligations of this warranty.
Assignment / Transfer of warranty: The warranty cannot be assigned and shall not
transfer if the product is resold by the first buyer. The above warranties are extended to
the first end user (original purchaser), and no warranty is made, nor authorized to be
made assignable on resale by the first end user.
What you must do to obtain limited warranty service: To obtain performance of any
obligation under this warranty for failure during the applicable warranty period, deliver
the defective product, to the nearest Authorized Dealer. KisanKraft Limited, its
manufacturers and its dealers reserve the right to inspect the claimed defective part(s)
to determine if the malfunction is the result of a defect covered by this warranty. Please
note that the decision of KisanKraft Limited with respect to any warranty claim is final.
Receipt is required for availing warranty services
Jurisdiction: All disputes are subject to Bangalore court’s jurisdiction.
ChainsawsBrush Cutters and AccessoriesHarvesters
Engines and Water PumpsHand ToolsGardenTools
Cultivators and AccessoriesSprayers and Accessories
Transplanter and Post Hole Digger Milking Machines
Warranty Certificate
(KISANKRAFT COPY)
This warranty is null & void, if you fail to register the warranty with
KisanKraft by sending the KisanKraft Copy with dealer’s stamp.
KisanKraft Limited (formerly known as KisanKraft Machine Tools P Ltd)
Agricultural
Inter-Cultivator
FOR THE SPECIFIED PERIOD FROM THE
DATE OF SALE OR DELIVERY WHICHEVER
IS EARLIER.
Buyer’s Info (Name, Address, Phone, etc.):
Dealer’s Stamp (Address, Phone, TIN, etc.):
What is covered: KisanKraft Limited and its manufacturers warrant this product to be
free from defects in material or workmanship. All parts defective in material and
workmanship are covered.
This warranty will only cover defects arising under normal usage.
This warranty is limited to repair or replacement by KisanKraft Limited or its
manufacturers at the premises of Authorized Dealers, of such parts as appear to
KisanKraft or its manufacturers, upon inspection, to be defective in material and/or
workmanship. KisanKraft or its manufacturers make no warranty with respect to trade
accessories not manufactured or sold by them.
What is not covered: The warranty shall become null and void and neither KisanKraft
Limited nor any of its manufacturers, nor its authorized dealers assumes any
responsibility, if the failure was caused by the following:
(1) Operation of product with incorrect fuel or lubricants, (2) Incorrect usage of
machine or misuse, (3) Lack of maintenance, (4) Negligence, (5) Accident or physical
damage, (6) Repairs made by unauthorized parties and/or with unauthorized parts, (7)
Improper set up, adjustments, tampering or altered products
Note: The purchase is not contingent upon a product demonstration. The
purchaser shall satisfy himself with the product, including any product
demonstration or verification of any function, before buying. KisanKraft Limited or
its authorized dealers, including online sellers, shall not be liable to give any on-
site demonstration after purchase of any of the product.