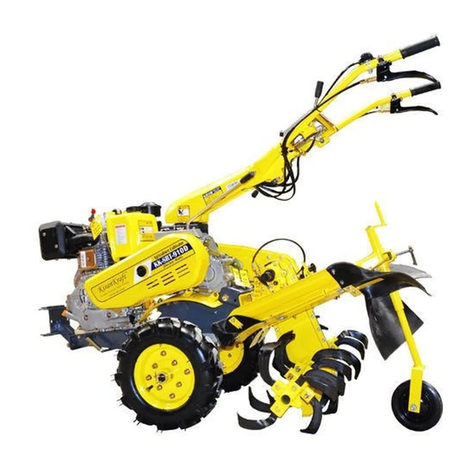
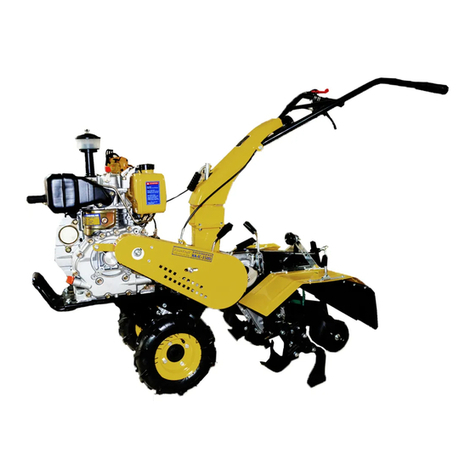
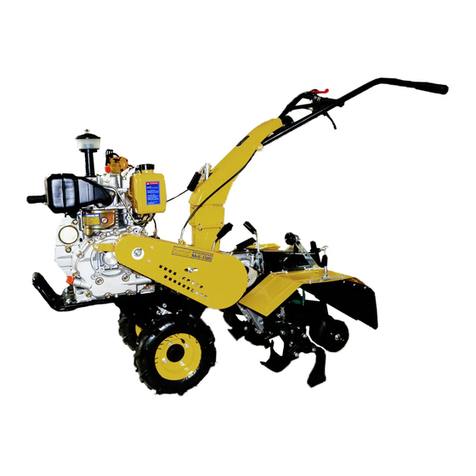
KISANKRAFT KK-IC-8626 User manual

KisanKraftTM
Warranty Certificate
(DEALER COPY)
This warranty is null & void, if you fail to register the warranty with
KisanKraft by sending the KisanKraft Copy with dealer’s stamp.
KisanKraft Machine Tools Private Limited
: www.kisankraft.com
: [email protected]om
: +91.80. 22178200
Page 1 of 48
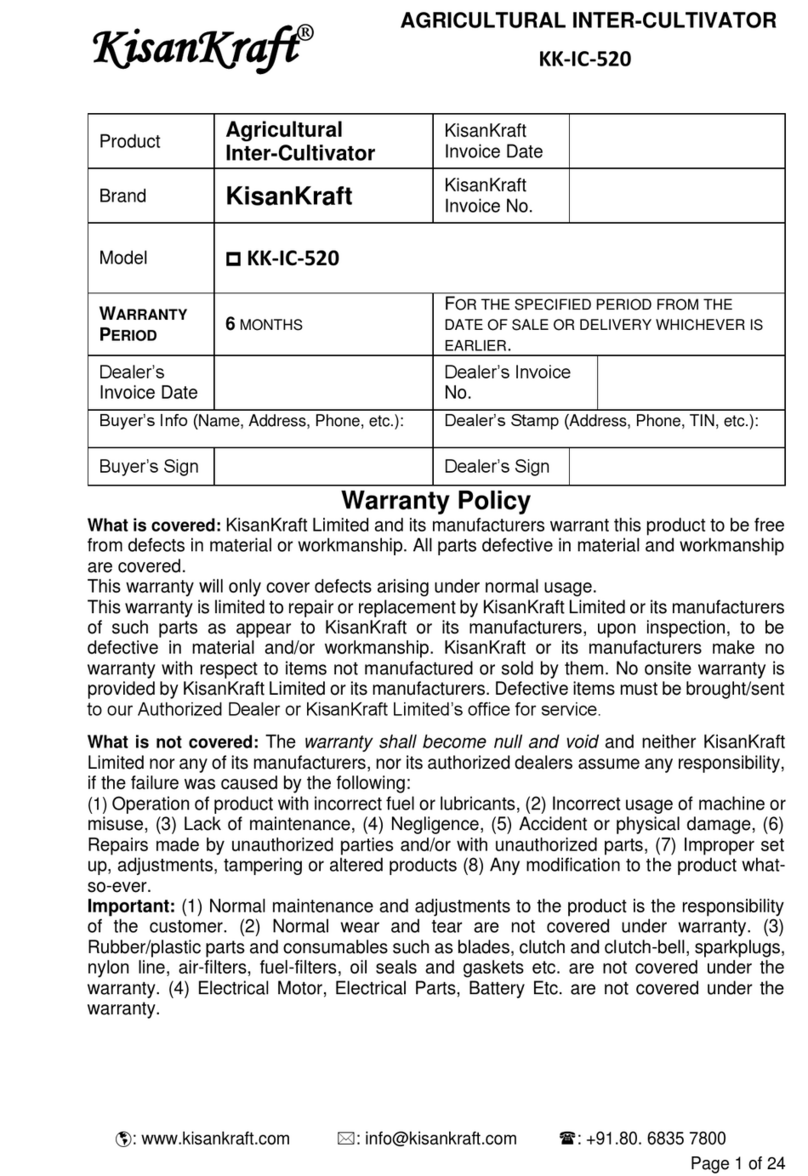
Product Intercultivator KisanKraftTM
Invoice Date
Brand KisanKraft KisanKraftTM
Invoice No.
Model KK-IC-8626
WARRANTY
PERIOD 6MONTHS
FOR THE SPECIFIED PERIOD FROM THE
DATE OF SALE OR DELIVERY WHICHEVER IS
EARLIER.
Dealer’s
Invoice Date Dealer’s
Invoice No.
Buyer’s Info (Name, Address, Phone, etc.):
Dealer’s Stamp (Address, Phone, TIN, etc.):
Buyer’s Sign Dealer’s Sign
What is covered: KisanKraft Machine Tools Private Limited and its manufacturers
warrant this product to be free from defects in material or workmanship. All parts
defective in material and workmanship are covered.
This warranty will only cover defects arising under normal usage.
This warranty is limited to repair or replacement by KisanKraft Machine Tools Private
Limited or its manufacturers at the premises of Authorized Dealers, of such parts as
appear to KisanKraft or its manufacturers, upon inspection, to be defective in material
and/or workmanship. KisanKraft or its manufacturers make no warranty with respect to
trade accessories not manufactured or sold by them.
What is not covered: The warranty shall become null and void and neither KisanKraft
Machine Tools Private Limited nor any of its manufacturers, nor its authorized dealers
assumes any responsibility, if the failure was caused by the following:
(1) Operation of product with incorrect fuel or lubricants, (2) Incorrect usage of machine
or misuse, (3) Lack of maintenance, (4) Negligence, (5) Accident or physical damage,
(6) Repairs made by unauthorized parties and/or with unauthorized parts, (7) Improper
set up, adjustments, tampering or altered products

KisanKraftTM
Warranty Certificate
(DEALER COPY)
This warranty is null & void, if you fail to register the warranty with
KisanKraft by sending the KisanKraft Copy with dealer’s stamp.
KisanKraft Machine Tools Private Limited
: www.kisankraft.com
: [email protected]om
: +91.80. 22178200
Page 2 of 48
Important: (1) Normal maintenance and adjustments to the product is the responsibility
of the customer. (2) Normal wear and tear is not covered under warranty
(3) Rubber/plastic parts and consumables such as blades, clutch and clutch-bell, spark-
plugs, nylon line, air-filters, fuel-filters, oil seals etc. are not covered under the warranty.
No Warranty On Electrical Motor / Electrical Parts Etc.
Incidental / Consequential Loss: KisanKraft Machine Tools Private Limited or its
manufacturers will not be liable for general damages, including bodily injuries, or for
incidental or consequential damages including, but not limited to, loss of use, loss of
profits, loss of production, expense of substitute equipment or other commercial loss or
damage.
Limitation of Liability: This limited warranty is in lieu of all other express warranties,
obligations, or liabilities. Any implied warranties, obligations or liabilities, including, but
not limited to, any implied warranty of merchantability shall be limited in duration to the
applicable warranty period. Any action for breach of any warranties hereunder,
including, but not limited to, any implied warranty of merchantability must be brought
within the applicable warranty period.
Modifications of Warranty: No agent, representative, dealer, or employee of
KisanKraft Machine Tools Private Limited or any of its manufacturers has the authority
to increase or alter the obligations of this warranty.
Assignment / Transfer of warranty: The warranty cannot be assigned and shall not
transfer if the product is resold by the first buyer. The above warranties are extended to
the first end user (original purchaser), and no warranty is made, nor authorized to be
made assignable on resale by the first end user.
What you must do to obtain limited warranty service: To obtain performance of any
obligation under this warranty for failure during the applicable warranty period, deliver
the defective product, to the nearest Authorized Dealer. KisanKraft Machine Tools
Private Limited, its manufacturers and its dealers reserve the right to inspect the claimed
defective part(s) to determine if the malfunction is the result of a defect covered by this
warranty. Please note that the decision of KisanKraft Machine Tools Pvt Ltd with respect
to any warranty claim is final.
Receipt is required for availing warranty services
Jurisdiction: All disputes are subject to Bangalore court’s jurisdiction.
Our
Products
ChainsawsBrush Cutters and AccessoriesHarvesters
Engines and Water PumpsHand ToolsGarden Tools
Cultivators and AccessoriesSprayers and Accessories
Transplanter and Post Hole Digger Milking Machines
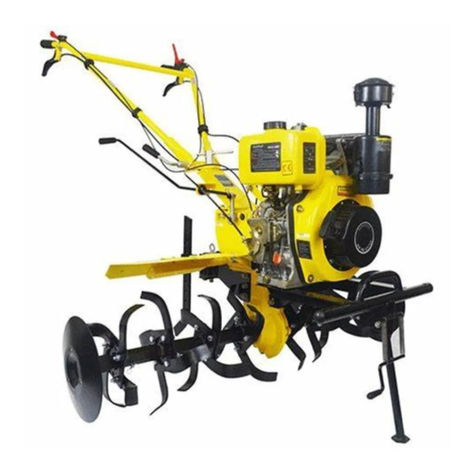

KisanKraft
TM
INTERCULTIVATOR
KK-IC-8626
: www.kisankraft.com
: [email protected]om
: +91.80. 22178200
Page 3 of 48
Operation Manual
KisanKraft Machine Tools Pvt. Ltd.
Sri Huchhanna Tower, #4,1st Main,7-A Cross, Maruthi Layout, Dasarahalli,
HAF Post, Hebbal, Bangalore 560024,Karnataka,INDIA
♦Bangalore (HO) ♦ Ahmedabad ♦ Bhopal ♦ Bhubaneswar ♦ Coimbatore ♦
♦Ernakulam ♦ Guwahati ♦ Patna ♦ Hinudpur ♦ Hubli ♦ Hyderabad ♦
♦Jaipur ♦ Karnal ♦ Kolkata ♦ Lucknow ♦ Nagpur ♦ Pune ♦ Raipur ♦ Shimla ♦

KisanKraft
TM
INTERCULTIVATOR
KK-IC-8626
: www.kisankraft.com
: [email protected]om
: +91.80. 22178200
Page 4 of 48

KisanKraft
TM
INTERCULTIVATOR
KK-IC-8626
: www.kisankraft.com
: [email protected]om
: +91.80. 22178200
Page 5 of 48
CONTENTS
BEFORE GETTING STARTED .......................................................................8
SAFETY INSTRUCTIONS..............................................................................8
ASSEMBLY INSTRUCTIONS ......................................................................10
STARTING INSTRUCTIONS .......................................................................15
TILLING ...................................................................................................18
CULTIVATING ..........................................................................................18
MAINTENANCE .......................................................................................20
STORAGE.................................................................................................23
TECHNICAL SPECIFICATIONS....................................................................24
TROUBLESHOOTING................................................................................25
PARTS DIAGRAM-TILLER/CULTIVATOR ASSEMBLY ..................................26
PARTS LIST-TILLER/CULTIVATOR ASSEMBLY............................................27
PARTS DIAGRAM-ENGINE ASSEMBLY......................................................28
PARTS LIST-ENGINE ASSEMBLY ...............................................................29
2 STROKE PETROL ENGINE- MANUAL ......................................................31

KisanKraftTM
Warranty Certificate
(CUSTOMER COPY)
This warranty is null & void, if you fail to register the warranty with
KisanKraft by sending the KisanKraft Copy with dealer’s stamp.
KisanKraft Machine Tools Private Limited
: www.kisankraft.com
: [email protected]om
: +91.80. 22178200
Page 6 of 48
Product Intercultivator KisanKraftTM
Invoice Date
Brand KisanKraft KisanKraftTM
Invoice No.
Model KK-IC-8626
WARRANTY
PERIOD 6MONTHS
FOR THE SPECIFIED PERIOD FROM THE
DATE OF SALE OR DELIVERY WHICHEVER IS
EARLIER.
Dealer’s
Invoice Date Dealer’s Invoice
No.
Buyer’s Info (Name, Address, Phone, etc.):
Dealer’s Stamp (Address, Phone, TIN, etc.):
Buyer’s Sign Dealer’s Sign
What is covered: KisanKraft Machine Tools Private Limited and its manufacturers
warrant this product to be free from defects in material or workmanship. All parts
defective in material and workmanship are covered.
This warranty will only cover defects arising under normal usage.
This warranty is limited to repair or replacement by KisanKraft Machine Tools Private
Limited or its manufacturers at the premises of Authorized Dealers, of such parts as
appear to KisanKraft or its manufacturers, upon inspection, to be defective in material
and/or workmanship. KisanKraft or its manufacturers make no warranty with respect
to trade accessories not manufactured or sold by them.
What is not covered: The warranty shall become null and void and neither KisanKraft
Machine Tools Private Limited nor any of its manufacturers, nor its authorized dealers
assumes any responsibility, if the failure was caused by the following:
(1) Operation of product with incorrect fuel or lubricants, (2) Incorrect usage of
machine or misuse, (3) Lack of maintenance, (4) Negligence, (5) Accident or physical
damage, (6) Repairs made by unauthorized parties and/or with unauthorized parts, (7)
Improper set up, adjustments, tampering or altered products.

KisanKraftTM
Warranty Certificate
(CUSTOMER COPY)
This warranty is null & void, if you fail to register the warranty with
KisanKraft by sending the KisanKraft Copy with dealer’s stamp.
KisanKraft Machine Tools Private Limited
: www.kisankraft.com
: [email protected]om
: +91.80. 22178200
Page 7 of 48
Important: (1) Normal maintenance and adjustments to the product is the
responsibility of the customer. (2) Normal wear and tear is not covered under
warranty.
(3) Rubber/plastic parts and consumables such as blades, clutch and clutch-bell,
spark-plugs, nylon line, air-filters, fuel-filters, oil seals etc. are not covered under the
warranty.
No Warranty On Electrical Motor / Electrical Parts Etc.
Incidental / Consequential Loss: KisanKraft Machine Tools Private Limited or its
manufacturers will not be liable for general damages, including bodily injuries, or for
incidental or consequential damages including, but not limited to, loss of use, loss
of profits, loss of production, expense of substitute equipment or other commercial
loss or damage.
Limitation of Liability: This limited warranty is in lieu of all other express warranties,
obligations, or liabilities. Any implied warranties, obligations or liabilities, including,
but not limited to, any implied warranty of merchantability shall be limited in duration
to the applicable warranty period. Any action for breach of any warranty hereunder,
including, but not limited to, any implied warranty of merchantability must be brought
within the applicable warranty period.
Modifications of Warranty: No agent, representative, dealer, or employee of
KisanKraft Machine Tools Private Limited or any of its manufacturers has the
authority to increase or alter the obligations of this warranty.
Assignment / Transfer of warranty: The warranty cannot be assigned and shall
not transfer if the product is resold by the first buyer. The above warranties are
extended to the first end user (original purchaser), and no warranty is made, nor
authorized to be made assignable on resale by the first end user.
What you must do to obtain limited warranty service: To obtain performance of
any obligation under this warranty for failure during the applicable warranty period,
deliver the defective product, to the nearest Authorized Dealer. KisanKraft Machine
Tools Private Limited, its manufacturers and its dealers reserve the right to inspect
the claimed defective part(s) to determine if the malfunction is the result of a defect
covered by this warranty. Please note that the decision of KisanKraft Machine Tools
Pvt Ltd with respect to any warranty claim is final.
Receipt is required for availing warranty services
Jurisdiction: All disputes are subject to Bangalore court’s jurisdiction.
Our
Products
ChainsawsBrush Cutters and AccessoriesHarvesters
Engines and Water PumpsHand ToolsGarden Tools
Cultivators and AccessoriesSprayers and Accessories
Transplanter and Post Hole Digger Milking Machines

KisanKraft
TM
INTERCULTIVATOR
KK-IC-8626
: www.kisankraft.com : [email protected] : +91.80. 22178200
Page 8 of 48
BEFORE GETTING STARTED
We wish to thank you for choosing our product. We are confident that the high quality of
our product will meet your requirement and will give you long-lasting service. The
Tiller/Cultivator tills and weeds precisely “to handle” your most difficult jobs. It handles
smoothly while the tines churn soil to ten inches deep. It creates a soft smooth seed bed,
even in stony soil. This manual contains valuable information about our new rototiller. It
has been carefully prepared to give you helpful suggestions for operating, adjusting, and
servicing. Keep this manual in a convenient place for quick and easy reference. Study it
carefully, only with proper care and operation you can expect to receive the long lasting
service of this rototiller.
SAFETY INSTRUCTIONS
You will notice Safety Rules and Important Notes throughout this Manual. Make sure you
understand and obey these warnings for your own protection.
Read and follow
the instructions in
this manual,
especially in the safety section. Failure t
o do so could
result in serious injury or death.
Take note! This safety alert symbol is found throughout
.
This manual. This symbol is used to call your attention t
o
instructions concerning your personal safety and
the
safety of others.
THIS SYMBOL MEANS
ATTENTION! YOUR
SAFETY IS INVOLVED!
STAY ALERT!
Warning- DO’s:
Always keep a firm grip on both handles while the tines are moving and/or the
engine is running. BE AWARE!! The tines may coast after throttle trigger is
released. Make sure tines have come to a complete stop and engine is off before
letting go of the Tiller/Cultivator.
Always maintain a firm footing and good balance. Do not overreach while
operating the Tiller/Cultivator. Before you start to use the Tiller/Cultivator, check
the work area for obstacles that might cause you to lose your footing, balance or
control of the machine.
Thoroughly inspect the area where equipment is to be used and remove all
objects that can be thrown by the machine.
Always keep area clear of children, pets, and bystanders.
Always stay alert. Watch what you are doing and use common sense. Do not
operate unit when fatigued.
Always dress properly. Do not wear loose clothing or jewelry, they might get
caught in moving parts. Use sturdy gloves. Gloves reduce the transmission of
vibration to your hands. Prolonged exposure to vibration can cause numbness
and other ailments.

KisanKraft
TM
INTERCULTIVATOR
KK-IC-8626
: www.kisankraft.com : [email protected] : +91.80. 22178200
Page 9 of 48
While working, always wear substantial footwear and long trousers. Do not
operate the equipment with barefoot or wearing open sandals.
Always wear ear and eye protection. Eye protection must meet ANSI Z 87.1. To
avoid hearing damage, we recommend hearing protection be worn whenever
using the equipment.
To reduce fire hazard, keep the engine, and petrol/gas storage area free of
vegetative material and excessive grease.
Start the engine carefully, according to the manufacturer’s instructions and with
feet well away from tool(s).
Keep all nuts, bolts and screws tight to be sure the equipment is in safe working
condition.
Use extreme caution when reversing or pulling the machine towards you.
Work only in daylight or good artificial light.
Always be sure of your footing on slopes.
Exercise extreme caution when changing direction on slopes.
Always keep a safe distance between two or more people when working together.
Always inspect your unit before each use and ensure that all handles, guards and
fasteners are secure, operating, and in place.
Always maintain and examine your Tiller/Cultivator with care. Follow
maintenance instructions given in manual.
Warning- DON’Ts:
Don’t use Tiller/Cultivator with one hand. Keep both hands on handles with
fingers and thumbs encircling the handles, while tines are moving, and engine is
running
Don’t overreach. Keep a good footing at all times.
Don’t run with the machine, walk.
Don’t work on excessively steep slopes.
Don’t attempt to clear tines while they are moving. Never try to remove jammed
material before switching the engine off and making sure the tines have stopped
completely.
Don’t allow children or incapable people to operate this Tiller/Cultivator.
Don’t operate while under the influence of alcohol or drugs.
Don’t attempt to repair this Tiller/Cultivator. Have repairs made by a qualified
dealer or repairman.
Engine/ Fuel - Warnings
DO’s
Always use fresh gasoline. Stale gasoline can cause damage to the machine.
Always store fuel in containers specifically designed for this purpose.

KisanKraft
TM
INTERCULTIVATOR
KK-IC-8626
: www.kisankraft.com : [email protected] : +91.80. 22178200
Page 10 of 48
Always pull starter cord slowly until resistance is felt. Then pull cord rapidly to
avoid kickback and prevent arm or hand injury. Stop the engine whenever you
leave the machine.
Allow the engine to cool before storing in any enclosure.
If the fuel tank needs to be drained, this should be done outdoors.
Engine/ Fuel Warnings - DON’Ts:
Don’t fuel, refuel or check fuel while smoking, or near an open flame or other
ignition source. Stop engine and be sure it is cool before refueling.
Don’t leave the engine running while the Tiller/Cultivator is unattended. Stop
engine before putting the Tiller/Cultivator down or while transporting from one
place to another.
Don’t refuel, start or run this Tiller/Cultivator indoors or in an improperly ventilated
area.
Don’t run engine when electrical system causes spark outside the cylinder.
During periodic checks of the spark plug, keep plug a safe distance from cylinder
to avoid burning of evaporated fuel from cylinder.
Don’t check for spark with spark plug or plug wire removed. Use an approved
tester.
Don’t crank engine with spark plug removed unless spark plug wire is
disconnected. Sparks can ignite fumes.
Don’t run engine when the odor of gasoline is present or other explosive
conditions exist.
Don’t operate the unit if gasoline is spilled.
Clean up spill completely before starting engine.
Don’t operate your Tiller/Cultivator if there is an accumulation of debris around
the muffler, and cooling fins.
Don’t touch hot mufflers, cylinders or cooling fins as contact may cause serious
burns.
Don’t change the engine governor setting or over speed the engine.
ASSEMBLY INSTRUCTIONS
WARNING: Improper assembly can result in serious injury. Make sure to follow all
instructions carefully. If you have any questions contact our local dealer.
Your Tiller/Cultivator comes partially assembled. You must install only the handlebars, the
wheels, this will take just a few minutes if you follow the directions
First, take all items out of the carton. The list below, shows the parts that come with your
Tiller/Cultivator. Check to make sure you have them.

KisanKraft
TM
INTERCULTIVATOR
KK-IC-8626
: www.kisankraft.com : [email protected] : +91.80. 22178200
Page 11 of 48
Key No Description Qty Key No Description Qty
1.
Engine
1
9.
2.
Middle Handle
1
10.
Axle Assembly
1
3.
Cap screw
4
11.
Wheel Assembly
2
4.
Right Handle
1
12.
Bracket Assembly
1
5.
Throttle Cable
Assembly
1 13. Fender Guard 2
6.
Throttle Lever
1
14.
Blade Bet aiming Pin
2
7.
Left Handle
1
15.
Blade
4
8.
Knob Handle
4
16.
Cover, Vent-pipe
1
How to Assemble Wheels:
1. Remove the look pin from the
clevis pin
2. Remove the clevis pin from the
axle Assembly.

KisanKraft
TM
INTERCULTIVATOR
KK-IC-8626
: www.kisankraft.com : [email protected] : +91.80. 22178200
Page 12 of 48
3. Remove the axle assembly from
the Tiller/Cultivator
4. Place two wheel Assembly onto
the axle Assembly. Please notice
the direction of the wheel
Assembly
5. Fix up the wheel Assembly using
a washer and a screw. Repeat on
other side
6. Attach the wheel cup to the wheel
Assembly. Repeat on other side.
7. Attach the bracket Assembly to
the Tiller/Cultivator. Refer step 3,
step 2 and step 1.

KisanKraft
TM
INTERCULTIVATOR
KK-IC-8626
: www.kisankraft.com : [email protected] : +91.80. 22178200
Page 13 of 48
How to Assemble Handles:
1. Attach the middle handle to the
lower handle using the knobs and
bolts provided. The knobs should
be on the outside.
2. Attach the left handle and right
handle to the middle handle using
the knobs and bolts provided. The
knobs should be on the outside.
Fuel Mix
Your Tiller/Cultivator is powered by a commercial two stroke engine which requires a fuel
mixture of gasoline and lubricating oil. Use a mixture of 30 parts unleaded regular gasoline
and 1 part two-stroke oil (30:1.) Make sure to use gasoline with a minimum octane number
of 90 ROZ.
Recommended mixing ratio
Gasoline :Oil
30:1
Exhaust emission are controlled by the fundamental engine parameters and components
(eq., carburetors, ignition timing and port timing) without addition of any major hardware or
the introduction of an inert material during combustion.
How to mix fuel:
1. Pour 3 liters of the gasoline into a safe container. Do not mix the fuel and oil in
the engine fuel tank.
2. Add 0.1 liters of two-cycle engine oil to the gasoline and mix. Then add the rest
of the gasoline.
3. Screw the cap onto the gasoline can. Then swirl the can to blend the oil and gas.
Fueling the unit:
1. Carefully pour the fuel mix into the Tiller/Cultivator’s fuel tank.
2. Put fuel into the fuel tank to 80% of the full capacity.
3. Fasten the fuel cap securely and wipe up any fuel spillage around the unit.
IMPORTANT: Two stroke fuel separates and ages. Do not mix more than what you use in
a month. Using old fuel can cause difficult starting or engine damage. Shake fuel container
thoroughly to mix fuel before each use. Do not attempt to run your engine on gasoline only,
use proper fuel mixture.

KisanKraft
TM
INTERCULTIVATOR
KK-IC-8626
: www.kisankraft.com : [email protected] : +91.80. 22178200
Page 14 of 48
Remember:
Always mix two-cycle oil with gasoline before fueling your Tiller/Cultivator. Never,
ever run your Tiller/Cultivator on gasoline alone. This will ruin your engine and
void all warranties.
Always use a clean gas can and unleaded gas.
Never try to mix the oil and gasoline in the engine fuel tank.
Always mix oil and gas in the proper proportions: 0.1 litres of two-cycle engine oil
to 3 litres of unleaded gasoline.
Gasohol - It can cause deterioration of rubber and/or plastic parts and disruption
of engine lubrication.
Oil for 4-cycle engine use or water coded 2-cycle engine use - it can cause spark
plug fouling, exhaust port blocking, or piston ring sticking.
WARNING: Fuel is extremely flammable. Handle it with care. Keep away from ignition
sources. Do not smoke while fueling your equipment
IMPORTANT NOTE:
Do not use old or stale oil/gasoline mixture. Always use the proper oil/gasoline mixture. If
you do not, your engine will suffer rapid, permanent damage and you will void the engine
warranty.
Gasoline
(Litre)
1 2 3 4 5
2-cycle
oil (ml)
33.3 66.7 100 133.3 166.7

KisanKraft
TM
INTERCULTIVATOR
KK-IC-8626
: www.kisankraft.com : [email protected] : +91.80. 22178200
Page 15 of 48
STARTING INSTRUCTIONS
Starting Your Tiller/Cultivator for the First Time Cold Engine)
1. Fill the fuel tank with the proper oil/gasoline mixture. (See previous section.)
2. Hand tighten the gasoline cap just until its snug.
3. Move run/stop lever into the “run”
position.
4. Slide the choke lever back to close
the engine choke
5. Locate the purge bulb on the upper
right of the engine, in front of the
fuel tank. It sends fuel into the
carburetor, for easy starting. Press
the purge bulb until you see fuel
flow through t e clear fuel return
line.
Since you’re starting “cold,” you
may need to press six to eight
times. As soon as fuel starts flowing
through the clear fuel line, stop
pressing!
6. Don’t pull the throttle trigger during the starting of the engine.
7. Pull the starter cord slowly until resistance is felt. Then give the recoil starter
cord a few short, brisk pulls until the engine fires. During cold starting, you
may need to pull at least three or four times before the engine fires.
NOTE: When the choke is closed, never pull the cord more than four or five
times. Over pulling may cause flooding. Also, bear in mind that, when the
engine fires, it only coughs or sputters, and will not run on choke.

KisanKraft
TM
INTERCULTIVATOR
KK-IC-8626
: www.kisankraft.com : [email protected] : +91.80. 22178200
Page 16 of 48
8. Move the choke lever to the Close
(Choke)position
9. Then pull the starter cord again. The engine should start and run. Let the
engine warm up two to three minutes before using.
Follow the above steps whenever you are starting the engine “cold”, or when the engine
has run dry and you have just added fuel. Remember, always use short, brisk pulls. Don’t
give the cord a long, forceful yank. And, do not let the cord snap back into the starter housing.
Starting a Warm Engine:
1. Slide ignition switch to START position.
2. Move the choke lever to the Open (Run) position.
3. If there is no fuel in the clear return line, push primer bulb 3-4 times or until fuel
is visible in the line.
4. Pull starter rope using short pulls, 1/2 to 2/3 of the rope length.
5. If engine fails to start in 4 pulls, use “First Time” starting procedure.
6. With engine running, and both hands on the handles, squeeze throttle trigger
gradually to increase the engine speed and engage the tines.
How to Stop the Engine:
Simply push the start/stop switch to “stop.”
This will stop the engine instantly. If it
should ever fail to do so, just pull out the
choke button. The engine will stop at once
About the Choke:
The choke controls the amount of air drawn into the engine. Your Tiller/Cultivator will run
only if the choke is open —that is, if the choke is pushed in.
Special Feature (with the idle set properly and the engine running):
Even when the engine is running, the tines won’t turn unless you press the throttle lever on
the handlebars. And, when you release the throttle lever, the tines will stop.
Tip for Extending Your Engine’s Life:
After you start the engine, let your Tiller/Cultivator warm up for two to three minutes before
you use it. Then, before you put your Tiller/Cultivator away, let it idle for a minute to give the
engine a chance to cool down.

KisanKraft
TM
INTERCULTIVATOR
KK-IC-8626
: www.kisankraft.com : [email protected] : +91.80. 22178200
Page 17 of 48
WARNING:If the engine does not stop when switch is set to the stop position, release
the throttle. Allow engine to idle. Put the tiller/cultivator down, and pull the choke button out
to cold start (closed) position. Check and return ignition switch to ON position before starting
the engine again.
What to do Just in Case:
If you follow the normal starting procedure, you should have no problem starting your
Tiller/Cultivator. But, just in case you do have problems, here’s what to do.
Make sure the run/stop switch is on “run” If the switch was on “stop” when you pulled the
cord, you may have flooded the engine.
•First, examine the spark plug. Use a 19 mm spark plug wrench.
•Remove the cap over the spark plug
IMPORTANT NOTE:
To avoid possible damage to the threads, do not try to remove the plug from a hot aluminum
cylinder head.
•Unscrew the spark plug.
Starting a Flooded Engine:
If the end of the spark plug is wet, the engine may be flooded. Make sure the switch is in
the stop position, disconnect spark plug wire and remove the plug. Use a paper towel or a
clean rag to dry the spark plug, then, with the spark plug out of the engine, pull the starter
cord several times. Shake the fuel out of the inside of the plug and air dry. Next, replace the
spark plug. Use the wrench to tighten it and replace the cap. Next, put the switch in the start
position and pull the choke button out. Pull the starter cord three or four times until the
engine coughs or sputters. Open the choke (push the choke button in) and pull the cord a
few times. The engine should start and run.
If the end of the spark plug is dry, check to see if the fuel line is blocked. The fuel line
runs from the fuel tank to the carburetor. Pull it off at the carburetor end. Fuel should drip
slowly from the line. Wipe off any excess or spilled fuel. If fuel does not drip from the line,
check the line for any bends or pinches. Kinks in the line restrict the flow of fuel to the engine.
Just straighten out the line. Reconnect. Then follow the normal starting procedure. If fuel
drips too freely, the line may be disconnected from the fuel filter. You’ll find the fuel filter
inside the fuel tank. Just re-attach the line to the filter, and put the filter back in the tank.
Then follow the normal starting procedure.
WARNING: Make sure the start/stop switch is in the stop position.
Keep plug wire away from the engine to avoid unintentional spark.
Another Way to Start your Tiller/Cultivator:
If you follow the steps above and your engine still won’t start, try this:
1. Push the switch to “start.”
2. Move the choke lever to open the choke.
3. Press the plastic bubble a few times.
4. Give the starter cord a few short, quick pulls. The engine should start and run.
5. If the engine does not start, then move the choke lever to close the choke. Pull
the starter cord four to five times. The engine should sputter or cough.
6. After the engine sputters, push the choke button in. Then pull the starter cord.
The engine should start and run.
7. If the engine still does not start, repeat steps 2 through 6.

KisanKraft
TM
INTERCULTIVATOR
KK-IC-8626
: www.kisankraft.com : [email protected] : +91.80. 22178200
Page 18 of 48
IMPORTANT NOTE:
Never use starting fluids. Starting fluids will cause permanent engine damage. Using them
will void the warranty.
TILLING
If you’ve seen other Tiller/Cultivators, your Tiller/Cultivator may surprise you. It tills best
when you pull it backward! When you pull your Tiller/Cultivator backward, you give extra
resistance to the tines, so they dig deeper. What’s more when you go backward, you erase
your footprints, so your soil stays light and fluffy. With other Tiller/Cultivators, by contrast,
you walk right over the soil you’ve just cultivated, packing it down, so it’s less plant able.
Place your Tiller/Cultivator at the head of the row or area you want to cultivate. Start it up.
Then use an easy rocking motion. First, pull your Tiller/Cultivator backward. Then use an
easy rocking motion. Again, pull your Tiller/Cultivator backward. Then, let it move forward
just a little bit. Then pull it backward again. This will help you cultivate deeper. Keep
repeating these steps until you’ve tilled an entire row. Start again on the next row. It’s much
like running a vacuum cleaner! You Can Even Control Depth.
For Deeper Cultivating:
Move your Tiller/Cultivator slowly back and forth, as you would a vacuum cleaner. Work the
same area over and over until you’ve dug to your desired depth.
For Shallow Cultivating:
Switch the tines to the cultivating position.
Then move your Tiller/Cultivator quickly over your soil surface.
For Big Weeds or Tough Roots:
Let your Tiller/Cultivator rock back and forth over the tough spot, until the tines slice through
the weed or root.
WARNING: The operator of this tiller/cultivator is responsible for accidents or hazards
occurring to himself, other people, or their property.
CULTIVATING
Guide your Tiller/Cultivator where you want to weed and start it up. Pull your Tiller/Cultivator
backward slowly, then let it move forward a bit, in a gentle rocking motion.
Watch it slice, shred, and bury those weeds! Got tough weeds? Lighten your pressure on
the throttle to slow your Tiller/Cultivator down. Then work back and forth until your
Tiller/Cultivator chops up the weeds. It’s easy and effective!
Remember, any Tiller/Cultivator will tangle in tall grass, stringy vines, or super-big weeds.
So, if you have a “backyard jungle,” first use a knife, pruner, or brush cutter to chop up the
overgrowth. If the tines become tangled anyway, turn the engine off completely before trying
to clear them.

KisanKraft
TM
INTERCULTIVATOR
KK-IC-8626
: www.kisankraft.com : [email protected] : +91.80. 22178200
Page 19 of 48
WARNING:
If your tines get jammed or entangled, shut off the engine at once.
Remove the obstruction while the engine is off.
Never try to remove an obstruction while the engine is running. Serious injury can
result.

KisanKraft
TM
INTERCULTIVATOR
KK-IC-8626
: www.kisankraft.com : [email protected] : +91.80. 22178200
Page 20 of 48
MAINTENANCE
How to Check, Clean and Change the Air Filter:
Check the air filter every 25 hours of use or more frequently if used under dusty conditions.
A clogged air filter may increase fuel consumption while cutting down the engine power.
Never operate the blower without the air filter or with a deformed filter element because
unfiltered dusty air will quickly ruin the engine.
Cleaning Air Filter:
1. Remove the air cleaner cover by pulling the tab on side and take out the 3 filter
element.
2. Use neutral detergent and warm water to clean the filter elements. After cleaning,
air dry the element completely and moisten with a small amount of motor oil.
3. Place the filter element into the air cleaner housing and press the cover against
the housing until it clicks.
Idle Speed Adjustment:
1. Warm up engine before
adjusting idle speed.
2.
The idle speed adjustment
screw controls the throttle
opening at idle position.
3. When the engine tends to stop
frequently at idling mode, turn
the adjusting screw clock wise.
4. If the tines continue to rotate
even after releasing the trigger,
turn the adjusting screw
counter-clockwise.
Clear Blockages from the Fuel Line & Filter
After you’ve used your Tiller/Cultivator for a few seasons, check for blockages in the fuel
tank and fuel filter. Such blockages can keep your Tiller/Cultivator away from starting. Clear
any blockages you see in the tank, fuel filter, or fuel line.
Remember: The fuel filter is located inside the tank. Then use the normal starting procedure
to start your Tiller/Cultivator.
Spark Plug:
Starting failure and mis-firing are often caused by a fouled spark plug. Clean the spark plug
and check whether the plug gap is in the correct range. (0.6~0.7mm)
CAUTION: Do not over tighten the spark plug. To install the spark plug first turn the plug
until it is finger tight, then tighten it a quarter turn more with a socket wrench.
Muffler:
Inspect periodically, the muffler for loose fasteners, any damage or corrosion. If
any sign of exhaust leakage is found, stop using the machine and have it repaired
immediately.
Note that failing to do so may result in the engine catching on fire.
Never touch the cylinder, muffler, or spark plugs with your bare hands
immediately after stopping the engine. The engine can become very hot when in
operation, and doing so could result in severe burns.
Other manuals for KK-IC-8626
1
Table of contents
Other KISANKRAFT Tiller manuals

KISANKRAFT
KISANKRAFT KK-IC-100P User manual

KISANKRAFT
KISANKRAFT KK-IC-8626 User manual

KISANKRAFT
KISANKRAFT KK-IC-750RT User manual

KISANKRAFT
KISANKRAFT KK-IC-210P User manual

KISANKRAFT
KISANKRAFT KK-IC-400D User manual

KISANKRAFT
KISANKRAFT KK-CRT-550D User manual

KISANKRAFT
KISANKRAFT KK-IC-410P User manual

KISANKRAFT
KISANKRAFT KK-IC-350D User manual

KISANKRAFT
KISANKRAFT KK-IC-520 User manual

KISANKRAFT
KISANKRAFT KK-IC-250D User manual