KOBE HAG200-D User manual

OPERATORS MANUAL
Please retain this information for future reference.
WARNING:
THE SAFETY INFORMATION
GIVEN INSIDE MUST BE READ AND
UNDERSTOOD BY ANY PERSON
USING, INSTALLING, REPAIRING
OR MAINTAINING THIS PRODUCT
ALWAYS WEAR
APPROPRIATE
PERSONAL
PROTECTIVE
EQUIPMENT.
PROFESSIONAL HOT AIR GUN KIT
- WITH LCD DISPLAY 2000W
MODEL HAG200-D
ORDER CODE KBE-279-2140K
Adjustable temperature between 60 - 600
°
C.
230v~50Hz, with 2 metre
industrial grade rubber power
cord fitted with a 3 pin plug.
3 stage airflow switch and
digital LCD temperature adjuster.
Supplied with 4 detachable
nozzles and a paint scraper.
Stainless steel nozzle outlet and detachable
heat protection sleeve allows for access into
narrow areas.
Overheating protection.
Can be used free standing on a work surface facing
upwards for hands free use.
Air inlet with lattice guard to keep out foreign matter.
Supplied in a tough blow moulded carrying case.
Used for a wide range of jobs safely and reliably,
such as soldering, welding PVC, shaping, drying,
shrink-fitting, stripping paint, removing sticky labels etc.
Digital LCD
temperature display

KOBE INDUSTRIAL POWER TOOLS
have been specifically designed to help you work SAFELY
and EFFICIENTLY. Your care and good judgement are the best protection against injury, but always ensure
that the appropriate safety equipment is worn. All possible hazards cannot be covered here, but the most
relevant ones have been highlighted.
SAFETY INSTRUCTIONS
2
GENERAL OPERATING HAZARDS
ALWAYS use the Hot Air Gun with care as misuse
could cause a fire.
ALWAYS disconnect from the electrical power
supply before cleaning or carrying out user
maintenance.
ALWAYS wear non-skid safety footwear when
working outdoors.
ALWAYS ensure the maintenance of electrical
components, including plug fitting, is carried out
by a suitably qualified person.
ALWAYS store the tool in a dry, secure place away
from children.
NEVER use electrical power tools when they are
damp or in a damp or wet environment.
NEVER operate the Hot Air Gun when tired or
under the influence of alcohol or prescription/non-
prescription drugs.
NEVER operate if any parts are missing or
damaged.
WORKPLACE HAZARDS
ALWAYS beware of fire and ignition hazards.
Exercise care when using the Hot Air Gun in the
proximity of flammable materials. Heat may also
be conducted to flammable materials that are out
of sight. This tool is not intended for use in a
flammable or combustible atmosphere.
ALWAYS keep the electric cable away from heat,
oil and sharp edges.
ALWAYS use a RCD (Residual Current Device) to
provide protection against electric shock.
ALWAYS make sure the area in which you are
working in has a good flow of air. Toxic gases may
occur when working on plastics, paints, varnishes
or similar materials.
PERSONAL PROTECTION
ALWAYS wear approved eye protection during
operation.
ALWAYS wear gloves to protect hands from cuts
and burns.
SPECIFIC OPERATING HAZARDS
ALWAYS ensure the Hot Air Gun is switched OFF
before connecting it to the power supply.
ALWAYS use recommended attachments or parts.
ALWAYS ensure the electric cable is not damaged
before connecting the Hot Air Gun to the electricity
supply.
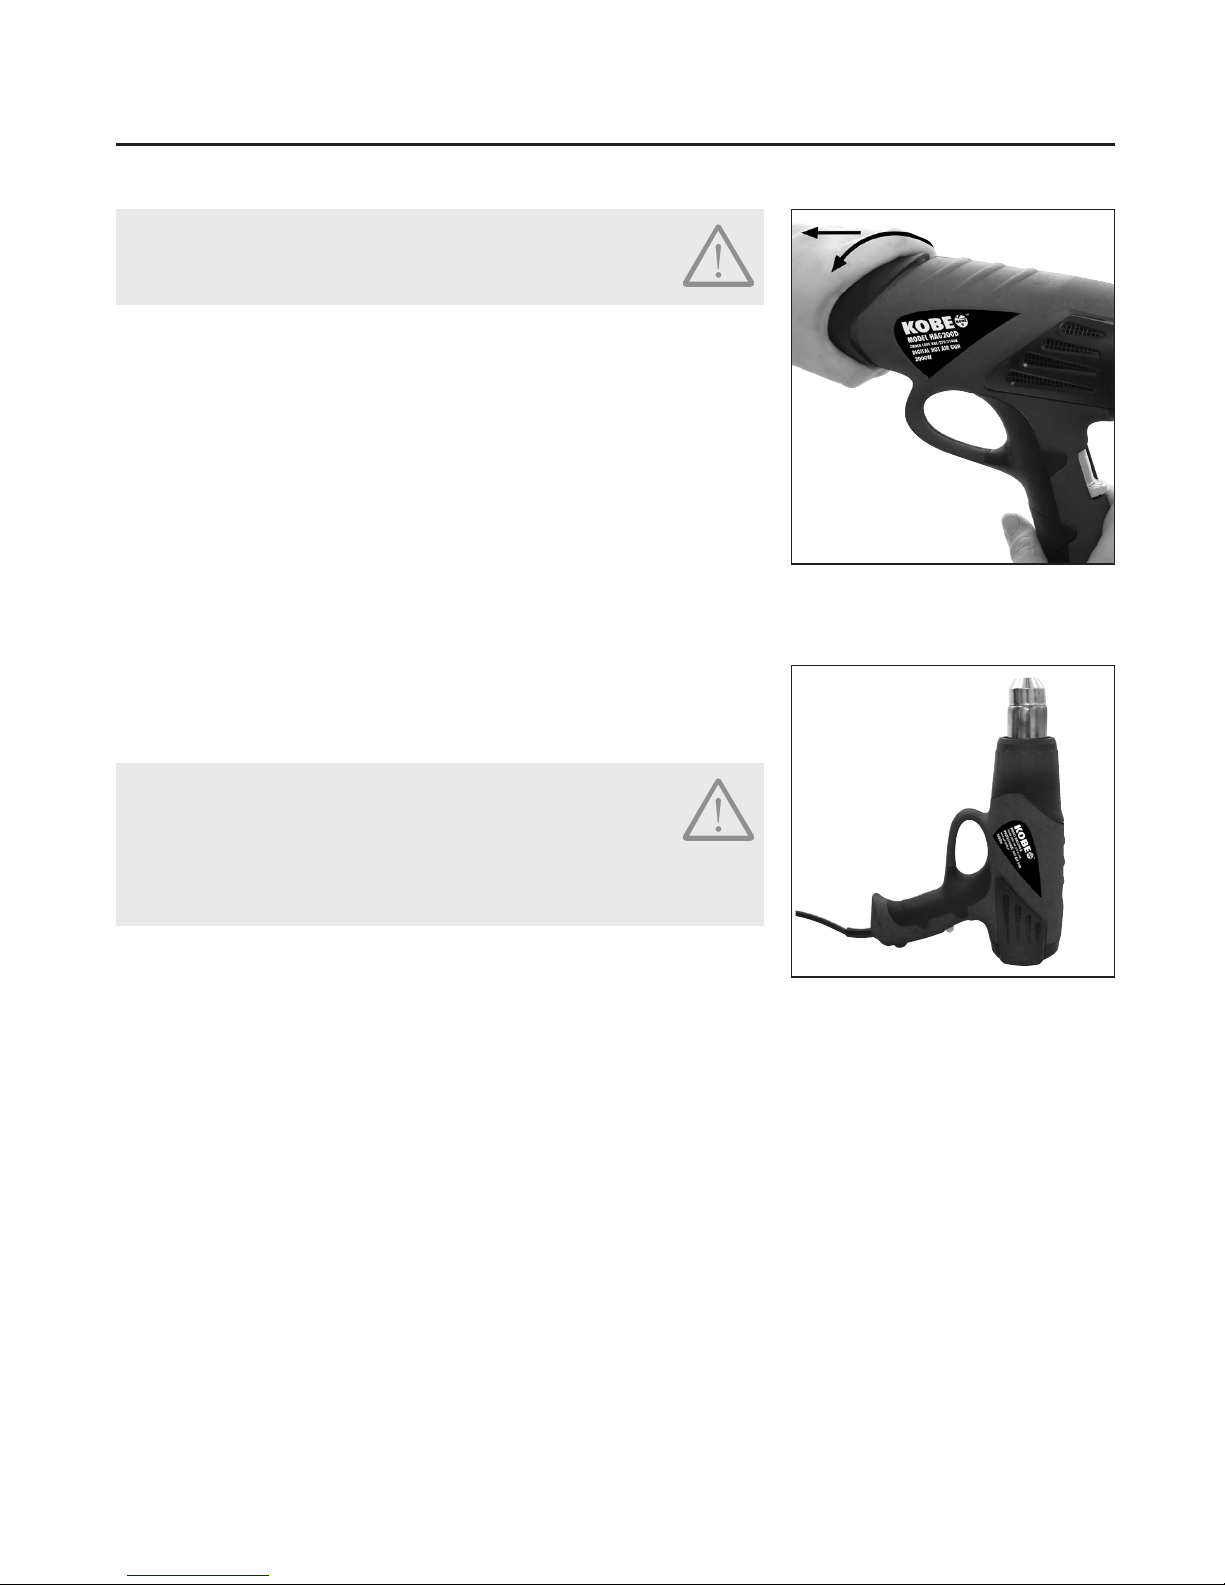
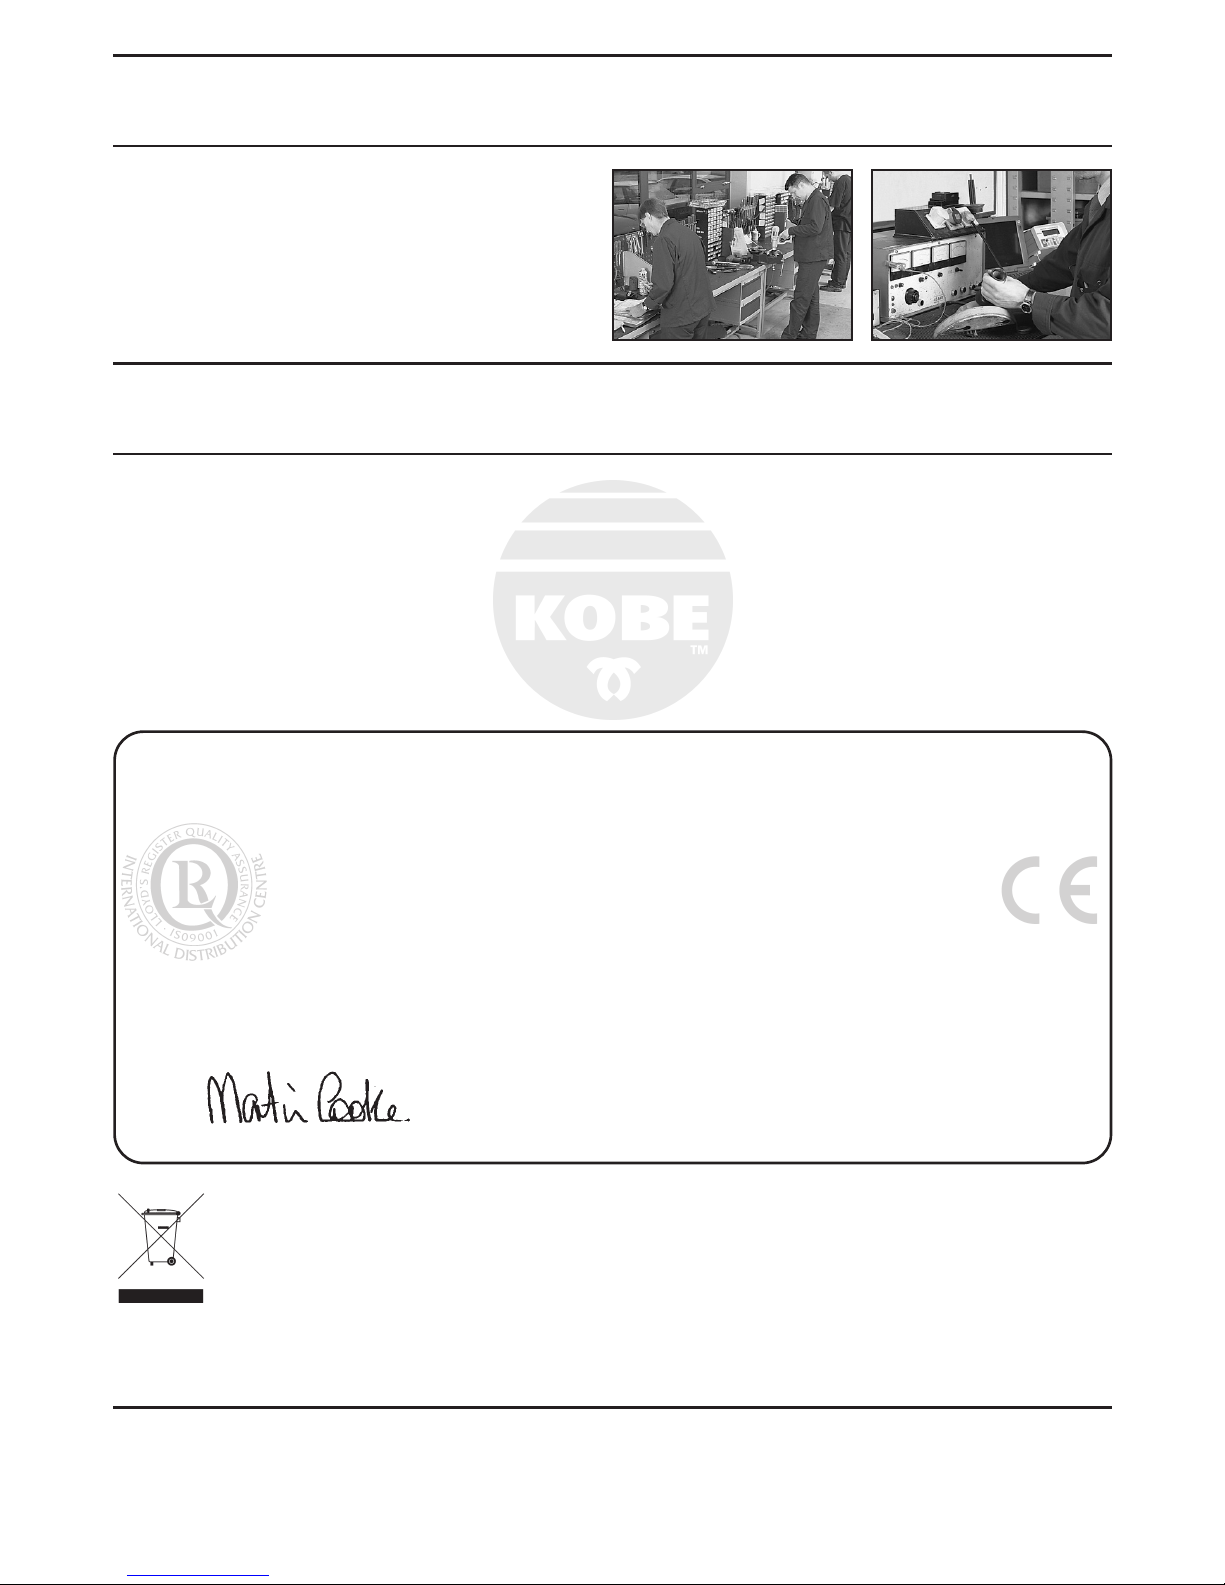
ALWAYS place the tool in its freestanding (see Fig 5,
on page 5
)
position after use and allow
to cool before putting it away. The nozzle reaches
temperatures in excess of 600°C.
NEVER use the Hot Air Gun as a hair dryer.
NEVER direct the flow of hot air at persons or
animals.
NEVER point the heat gun directly at a window or
other glass surfaces.
NEVER leave the Hot Air Gun running whilst
unattended.
NEVER direct the Hot Air Gun onto the same spot
for any prolonged period.
NEVER make any alterations to the Hot Air Gun
and only use it for the task for which it has been
designed.
NEVER insert objects inside the air intake.
NEVER position too close to the work piece as the
air flow will be restricted and may cause the Hot
Air Gun to overheat. Position the nozzle at least
25mm away from the work surface.
NEVER carry the tool by the power cord.
NEVER unplug the tool by pulling on the power
cord.
NEVER allow children to use the unit.
You have purchased a quality industrial product that is designed for high performance
and long service life. If correct use, safety and maintenance procedures are observed
this machine will last for many years.

MODEL NUMBER ........................................ HAG200-D
ORDER CODE ...................................... KBE-279-2140K
POWER SUPPLY ....................................... 230V~50Hz
INPUT POWER ................................................. 2000W
DIMENSIONS - GUN .......... 190(H) x 270(W) x 80(D)mm
DIMENSIONS - CASE ....... 270(H) x 340(W) x 115(D)mm
WEIGHT - GUN ................................................. 910g
NET WEIGHT ................................................... 2.2Kg
AIRFLOW AND TEMPERATURE ..................................
Stage I 350L/min 60°C (140°F)
Stage II 350L/min 60 - 600°C (140- 1112°F)
Stage III 550L/min 60 - 600°C (140- 1112°F)
3
TECHNICAL DATA & PARTS
SPECIFICATIONS
IDENTIFICATION
On/off Switch
(4 positions)
Nozzle
Heat Guard
Air Inlet Temperature
adjustor
LCD Display
Fig 1.
Blow moulded
Carry Case
Surface
Nozzle
Window
Nozzle
Reflector
Nozzle
Paint
Scraper
Reduction
Nozzle

OPERATION
Always use the correct supply voltage!
The voltage of the power source must be the same as the value given on the rating plate of the unit. Units
designed for 230V can also be operated with 220V.
SWITCHING ON/OFF & SETTING THE AIRFLOW TEMPERATURE
Ensure that the Hot Air Gun is switched OFF (O) before
connecting it to the power supply or when attaching any
nozzles to it!
The On/Off switch has four settings (See fig. 2).
Position "O" is "OFF" and the other three positions provide different rates of air flow.
Slide the Switch up to position I, II, or III.
With Stage "I" you can have a temperature of no more than 60°C regardless of the number
selected by the Temperature Adjustor. Only whilst using Stage II and Stage III airflow
settings, can the Temperature Adjustor be used to change the required temperature.
To switch "OFF" the Hot Air Gun, slide the On/Off Switch to the "O" position.
Air Flow Temperature
Stage I 350l/min 60°C
Stage II 350l/min Variable from 60°C to approx. 600°C
Stage III 550l/min Variable from 60°C to 600°C
SETTING THE TEMPERATURE
In the switch positions II and III, the temperature can be continuously regulated.
The distance from the object you are working on depends on the material and intended method of working. Always
try out the air flow and temperature settings on a test piece first. Using the attachable accessory nozzles, the flow
of hot air can be controlled with maximum precision. If the Hot Air Gun is continuously used to close to the
workpiece (i.e. misused) the thermal overload protection will be activated and the tool will completely shut
down. Allow the tool to cool down before attempting to use it.
Decrease the air flow when, for example:
- The surroundings of the work piece should not be heated more than
necessary.
- A light work piece could be blown away by the air stream.
After switching to stage II or III, the target temperature can be regulated.
Pressing the "+or -" Temperature adjuster button increases or decreases
the target temperature one time by 10°C. Holding down the
"+or -" Temperature adjustor button increases or decreases the
temperature continuously by 10°C steps until the button is released or the
minimum or maximum temperature is reached. (See fig. 3)
In switch position I, the pre-set temperature is 60°C.
When switching from position II or III with higher temperatures to position I,
a short time is required for the unit to cool to 60°C. During the cooling
period, the LCD display shows the actual temperature at the nozzle outlet.
Fig. 2
0OFF
ON
350L/min
60°C only
ON
350L/min
60-600°C
ON
550L/min
60-600°C
4
Fig. 3

OPERATION
REMOVING THE HEAT GUARD SLEEVE
CAUTION - Be careful of the hot nozzle!
There is an increased danger of burning when working
without the heat guard.
For working in especially narrow places, the Heat Guard can be removed.
1. To remove or mount the heat guard, the unit must be in the "OFF"
position and be allowed to cool down until cold.
2. With the Hot Air Gun facing away from you, hold the gun in your right
hand and twist the Heat Guard with your left hand in a clockwise
direction then pull off of the main body. (See fig. 4)
3. To mount the Heat Guard back on, slide the Heat Guard over the Nozzle
and push the clips into position.
Always take EXTREME care when using the Hot Air Gun in the
proximity of flammable materials. Heat may also be conducted to
flammable materials that are out of sight.
PLACING DOWN THE HOT AIR GUN
For cooling of the heat gun or to have both hands free for working, it can
be placed down in an upright position on the rear of the housing.
(See fig. 5).
CAUTION - Be especially careful when working with
the heat gun in an upright position!
There is greater danger of burning yourself on the hot nozzle
and the hot air stream.
NEVER LEAVE THE HOT AIR GUN SWITCHED ON AND UNATTENDED!
Fig. 4
Fig. 5
5

Removing paint from window frames
CAUTION! There is a danger of glass
breaking!
Use the window nozzle
(2) to protect the
glass when using the
Hot Air Gun to remove
paint from the frame.
On profiled surfaces,
paint can be removed
using the triangular scraper (3) and
brushed off using a soft wire brush.
WINDOW NOZZLE & PAINT SCRAPER
WORKING EXAMPLES
REDUCTION NOZZLE
Shrink fitting
After fitting the reduction nozzle (4),
select the diameter of the heat-shrink
tubing according to the work piece, for
example, a spade connector. Heat the
heat-shrinkable sleeve evenly.
6
Temperature settings given in the application examples
are suggested values that depending on the material
characteristics, can deviate. The distance between the
nozzle and work piece is dependent on the material to
be worked on.
The ideal temperature should first be ascertained by
performing a test. Therefore, begin with a lower
temperature setting.
All application examples (except B) can be performed
without accessories. However, the use of the
recommended accessory parts simplify the work and
significantly improve the quality of the results.
Be careful when changing the nozzle, danger of
burning!
Do not touch the hot nozzle. Allow the unit to cool.
Wear protective gloves.
SURFACE NOZZLE
Removing paint/softening Adhesives
Attach the surface nozzle (1). Soften
the paint using hot air and remove
using a scraper. Do not heat the paint
for too long since this will burn the
paint, making it more difficult to
remove. The scraper should be kept
sharp and clean.
Many adhesives (e.g. stickers) become softer when
heated allowing adhesive bonds to be broken or
excess adhesive to be removed.

PAINT SCRAPER KIT
KBE-298-3800S
SEAM ROLLER
KBE-298-3801S
HEAT SHRINK
TUBING
32 piece.
KEN-515-6800K
REFLECTOR NOZZLE
Defrosting water pipes
Water pipes often do not differ in
appearance from gas pipes.
Gas pipes are NOT to be heated under
any circumstances!
Place on the reflector nozzle (5). Heat
the frozen zone always from the outside to the middle .
Be especially careful when warming plastic pipes and
connections between pipe pieces to prevent damage.
WORKING EXAMPLES
Available from your local KOBE agent.
ACCESSORIES
7
REDUCTION
NOZZLE
KBE-280-3400K
MAINTENANCE
Ensure the Hot Air Gun is disconnected from the electrical supply and cannot operate accidentally when
servicing or cleaning. If a guard or safety feature needs to be removed during maintenance, be sure to replace
them before resuming operation of the Hot Air Gun.
CLEANING
Clean the Hot Air Gun with a soft brush or a cloth moistened with a suitable biodegradable solvent. Do not use
flammable liquids like petrol or alcohol, they are a fire risk and will also damage the paint finish and plastic
components.
CHECK FOR DAMAGED PARTS
Check for breakage of parts, mountings and other conditions that may affect the operation of the Hot Air Gun.
Repairs must be carried out by an authorised repair technician.
STORAGE
The Hot Air Gun should be stored in the dry, out of reach of children and in a frost-free environment.
REFLECTOR
NOZZLE
KBE-280-3410K
SURFACE
NOZZLE
KBE-280-3430K
WINDOW
NOZZLE
KBE-280-3440K
PAINT SCRAPER
KBE-280-3420K

QUALITY GUARANTEE & WARRANTY
KOBE PRODUCTS carry a one years manufacturers warranty.
KOBE PRODUCTS are designed & produced to the highest standards & specifications
KOBE PRODUCTS are fully guaranteed against faulty materials & workmanship
Should they be found to be defective, they will either be repaired or replaced free of charge
(fair wear and tear and/or misuse excepted). This does not affect your legal rights.
Please retain supplier invoice as proof of purchase.
© The Kennedy Group Ltd. 05/10
Kobe Tools continually strives to improve its products. Specifications may change without prior notice.
KOBE TOOLS Official Agents:
JAPAN: MIKI TOOL TRADING CO. MIKI CITY, JAPAN.
EUROPE, MIDDLE EAST, AMERICA & AFRICA: THE KENNEDY GROUP LTD, WIGSTON, ENGLAND.
For EU and EEA countries only.
In observance of European Directive 2002/96/EC on Waste Electrical and Electronic Equipment
(WEEE) and its implementation in accordance with national law, electrical goods that have reached
the end of their life must be collected separately and returned to an environmentally compatible
recycling facility.
Do not dispose of electrical goods with domestic waste materials as inappropriate disposal may cause potential
hazards to the environment and human health.
For further information, please contact your local authority or the retailer from whom you purchased the product.
THE ENVIRONMENT
DECLARATION OF CONFORMITY
We hereby certify that KOBE HAG2000-D Professional Hot Air Gun - with LCD Display
complies with all the relevant provisions of the following directives:
Electromagnetic Compatibility 2004/108/EC and Low Voltage 2006/95/EC.
Standards applied: EN 50366:2033/+A1:2006, EN 60335-2-45.
EN 60335-2-45:2002, EN 60335-1:2002 + A11:2004 + A1:2004
+ A12:2006 + A2:2006.
Official Agent
KENNEDY TOOLS
Wigston, Leicester, England.
ISO 9001 REGISTERED COMPANY
A comprehensive repair and service facility is available
through your local Kobe agent.
SERVICE & REPAIR
Date: 27th May 2010
Position: Director, The Kennedy Group Ltd.
Signed:
Name: Martin Cooke
Table of contents
Other KOBE Power Tools manuals