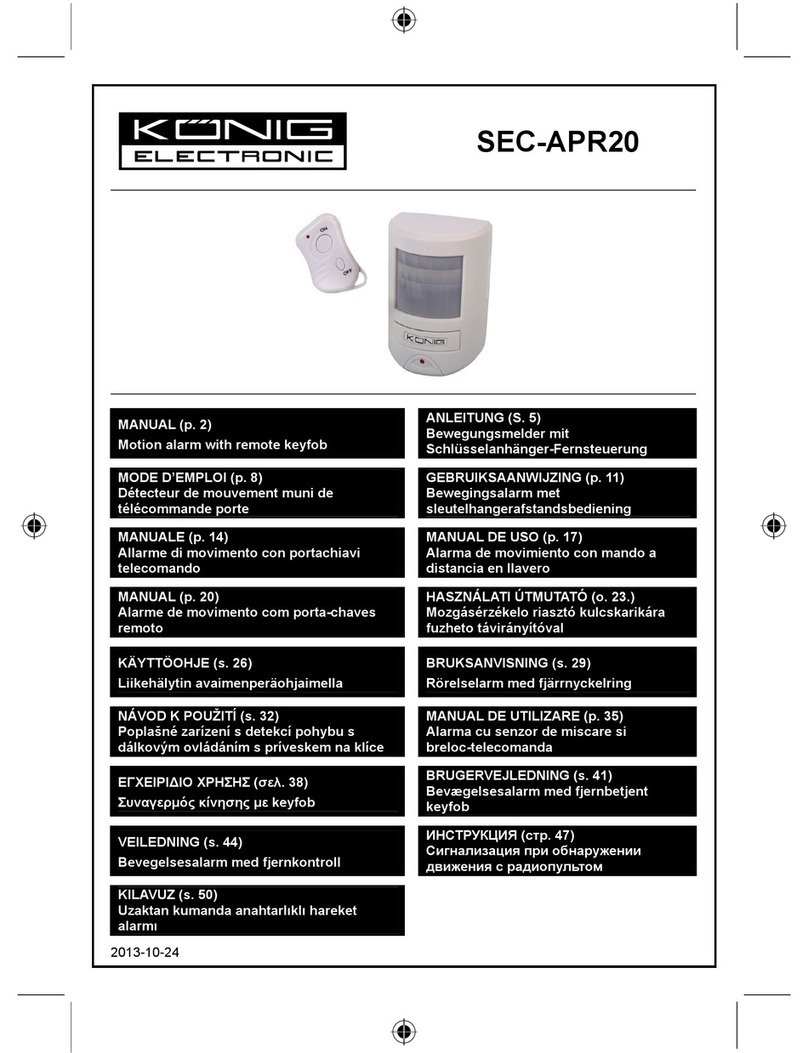
Konig SAS-APR20 User manual

SAS-APR20
MANUAL (p. 2)
ANLEITUNG (S. 5)
MODE D’EMPLOI (p. 8)
GEBRUIKSAANWIJZING (p. 11)
MANUALE (p. 14)
MANUAL DE USO (p. 17)
MANUAL (p. 20)
HASZNÁLATI ÚTMUTATÓ (o. 23)
KÄYTTÖOHJE (s. 26)
BRUKSANVISNING (s. 29)
NÁVOD K POUŽITÍ (s. 32)
MANUAL DE UTILIZARE (p. 35)
ΕΓΧΕΙΡΙΔΙΟ XPHΣHΣ (σελ. 38)
BRUGERVEJLEDNING (s. 41)
VEILEDNING (s. 44)
ИНСТРУКЦИЯ (47 стр.)
KILAVUZ (s. 50)
KASUTUSJUHEND (lk. 53)
NÁVOD (s. 56)
ROKASGRĀMATA (lpp. 59)
NAUDOJIMO VADOVAS (62 p.)
PRIRUČNIK (str. 65)
РЪКОВОДСТВО (p. 68)
INSTRUKCJA OBSŁUGI (str. 71)
PRIROČNIK (str. 74)
Motion alarm with remote keyfob

ENGLISH
2
Learn button
PIR motion
sensor
Alarm
speaker
ON
OFF
Battery low
indicator
Battery low indicator
RF Romote keyfob Rotary mounting bracket
Battery cover
Alarm Unit (Front) Alarm Unit (Back)
Battery installation:
Alarm Unit
1. The battery compartment is accessed from the rear of the alarm unit by
removing the back cover.
2. Insert 2x AA size batteries (not included) and conform the polarity as shown
in the battery compartment.

ENGLISH
3
3. When the last battery is inserted the alarm will beep very loudly to indicate
that the batteries are installed properly.
4. Replace the back cover again.
Remote Keyfob
The remote keyfob uses 1x A27 battery (included).
Note: The Battery Low indicator will light when the batteries needs to be
replaced. Do not mix dierent types of battery such as Alkaline and Carbon-zinc
or old batteries with new. Remove the batteries if the alarm will not be used for
a period of time.
Alarm installation:
1. Place the alarm in the desired location with the rotary wall mount bracket.
Note: The motion detector of the alarm has a 6 meter range with approximate
angles of 30° vertical and 60° horizontal.
2. Fix the bracket to the wall with the supplied screws.
Note: The alarm can also be used without the bracket, as a free standing alarm.
Operation:
1. Press, at a distance of 10meter, the ON button of the remote control.
A conrmation tone will indicate that the alarm is armed and you have
30seconds to leave the projected area. After this time, if motion is detected,
the alarm will sound.
2. Press, when entering the protected area, the OFF button of the remote
control within a distance of 10 meters to disarm the alarm. When entering
the area, there is a short beep to indicate that motion has been detected
and you have a 4 second delay before the alarm will sound.
Learning remote keyfob code to the alarm unit:
After batteries installed, learn the Remote Keyfob code, press the Learn button
on the Alarm unit and press the ON button of keyfob. The Alarm unit will beep
2 times when set. The Alarm is ready to use.
Note: The alarm unit will need to relearn the Remote keyfob code every time
the batteries are replaced in either the alarm unit or the remote keyfob. One
alarm unit can learn 3 remotes maximum.

ENGLISH
4
Specications:
Alarm: 130 dB
Detection: Infrared
Exit delay: 30 seconds
Entry delay: 4 seconds
Battery: 2x AA (not included)
CAUTION
RISK OF ELECTRIC SHOCK
DO NOT OPEN
Safety precautions:
To reduce risk of electric shock, this product should ONLY be opened by an authorized
technician when service is required.
Disconnect the product from mains and other equipment if a problem should occur. Do
not expose the product to water or moisture.
Maintenance:
Clean only with a dry cloth.
Do not use cleaning solvents or abrasives.
Warranty:
No guarantee or liability can be accepted for any changes and modications of the product or damage caused due to
incorrect use of this product.
General:
Designs and specications are subject to change without notice.
All logos brands and product names are trademarks or registered trademarks of their respective holders and are hereby
recognized as such.
This manual was produced with care. However, no rights can be derived. König Electronic can not accept liability for any
errors in this manual or their consequences.
Keep this manual and packaging for future reference.
Attention:
This product is marked with this symbol. It means that used electrical and electronic products should not be
mixed with general household waste. There is a separate collections system for these products.
This product has been manufactured and supplied in compliance with all relevant regulations and directives, valid for all
member states of the European Union. It also complies to all applicable specications and regulations in the country of
sales.
Formal documentation is available upon request. This includes, but is not limited to: Declaration of Conformity (and
product identity), Material Safety Data Sheet, product test report.
Please contact our customer service desk for support:
via website: http://www.nedis.com/en-us/contact/contact-form.htm
via telephone: +31 (0)73-5993965 (during oce hours)
NEDIS B.V., De Tweeling 28, 5215 MC ’s-Hertogenbosch, THE NETHERLANDS

DEUTSCH
5
Übernah-
metaste
PassivInfrarot
Bewegungsmelder
Alarm-melder
EIN
AUS
Batterie-
Statusan-
zeige
Batterie-Statusan-zeige
Fernbedienung als
Schlüsselanhänger
Drehbare Montagehalterung
Batteriefach
Frontansicht Frontansicht
Einlegen der Batterie:
Alarmeinheit
1. Das Batteriefach ist von der Rückseite der Alarmeinheit zugänglich, wenn
die hintere Abdeckung abgenommen wird.
2. Legen Sie 2x AA-Batterien (nicht beigefügt) mit der richtigen Polarität
(imBatteriefach gezeigt) ein.
3. Wenn die letzte Batterie eingelegt ist, ertönt ein sehr lauter Alarm, womit
Ihnen angezeigt wird, dass die Batterien richtig eingelegt.
4. Bringen Sie die rückseitige Abdeckung wieder an.

DEUTSCH
6
Fernbedienung als Schlüsselanhänger
Die Fernbedienung benutzt eine A27 Batterie (mitgeliefert).
Hinweis: Die Anzeige für den niedrigen Ladezustand der Batterie leuchtet,
wenn die Batterien gewechselt werden müssen. Vermischen Sie keine
verschiedenen Batterietypen wie Alkaliund Kohle-Zink- oder alte und neue
Batterien. Nehmen Sie die Batterien heraus, wenn der Alarmmelder eine Zeit
lang nicht benutzt wird.
Installation des Alarmmelders:
1. Bringen Sie den Alarmmelder an der gewünschten Stelle mit einer
drehbaren Wandmontagehalterung an.
Hinweis: Der Bewegungsmelder hat eine Reichweite von 6m mit einem
Erfassungswinkel von ca. 30º vertikal und 60º horizontal.
2. Befestigen Sie die Halterung mit den mitgelieferten Schrauben an der
Wand.
Hinweis: Der Alarmmelder kann auch als freistehendes Gerät ohne Halterung
benutzt werden.
Betrieb:
1. Drücken Sie in einem Abstand von 10 m an der Fernbedienung die EIN-
Taste. Ein Ton bestätigt, dass der Alarmmelder angeschaltet ist und Sie
30Sekunden Zeit haben, um den geschützten Bereich zu verlassen. Danach
ertönt der Alarmmelder, wenn eine Bewegung wahrgenommen wird.
2. Wenn Sie den geschützten Bereich betreten, drücken Sie die AUS-Taste
der Fernbedienung in einem Abstand von weniger als 10m, um den
Alarmmelder auszuschalten. Wenn Sie den Bereich betreten, gibt es einen
kurzen Piepton, um Ihnen zu zeigen, dass eine Bewegung bemerkt worden
ist und Sie 4 Sekunden Zeit haben, bis der Alarm ertönt.
Übernahme Fernbedienungscode auf Alarmanlage:
Nach dem Einsetzen der Batterie drücken Sie zur Übernahme des
Fernbedienungscodes die Übernahmetaste auf der Alarmanlage und drücken
Sie gleichzeitig die Taste EIN auf der Fernbedienung. Die Alarmanlage gibt zwei
Signaltöne ab, sobald die Einstellung vorgenommen ist. Die Alarmanlage ist
einsatzbereit.
Hinweis: Der Fernbedienungscode muss jedes Mal neu übernommen werden,
wenn die Batterien entweder der Alarmanlage oder der Fernbedienung
ausgetauscht werden. Eine Alarmanlage kann von bis zu 3 Fernbedienungen
gesteuert werden.

DEUTSCH
7
Technische Daten:
Wecker: 130 dB
Erkennung: Infrarot
Ausgangsverzögerung: 30 Sekunden
Eingangsverzögerung: 4 Sekunden
Akku: 2x AA (nicht enthalten)
VORSICHT
STROMSCHLAGGEFAHR
NICHT ÖFFNEN
Sicherheitsvorkehrungen:
Um das Risiko eines elektrischen Schlags zu verringern, sollte dieses Produkt
AUSSCHLIESSLICH von einem autorisierten Techniker geönet werden.
Trennen Sie das Produkt von anderen Geräten, wenn ein Problem auftreten sollte. Setzen
Sie das Gerät nicht Wasser oder Feuchtigkeit aus.
Wartung:
Nur mit einem trockenen Tuch säubern.
Keine Reinigungs- oder Scheuermittel verwenden.
Garantie:
Es kann keine Garantie oder Haftung für irgendwelche Änderungen oder Modikationen des Produkts oder für Schäden
übernommen werden, die aufgrund einer nicht ordnungsgemäßen Anwendung des Produkts entstanden sind.
Allgemeines:
Design und technische Daten unterliegen unangekündigten Änderungen.
Alle Logos, Marken und Produktnamen sind Marken oder eingetragene Marken ihrer jeweiligen Eigentümer und werden
hiermit als solche anerkannt.
Diese Bedienungsanleitung wurde sorgfältig verfasst. Dennoch können daraus keine Rechte und Pichten hergeleitet
werden. König Electronic haftet nicht für mögliche Fehler in dieser Bedienungsanleitung oder deren Folgen.
Bitte bewahren Sie Bedienungsanleitung und Verpackung für spätere Verwendung auf.
Achtung:
Dieses Produkt ist mit diesem Symbol gekennzeichnet. Es bedeutet, dass die ausgedienten elektrischen
und elektronischen Produkte nicht mit dem allgemeinen Haushaltsmüll entsorgt werden dürfen. Für diese
Produkte stehen gesonderte Sammelsysteme zur Verfügung.
Dieses Produkt wurde hergestellt und geliefert in Übereinstimmung mit allen geltenden Vorschriften und Richtlinien,
die für alle Mitgliedsstaaten der Europäischen Union gültig sind. Es entspricht allen geltendenVorschriften und
Bestimmungen im Land des Vertriebs.
Eine formale Dokumentation ist auf Anfrage erhältlich. Diese beinhaltet unter anderem, jedoch nicht ausschließlich:
Konformitätserklärung (und Produktidentität), Sicherheitsdatenblatt,Testreport des Produkts.
Wenden Sie sich bei Fragen bitte an unseren Kundendienst:
per Internet: http://www.nedis.de/de-de/kontakt/kontaktformular.htm
per Telefon: Niederlande +31 (0)73-5993965 (während der Geschäftszeiten)
NEDIS B.V., De Tweeling 28, 5215 MC ’s-Hertogenbosch, NIEDERLANDE

FRANÇAIS
8
Touche
Apprendre
Détecteur de
mou-vement
PIR
Hautparleur
d’alarme
ACTIVÉ
DÉSACTIVÉ
Témoin pile
faible
Témoin pile faible
Télécommande RF – porte-clés Support de montage rotatif
Couvercle des piles
Unité d’alarme (Avant) Unité d’alarme (Arrière)
Installation de la pile :
Unité d’alarme
1. Le compartiment à piles est accessible depuis l’arrière de l’unité d’alarme
en retirant le couvercle arrière.
2. Introduisez 2 piles AA (non fournies) en respectant les polarités indiquées
sur le couvercle du compartiment.
3. Lorsque la dernière pile est introduite, l’alarme émet un bip très fort pour
indiquer que les piles sont installées correctement.
4. Remettez le couvercle en place.

FRANÇAIS
9
Télécommande porte-clés
La télécommande porte-clés fonctionne avec une pile A27 (incluse).
Remarque: l’indicateur batterie faible s’allume lorsque les piles doivent être
remplacées. Ne mélangez pas le type de piles diérents comme les piles
alcalines, au carbone-zinc ou les piles neuves avec les piles usagées. Retirez les
piles si l’alarme n’est pas utilisé pendant une longue durée.
Installation de l’alarme :
1. Placez l’alarme dans le lieu désiré à l’aide du support de montage mural
rotatif.
Remarque: Le détecteur de mouvement de l’alarme fonctionne dans un
rayon de 6mètres et une orientation comprise en 30º à la verticale et 60º à
l’horizontale.
2. Fixez le support au mur à l’aide des vis fournies.
Remarque: l’alarme peut également être utilisée sans support, simplement
posée sur un meuble.
Fonctionnement:
1. Appuyez à une distance maximum de 10mètre sur la touche ACTIVÉ de la
télécommande. Un son de conrmation indiquera que l’alarme est armée et
que vous disposez de 30secondes pour quitter la zone surveillée. Au bout
de ce délai, l’alarme retentira dès qu’un mouvement sera détecté.
2. Lorsque vous entrez dans la zone protégée, appuyez sur la touche
DÉSACTIVÉ de la télécommande à une distance maximum de 10mètres
pour désactiver l’alarme. Lorsque vous entrez dans la zone, un court bip
indique qu’un mouvement a été détecté et vous disposez de 4secondes
avant que l’alarme ne retentisse.
Apprentissage du code de télécommande à l’unité d’alarme :
Après l’installation des piles, il faut apprendre le code de télécommande ,
appuyez sur la touche Apprendre de l’unité d’alarme et appuyez sur la touche
ACTIVÉ du porte-clés. L’unité d’alarme émettra 2bips dès qu’elle est réglée.
L’unité d’alarme est prête à l’emploi.
Remarque: L’unité d’alarme doit réapprendre le code de la télécommande
après chaque remplacement de la pile de code de télécommande ou du porte-
clés. L’unité d’alarme ne peut apprendre que 3 codes maximum.

FRANÇAIS
10
Spécications:
Alarme: 130 dB
Détection : Infrarouge
Temporisation de sortie: 30 secondes
Temporisation d'entrée: 4 secondes
Batterie : 2x AA (non incluses)
ATTENTION
RISQUE DE CHOC ELECTRIQUE
NE PAS OUVRIR
Précautions de sécurité:
Pour réduire le risque de choc électrique, ce produit ne doit être ouvert que par un
technicien qualié si une réparation s’impose.
Débranchez l'appareil et les autres équipements du secteur s'il y a un problème. Ne pas
exposer l’appareil à l’eau ni à l’humidité.
Entretien :
Ne nettoyez l'appareil qu'avec un chion sec.
N'utilisez pas de solvants ni des produits abrasifs.
Garantie :
Aucune garantie ou responsabilité ne sera acceptée en cas de modication et/ou de transformation de l'appareil ou en
cas de dommages provoqués par une utilisation incorrecte de l'appareil.
Generale :
Le design et les caractéristiques techniques sont sujets à modication sans notication préalable.
Tous les logos de marques et noms de produits sont des marques déposées ou immatriculées dont leurs détenteurs sont
les propriétaires et sont donc reconnues comme telles dans ce document.
Ce manuel a été produit avec soin.Toutefois, aucun droit ne peut en dériver. König Electronic ne peut être tenu
responsable pour les erreurs contenues dans ce manuel et leurs conséquences.
Conservez ce manuel et l'emballage pour toute référence ultérieure.
Attention :
Ce symbole gure sur l'appareil. Il signie que les produits électriques et électroniques ne doivent pas être
jetés avec les déchets domestiques. Le système de collecte est diérent pour ces produits.
Ce produit est fabriqué et délivré en conformité avec toutes les directives et règlements applicables et en vigueur dans
tous les états membre de l'Union Européenne. Il est également conforme aux spécications et à la réglementation en
vigueur dans le pays de vente.
La documentation ocielle est disponible sur demande. Cela inclut mais ne se limite pas à: La déclaration de conformité
(et à l'identication du produit), la che technique concernant la sécurité des matériaux, les rapports de test du produit.
Veuillez contacter notre centre de service à la clientèle pour plus d'assistance:
via le site Web: http://www.nedis.fr/fr-fr/contact/formulaire-de-contact.htm
via téléphone: +31 (0)73-5993965 (aux heures de bureau)
NEDIS B.V., De Tweeling 28, 5215 MC ’s-Hertogenbosch, PAYS-BAS

NEDERLANDS
11
Inleertoets
PIR bewegin-
gssensor
Alarmluid-
spreker
AAN
UIT
Lagebatterij
indicator
Lagebatterij indicator
RF sleutelhangerafstandsbediening Draaibare bevestigingsbeugel
Batterijklepje
Alarmeenheid (Voorkant) Alarmeenheid (Achterkant)
Plaatsen van de batterij:
Alarmeenheid
1. Het batterijcompartiment is vanaf de achterkant van de alarmeenheid
toegankelijk, door de achterklep te verwijderen.
2. Plaats 2x AA-formaat batterijen (niet meegeleverd), in overeenstemming
met de polariteit die in het batterijcompartiment is weergegeven.
3. Zodra de laatste batterij is geplaatst, zal het alarm een luid signaal geven
om aan te geven dat de batterijen op de juiste wijze werden geplaatst.
4. Plaats de achterklep weer terug.

NEDERLANDS
12
Sleutelhanger Afstandsbediening
De sleutelhangerafstandsbediening gebruikt 1x A27 batterij (inbegrepen).
Opmerking: De indicator voor de batterijstatus zal oplichten op het moment
dat de batterij vervangen dient te worden. Geen verschillende soorten
batterijen, zoals alkaline en koolstof-zink batterijen of een combinatie van
oude en nieuwe batterijen gebruiken. Verwijder de batterijen als het alarm
gedurende een langere periode niet gebruikt zal gaan worden.
Alarminstallatie:
1. Bevestig het alarm met de roterende op de wand gemonteerde klem, op de
gewenste locatie.
Opmerking: De bewegingsdetector van het alarm heeft een 6meter bereik op
een verticale hoek van ca. 30º en een horizontale hoek van ca. 60º.
2. Gebruik de meegeleverde schroeven om de klem op de muur te bevestigen.
Opmerking: Het alarm kan ook zonder de klem, als een vrijstaand alarm
worden gebruikt.
Functionering:
1. Druk op een afstand van 10meter, op de knop aan van de
afstandsbediening. Een bevestigingsignaal zal aangeven dat het alarm
geactiveerd is, waarna u 30seconden hebt om de beveiligde ruimte te
verlaten. Als na het verlopen van deze 30 seconden een beweging wordt
gedetecteerd, zal het alarm afgaan.
2. Druk bij binnenkomst in de beveiligde ruimte en binnen een afstand van
10meter, op de afstandsbediening op de knop Uit om het alarm uit te
schakelen. Bij binnenkomst in de ruimte zal er een kort signaal worden
weergegeven om aan te geven dat een beweging werd gedetecteerd,
waarna er een vertraging is van 4seconden, voordat het alarm af zal gaan.
Code van de sleutelhangerafstandsbediening inleren in de alarmeenheid:
Installeer de batterijen en leer de code van de Sleutelhangerafstandsbediening
in door op de Inleertoets van de alarmeenheid te drukken en vervolgens op de
Aan toets van de sleutelhanger. De alarmeenheid zal tweemaal piepen wanneer
ingesteld en is klaar voor gebruik.
Opmerking: Telkens nadat u de batterijen vervangt in de alarmeenheid of
sleutelhangerafstandsbediening, moet de alarmeenheid de code van de
sleutelhangerafstandsbediening opnieuw inleren. Eén alarmeenheid kan tot op
3 afstandsbedieningen inleren.

NEDERLANDS
13
Specicaties:
Alarm: 130 dB
Detectie: infrarood
Uitgangsvertraging: 30 seconden
Ingangsvertraging: 4 seconden
Batterij: 2x AA (excl.)
VOORZICHTIG
GEVAARVOOR ELEKTRISCHE SCHOK
NIET OPENEN
Veiligheidsmaatregelen:
Om het risico op elektrische schokken te voorkomen mag dit product ALLEEN worden
geopend door een erkende technicus wanneer er onderhoud nodig is.
Koppel het product los van de elektrische voeding en van andere apparatuur als er zich
problemen voordoen. Stel het product niet bloot aan water of vocht.
Onderhoud:
Uitsluitend reinigen met een droge doek.
Gebruik geen reinigingsmiddelen of schuurmiddelen.
Garantie:
Voor wijzigingen en veranderingen aan het product of schade veroorzaakt door een verkeerd gebruik van dit product,
kan geen aansprakelijkheid worden geaccepteerd. Tevens vervalt daardoor de garantie.
Algemeen:
Ontwerpen en specicaties kunnen zonder kennisgeving worden gewijzigd.
Alle logo’s, merken en productnamen zijn handelsmerken of geregistreerde handelsmerken van de respectievelijke
eigenaren en worden hierbij als zodanig erkend.
Deze handleiding is met zorg samengesteld. Er kunnen echter geen rechten aan worden ontleend. König Electronic kan
geen aansprakelijkheid aanvaarden voor eventuele fouten in deze handleiding of de gevolgen daarvan.
Bewaar deze gebruiksaanwijzing voor latere raadpleging.
Opgelet:
Dit product is voorzien van dit symbool. Dit symbool geeft aan dat afgedankte elektrische en elektronische
producten niet met het gewone huisafval verwijderd mogen worden. Voor dit soort producten zijn er speciale
inzamelingspunten.
Dit product is vervaardigd en geleverd in overeenstemming met de relevante reglementen en richtlijnen die voor alle
lidstaten van de Europese Unie gelden. Het voldoet ook aan alle toepasselijke specicaties en reglementen van het land
van verkoop.
Op aanvraag is ociële documentatie verkrijgbaar. Inclusief, maar niet uitsluitend: Conformiteitsverklaring (en
productidentiteit), materiaalveiligheidsinformatie en producttestrapport.
Wend u tot onze klantenservice voor ondersteuning:
via de website: http://www.nedis.nl/nl-nl/contact/contact-formulier.htm
telefonisch: +31 (0)73-5993965 (tijdens kantooruren)
NEDIS B.V., De Tweeling 28, 5215 MC ’s-Hertogenbosch, NEDERLAND

ITALIANO
14
Bottone
apprendimento
Sensore di
movimento
PIR
Altoparlante
dell’allarme
ACCESO
SPENTO
Indicatore
livello basso
batteria
Indicatore livello basso batteria
Portachiavi con telecomando RF Supporto di montaggio rotante
Coperchio della batteria
Unità Allarme (Fronte) Unità Allarme (Retro)
Inserimento batterie:
Unità allarme
1. Si accede al vano batteria togliendo il coperchio sulla parte posteriore
dell’unità allarme.
2. Inserire 2 batterie AA (non incluse) rispettando la polarità indicata nel vano
stesso.
3. Dopo l’inserimento dell’ultima batteria, l’allarme emetterà un suono intenso
per indicare la correttezza dell’inserimento stesso.

ITALIANO
15
4. Riposizionare il coperchio.
Portachiavi con telecomando
Il portachiavi con telecomando usa una batteria A27 (inclusa).
Nota: L’indicatore di batteria in esaurimento appare quando è necessario
sostituire le batterie. Non mescolare tipi diversi di batteria (ad esempio alcaline
e zincocarbonio, oppure batterie vecchie e nuove). Togliere le batterie se non si
utilizza l’allarme per un periodo prolungato.
Installazione allarme:
1. Posizionare l’allarme nel punto desiderato con la staa di montaggio a
parete rotante.
Nota: il rilevatore di movimento dell’allarme ha un range di 6metri con un
angolo approssimativo di 30° in verticale e 60° in orizzontale.
2. Fissare la staa alla parete con le viti in dotazione.
Nota: È possibile utilizzare l’allarme senza la staa, come allarme autonomo.
Funzionamento:
1. Premere, a distanza di 10metri, sul pulsante ACCESO del telecomando. Un
suono di conferma indicherà l’attivazione dell’allarme e sono disponibili
30secondi per lasciare l’area della proiezione. Dopo questo periodo, se si
rileva un movimento, suonerà l’allarme.
2. Premere, entrando nell’area protetta, il pulsante SPENTO del telecomando
a una distanza di 10metri, per disattivare l’allarme. All‘ingresso nell’area,
viene emesso un breve segnale acustico per indicare la rilevazione di un
movimento e si hanno a disposizione 4secondi di ritardo prima che suoni
l’allarme.
Apprendimento del codice del portachiavi con telecomando da parte
dell’unità allarme:
dopo che le batterie sono state istallate, svolgere l’apprendimento del codice
del Portachiavi con Telecomando, premere il bottone Apprendimento sull’Unità
allarme e premere il bottone ACCESO sul portachiavi. L’Unità allarme emetterà
un bip per 2 volte una volta impostata. L’Allarme è pronto all’uso.
Nota: l’unità allarme deve apprendere di nuovo il codice del Portachiavi con
Telecomando ogni volta che le batterie vengono sostituite nell’unità allarme o
nel portachiavi con telecomando. Un’unità allarme può apprendere massimo 3
codici telecomando.

ITALIANO
16
Speciche:
Allarme: 130 dB
Rilevazione: Infrarossi
Ritardo uscita: 30 secondi
Ritardo ingresso: 4 secondi
Batterie: 2x AA (non incluse)
PRECAUZIONI
RISCHIO DI SCOSSE ELETTRICHE
NON APRIRE
Precauzioni di sicurezza:
Per ridurre il rischio di scosse elettriche, il presente dispositivo deve essere aperto SOLO
da un tecnico autorizzato, nel caso sia necessario ripararlo.
Scollegare il prodotto dalla rete di alimentazione e da altri apparecchi se dovesse
vericarsi un problema. Non esporre l'apparecchio ad acqua o umidità.
Manutenzione:
Pulire solo con un panno asciutto.
Non utilizzare solventi detergenti o abrasivi.
Garanzia:
Non sarà accettata alcuna garanzia o responsabilità in relazione a cambiamenti e modiche apportate al prodotto o a
danni determinati dall’uso non corretto del prodotto stesso.
Informazioni generali:
Il design e le caratteristiche tecniche sono soggetti a modica senza necessità di preavviso.
Tutti i marchi a logo e i nomi di prodotto sono marchi commerciali o registrati dei rispettivi titolari e sono riconosciuti
come tali in questo documento.
Questo manuale è stato redatto con cura.Tuttavia non possono essere avanzati diritti. König Electronic non può accettare
responsabilità per errori in questo manuale né per eventuali conseguenze.
Conservare questo manuale e la confezione per riferimenti futuri.
Attenzione:
Il prodotto è contrassegnato con questo simbolo. Questo signica che i prodotti elettrici ed elettronici
non devono essere smaltiti con i normali riuti domestici. Per questi prodotti esiste un sistema di raccolta
dierenziata.
Il presente prodotto è stato realizzato e fornito in conformità a tutte le norme e le direttive vigenti, con validità in tutti
gli stati membri della Comunità Europea. Inoltre è conforme alle speciche e alle normative applicabili nel paese in cui è
stato venduto.
La documentazione uciale è disponibile su richiesta. Essa include a titolo esemplicativo ma non limitativo:
Dichiarazione di conformità (e di identità del prodotto), scheda di sicurezza dei materiali, rapporto di prova del prodotto.
Contattare il nostro servizio clienti per assistenza:
tramite il nostro sito web: http://www.nedis.it/it-it/contatti/modulo-contatto.htm
tramite telefono: +31 (0)73-5993965 (in orario di ucio)
NEDIS B.V., De Tweeling 28, 5215 MC ’s-Hertogenbosch, Paesi Bassi

ESPAÑOL
17
Botón de
aprendizaje
Sensor de
movimiento
PIR
Altavoz
ACTIVA
DESACTIVAR
Indicador
batería baja
Indicador batería baja
Mando a distancia RF en llavero Soporte de montaje giratorio
Tapa de la batería
Unidad de alarma (Frontal) Unidad de alarma (trasera)
Instalación de las pilas:
Unidad de la alarma
1. El compartimento de las pilas es accesible a partir de la parte trasera de la
unidad de la alarma sacando la cubierta trasera.
2. Introduzca 2 pilas de tamaño AA (no incluidas) de conformidad con las
polaridades tal y como se indica en el compartimento de pilas.

ESPAÑOL
18
3. Cuando se introduzca la última pila, la alarma sonará muy fuerte para
indicar que las pilas se han introducido adecuadamente.
4. Vuelva a poner la tapadera de nuevo.
Mando a distancia en llavero
El mando a distancia en llavero usa una batería A27 (incluida).
Nota: El indicador de batería baja se encenderá cuando las pilas tengan que
cambiarse. No mezcle distintos tipos de pilas como las alcalinas y las de zinc-
carbono o las viejas pilas con las nuevas. Saque las pilas si la alarma no será
utilizada durante un periodo de tiempo.
Instalación de la alarma:
1. Coloque la alarma en la ubicación deseada con el soporte de instalación en
pared giratorio.
Nota: El sensor de movimiento de la alarma tiene un alcance de 6metros con
ángulos aproximados de 30º en vertical y 60º en horizontal.
2. Fije el soporte en la pared con las tuercas suministradas.
Nota: La alarma también puede utilizarse, sin el soporte, como alarma de libre
soporte.
Funcionamiento:
1. Pulse, a una distancia de 10metros, el botón ACTIVAR del mando a
distancia. Un tono de conrmación indicará que la alarma está montada y
tendrá 30segundos para dejar la zona proyectada. Tras este tiempo, si se
detecta un movimiento, la alarma sonará.
2. Pulse, al acceder a la zona protegida, el botón DESACTIVAR del mando a
distancia, a una distancia de 10metros para desmontar la alarma. Al acceder
a la zona, se emitirá un breve sonido para indicar que se ha detectado
movimiento y tendrá un plazo de 4 segundos antes de que suene la alarma.
Aprendizaje del código del mando a distancia por la unidad de alarma:
Después de colocar las baterías, la unidad de alarma tiene que aprender el
código del mando a distancia, pulse el botón Aprendizaje de la unidad de
alarma y pulse el botón ACTIVAR del mando a distancia. La unidad de alarma
dará 2bips cuando esté congurada. La alarma está lista para usar.
Nota: La Unidad de alarma deberá volver a aprender el código del mando a
distancia cada vez que cambie las baterías de una o del otro. Una unidad de
alarma puede aprender hasta 3 códigos máximo.

ESPAÑOL
19
Especicaciones:
Alarma: 130 dB
Detección: Infrarrojos
Retardo de salida: 30 segundos
Retardo de entrada: 4 segundos
Pila: 2x AA (no incluidas)
PRECAUCIÓN
RIESGO DE ELECTROCUCIÓN
NO ABRIR
Precauciones de seguridad:
Para reducir el peligro de descarga eléctrica, este producto SÓLO lo debería abrir un
técnico autorizado cuando necesite reparación.
Desconecte el producto de la toma de corriente y de los otros equipos si ocurriera algún
problema. No exponga el producto al agua ni a la humedad.
Mantenimiento:
Límpielo sólo con un paño seco.
No utilice disolventes de limpieza ni productos abrasivos.
Garantía:
No se aceptará ninguna garantía o responsabilidad derivada de cualquier cambio o modicaciones realizadas al producto
o daños provocados por un uso incorrecto del producto.
General:
Las ilustraciones y las especicaciones podrán sufrir cambios sin previo aviso.
Todas las marcas de logotipos y nombres de productos constituyen patentes o marcas registradas a nombre de sus
titulares correspondientes, reconocidos como tal.
Este manual se ha redactado con sumo cuidado. Aún así, no se ofrece ninguna garantía. König Electronic no será
responsable de los errores de este manual o de las consecuencias derivadas de los mismos.
Conserve este manual y el embalaje en caso de futura necesidad.
Atención:
Este producto está señalizado con este símbolo. Esto signica que los productos eléctricos y electrónicos
usados no deberán mezclarse con los desechos domésticos generales. Existe un sistema de recogida individual
para este tipo de productos.
Este producto se ha fabricado y distribuido de conformidad con todas las normativas y directivas relevantes, válidas para
todos los estados de la Unión Europea. También cumple con todas las especicaciones y normativas en el país en el cual
se comercializa.
Previa solicitud, podremos proporcionarle la documentación formal. Esta documentación incluye, entre otros: Declaración
de conformidad (e identidad del producto), hoja de datos de seguridad del material, informe sobre las pruebas realizadas
al producto.
Póngase en contacto con nuestro servicio de atención al cliente para obtener información adicional:
por medio de nuestro sitio web: http://www.nedis.es/es-es/contacto/formulario-de-contacto.htm
o llamando por teléfono: +31 (0)73-5993965 (en horario de ocina)
NEDIS B.V., De Tweeling 28, 5215 MC ’s-Hertogenbosch, PAÍSES BAJOS

PORTUGUÊS
20
Botão de
informação
Sensor de
movimento
PIR
Altifalante do
alarme
LIGADO
DESLIGADO
Indicador de
bateria fraca
Indicador de bateria fraca
Porta-chaves remoto RF Suporte de montagem rotativo
Tampa da bateria
Unidade de Alarme (Frente) Unidade de Alarme (Traseira)
Instalação da bateria:
Unidade de Alarme
1. O compartimento da bateria é acedido a partir da parte traseira da unidade
de alarme através da remoção da tampa traseira.
2. Insira 2x pilhas de tamanho AA (não incluídas) cumprindo a polaridade,
conforme indicado no respectivo compartimento.
Table of contents
Languages:
Other Konig Security System manuals

Konig
Konig SEC-APC10 User manual

Konig
Konig SEC-ALARM200 User manual

Konig
Konig VID-TRANS300 User manual

Konig
Konig SEC-ALARM200 User manual

Konig
Konig SAS-ALARM100 User manual

Konig
Konig SEC-DVR504 User manual

Konig
Konig SEC-ALARM100 User manual

Konig
Konig SEC-AED10 (V.2) User manual

Konig
Konig SAS-TRANS60/U User manual

Konig
Konig SEC-APR20 User manual
Popular Security System manuals by other brands

Triton
Triton LR30 quick start guide

PSG Dover
PSG Dover Wilden SafeGuard Engineering, operation & maintenance

FBII
FBII XL-20 owner's manual

ADT
ADT On-The-Go Quick installation guide

Teletek electronics
Teletek electronics SensoIRIS MCP150MR installation instructions

Consilium
Consilium Salwico CS3000 installation manual