KORNORGE A9 User manual

A9
MADE BY KORNORGE
KORNORGE ELECTRIC BIKE
USER MANUAL
(Please read the instruction manual carefully and understand the
performance of the electric bicycle before using. Please keep the instruc-
tion manual properly)

Smart Electric Bike Instruction Manual
LIST OF ACCESSORIES
Install Pedals:
Right Pedal: Rotating Clockwise
Left Pedal: Rotating Anticlockwise
Note:Some details of your bike may be little different from the above picture due to
our product upgrading,which will not affect the usage.
Pedal×2 Charger×1 Manual×1 Warranty card×1 Allen key×1 15mm Open wrench×1
Folding Steps:
2.Adjust the handle,
loosen the handle
of the folding riser,
and fold the lower
riser.
1.Insert the key to
open the seat tube
battery lock.
3.Adjust the seat
tube height,open
the frame folding
handle, and fold
the frame.
transmission
meter
brake handle
standpipe
standpipe folding buckle
headlight
head tube
wiring harness
tire
disc brake
spokes
front disc brake
pedal
chain
reflector
parking rack
cushion
battery and
power switch
rear reflector
with locking
pipe clamp
disc brake
flywheel
rear derailleur
battery tube
battery
disc brake
taillight
变速转吧
folding handle
reflector
quick release hub
frame
dental plate
crank
frame folder
controller cover
controller
quick release handle
grip
speed up
front fork
1
2
3
4
5
6
7
8
9
10
11
12
13
14
15
16
17
18
19
20
21
22
23
24
25
26
27
28
29
30
31
32
33
34
35
36
37
38
39
40

FUNCTION
Up key (switch machine)
Down button
(light on button)
charging port
±Key (gear addition
and subtraction)
3. Switch on and off: Turn on the battery power switch, and press and hold the button on the meter for 3
seconds to switch the power of the e-bike on and off.
4. Light switch: Press the down button of the instrument once to turn on or off the front and rear lights of the
e-bike.
5. Power-assist mode: When riding, step on the pedal to assist the electric output. The power-assist is
divided into 3 gears, corresponding to the speed limit of 15km/h, 20km/h and 25km/h respectively.If you need
to adjust the gear, short press the "+-" button to complete the gear switching, and the instrument will display
the current corresponding assist gear.
6. Pure electric mode: Press the accelerator dial, the e-bike can be directly accelerated electrically, and the
maximum speed of pure electric is 25km/h.
7. Multi-function display: Speed display, gear display, total mileage/single mileage display (press the down
button of the instrument quickly 2 times to switch single/total mileage), speed unit display (press the down
button of the instrument 3 times to switch KMH/ MPH) etc.
8. Power-off brake and tail light: When the power-off brake lever is squeezed, the controller first cuts off the
motor output, and then the disc brake mechanically brakes. When the brake lever is not fully rebounded,
neither the dial nor the power assist can give electric acceleration.
9. Tail lights: Night running lights/brake lights, night running lights and headlights synchronous switch, tail
lights flashing when braking.
10. Battery removal and installation: The seat tube is detachable. To adjust the seat tube battery,you need to
open the seat tube handle switch with a key. You can adjust the seat tube battery up and down and remove
the seat tube battery. After unplugging the power cord, you can pull out the battery.
(If the battery is damaged and needs to be replaced, please contact the official customer service.)
Multifunction display
1. Unpacking assembly and debugging: After unpacking, take out the electric bike, assemble the handlebar,
lock the handlebar quick release, install the front wheel in the hook groove of the front fork, install the quick
release lock, lightly hold the brake lever several times, wait for The brake line is restored to the best state,
and it is confirmed that there is no abnormal noise when the front wheel rotates, and that the front and rear
brakes are functioning properly. Adjust the seat tube height, lock the quick release handle after adjusting to a
suitable height, install the power cord, and install the foot pedal.
2. Charging: First connect the DC end of the charger to the charging port of the electric bike, and then
connect the AC end of the charger to the household power socket. After the charger is connected, it starts to
charge. During charging, the indicator light of the charger shows a red light. The indicator light changes from
red to yellow-green, indicating that the battery is fully charged.
11. Instrument setting: Press the "+/-" keys at the same time to enter the instrument setting interface, the "+/-"
key to adjust the setting mode P0-P2, P0: voltage setting; P1: mileage reset; P2: wheel diameter setting.
After switching to the corresponding mode, press the down key of the meter to switch to the mode setting
item. After switching to the mode setting item, press the "+/-" key to switch the setting option. After the switch
is completed, press the upper key of the meter to exit the setting mode.
battery
power switch

Gears
Derailleur System
Some of KORNORGE E-Bike go with gears, which consists of:
• A rear sprocket cluster, called a freewheel or cog set
• A rear derailleur
• One swifter
• One control cable
• One front sprocket called a chaining
• A drive chain
There are many different types of swifter mechanisms, each preferred for specific
Applications because of its ergonomic, performance and price characteristics.
A downshift is a shift to a lower or lower gear, one which is easier to pedal. An upshift is a shift to a higher or faster gear, one which is harder to
pedal. For example, you can downshift to a lower gear to make pedaling easier on a hill.
On the other hand, you may upshift to a higher gear when you wish to go faster.
Whether up-shifting or downshifting, the derailleur system requires that the drive
Chain be moving forward and be under at least some tension. A derailleur will
Shift only if you are pedaling forward.
Caution:__________________________________________________
Never move the swifter while pedaling backward. Also do not pedal backwards after moving the swifter. Either of these actions could jam chain
and cause serious damage to the E-Bikes.
The derailleur system includes the front and rear derailleur, the shift levers,
and the derailleur control cables, all of which must function properly for smooth
gear
shifting to occur.
Derailleur
Although the front and rear derailleur are initially adjusted in our factory, you will
need to inspect and read just both before riding bicycle.
Rear Derailleur
Begin by shifting the rear swifter to largest number indicated, loosen the cable
from the rear derailleur cable anchor bolt, and place the chain on the smallest
sprocket.
Adjust the high limit screw so that the guide pulley and the smallest sprocket
are lined up vertically. Re-tighten the cable, pull out any slack, and re-tighten
the anchor bolt securely. Shifting through the gears, making sure that each gear
is achieved quietly and without hesitation. If necessary, use the barrel adjuster
to fine tune the cable tension by turning it the direction you want the chain to
go. For example, turning clockwise will loose the cable tension and move the
chain away from the wheel, while turning counter-clockwise will tighten cable
tension and direct the chain to the wheel.

Product Parameters
Physical
Dimension
Performance
Weight
Max load
Riding speed
Max speed
Power consumption
Mileage(pure electric)
Assistant-Mileage
Uphill
Temperature
Waterproof
18.7kg
75kg
20km/h
25km/h
1.1kWh
25KM
30-40km
15 degree
-10~45℃
IP54
Model
Material
Folding size
Spread size
Package size
Center distance
Foot distance
Hub size
Color Black / White
20inch
972mm
130mm
815*400*690mm
1475*540*690mm
1220*260*595mm
magnesium alloy
A9
Remark: Many factors will affect the max speed, such as power, load, tyre pressure,
road conditions, chain, lubrication degree etc. Mileage has been measured on basis of
temperature 25℃, load of 60KG, speed of 15-20KM/H, smooth and hard road, and from
full battery to dead battery. It also is subjected to other factors, such as driving habits,
temperature, load, tyre presure, road conditions etc.

Model
A9
Model
Battery Type
Battery capacity
Rated voltage
Charging voltage
Input voltage
Charging time
Motor type
Rated power
Motor rated speed
Motor rated voltage
Controller
undervoltage value
Controller current
limit value
Quick meter
Transmission
Dial accelerator
Headlight
Taillight
Seat
Sensor
Support
Braking method
Personalized stickers
Front and rear dual disc brakes
Speed sensor
Liftable seat tube battery
7variable speed
Yes
Yes
Yes
280r/min
36V
31±0.5V
15± 1A
Yes
250W
High speed motor
DC36V
DC42V
AC100-240V
4-5H
7.5Ah
Lithium battery
Product
Parameters
Features
Remark: Many factors will affect the max speed, such as power, load, tyre pressure, road
conditions, chain, lubrication degree etc. Mileage has been measured on basis of
temperature 25℃, load of 60KG, speed of 15-20KM/H, smooth and hard road, and from
full battery to dead battery. It also is subjected to other factors, such as driving habits,
temperature, load, tyre presure, road conditions etc.

Circuit Schematic
Left brake lever
Right brake lever
motor
Headlight 3W
Power_36V (brake trigger)
100VAC
30A
36V battery pack
DC2.1
charging port
TX
5V
Phase A
Ha
Hb
Hc
GND
Phase B
Phase C
RX
GND
XT
RT
GND
A_GND
36V
100VAC
10A
GND
Brake
GND
Brake
GND
Power supply 36V
Power supply 36V
Electric lock_36V
Electric lock_36V
Booster
5V
GND
Power supply 36V
Electric lock_36V
Moment
Signal
Speed Hall
B_GND
5V
GND
Signal
Controller
Call
Left instrument

Maintenance:
Responsibility Announcement:
Battery and Charging:
CAUTION
Riding:
1.Only charge at 0°~ 45°, discharge at -20°~ 60°, keep the battery dry. Do not put the battery in acidic or alkaline liquids, avoid rain,
and keep the battery away from fire, heat and high temperature environments. The negative pole is reversed, and it is strictly forbidden
to damage, disassemble or short-circuit the battery.
2.When charging, please use the original special charger, not more than 6 hours, and the charging current should not exceed 2A.
When not in use for a long time, please keep the battery in a cool and dry place, and charge the battery for two hours every month.
3.Pay attention tothe battery types and applicable voltages that the charger can charge. Mixing is strictly prohibited.When charging, it
should be placed in a ventilated environment, and it is strictly forbidden to charge in a closed space or in a hot sun and high
temperature environment.
4.When charging, plug in the battery first, and then add the utility power; when the battery is fully charged, cut off the utility power first,
and then unplug the battery.
5.When the green lightis on, the power supply should be cut off in time, and it is forbidden toconnect the charger tothe AC power
supply with no load for a long time without charging.
6.During the charging process, if the indicator light is abnormal, there is a peculiar smell or the charger shell is overheated, the charging
should be stopped immediately, and the charger should be repaired or replaced.
7.Waste batteries are hazardous chemicals,and should not be disassembled without authorization, and will be recycled by relevant
professional departments. Inthe process of use and storage, pay attention to avoid the entry of foreign objects, especially to avoid the
inflow of water or other liquids, so as to avoid short circuit inside the charger.
8.Try not to carry the charger with the car. If you really need to carry it, it should be placed in the toolbox after the shock absorption
treatment. Do notdisassemble or replace the components in the charger by yourself.especially to avoid the inflow of water or other
liquids, so as to avoid short circuit inside the charger.
Read the instruction first to know the product performance first.
Don’t lend it to someone who is not familiar with it.
Wear a helmet when riding. Obey the traffic rules and don’t ride it in the cars road.Don’t riding it in the crowded road.
Do not charge and park in residential buildings, keep away from combustibles when charging, and the charging time should not be too long.
Drive on the right on non-motorized vehicle lanes, downhill slopes and paved roads not exceeding 15km/h, and drive on the right when
there is no non-motorized vehicle lane.
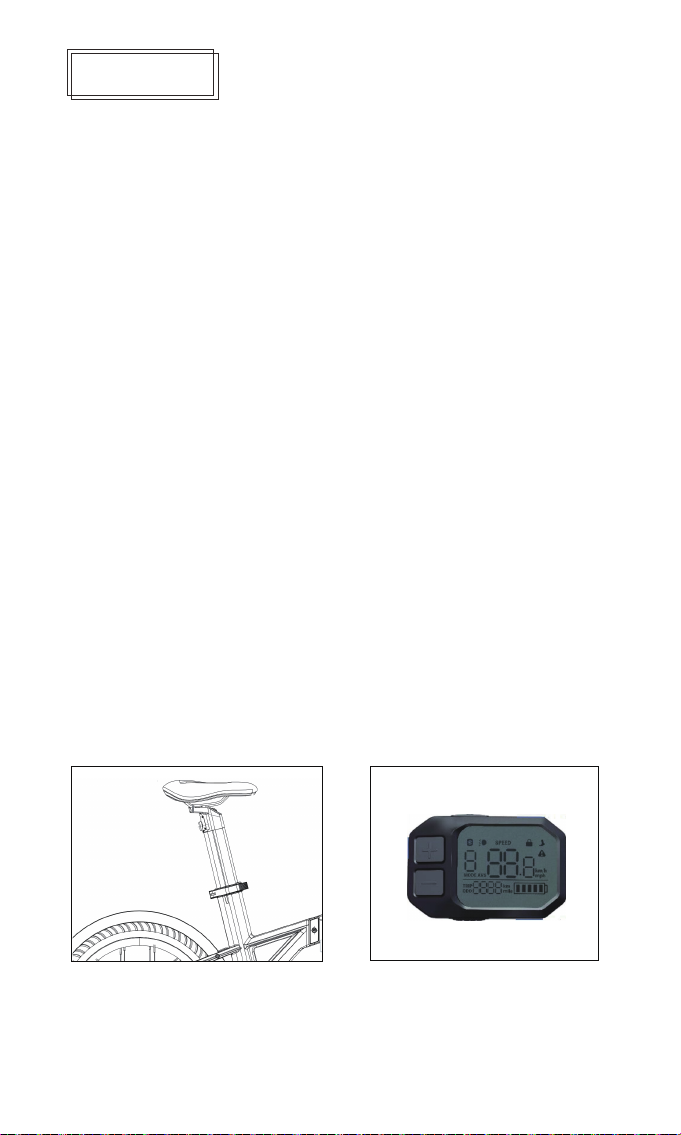
When adjusting the handlebars or saddles, be careful not to leak the safety line marks on the handlebars and saddles.
Please check the tire pressure before riding, the recommended tire pressure is 35-45PSI.
Before riding, please check the status of the power circuit, lighting circuit, etc.
When using the motor, be careful not to hit it vigorously, and keep the shaft lubricated.
Don’t over load.(Max load is 120kg)
When riding in rain or snow, the braking distance will be extended, so pay attention to slow down.
In severe weather such as heavy rain, try to avoid travel.
Suitable for people 16-45 years old. It is strictly forbidden to ride with one hand and people under the age of 16 to drive E-bike on the road.
Before riding, please check whether the front and rear brakes work normally, check the fastening status of the E-bike handlebars and front
and rear wheels, and check whether the reflectors are damaged or polluted.
Carry people or items in accordance with the requirements of laws and regulations, and do not park in the building foyer, evacuation
stairs, aisles and safe entrances and exits.
1.The E-bike front and back wheel should be at the center of the frame.
2.Put the E-bike up after riding at cool and dry place.
3.It is forbidden to rinse with water, and the surface of the body of the E-bike can be wiped with a semi-dry cloth.
4.Check the Motor and Brake often, don’t inject the oil onto the brake.
5.Check the E-bike and screws and places that need fixing, fix it often.
6.Suggested torsion: Bar screws 60-80 kgf.cm, bar stand screws 175-200kgf.cm, wheel screws 320-450kgf.cm.
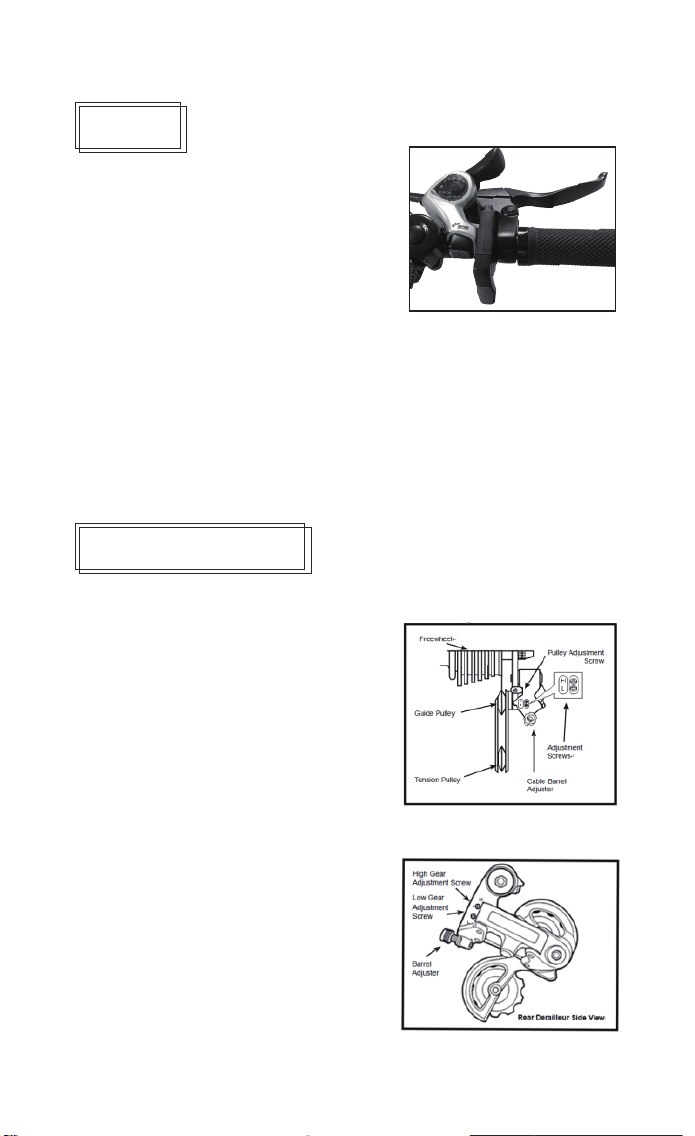
7.Regularly check the chain tension, which can be adjusted by the chain adjuster.
8.Please check the tire frequently for scratches, cracks or excessive wear. The inner tube and valve should be perpendicular tothe wheel
hub and not crooked. Accidentally punctured damaged or excessively worn inner and outer tires should be replaced immediately, please
seek professional technicians to repair or replace your tires.
9.Bad or excessively worn inner and outer tires should be replaced immediately, please seek professional technicians to repair or replace
your tires.
10.It is forbidden to modify key structural parts such as frame, front fork, standpipe and electrical function accessories.
11.Three-guarantee service, any loss or damage caused by modification is at your own risk.
All the product model, type and related information copy right and explain right are reserved.
This instruction is suitable for denoted models.
Any changing or replace part of the E-bike will not be informed again.
No copy, modification, propaganda or publication before getting the permission form KORNORGE .
Read the instructions and follow the instructions or the user will be responsible for the damage.
KORNORGE won’t be responsible for injuries, casualties and possession damages.
For more information please visit : www.kornorge.com .
Table of contents
Other KORNORGE Scooter manuals