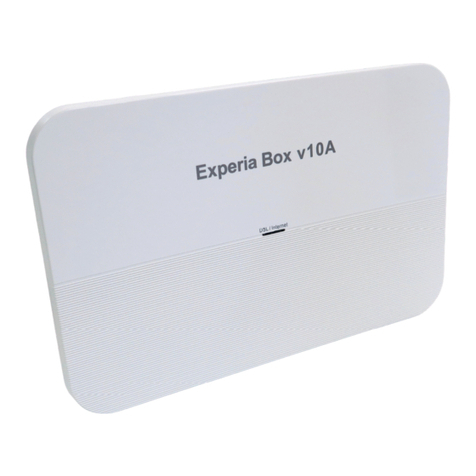
KPN Experia Box v10 Installation guide

Modem
Installation overview
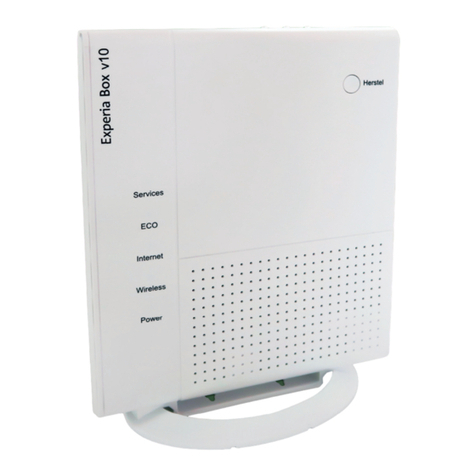
ExperiaBox v10
Start
Get online, watch TV and make a call in 5 steps.

Checklist to prepare your connection
IF YOU STILL HAVE ACCESS TO THE INTERNET
Watch the installation videos at www.kpn.com/installatievideo for additional explanations on how
to install all devices.
Do you already have an Experia Box?
Always connect your new ExperiaBox! Make sure you also replace any old cables with the cables provided.
BEFORE YOU START WITH STEP 1
Have you received your confirmation letter?
Have you received a confirmation letter in the post or by e-mail? This letter contains information that you will need for the installation process.
INTERNET: Check the internet activation date in the confirmation letter.
You cannot use your KPN services with the equipment from your do-it-yourself installation package until this date.
Make sure there is an available power outlet?
Check whether there is an empty power outlet near the connection point for your Experia Box.
Note down Network Name (SSID) and Password (WPA2)
Note down or take a picture of the SSID (network name) and the WPA2 code (password).
You can find these details on the removable card on the back of the Experia Box. You will need this information for a wireless connection.
Are all cables long enough?
Only use the cables provided. Refer to the overview of the cables on the back of this page and discover the function of each coloured cable.
For longer or new cables, go to a KPN store.
Check the tools you will need.
For two types of main connection points, you will need some wire cutters.
For your own safety, use insulated tools.
INTERACTIVE TV: Have you received your subscription details?
You can find your subscription number and PIN code in your confirmation letter or e-mail.
PHONE: Switch o VoiceMail.
Make sure messages cannot be left on your old VoiceMail.
KPN landline phone service: Dial #61# on the telephone currently connected to your landline to switch o VoiceMail.
PHONE: Switch o call forwarding.
Make sure that call forwarding from or to your landline telephone on your old network is disabled.
KPN landline phone service: Dial #21# or #67# on the telephone currently connected to your landline to switch o call forwarding.

Step 1
Determining
the type of
connection box
• Before installation, go through the
Checklist to prepare your connection.
• Determine the type and location of
the master phone socket connection
point in your home. 1and 2: Proceed
to the connection process (Step 2)
straightaway.
3and 4: Prepare the connection point
using the extended user manual
‘Start Installation Experia Box v10’.
• You can consult or download
the interactive user manual at
www.kpn.com/handleidingen.
Step 2
Connecting
the ExperiaBox
• Click the stand onto the bottom of the ExperiaBox.
• Take the cable with grey connectors.
• Connect this cable between the connection point and the grey [DSL] port on the Experia
Box. Make sure to hear or feel a click when you connect the cables to the Experia Box.
• Securely connect the power adapter to the [POWER] port on the Experia Box and insert
the adapter into the wall power outlet.
• Switch on the ExperiaBox using the white [ONOFF] button on the side and wait until
the 'Services', 'Internet', 'Wireless' and 'Power' lights turn green.
Stand
Experia Box
(side)
PhonePhone
L
L
DSL
ETHERNET
WAN PowerReset On/OffUSB
Power outlet
Power adapter
Connection box
ISRA 1
Utility cupboard
OR
Connection box
Twist-on wire connector
Utility cupboard
OR
Telephone
connector
Wall socket
Living room
OR
ISRA 2
Utility cupboard
1
2
3
4
Cable with grey
connectors
Lights
Power
Wireless
Internet
ECO
EXPERIA BOX 10
Services
PC
TV
1

Step 4
Connecting a computer
or laptop
Your Network Name and Password are on the removable card
on the back of the Experia Box.
Connecting a wired device with Windows?
• Connect the Ethernet cable with yellow connectors to the
[ETHERNET] port of your computer or laptop and to any of
the yellow Ethernet ports on the ExperiaBox.
• Turn on your computer and/or laptop and click the network
icon in the lower right corner of the task bar.
• Select your Network Name (SSID) from the list of available
networks and click Connect.
• Enter the Password (WPA / WPA2) and click Next.
Connecting a device wirelessly?
Refer to the ‘Internet’ installation card.
Step 3
Connecting the TV receiver
• Connect the Ethernet cable with yellow connectors to
the [ETHERNET] port on your TV receiver. Plug the other
end into any of the yellow [ETHERNET] ports in the back
of the Experia Box.
• Make sure your television is switched o. Connect the [HDMI]
port of your TV receiver and an HDMI port in your television
with an HDMI cable.
• Connect the power adapter to the [ V DC] port and insert
the plug into the power outlet.
• Turn on your TV and TV receiver by using the [POWER] button
on the receiver.
• Follow the instructions on your television screen.
• To tune the remote control to your television, check the
installation chart for Interactive TV or go online to
www.kpn.com/handleidingen.
Repeat this step for every TV receiver.1)
Need more detailed instructions?
Read the Interactive TV installation card for further information
and for details on how to tune your remote control
to your television.
Connecting a laptop, tablet or smartphone via Wi-Fi?
Read the ‘Internet’ installation chart for more information.
Power outlet
HDMI
HD TV
TV receiver
POWER
HDMI
ETHERNET
Ethernet port
on Experia Box
Power
adapter
ETHERNET
www.kpn.com/
handleidingen
Computer
Ethernet port
on Experia Box

Step 5
Connecting a landline
telephone
• Use the provided telephone cable with green
connectors or the telephone cable of your current
landline phone with a mini connector.
• Connect the telephone to the first green
[PHONE] port on the ExperiaBox.
• Have you purchased extra DECT handsets?
Refer to the user manual of your DECT telephone
for instructions.
Do you have a dierent type of phone?
You can consult or download the interactive user
manual at www.kpn.com/handleidingen and
choose Phone.
Does your telephone have a dierent connector?
If your phone has a dierent connector,
refer to www.kpn.com/handleidingen and choose
the ‘Making Telephone Calls’ installation card.
Change Wi-Fi name and password
Advice: Always change your Wi-Fi name and password.
Change your Wi-Fi network name and password immediately
after installing the Experia Box. You can change these
settings with the Online Service Tool. Always do this from
your own home. Visit www.kpn.com/netwerkbeveiligen
for more information.
Creating a MijnKPN (MyKPN) account
How do you create a KPN ID? Go to www.kpn.com/mijnkpn
and create a MijnKPN account. You can view and change
your settings in the MijnKPN environment. You will also find
your invoice and subscription details here.
1) If you wish to connect more than three tv receivers, you will need the supplied
KPN Switch. Refer to the ‘KPN Switch’ user manual for more information and help
with installation.
DECT base station
Phone Phone
Phone1 on
Experia Box
Step 6
Benefit from strong
Wi-Fi anywhere in
your home
• Go to the Wifi Tuner at www.kpn.com/wifi.
• Follow the directions in the Wifi Tuner.
• See whether your Wi-Fi can be improved straightaway.
• Benefit from strong Wi-Fi anywhere in your home.
INFORMATION ABOUT INTERNET
Codes for connecting to the Internet.
SSID (name of the wireless home network):
WPA/WPA2 (security key for Wi-Fi):
INFORMATION ABOUT INTERACTIVE TV
Codes (see letter of confirmation) for registering on your TV.
Subscription number for Interactive TV:
PIN code for Interactive TV:

847726/04-19
Telephone cable:
grey connector
(connector RJ11)
Connects the ExperiaBox
to the KPN network.
PHONE
Telephone cable:
green connector
(connector RJ11)
Optional: suitable for
connecting a phone.
Ethernet cable:
yellow connector
(type cat5 or cat6)
1x per laptop or desktop
1x per TV receiver.
INTERACTIEVE TV
HDMI cable
Suitable for connecting
your (HD) TV.
Green port on connection box
You will need this to connect two
older types of telephones on one
phone number.
Grey port on connection box
You will need this to connect the
ExperiaBox to a twist-on wire
connector or ISRA 1 port.
Telephone connector
You will need this to connect the
ExperiaBox to a wall socket.
Overview of ADSL/VDSL cables
The colour of each connector is the same as the colour of its corresponding port on the ExperiaBox or TVreceiver.
More information
See on www.kpn.com for the technical data, the guidelines
for socially responsible enterprises and the Declaration
of Conformity.
Customer service (also free with mobile)
Was the installation not successful? We are happy to help.
You can reach us on +31 (0) 800 0402 (free phone
number), 24hours a day, 7days a week.
Still having issues after getting help from our customer
service? Don’t panic! Go to www.kpn.com/monteur and
we will send an expert engineer out to you free of charge.
Returning an item
If you want to return this package, go to
www.kpn.com/retouren or contact KPN customer service
for instructions.
Conditions for use
• Only connect the ExperiaBox to 230 V sockets.
• Do not touch the power cable with wet hands.
• To prevent a fire or electric shocks, keep liquids away from the Experia Box.
• Disconnect the connector of the ExperiaBox from the socket immediately if
the ExperiaBox starts to make strange noises, emits a smell, or if smoke
comes out the Experia Box.
• Never open the housing of the ExperiaBox. This can cause electric shocks.
• Do not attempt to carry out repairs on this product yourself. Defects caused by
opening by the ExperiaBox will not be covered by the warranty terms of your KPN.
Table of contents
Other KPN Modem manuals

KPN
KPN MIM802 Instruction manual

KPN
KPN usb-modem User manual

KPN
KPN usb-modem User manual

KPN
KPN usb-modem Instruction manual

KPN
KPN USB-Modem 2 Instruction manual

KPN
KPN Experia Box v10A Installation guide

KPN
KPN Experia Box v10A Installation guide

KPN
KPN E160 Instruction manual

KPN
KPN Experia Box v10 Installation guide