manuals.online logo
Brands
  1. Home
  2. •
  3. Brands
  4. •
  5. Kramer
  6. •
  7. Switch
  8. •
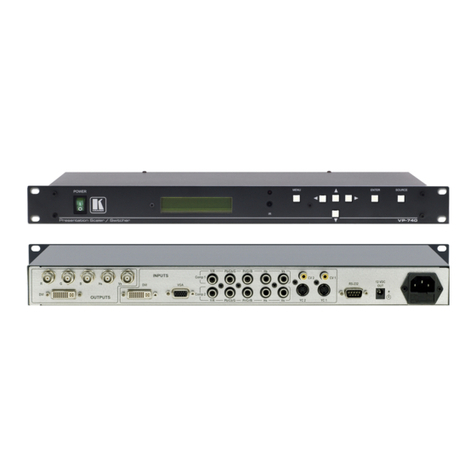
  9. Kramer VP-440 User manual

Kramer VP-440 User manual

Other manuals for VP-440

4

Other Kramer Switch manuals

Kramer Tools VP-111 User manual

Kramer

Kramer Tools VP-111 User manual

Kramer VP-558 User manual

Kramer

Kramer VP-558 User manual

Kramer VP-23N User manual

Kramer

Kramer VP-23N User manual

Kramer VS-1211 User manual

Kramer

Kramer VS-1211 User manual

Kramer VP-81KSi User manual

Kramer

Kramer VP-81KSi User manual

Kramer VP-24 User manual

Kramer

Kramer VP-24 User manual

Kramer ASPEN-32UFX User manual

Kramer

Kramer ASPEN-32UFX User manual

Kramer VS-4x4FW User manual

Kramer

Kramer VS-4x4FW User manual

Kramer VS-34FD User manual

Kramer

Kramer VS-34FD User manual

Kramer TP-900UHD User manual

Kramer

Kramer TP-900UHD User manual

Kramer VP-720DS User manual

Kramer

Kramer VP-720DS User manual

Kramer PT201VGA User manual

Kramer

Kramer PT201VGA User manual

Kramer VP-23xl User manual

Kramer

Kramer VP-23xl User manual

Kramer VP-440 User manual

Kramer

Kramer VP-440 User manual

Kramer ProScale VP-728 User manual

Kramer

Kramer ProScale VP-728 User manual

Kramer VS-21HDCP-IR User manual

Kramer

Kramer VS-21HDCP-IR User manual

Kramer VS-161H User manual

Kramer

Kramer VS-161H User manual

Kramer VA-1DVIN User manual

Kramer

Kramer VA-1DVIN User manual

Kramer VS-211H User manual

Kramer

Kramer VS-211H User manual

Kramer VS-21 User manual

Kramer

Kramer VS-21 User manual

Kramer 6241HDx1 User manual

Kramer

Kramer 6241HDx1 User manual

Kramer 6241 User manual

Kramer

Kramer 6241 User manual

Kramer VP-440H2 User manual

Kramer

Kramer VP-440H2 User manual

Kramer VP-81SID User manual

Kramer

Kramer VP-81SID User manual

Popular Switch manuals by other brands

SMC Networks SMC6224M Technical specifications

SMC Networks

SMC Networks SMC6224M Technical specifications

Aeotec ZWA003-S operating manual

Aeotec

Aeotec ZWA003-S operating manual

TRENDnet TK-209i Quick installation guide

TRENDnet

TRENDnet TK-209i Quick installation guide

Planet FGSW-2022VHP user manual

Planet

Planet FGSW-2022VHP user manual

Avocent AutoView 2000  AV2000BC AV2000BC Installer/user guide

Avocent

Avocent AutoView 2000 AV2000BC AV2000BC Installer/user guide

Moxa Technologies PT-7728 Series user manual

Moxa Technologies

Moxa Technologies PT-7728 Series user manual

Intos Electronic inLine 35392I operating instructions

Intos Electronic

Intos Electronic inLine 35392I operating instructions

Cisco Catalyst 3560-X-24T Technical specifications

Cisco

Cisco Catalyst 3560-X-24T Technical specifications

Asante IntraCore IC3648 Specifications

Asante

Asante IntraCore IC3648 Specifications

Siemens SIRIUS 3SE7310-1AE Series Original operating instructions

Siemens

Siemens SIRIUS 3SE7310-1AE Series Original operating instructions

Edge-Core DCS520 quick start guide

Edge-Core

Edge-Core DCS520 quick start guide

RGBLE S00203 user manual

RGBLE

RGBLE S00203 user manual

Thrustmaster FLIGHT SIMULATOR X quick guide

Thrustmaster

Thrustmaster FLIGHT SIMULATOR X quick guide

Southwire SURGE GUARD 41390 RVC troubleshooting guide

Southwire

Southwire SURGE GUARD 41390 RVC troubleshooting guide

Buhler Nivotemp NT 61 Brief instructions

Buhler

Buhler Nivotemp NT 61 Brief instructions

Techly IDATA AU-270 user manual

Techly

Techly IDATA AU-270 user manual

Belkin F1U109 user manual

Belkin

Belkin F1U109 user manual

Emerson Rosemount 2521 Series quick start guide

Emerson

Emerson Rosemount 2521 Series quick start guide

manuals.online logo
manuals.online logoBrands
  • About & Mission
  • Contact us
  • Privacy Policy
  • Terms and Conditions

Copyright 2025 Manuals.Online. All Rights Reserved.

Step 2: Install the VP-440
Step 3: Connect inputs and outputs
Mount the machine in a rack or place on a table.
VP-440 Quick Start (P/N: 2900-300476QS REV 1)
1 Quick start guide
4 Rubber feet
The VP-440 Presentation Switcher/Scaler
1 Power adapter
Mounting brackets
For best results, we recommend that you always use Kramer high-performance cables to connect AV equipment to
the VP-440.
VP-440 Quick Start Guide
Step 1: Check what’s in the box
Rev:
1
2 9 0 0 - 3 0 0 4 7 6 QS
Microphone
Always switch OFF the power on each device
before connecting it to your VP-440.
Rev:
Computer
Graphics
Source (PC)
BluRay Disk
Player
Laptop LCD
Display
Projector
Analog Audio
Inputs
Analog Audio
Inputs
PC Control
Device
RJ-45 Pinout
For the Ethernet connector, see the proper wiring diagram below:
For a condenser
microphone:
For a dynamic
microphone:
1
2
3
4
5
6
7
8
Orange / White
Orange
Green / White
Blue
Blue / White
Green
Brown / White
Brown
PIN Wire Color
EIA / TIA 568B
The Microphone Pinout:
Microphone +
Microphone -
Ground
Microphone
Ground
For optimum range and performance use
Kramer's BC-HDKat6a
cable. These specially built cables significantly outperform
regular CAT 6 cables.
This guide helps you install and use your product for the first time. For more detailed information, g
to to download the latest manual or scan the QR code on
the left.
o
http://www.kramerav.com/manual/VP-440
Step 6: Operate via the front panel buttons and via the:
RS-232 and Ethernet:Embedded Web
Page:
Step 4: Connect the power
Connect the 5V DC power adapter to the rear of the VP-440 and connect the adapter to the mains electricity
Step 5: Set operation parameters via OSD menu
Enter the OSD menu via the MENU button
on the front panel. Select a menu item
and set parameters as required.
If you cannot see any images, verify that
the display, TV, or projector is in good
working order and is connected to the
VP-440. If you still don't see an image,
press and hold the RESET TO
XGA/720P button for 3 seconds to reset
the output to XGA or 720p resolution.
Menu Item
Function
OUTPUT Select the input, the image size and the resolution
PICTURE Set the contrast, brightness, red, green and blue levels. Set the
hue, saturation, sharpness, noise reduction. When PC is the
selected input, finetune the image
AUDIO Set the input and output volumes, the audio delay time and
mute/unmute. Select the audio source for each HDMI input. set
the microphone mixer mode and the microphone volume
ADVANCED Set HDCP on input and on output, auto sync off and the OSD
parameters. Set the auto switch mode, the Ethernet parameters
and the Timing shift
FACTORY RESET Perform factory reset
INFORMATION Display the input and output resolutions, the HDCP status, the
firmware version and the IP address
RS-232
Baud Rate: 9,600
Data Bits: 8
Stop Bits: 1
Parity: None
Ethernet
To reset the IP settings to the factory reset values go to : Menu-> Factory-> RESET->Change
the option to YES and press Enter
IP Address: 192.168.1.39
Subnet mask: 255.255.0.0
Default gateway: 0.0.0.0
Default UDP Port #: 50000
Maximum UDP Ports: 4
Full Factory Reset
OSD Go to : Menu-> Factory-> RESET->Change the option to YES and
press Enter
RS-232/Ethernet (UDP) Command Protocol
Command Format: ASCII protocol 3000
Example (Route the video HDMI3 input to the output): #ROUTE 12,1,2<cr>