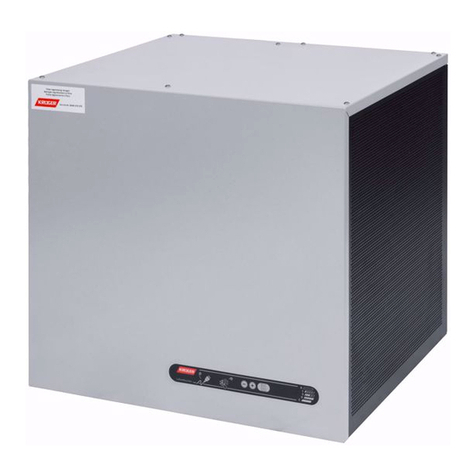
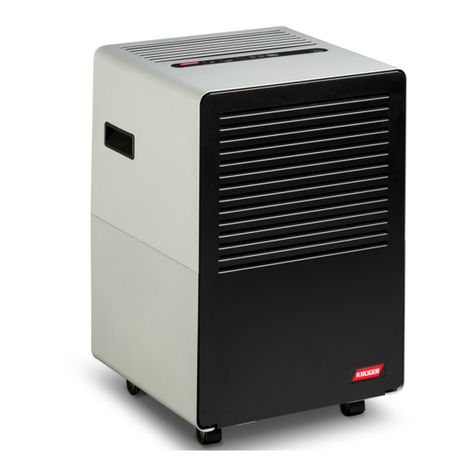
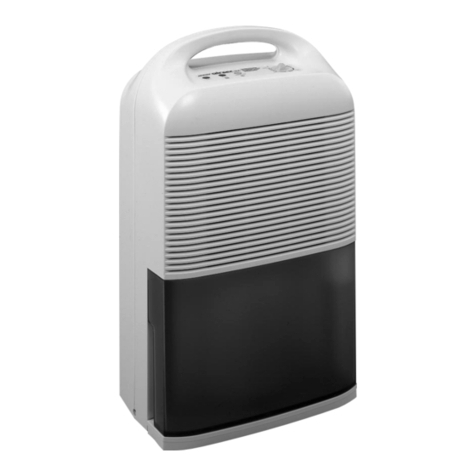
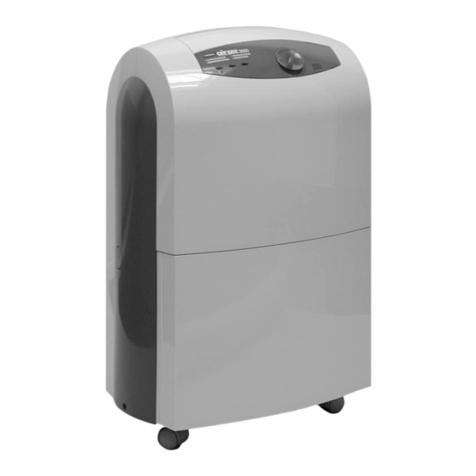
Kruger AIRSEC 3000 User manual

Deutsch Seite 2
Français Page 8
Italiano Pagina 12
English Page 16
entfeuchten
heizen
kühlen
sanieren
AIRSEC 3000
Bedienungsanleitung

1
Hygrostatknopf
Bouton de l’hygrostat
Selettore igrostato
Hygrostat dial
2
Betriebslampe
Lampe-témoin
Spia d’esercizio
Pilot light
3
Anzeige Wasserbehälter
Lampe-témoin bac à eau
Spia di controllo secchiello
Water container indicator light
4
Abtau-Lampe
Lampe-témoin dégivrage
Spia di controllo sbrinamento
Defrost light
1
34 2
A
Gerät ausgeschaltet
Appareil arrêté
Apparecchio spento
Machine switched o
B
Normalbetrieb
Operation normale
Funzionamento normale
Normal operation
C
Dauerbetrieb
Service continu
Funzionamento continuo
Permanent operation
B
A C

5
Luftfilter-Rahmen
Grille d’aspiration
Griglia d’aspirazione
Air filter frame
6
Luftfilter
Filtre à air
Filtro dell’aria
Air filter
7
Wasserbehälter
Bac à eau
Secchiello
Water container
8
Traggri
Poignée
Maniglia
Carrying handle
9
Luft-Austrittsklappe
Volet de sortie d’air
Deflettore d’emissione dell’aria
Air outlet flap
9
8
7
5
6

Vor dem Benutzen
Bitte lesen Sie alle in dieser Gebrauchsanwei-
sung aufgeführten Informationen aufmerk-
sam durch. Sie geben Ihnen wichtige Hinwei-
se für den Gebrauch, die Sicherheit und den
Unterhalt des Gerätes.
Bewahren Sie diese Gebrauchsanweisung
sorgfältig auf und geben Sie diese gegebe-
nenfalls an Nachbenutzer weiter.
Das Gerät darf nur für den vorgesehenen
Zweck gemäss dieser Gebrauchsanweisung
verwendet werden. Beachten Sie die Sicher-
heitshinweise.
Sicherheitshinweise
Dieses Gerät ist kein Kinderspielzeug. Kin-
der erkennen die Gefahren nicht, die beim
Umgang mit Elektrogeräten entstehen
können. Das Gerät muss deshalb ausser
Reichweite von Kindern benutzt und
auewahrt werden.
Der Luftentfeuchter darf nur entspre-
chend den nationalen Anschlussbe-
dingungen installiert werden.
Nie Finger und Gegenstände in die Luft-
eintritts- und -austrittsönungen halten.
Verletzungsgefahr!
Gerät immer ausschalten, wenn es nicht
benutzt wird.
Verhindern Sie den Kontakt des Elektroka-
bels mit einer heissen Oberfläche.
Den Netzstecker ziehen:
a) bei Störungen
b) vor jeder Reinigung und Pflege
c) nach Gebrauch
Den Stecker niemals am Netzkabel oder mit
nassen Händen aus der Steckdose ziehen.
Das Gerät nie am Netzkabel ziehen.
Das Netzkabel nicht über scharfe Kanten
ziehen oder einklemmen.
Verlängerungskabel nur dann verwenden,
wenn Sie sich zuvor von dessen einwand-
freiem Zustand überzeugt haben. Bei
einer Kabelrolle ist das gesamte Kabel von
der Rolle zu ziehen.
Das Gerät ist nicht in Betrieb zu nehmen
(Netzstecker sofort ziehen) wenn:
a) das Gerät oder Netzkabel beschädigt ist
b) der Verdacht auf einen Defekt nach
einem Sturz oder ähnlichem besteht.
In diesem Fall muss das Gerät durch einen
Fachmann (Kältespezialist) kontrolliert und
eventuell repariert werden.
Das Gerät darf nie in stehendem Wasser
benützt werden. Sollte dies der Fall sein,
so muss das Gerät zuerst ausgesteckt
oder die Sicherung herausgeschraubt wer-
den, bevor man die Wasserlache betritt.
Keine schweren Gegenstände auf das
Gerät stellen oder sich darauf setzen.
Wird das Gerät zweckentfremdet, falsch
bedient oder nicht fachgerecht repariert,
kann keine Haftung für eventuelle Schä-
den übernommen werden. In diesem Fall
entfällt der Garantieanspruch.
Verwendungszweck
Dieses Gerät ist speziell für Wohnräume kon-
zipiert. Es darf nicht in Waschküchen und
Trocknungsräumen eingesetzt werden. Mit
diesem Luftentfeuchter kann die relative
Feuchtigkeit eines Raumes reguliert werden.
Das Gerät arbeitet auf dem Kondensations-
prinzip. Der niedrigste Feuchtigkeitsgehalt,
der erreicht werden kann, beträgt je nach
Temperatur ca. 35 – 40% r.F.
System-Beschreibung
Die feuchte Raumluft wird mittels eines
Ventilators über den am Kühlaggregat an-
geschlossenen Verdampfer geführt. Die
Feuchtigkeit kondensiert an den Verdamp-
fer-Schlangen und tropft als Wasser in das
Sammelgefäss ab. Vor dem Austritt wird die
Luft durch den Kondensator wieder auf die
Eingangstemperatur erwärmt.
Anleitung
Transport/Lagerung
Das Gerät sollte, wenn immer möglich, auf-
recht transportiert werden. Nach einem
liegenden Transport muss das Gerät min-
destens zwei Stunden aufrecht hingestellt
werden, bevor es angeschlossen und in Be-
trieb genommen werden darf.
Sollte das Gerät längere Zeit nicht in Ge-
brauch sein, so muss vor der Einlagerung der
Wassereimer und das Gehäuse mit einem
feuchten Lappen gereinigt und trockengerie-
ben werden. Das Gerät sollte dann verpackt
werden (Originalkarton).
Aufstellung
Gerät auf ebenen Grund stellen.
Luftzirkulation innerhalb des Raumes
gewährleisten.
Ansaug- und Ausblasönungen nicht
verdecken.
Sicherheitsabstand von 8 cm zu brenn-
baren Teilen einhalten.
Mindestabstand von 50 cm zu Wänden
und Mobiliar.
Maximale Raumgrösse bis 200 m3beachten
Betriebstemperaturen:
minimal + 12 °C/maximal + 30 °C.
Inbetriebnahme
Fenster und Türen schliessen.
Netzstecker einstecken – Betriebslampe
(2) brennt.
Luft-Austrittsklappe oben am Gerät önen
– ACHTUNG: Gerät darf nicht mit geschlos-
sener Klappe in Betrieb genommen werden
Korrekte Platzierung des Wassereimers (7)
kontrollieren.
Hygrostatrad (1) auf gewünschten Wert
einstellen (in der Regel Position «B»).
DasGerätarbeitetautomatisch,d.h.sobaldder
eingestellte Trockengrad erreicht ist, schaltet
der Entfeuchter ab und beginnt erst bei Wie-
deranstieg der Feuchtigkeit zu arbeiten. Es
empfiehlt sich, im Raum einen Hygrometer
aufzuhängen, um die Feuchtigkeitswerte zu
kontrollieren. Bei zu hoher Feuchtigkeit ist
der Hygrostatschalter des Gerätes auf einen
tieferen, bei zu tiefer Feuchtigkeit auf einen
höheren Wert einzustellen. Wird der Hygro-
statschalter auf «C» gestellt, so arbeitet das
Gerät im Dauerbetrieb.
Während der Abtauphase – Defrost-Lampe
(4) brennt – stellt der Kompressor ab, der Ven-
tilator läuft jedoch weiter.
Unterhalt
Bei vollem Wassereimer (7) schaltet der Ap-
parat automatisch ab. Dieser Stillstand wird
durch das Aufleuchten der mittleren Kon-
trollampe (3) gekennzeichnet.
Eimer links und rechts an den Gririllen
fassen und sorgfältig rausziehen.
Eimer leeren.
Eimer wieder korrekt platzieren.

Direkte Wasserableitung
Bei Bedarf kann das der Luft entzogene Was-
ser auch direkt abgeleitet werden.
Wassereimer (7) entfernen
Vorgestanztes Plastikteil (10) auf der linken
Seite des Gerätes herausbrechen
Schlauch (im Handel erhältlich, Innen-
durchmesser 12mm) durch die entstan-
dene Önung einführen und über den
Ablaufstutzen stülpen
Das andere Schlauchende mit stetigem Ge-
fälle in ein Ablaufrohr führen. Darauf achten,
dass kein Wasser in das Gerät zurückläuft
oder dass es sich im Schlauch stauen kann
Wassereimer wieder einsetzen
Reinigung
Das Kälteaggregat ist hermetisch verschlossen,
die Lager des Ventilators sind dauergeschmiert
und bedürfen deshalb keiner Wartung.
Netzstecker aus Steckdose ziehen.
Gehäuse mit einem weichen trockenen
Tuch abwischen, bei starker Verschmut-
zung ein feuchtes Tuch mit einem milden
Reinigungsmittel verwenden.
Luftfilter-Rahmen (5) an der Einkerbung
fassen und herausziehen.
Weisses Filternetz mit einer Bürste oder
Staubsauger entstauben (alle 3 bis 4
Wochen).
Filterrahmen mit Filter ins Gerät einschieben.
Netzstecker wieder in Steckdose einstecken.
Warten Sie nach der Reinigung drei
Minuten, bis Sie das Gerät wieder in
Betrieb nehmen.
Bei starker Verschmutzung ist eine Innen-
reinigung des Gerätes notwendig. Diese Un-
terhaltsarbeit muss durch einen Kältefach-
mann ausgeführt werden.
Störungskontrolle
Bitte kontrollieren Sie die nachstehenden
Punkte, bevor Sie das Gerät zu Ihrem Fach-
händler bringen:
A. Gerät läuft nicht
Ist der Netzstecker korrekt eingesteckt?
Ist die Sicherung Ihres Elektrokastens in
Ordnung?
Ist das Netzkabel oder das eventuell ver-
wendete Verlängerungskabel in Ordnung?
Ist der Wassereimer leer?
Ist der Wassereimer korrekt eingesetzt?
Liegt die Raumfeuchtigkeit über dem am
Gerät eingestellten Wert?
Haben Sie drei Minuten gewartet, bevor
Sie das Gerät wieder eingeschaltet
haben? Der Luftentfeuchter ist mit einem
Kompressorschutz ausgerüstet. Nach dem
Abschalten läuft der Kompressor erst nach
einer Drei-Minuten-Wartezeit wieder an.
10

B. Gerät läuft ununterbrochen
Ist das Hygrostatrad auf die Position «B»
eingestellt?
Sind die Türen und Fenster geschlossen?
Ist die Geräteleistung ausreichend für die
Raumgrösse (max. 200 m3)?
C. Das Gerät entfeuchtet nur
ungenügend
Ist die Luftzirkulation im Raum gewährlei-
stet?
Sind die Ansaug- und Ausblas-Önungen
frei?
Ist die Raumtemperatur zu hoch oder zu
niedrig (s. Rubrik Aufstellung)?
Ist der Filter sauber?
Sollte die Kontrolle obiger Punkte zu keinem
Erfolg führen, so muss das Gerät einem Fach-
mann (Kältespezialisten) zur Inspektion über-
geben werden.
Entsorgung
Der Luftentfeuchter ist mit einem Kälte-
mittel gefüllt. Eine spezielle Entsorgung ist
deshalb notwendig. Bitte wenden Sie sich an
Ihren Fachhändler oder die örtliche Entsor-
gungsstelle. ∕

Avant la premiere utilisation
Lisez attentivement ce mode d’emploi, il
contient toutes les informations importantes
sur l’utilisation, la sécurité et l’entretien de
l’appareil.
Conservez ce mode d’emploi dans un endroit
sûr et, remettez-le, le cas échéant, au pro-
chain utilisateur.
L’appareil ne doit être utilisé que pour l’usage
prévu conformément à ce mode d’emploi.
Veuillez observer les consignes de sécurité.
Consignes de securite
Cet appareil n’est pas destiné aux enfants.
Les enfants ne sont pas en mesure de
reconnaître les dangers que peut pré-
senter l’utilisation d’appareils électriques.
L’utilisation et l’entreposage de l’appareil
doivent avoir lieu dans un endroit hors de
portée des enfants.
Le raccordement du déshumidificateur
doit être conforme aux prescriptions
nationales.
Ne jamais introduire les doigts ou objets
dans les ouvertures d’aspiration et de
sortie d’air. Dangers d’accident!
Lorsque l’appareil n’est pas utilisé, il doit
être déconnecté.
Le câble ne doit pas être mis en contact
avec une surface chaude.
Le câble d’alimentation doit être retiré
dans les cas suivants:
a) lors d’un dérangement
b) avant chaque nettoyage ou entretien
c) après utilisation
La fiche ne doit jamais être retirée en
tirant sur le câble d’alimentation ou avec
les mains mouillées.
L’appareil ne doit jamais être déplacé en le
tirant par le câble.
Le câble ne doit pas être en contact avec
des arêtes vives ou être écrasé.
Seules des rallonges en parfait état
doivent être employées. Si vous utilisez un
enrouleur de câble, il faut dérouler entière-
ment le câble.
Il est interdit de mettre l’appareil en
service (la fiche doit être immédiatement
retirée) lorsque:
a) l’appareil ou le câble d’alimentation est
endommagé
b) la présence d’un défaut suite à un choc
ne peut pas être exclue.
Dans ce cas, l’appareil doit être contrôlé
par une personne qualifiée (spécialiste du
froid) et au besoin être réparé.
Il est strictement interdit de faire fonc-
tionner l’appareil dans de l’eau. Si un tel
cas se produit, il faudra en premier retirer
l’alimentation électrique ou dévisser le
fusible avant d’entrer en contact avec
l’eau.
Aucun objet lourd ne doit être posé sur
l’appareil. Il est également interdit de
s’asseoir dessus.
Nous déclinons toute responsabilité sur
d’éventuels défauts découlant d’une
utilisation inadaptée ou d’une réparation
inappropriée. Dans ce cas, la garantie
devient caduque.
Emploi
Cet appareil est conçu pour les habitations. Il
est interdit de l’utiliser dans les buanderies et
les locaux de séchage. Ce déshumidificateur
permet de régler l’humidité relative dans un
local. L’appareil fonctionne selon le principe
par condensation. Le taux d’humidité le plus
bas pouvant être atteint se situe, selon la
température, entre 35 – 40% h.r.

Fonctionnement
L’air humide ambiant est amené sur une bat-
terie froide (évaporateur) au moyen d’un ven-
tilateur. L’humidité se condense sur les ser-
pentins de l’évaporateur et s’égoutte dans
une cuvette de rétention. Le condenseur ré-
chaue l’air à la température ambiante avant
de le céder à l’extérieur.
Instructions
Transport / Entreposage
Dans la mesure du possible, l’appareil doit
être transporté debout. Après un transport
en position couchée, l’appareil doit être placé
debout pendant deux heures au minimum
avant d’être raccordé et mis en service.
Si l’appareil n’est pas utilisé pendant une
période prolongée, le bac à eau et le caisson
doivent être nettoyés à l’aide d’un chion hu-
mide et être séchés. Pour l’entreposage, il est
conseillé d’emballer l’appareil (de préférence
dans son carton d’origine).
Installation de l’appareil
Placer l’appareil sur une surface plane.
Garantir la circulation d’air à l’intérieur du
local.
Ne pas boucher les ouvertures d’aspira-
tion et de sortie d’air.
Respecter une distance de sécurité de 8
cm par rapport à des parties inflammables.
Respecter une distance minimale de 50
cm par rapport aux murs et aux meubles.
Observer le volume maximal du local, soit
200 m3.
Températures de service: minimale + 12° C,
maximale + 30° C.
Mise en service
Fermer les portes et les fenêtres.
Raccorder la fiche d’alimentation – la
lampe-témoin (2) s’allume.
Ouvrir le clapet de sortie d’air sur la partie
supérieure de l’appareil – ATTENTION: Il
est interdit de faire fonctionner l’appareil
avec le clapet fermé.
Contrôler la mise en place du bac à eau (7).
Régler le bouton de l’hygrostat (1) à la
position désirée (généralement sur posi-
tion «B»).
Le fonctionnement de l’appareil est automa-
tique, c.-à-d. au moment où le taux d’hygro-
métrie réglé est atteint, le déshumidifica-
teur se déclenche. Il se remet seulement en
marche, lorsque l’humidité dans le local aug-
mente. Il est recommandé de placer un hygro-
mètre dans le local afin de contrôler les va-
leurs d’humidité. Si le taux d’humidité est trop
élevé, le bouton de réglage de l’hygromètre
doit être placé sur une valeur inférieure, si
les valeurs sont trop basses, sur une valeur
supérieure. En réglant l’hygromètre sur «C»,
l’appareil travaille en régime permanent.
Durant la phase de dégivrage – lampe-témoin
Defrost (4) – le compresseur s’arrête, mais le
ventilateur continue de fonctionner.
Entretien
Lorsque le bac à eau (7) est plein, l’appareil
s’arrête automatiquement. Cet arrêt est si-
gnalé par la lampe-témoin du milieu (3).
Saisir le bac aux prises gauche et droite et
le sortir avec précaution.
Vider le bac.
Remettre le bac en place.

Ecoulement direct
Si souhaité, il est possible de faire évacuer
l’eau recueillie par un écoulement direct.
Retirer le bac à eau (7).
Casser la partie en plastique prédécoupée
(10) située sur le côté gauche de l’appareil
Introduire le tuyau (vendu dans le com-
merce, diamètre intérieur 12mm) dans
l’ouverture pratiquée et le fixer sur le
raccord d’écoulement.
Amener l’autre extrémité du tuyau dans
l’écoulement direct avec une déclivité
constante. Faire attention à ce qu’il n’y
ait pas de refoulement ou d’accumulation
d’eau dans le tuyau.
Remettre le bac à eau en place.
Nettoyage
La batterie froide de l’appareil est fermée hermé-
tiquement, les roulements du ventilateur sont
graissés à vie et ne demandent aucun entretien.
Retirer la fiche d’alimentation.
Essuyer le caisson avec un chion doux;
en cas de fort encrassement, utiliser un
chion imbibé d’un détergent doux.
Saisir la grille d’aspiration (5) aux encoches
et la retirer.
Dépoussiérer le filtre en fibres blanches
à l’aide d’une brosse ou d’un aspirateur
(toutes les 3 à 4 semaines).
Replacer la grille d’aspiration avec le filtre
dans l’appareil.
Insérer la fiche d’alimentation dans la
prise.
En cas d’encrassement important, l’intérieur
de l’appareil doit être nettoyé. Ce travail
d’entretien doit être confié à un spécialiste
du froid.
Contrôles en cas de dérangement
Avant d’apporter l’appareil à votre spécialiste,
répondez aux questions suivantes:
A. L’appareil ne fonctionne pas
Est-ce que la fiche d’alimentation est
correctement enfichée dans la prise?
Est-ce que le fusible de votre armoire
électrique est en ordre?
Est-ce que le câble d’alimentation ou la
rallonge utilisée est en ordre?
Est-ce que le bac à eau est vide?
Est-ce que le bac à eau est mis en place
correctement?
Est-ce que l’humidité relative réglée est
supérieure au taux d’humidité ambiant?
Après avoir déclenché l’appareil, avez-
vous observé un délai d’attente de trois
minutes? Le compresseur du déshumidi-
ficateur est muni d’une protection. Après
l’arrêt de l’appareil, le compresseur ne se
remet à fonctionner qu’après un délai
d’attente de trois minutes.
10

B. L’appareil fonctionne sans interrup-
tion
Est-ce que le bouton de l’hygrostat est
réglé sur position «B»?
Est-ce que les portes et les fenêtres sont
fermées?
Est-ce que la puissance de l’appareil est en
rapport avec le volume du local (au max.
200 m3)?
C. La puissance de déshumidification
de l’appareil est insusante
Est-ce que la circulation d’air dans le local
est garantie?
Est-ce que les ouvertures d’aspiration et
de sortie d’air sont libres?
Est-ce que la température ambiante
est trop élevée ou trop basse (voir sous
«Installation»)?
Est-ce que le filtre est propre?
Si après vérification des points précités
l’appareil ne donne toujours pas satisfaction,
il doit être confié à une personne qualifiée
(spécialiste du froid) pour vérification.
Elimination
Le déshumidificateur est rempli avec un
fluide frigorigène. Une élimination spéciale
est donc indispensable. Adressez-vous à
votre spécialiste ou au centre de ramassage
et de recyclage de votre domicile. ∕

Prima della messa in esercizio
Prima della messa in esercizio, vi invitiamo
a leggere attentamente queste istruzioni.
Esse vi informano sull’uso, la sicurezza e la
manutenzione dell’apparecchio.
Conservate con cura queste istruzioni per
l’uso e, se del caso, consegnatele al successi-
vo utente dell’apparecchio.
L’apparecchio dev’essere utilizzato soltanto
per gli scopi per cui è stato fabbricato e se-
condo le presenti istruzioni per l’uso. Osser-
vate le norme di sicurezza.
Avvertenze di sicurezza
Questo apparecchio non è un giocattolo.
I bambini non sanno riconoscere i pericoli
derivanti dalla manipolazione degli appa-
recchi elettrici. L’apparecchio dev’essere
quindi tenuto e utilizzato fuori dalla
portata dei bambini.
Il deumidificatore dev’essere installato
unicamente secondo le vigenti norme
nazionali d’allacciamento.
Mai introdurre dita o oggetti nelle
aperture d’aspirazione e di uscita dell’aria.
Pericolo di lesioni!
Spegnere sempre l’apparecchio quando
non è in uso.
Evitare il contatto del cavo elettrico con la
superficie calda.
Il cavo d’alimentazione dev’essere stac-
cato:
a) in caso di guasto;
b) prima della pulizia e manutenzione;
c) dopo l’uso.
La spina non va mai staccata tirando
il cavo d’alimentazione o con le mani
bagnate.
L’apparecchio non va mai spostato tirando
il cavo d’alimentazione.
Il cavo d’alimentazione non va mai incas-
trato o fatto passare su spigoli taglienti.
Utilizzare eventuali prolunghe solo dopo
averne appurato il perfetto stato. Se si
usa un tamburo avvolgicavo occorre svol-
gere tutto il cavo.
L’apparecchio non va messo in esercizio
(staccare subito la spina) se:
a) l’apparecchio o il cavo d’alimentazione
risultano danneggiati;
b) sussiste il sospetto di un difetto in
seguito a caduta o danneggiamento.
In questo caso, l’apparecchio dev’essere
controllato da uno specialista (tecnico in
refrigerazione) e, se del caso, riparato.
L’apparecchio non va mai messo in eserci-
zio in acqua. Se venisse a trovarsi in acqua,
è necessario staccare la spina o disinserire
la valvola prima di accedere alla pozza.
Non collocare oggetti pesanti e non
sedersi sul deumidificatore.
Se l’apparecchio è utilizzato per altri scopi,
azionato in modo errato o riparato in modo
approssimativo non può essere assunta
nessuna responsabilità per eventuali
danni. In questo caso decade la garanzia.
Uso dell’apparecchio
Questo apparecchio è stato progettato per
l’impiego in locali abitativi. Non può essere
impiegato in lavanderie o locali stenditoio.
Con questo deumidificatore può essere re-
golata l’umidità relativa in un locale. L’appa-
recchio funziona secondo il principio della
condensazione.Il tasso d’umidità più basso
raggiungibile è di ca. 35-40% u.r., a dipenden-
za della temperatura.
Descrizione del sistema
L’aria umida del locale viene addotta trami-
te un ventilatore all’evaporatore allacciato
al gruppo frigorigeno. L’umidità si condensa

sulle serpentine dell’evaporatore e gocciola
sotto forma di vapore acqueo nella bacinella
di raccolta. Prima della reimmissione nel loca-
le, l’aria viene riportata alla temperatura am-
biente tramite il condensatore.
Istruzioni per l’uso
Trasporto/deposito
L’apparecchio dovrebbe sempre essere tra-
sportato in posizione verticale. Dopo un tra-
sporto in posizione orizzontale è necessario
lasciare l’apparecchio disconnesso in posizio-
ne verticale per almeno due ore prima dell’al-
lacciamento e della messa in esercizio.
Se l’apparecchio rimane inutilizzato per un
periodo prolungato occorre pulire con un
panno umido il recipiente dell’acqua e il mo-
bile, asciugandoli quindi con uno strofinaccio
asciutto. Se possibile, l’apparecchio andrebbe
riposto nell’imballaggio originale.
Installazione
Collocare l’apparecchio su una superficie
piana.
Assicurare la circolazione dell’aria nel
locale.
Non coprire le aperture d’aspirazione e
d’emissione.
Tenere una distanza di sicurezza di 8 cm
da oggetti infiammabili.
Tenere una distanza minima di 50 cm dalle
pareti e dai mobili.
Grandezza massima del locale: 200 m3.
Temperature d’esercizio:
minima +12°C / massima +30°C.
Messa in esercizio
Chiudere le porte e le finestre.
Inserire la spina nella presa di corrente – la
spia d’esercizio (2) s’illumina.
Aprire il deflettore di emissione d’aria in
alto sull’apparecchio. ATTENZIONE: mai
mettere in esercizio l’apparecchio a deflet-
tore chiuso!
Controllare il corretto posizionamento del
secchiello d’acqua (7).
Regolare il selettore dell’igrostato (1) sul va-
lore desiderato (di regola la posizione «B»).
L’apparecchio funziona automaticamente. Ciò
significa che non appena è stato raggiunto il
grado di deumidificazione desiderato, l’appa-
recchio si spegne e si riaccende solo quando
l’umidità torna salire. Si raccomanda di ap-
pendere un igrometro nel locale per control-
lare l’umidità. In caso di umidità eccessiva, il
selettore dell’igrostato dell’apparecchio va
posizionato su un valore più basso, in caso di
umidità insuciente, su un valore più alto. Se
il selettore dell’igrostato viene posizionato
sulla funzione «C», l’apparecchio funziona in
esercizio continuo.
Durante la fase di sbrinamento - la spia di
controllo del processo di defrost (4) è accesa –
il compressore è spento mentre il ventilatore
rimane in funzione.
Manutenzione
L’apparecchio si spegne automaticamente
quando il secchiello dell’acqua (7) è pieno. L’ar-
resto dell’esercizio è segnalato tramite l’illumi-
nazione della spia di controllo centrale (3).
Aerrare il secchiello da ambo i lati ai
solchi di presa estraendolo con cautela.
Svuotare il secchiello.
Ricollocare correttamente il secchiello.

Scarico diretto dell’acqua
L’acqua sottratta all’aria può essere evacuata
anche per via diretta.
Rimuovere il secchiello (7).
Rimuovere la parte di plastica punzonata
(10) sul lato sinistro dell’apparecchio.
Inserire un tubo (ottenibile in commercio,
diametro interno 12mm) attraverso l’aper-
tura così ottenuta e collegarlo al tronchet-
to di scarico.
Addurre l’altra estremità del tubo alla
condotta di scarico mantenendo una pen-
denza costante. Occorre sistemare il tubo
in modo da escludere un rifl usso d’acqua
all’apparecchio o un ristagno nel tubo.
Ricollocare il secchiello nel suo alloggia-
mento.
Pulizia
Il gruppo frigorigeno è chiuso ermeticamente
e i cuscinetti del ventilatore sono a lubrifica-
zione permanente, cosicché non necessitano
di manutenzione.
Togliere la spina dalla presa.
Pulire il mobile con un panno morbido
asciutto; in caso di sporco tenace utilizza-
re un panno umido con un detergente non
aggressivo.
Estrarre la griglia d’aspirazione (5)
aerrandola alle tacche.
Rimuovere la polvere dal filtro a rete bian-
co con una spazzola o l’aspirapolvere (ogni
3-4 settimane).
Ricollocare la griglia d’aspirazione con il
filtro nell’apparecchio.
Reinserire la spina nella presa.
In caso di forte insudiciamento, occorre pro-
cedere a una pulizia interna dell’apparecchio.
Questo intervento di manutenzione va ese-
guito da un tecnico di refrigerazione.
Controllo guasti e disfunzioni
Prima di rivolgervi al vostro rivenditore vo-
gliate controllare i punti seguenti
A. L’apparecchio non funziona
La spina è inserita correttamente?
Le valvole di casa sono inserite?
Il cavo d’alimentazione e l’eventuale pro-
lunga sono in ordine?
Il secchiello dell’acqua è vuoto?
Il secchiello dell’acqua è inserito corretta-
mente?
L’umidità ambiente supera il valore selezio-
nato sull’apparecchio?
Avete aspettato 3 minuti prima di riaccen-
dere l’apparecchio? Il deumidificatore è
munito di un dispositivo di protezione del
compressore. In seguito a spegnimento il
compressore si rimette in funzione solo
dopo un periodo d’attesa di 3 minuti.
10

B. L’apparecchio funziona ininterrotta-
mente
Il selettore dell’igrostato è posizionato su
«B»?
Le porte e finestre sono chiuse?
La potenza dell’apparecchio è suciente
per la grandezza del locale (mass. 200 m3)?
C. La deumidificazione è insu ciente
È assicurata la circolazione dell’aria nel
locale?
Le aperture di aspirazione e di emissione
sono libere?
La temperatura del locale è troppo bassa o
troppo alta (vedi rubrica installazione)?
Il filtro è pulito?
Se i controlli summenzionati non sortissero
alcun eetto, l’apparecchio dev’essere ispe-
zionato da uno specialista (tecnico di refrige-
razione).
Smaltimento
Il deumidificatore contiene un mezzo refrige-
rante. È quindi necessario uno smaltimento
speciale. Rivolgetevi al rivenditore o al servi-
zio locale di smaltimento rifiuti. ∕

Before first use
Please read carefully through all the in-
formation in these operating instructions.
They contain important explanations con-
cerning usage, safety and maintenance of
the appliance.
Ensure that these operating instructions are
stored safely and be sure to pass them on to
any new owner of the appliance.
The appliance may only be used for its in-
tended purpose in accordance with these
operating instructions. Please observe the
safety information.
Safety information
This appliance is not a toy. Children are
not aware of the inherent dangers of
electrical equipment. The appliance must
therefore be used and stored out of the
reach of children.
The humidifier may only be installed in ac-
cordance with national electrical connec-
tion requirements.
Never place fingers or objects in the air
inlet and outlet vents. Risk of injury!
Always switch the appliance o when it is
not being used.
Always prevent the electrical cord from
coming into contact with a hot surface.
Remove the mains plug:
a) when a fault has become evident
b) before every cleaning and main-
tenance operation
c) after use
Never use the power cord or wet hands to
pull the mains plug out of a wall socket.
Never pull the appliance by its power cord.
Do not pull or wedge the power cord over
sharp edges.
An extension cable may only be used if
prior inspection has shown it to be in a
satisfactory condition. If use of a cable
reel is planned, all the cable must be re-
moved from the reel before the cable can
be used.
The appliance should not be used (immedi-
ately remove mains plug) if:
a) the appliance or power cord is
damaged in any way
b) there is suspicion of a fault after
the appliance has been knocked
over, or similar.
In such cases the appliance must be
inspected, and repaired as necessary, by a
refrigeration specialist.
The appliance must never be operated in
a pool of water. Should this be the case,
the appliance must firstly be disconnected
from the mains power supply, or the fuse
must firstly be removed, before anyone
steps into the wet area.
No heavy objects should be placed on the
appliance, nor should it be sat upon.
No liability for possible damages can be
assumed if the appliance is not operated
in accordance with its intended use and
these instructions, or if repairs have not
been carried out by a specialist tradesper-
son. In such cases, the right to a guaran-
tee claim is rescinded.
Intended use
This appliance has been specifically de-
signed for living rooms. It may not be used
in laundries and drying rooms. The relative
humidity of a room can be controlled with
this dehumidifier. The operation of the appli-
ance is based on the condensation principle.
The lowest moisture content that can be
achieved, depending on the temperature, is
approx. 35 – 40% relative humidity.

System description
A fan is used to draw the moist room air
across the refrigeratory attached to the
cooling unit. The moisture condenses on the
evaporator coils and drips o as water into
the collecting bucket. Before leaving the unit,
the air is re-heated to the inlet temperature
by the condenser.
Useage instructions
Transport/Storage
Whenever possible, the appliance should
be transported in an upright position. After
being transported on its side, the appliance
must be stood in an upright position for at
least two hours before connection to the
mains and operation.
Before putting the appliance into storage if
it is not required for an extended period, the
water bucket must be removed and the appli-
ance must be cleaned with a damp cloth and
then wiped dry. The appliance should then be
packed away (original carton).
Installation
Place the dehumidifier on level ground.
Ensure that air in the room can circulate
freely.
Do not obstruct the inlet or outlet vents.
Maintain a safety zone of 8 cm from any
flammable parts.
Place the dehumidifier at least 50 cm from
walls and furnishings.
Heed the maximum room size of 200 m3.
Operating temperatures: Minimum +12 °C
/ maximum +30 °C.
Operation
Close all windows and doors.
Insert the mains plug into a wall socket –
the pilot light (2) will illuminate.
Open the air outlet flap at the top of the
appliance – IMPORTANT: The appliance
must not be operated with a closed flap.
Check to see whether the water collecting
bucket (7) is correctly positioned.
Turn the hygrostat dial (1) to the desired
position (generally the «B» position).
The dehumidifier will operate automat-ically,
i.e. it will switch itself o as soon as the set
degree of dryness has been reached, and will
only switch itself on again with rising humid-
ity. It is recommended that a hygrometer is
hung up in the room to check on moisture
levels. If room humidity levels are excessive,
turn the hygrostat dial on the appliance to a
lower setting, conversely, if humidity levels
are too low, select a higher setting on the de-
humidifier. If the hygrostat dial is set to «C»,
the appliance will operate continuously.
During the defrosting stage – shown by an il-
luminated defrost light (4) – the compressor
will be switched o, however the fan will con-
tinue to operate.
Maintenance
The appliance will switch itself o automati-
cally when the water bucket (7) is full. This
shutdown will also be indicated by the illumi-
nation of the centre pilot light (3).
Grasp the bucket by the handle grips on
the left and right-hand sides and remove
the bucket carefully.
Empty the bucket.
Replace the bucket in its proper position.

Direct water drainage
If required, the water removed from the air
can also be drained directly away.
Remove the water collecting bucket (7)
Knock out the prepared plastic part (10) on
the left-hand side of the appliance
Introduce a hose (available from trade out-
lets, inside diameter 12mm) through the
new opening and push over the end of the
outlet pipe
Ensuring that a steep gradient is main-
tained, lead the other end of the hose into
a discharge pipe. Ensure that no water can
run back into the appliance and water flow
is not obstructed in the hose.
Re-insert the water bucket
Cleaning
The cooling unit is hermetically sealed; the
fan bearings are permanently lubricated and
therefore require no maintenance.
Remove the mains plug from the wall
socket.
Wipe the housing with a soft, dry cloth. In
the case of light soiling use a damp cloth
with a mild cleaning agent.
Grip the air filter frame (5) at the indent
and pull out.
Remove any dust and lint from the white
filter mesh with a brush or vacuum cleaner
(every 3 – 4 weeks).
Re-insert the filter and filter frame into
the appliance.
Re-insert the mains plug into the wall socket.
Heavy soiling will require the inside of the
appliance to be cleaned. This maintenance
must be carried out by a refrigeration specialist.
Troubleshooting
Please check the following points before
taking the appliance to your specialist retailer:
A. The appliance does not operate
Has the mains plug been inserted cor-
rectly?
Is the fuse in your electrical switchbox
OK?
Is the mains cable and/or any extension
cord being used in good working condi-
tion?
Is the water collecting bucket empty?
Has the water collecting bucket been
replaced correctly?
Is the room humidity level above that set
on the appliance?
Have you waited three minutes before
attempting to switch on your appli-
ance again? The dehumidifier is fitted
with compressor protection. After being
switched o, the compressor can only
be re-started after an idle period of 3
minutes.
10

B. The appliance operates
continuously
Is the hygrostat dial set to the «B» posi-
tion?
Are the doors and windows shut?
Is the machine capacity sucient for the
room size (max. 200m3)?
C. The appliance always dehumidifies
insuciently
Is the air in the room free to circulate?
Are the inlet and outlet vents unob-
structed?
Is the room temperature too high or too
low (see the heading «Installation»)
Is the filter clean?
If checks of the above points do not bring
about satisfactory operation, the appliance
will need to be taken to a refrigeration spe-
cialist for inspection.
DISPOSAL
The dehumidifier is filled with a refrigerant.
Special precautions therefore need to be
taken during disposal. Please contact your
specialist retailer or your local waste disposal
centre for further information. ∕

Krüger + Co. AG
Winterhaldenstrasse 11
9113 Degersheim
0848 370 370
info@krueger.ch
www.krueger.ch
entfeuchten
heizen
kühlen
sanieren
Hotline 0848 370 370
6.20
Other manuals for AIRSEC 3000
1
This manual suits for next models
1
Table of contents
Languages:
Other Kruger Dehumidifier manuals

Kruger
Kruger KRG 80 HE User manual

Kruger
Kruger AIRSEC 225 User manual

Kruger
Kruger KRK 80 User manual

Kruger
Kruger AIRSEC 1400 User manual

Kruger
Kruger AIRSEC 800 AF User manual

Kruger
Kruger KRK 10 User manual

Kruger
Kruger WMD 80 User manual

Kruger
Kruger Airsec 265 AH User manual

Kruger
Kruger AreaDry 8 User manual

Kruger
Kruger AreaDry 8 User manual