KSB LevelControl Basic 2 User manual

Level Control Unit
LevelControl Basic 2
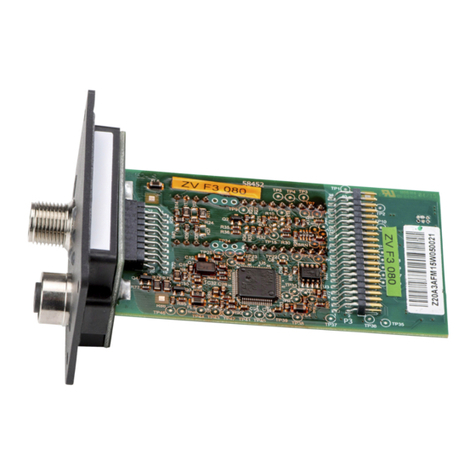
Signalling Module
Current Measuring Module
Supplementary Operating
Manual

Legal information/Copyright
Supplementary Operating Manual LevelControl Basic 2
Original operating manual
All rights reserved. The contents provided herein must neither be distributed, copied, reproduced,
edited or processed for any other purpose, nor otherwise transmitted, published or made available to a
third party without the manufacturer's express written consent.
Subject to technical modification without prior notice.
© KSB SE & Co. KGaA, Frankenthal 19/01/2018

Contents
3 of 40
LevelControl Basic 2
Contents
1 General.................................................................................................................................................... 4
2 Safety...................................................................................................................................................... 5
2.1 General..............................................................................................................................................................5
3 Transport/Temporary Storage/Disposal............................................................................................... 6
3.1 Condition upon delivery ..................................................................................................................................6
3.2 Transport...........................................................................................................................................................6
3.3 Storage..............................................................................................................................................................6
4 Description ............................................................................................................................................. 7
4.1 Compatibility ....................................................................................................................................................7
4.2 General description ..........................................................................................................................................7
4.3 Technical data...................................................................................................................................................9
5 Installation at Site................................................................................................................................ 11
5.1 Connecting the signalling module ................................................................................................................11
5.2 Connecting the current measuring module..................................................................................................13
6 Commissioning/Start-up/Shutdown................................................................................................... 15
6.1 Commissioning/start-up .................................................................................................................................15
6.2 Shutdown........................................................................................................................................................15
7 Operation.............................................................................................................................................. 17
7.1 Extensions with signalling/current measuring module................................................................................17
7.1.1 Menu extension .................................................................................................................................17
7.1.2 Additional functions ..........................................................................................................................17
8 Servicing/Maintenance........................................................................................................................ 28
8.1 Maintenance/inspection measures ................................................................................................................28
9 Trouble-shooting.................................................................................................................................. 29
10 Related Documents.............................................................................................................................. 30
10.1 Wiring diagram/terminal diagram ................................................................................................................30
10.1.1 Individual signals - control board display (example) .......................................................................30
10.1.2 Analog output....................................................................................................................................30
10.1.3 Three-phase current measurement...................................................................................................31
10.1.4 Single-phase current measurement ..................................................................................................32
10.1.5 Field bus connection ..........................................................................................................................32
10.1.6 Redundant pneumatic level measurement ......................................................................................33
10.1.7 Partially redundant bubbler system..................................................................................................35
Index ..................................................................................................................................................... 37
1 General
4 of 40 LevelControl Basic 2
1 General
This supplementary operating manual accompanies the installation/operating
manual. All information contained in the installation/operating manual must be
observed.
Table1: Relevant operating manuals
Type series Reference number of the installation/operating
manual
LevelControl Basic 2 4041.80

2 Safety
5 of 40
LevelControl Basic 2
2 Safety
2.1 General
This supplementary operating manual contains additional applicable information.
General installation, operating and maintenance instructions that must be observed
to ensure safe operation and prevent personal injury and damage to property are
given in the installation/operating manual.
The safety information in all sections of this supplementary operating manual and in
the relevant installation/operating manual must be complied with.
The supplementary operating manual must be read and completely understood by
the responsible specialist personnel/operators.
The contents of this supplementary operating manual must be available to the
specialist personnel at the site at all times.
The operator is responsible for ensuring compliance with all local regulations which
are not taken into account in this supplementary operating manual.

3 Transport/Temporary Storage/Disposal
6 of 40 LevelControl Basic 2
3 Transport/Temporary Storage/Disposal
3.1 Condition upon delivery
NOTE
Prior to shipping, the accessories were tested to ensure full compliance with the
specifications. They should, therefore, be in perfect electrical and mechanical
condition upon arrival.
It is recommended that the accessories be inspected for in-transit damage
immediately upon receipt. If there are any complaints or objections, the recipient
and carrier must jointly draw up a damage report.
3.2 Transport
CAUTION
Improper transport
Damage to the accessories!
▷Always transport the accessories properly and in their original packaging.
▷During transport, observe the transport instructions on the original packaging.
Transport the accessories as specified.
3.3 Storage
If the ambient conditions for storage are met, the accessories will give reliable service
even after a prolonged period of storage.
Table2: Ambient conditions for storage
Ambient conditions Value
Relative humidity Max. 85% (no condensation)
Ambient temperature - 10°C to +70°C
▪Store the accessories in dry, vibration-free conditions and, if possible, in their
original packaging.
▪Store the accessories in a dry room in which the atmospheric humidity is
maintained at a constant level (as far as this is possible).
▪Prevent excessive fluctuations in atmospheric humidity (see table "Ambient
conditions for storage").
If stored properly, the accessories will be protected for a maximum of 12 months.

4 Description
7 of 40
LevelControl Basic 2
4 Description
4.1 Compatibility
NOTE
The KSB Service Tool can be downloaded free-of-charge from the KSB web site. The
web site also contains further information on how to order the additional
parameterisation cable required.
Signalling module and current measuring module can be used with device firmware
version 1.2 or higher. Devices with earlier firmware versions must be updated using
the KSB Service Tool.
4.2 General description
Signalling module
The signalling module is an extension module for LevelControl Basic 2.
It features:
▪Six volt-free signals:
–Fault at pump 1
–Fault at pump 2
–High water
–Sensor fault
–Pump 1 in operation (not available for lifting units with single-phase motor
and cutter)
–Pump 2 in operation (not available for lifting units with single-phase motor
and cutter)
▪Analog output (level-proportional current signal, type 4–20 mA)
▪ModBus RTU interface (direct connection or field bus module connection)
▪System bus interface (currently no function)
▪Connection option for one current measuring module per pump
▪Depending on the version, the device is fitted with a pressure sensor for
redundant pneumatic level measurement (without compressor) or for setting up
a partially redundant bubbler system
NOTE
The assignment of the volt-free signals and the measured values provided via the
analog output can be modified using the ServiceTool.

4 Description
8 of 40 LevelControl Basic 2
Fig.1: Description of signalling module
1 Service interface (for production only -
parameterisation takes place via the service
interface on the LevelControl Basic2 printed
circuit board)
2 Power supply for PCB (optional, 9–30 V)
3 Current measuring module connection, pump 2 4 Current measuring module connection, pump 1
5 Signalling module connection to LevelControl
Basic 2
6 Analog output (4–20 mA)
7 ModBus-RTU connection 8 system bus connection (no function)
9 Volt-free signal 1 (default: Pump 1 fault) 10 Volt-free signal 2 (default: Pump 2 fault)
11 Volt-free signal 3 (default: High water) 12 Volt-free signal 4 (default: External fault)
13 Volt-free signal 5 (default: Pump 1 in operation) 14 Volt-free signal 6 (default: Pump 2 in operation)
15 Redundant pressure sensor 16 Status LED
17 Terminating resistors for ModBus RTU and system
bus connection
Current measuring module
The current measuring module measures the pump current in the motor power cable
in the control unit.
Up to 10 A, the pump current is measured directly, over 10 A, it is measured via an
upstream current transformer.
The current measuring module is connected to LevelControl Basic 2 via the signalling
module.

4 Description
9 of 40
LevelControl Basic 2
Fig.2: Description of current measuring module
1 Phase L2 2 Phase L3
3 Connection to signalling module
NOTE
The current measuring module measures the currents in phases L2 and L3 (three-
phase motor) or L (single-phase motor) of the connected pumps.
(ðSection10.1,Page30)
4.3 Technical data
Signalling module
Table3: Technical data
Characteristic Value
Power supply 9–30 V DC
via LevelControl Basic 2
Enclosure BC version: IP00
BS version: IP20
Switching capacity of individual signals 30 V, 1 A
Analog output 0/4-20 mA
Housing version BC version: without housing
BS version: top hat rail housing

4 Description
10 of 40 LevelControl Basic 2
Characteristic Value
Design variants Signalling module
Signalling module with pressure sensor,
3mlc
Signalling module with pressure sensor,
10 mlc
Weight 0.3 kg
NOTE
The signalling module can be used with device firmware version 1.2 or higher.
Current measuring module
NOTE
LevelControl Basic 2 is only fitted with current measuring module(s) ex works.
Current measuring modules cannot be retrofitted!
The current measuring modules are connected to LevelControl Basic 2 via the
signalling module.
This means that the current measuring module can be used only in combination with
the signalling module!
Table4: Technical data
Characteristic Value
Power supply Supply via signalling module
Enclosure IP20
Maximum supply voltage 500 V AC
Measuring range 10 (15) A1)
Measuring ranges for indirect
measurement via transformer
10 to 20 A (30 A)
20 to 40 A (60 A)
40 to 75 A (110 A)2)
Weight 0.2 kg
NOTE
The current measuring module can be used with device firmware version 1.2 or
higher.
NOTE
One current measuring module is required for each pump. For dual-pump control,
the signalling module offers connection options for two current measuring
modules.
1) Larger currents can be measured via upstream transformers
2) Measurement of larger currents possible on request

5 Installation at Site
11 of 40
LevelControl Basic 2
5 Installation at Site
5.1 Connecting the signalling module
DANGER
Exposed live parts
Danger of death from electric shock!
▷Separate the control unit from the power supply before installing the signalling
module.
CAUTION
Improper handling of the control unit and its built-in components
Defective control unit!
▷Handle the control unit and its built-in components carefully.
CAUTION
Incorrect handling of the rechargeable battery
Electrical damage to the control unit!
▷If the battery installation option is used, disconnect one of the battery's
connectors before connecting the signalling module. This ensures that the
control unit is completely de-energised.
▷Do not re-connect the battery connector until the connection has been made.
BC version
Fig.3: Position of signalling module in BC version
üThe place of installation conforms to the requirements.
1. Separate the control unit from the power supply and verify that it is de-
energised.
2. Open the control unit using a suitable tool.
3. Carefully detach the BC PCB cover plate from the spacers.
4. Connect the signalling module to the BC PCB using the connection cable
supplied.
Make sure the connector is correctly positioned! When attaching the connection
cable, observe the mechanical coding on the connectors!

5 Installation at Site
12 of 40 LevelControl Basic 2
(The connector has a pin that has to engage in the hole in the PCB next to the
PCB-side connector.)
5. Snap the signalling module for the BC version onto the spacers and check that it
is firmly seated.
6. Close the control unit again properly.
7. Reconnect the power supply.
When the device is switched on, the green status LED on the signalling module lights
up continuously. This means that the signalling module is functioning correctly.
If the green status LED on the signalling module does not illuminate, the correct
seating of the cable connecting the signalling module and the LevelControl Basic 2
PCB must be checked again.
If the green status LED on the signalling module flashes, the signalling module has
not been detected by LevelControl Basic 2. In this case, check the firmware version of
the control unit, which is displayed at parameter 4-1-1. Firmware version 1.2 or
higher is required.
NOTE
To set up a redundant pneumatic level measurement system, observe
(ðSection10.1.6,Page33) .
To set up a partially redundant bubbler system, observe
(ðSection10.1.7,Page35) .

5 Installation at Site
13 of 40
LevelControl Basic 2
BS version
Fig.4: Position of signalling module in BS version
üThe place of installation conforms to the requirements.
1. Separate the control unit from the power supply and verify that it is de-
energised.
2. Open the control unit.
3. Snap the signalling module for the BS version onto a free top hat rail slot and
check that it is firmly seated.
4. Connect the signalling module to the BS PCB using the connection cable
supplied.
Make sure the connector is correctly positioned! When attaching the connection
cable, observe the mechanical coding on the connectors!
(The connector has a pin that has to engage in the hole in the PCB next to the
PCB-side connector.)
5. Close the control unit again properly.
6. Reconnect the power supply.
When the device is switched on, the green status LED on the signalling module lights
up continuously. This means the signalling module is functioning correctly.
If the green status LED on the signalling module does not illuminate, the correct
seating of the cable connecting the signalling module and the LevelControl Basic 2
PCB must be checked again.
If the green status LED on the signalling module flashes, the signalling module has
not been detected by LevelControl Basic 2. In this case, check the firmware version of
the control unit, which is displayed at parameter 4-1-1. Firmware version 1.2 or
higher is required.
NOTE
To set up a redundant pneumatic level measurement system, observe
(ðSection10.1.6,Page33) .
To set up a partially redundant bubbler system, observe
(ðSection10.1.7,Page35) .
5.2 Connecting the current measuring module
NOTE
LevelControl Basic 2 is only fitted with current measuring module(s) ex works.
Current measuring modules cannot be retrofitted!

5 Installation at Site
14 of 40 LevelControl Basic 2
Connect the current measuring module in accordance with the wiring diagram.
(ðSection10.1.3,Page31) / (ðSection10.1.4,Page32)

6 Commissioning/Start-up/Shutdown
15 of 40
LevelControl Basic 2
6 Commissioning/Start-up/Shutdown
6.1 Commissioning/start-up
üThe supplementary operating manual and the installation/operating manual
have been read.
üThe device variant conforms to the requirements.
üThe control unit has been assembled as per operating instructions and connected
to the power supply in accordance with the wiring diagram.
üThe signalling module has been installed as per operating instructions
(ðSection5.1,Page11) and connected in accordance with the terminal diagram.
üThe current measuring module has been installed as per operating instructions
and connected in accordance with the terminal diagram.
1. Re-tighten the connection terminals (individual signals, analog output, field bus
connection and current measuring modules).
2. Connect the power cable.
3. Connect the sensors.
4. Insert the motor protection device and fuses.
5. Set the manual-0-automatic switches for both pumps to "0".
6. Switch on the power supply.
7. Check that the green status LED is continuously ON.
8. Check that the parameters are set as required and adapt if necessary.
9. Carry out test run for several start/stop cycles.
10. Check alarm devices, including the individual signals, for proper function.
11. Set the manual-0-automatic switches for both pumps to "Automatic".
ðBoth pumps can now be started/stopped by the control unit as required.
12. Provide support and/or training for operating personnel.
13. File a copy of the supplementary operating manual with the installation/
operating manual.
6.2 Shutdown
Short-term shutdown
1. Set the manual-0-automatic switches for both pumps to "0".
ðBoth pumps are switched off.
ðThe control unit remains operational.
Short-term shutdown for work on the pump
1. Set the manual-0-automatic switches for both pumps to "0".
ðBoth pumps are switched off.
ðThe control unit remains operational.
2. Open the control unit.
3. For 400V variants:
Switch off motor protection switch for both pumps and secure to prevent
restart.
For 230V variants:
Pull pump mains plug. If the pumps are connected directly to the terminals in
the device, the device must be disconnected from the power supply.
4. Close the control unit again.
Long-term shutdown
1. Set the manual-0-automatic switches for both pumps to "0".
2. Switch off the power supply.

6 Commissioning/Start-up/Shutdown
16 of 40 LevelControl Basic 2
ðThis disables all control and signalling functions.

7 Operation
17 of 40
LevelControl Basic 2
7 Operation
7.1 Extensions with signalling/current measuring module
NOTE
Additional parameters available are documented on the enclosed parameter label.
If signalling module and, where applicable, current measuring module are installed,
additional parameters appear in the display. These can be selected as usual using the
arrow keys.
The selectable parameters depend on the operating mode and measurement
method. Only parameters that are relevant to the current operating mode and
measurement method are displayed.
7.1.1 Menu extension
7.1.1.1 Measured values menu
If the signalling module and current measuring module are used, parameters
indicating the current values for each pump are added to the measured values menu.
Table5: Additional parameters in measured values menu
Parameter Description Single-
pump
station
Dual-
pump
station
1-2-3 Current, pump 1 Current of pump 1 in ampere x -
1-3-3 Current, pump 2 Current of pump 2 in ampere x x
7.1.1.2 Settings menu
If a signalling module with redundant pressure measurement is used, the parameter
indicating the installation height of the second open or closed pressure bell is added
to the settings menu. (ðSection10.1.6,Page33)
Table6: Additional parameter in settings menu
Parameter Description Values
3-4-5-1 Level of bell 2 Distance of the second pressure bell (lower
edge) from the bottom of the tank (offset).
Factory setting: 200 mm
200 mm (factory setting)
7.1.1.3 Signalling module fault
If a fault occurs at the signalling module during operation, this is indicated by fault -
A17 - in the display.
Table7: Signalling module fault message
Message Description
- A17 - Signalling module fault
7.1.2 Additional functions
7.1.2.1 Volt-free signals
If the signalling module is used, six volt-free signals are provided:
▪Switching capacity: 30 V, 1 A
▪Type: Change-over contact.

7 Operation
18 of 40 LevelControl Basic 2
The signal relays are energised in the good or idle state and de-energise in the event
of a signal.
Table8: Volt-free signals
Volt-free signal Standard assignment Description Signal status
Signal relay 1 Fault pump 1 Pump 1 is blocked due to a fault and
cannot be started upon demand.
de-energised
Signal relay 2 Fault pump 2 Pump 2 is blocked due to a fault and
cannot be started upon demand.
de-energised
Signal relay 3 High water (A9) The high water switching point has been
reached
de-energised
Signal relay 4 Sensor fault (A11) Fault of the level measurement sensors
used
de-energised
Signal relay 5 Pump 1 in operation Pump 1 running energised
Signal relay 6 Pump 2 in operation Pump 2 running energised
The state of the signal relays is also indicated by the yellow LEDs positioned above
the relays on the PCB. An illuminated LED indicates an energised relay.
NOTE
In the case of lifting units with single-phase motor and cutter, signal relays 5 and 6
are used to control the start capacitors required for operation and are not available
for volt-free signals.
NOTE
For single-pump systems, the signal relays normally assigned with signals for pump
2 do not carry any standard settings. These can be assigned using the ServiceTool.
The signal relays can be assigned with the following functions using the ServiceTool:
Table9: Assignment of the signal relay
Signal Description Signal status
Message A1 Motor protection pump 1 (winding protection or motor
protection switch tripped)
de-energised
Message A2 Motor protection pump 2 (winding protection or motor
protection switch tripped)
de-energised
Message A3 Motor 1 temperature too high de-energised
Message A4 Motor 2 temperature too high de-energised
Message A5 Power failure de-energised
Message A6 Phase error (phase failure) de-energised
Message A7 Leakage at motor 1 de-energised
Message A8 Leakage at motor 2 de-energised
Message A9 High water alert de-energised
Message A10 External alarm de-energised
Message A11 Sensor fault de-energised
Message A12 Incorrect rotary field of mains supply (phase sequence) de-energised
Message A13 Undervoltage (-15 % of rated voltage) de-energised
Message A14 Overvoltage (+15 % of rated voltage) de-energised
Message A15 Flat battery de-energised
Message A16 Service interval (activation via parameter 3-7-1) de-energised
Fault pump 1 Pump 1 is blocked due to a fault and cannot be started upon
demand.
de-energised
Fault pump 2 Pump 2 is blocked due to a fault and cannot be started upon
demand.
de-energised
Pump 1 operational No fault at pump 1, the manual-0-automatic switch is in "Auto"
position
energised

7 Operation
19 of 40
LevelControl Basic 2
Signal Description Signal status
Pump 2 operational No fault at pump 2, the manual-0-automatic switch is in "Auto"
position
energised
Pump 1 in operation Pump 1 running energised
Pump 2 in operation Pump 2 running energised
Pump 1 in automatic
mode
Manual-0-automatic switch of pump 1 in "Auto" position energised
Pump 2 in automatic
mode
Manual-0-automatic switch of pump 2 in "Auto" position energised
Check run pump 1 Check run of pump 1 in progress energised
Check run pump 2 Check run of pump 2 in progress energised
7.1.2.2 Analog output
The signal module offers an analog output with the following specifications:
Table10: Analog output specifications
Specification Value
Type 0/4–20 mA
External working resistance Mains operation: max. 500 Ω
Battery operation: max. 300 Ω
The analog output signals the measured fill level as standard.
The analog output can optionally be assigned with the following values using the
ServiceTool:
Table11: Analog output assignment
Parameter Value Display
Level
(ðSection7.1.2.2.1,Pag
e19) to
(ðSection7.1.2.2.4,Pag
e22)
1-1-3 Mains voltage of the system 0 mA = fault
4 mA ➔ 180 V
20 mA ➔ 500 V
None System current
- single-pump: current of pump1
- dual-pump: current of pumps1+2
0 mA = fault
4 mA ➔ 0 A
20 mA ➔ 30 A
NOTE
For current measurement > 10 (15) A, please note the following transformer
factors:
10–20 (40) A: 4 mA ➔ 0 A, 20 mA ➔ 40 A
20–40 (60) A: 4 mA ➔ 0 A, 20 mA ➔ 60 A
40–75 (110) A: 4 mA ➔ 0 A, 20 mA ➔110 A
7.1.2.2.1 Level measurement using float switches or digital sensors
When digital level measuring methods are employed (floats, digital switches), a step
signal corresponding to the switching status is displayed.
The allocation of the switching states is shown in the table below:

7 Operation
20 of 40 LevelControl Basic 2
Table12: Allocation of switching states for level measurement with float switches or digital sensors
Display Level Analog signal Switching state
When draining When filling
Sensor fault 0 mA - -
Very low 4 mA Pumps OFF Peak load pump ON
Low 7 mA Peak load pump OFF
(irrelevant)
Base load pump ON
Medium 10 mA - -
High 13 mA Base load pump ON Peak load pump OFF
(irrelevant)
Other manuals for LevelControl Basic 2
3
Table of contents
Other KSB Control Unit manuals

KSB
KSB MIL 10000 User manual

KSB
KSB BOACHEM ZXA User manual

KSB
KSB ECOLINE-VA16 User manual

KSB
KSB ECOLINE GLF User manual

KSB
KSB MSE User manual

KSB
KSB AMTRONIC R1300 User manual

KSB
KSB STAAL 40 AKDS User manual

KSB
KSB BOA-Control PIC User manual

KSB
KSB Cervomatic EDP.2 Installation instructions

KSB
KSB APORIS Series User manual

KSB
KSB ISORIA 10 User manual

KSB
KSB MIL 41000 Installation instructions

KSB
KSB ECOLINE GT 40 User manual

KSB
KSB MIL 21000 User manual

KSB
KSB BOA-SuperCompact User manual

KSB
KSB COBRA-TDC01/03 Installation instructions

KSB
KSB BOA-Control IMS User manual

KSB
KSB Controlmatic E.2 User manual

KSB
KSB UPA User manual

KSB
KSB BOAX-S User manual