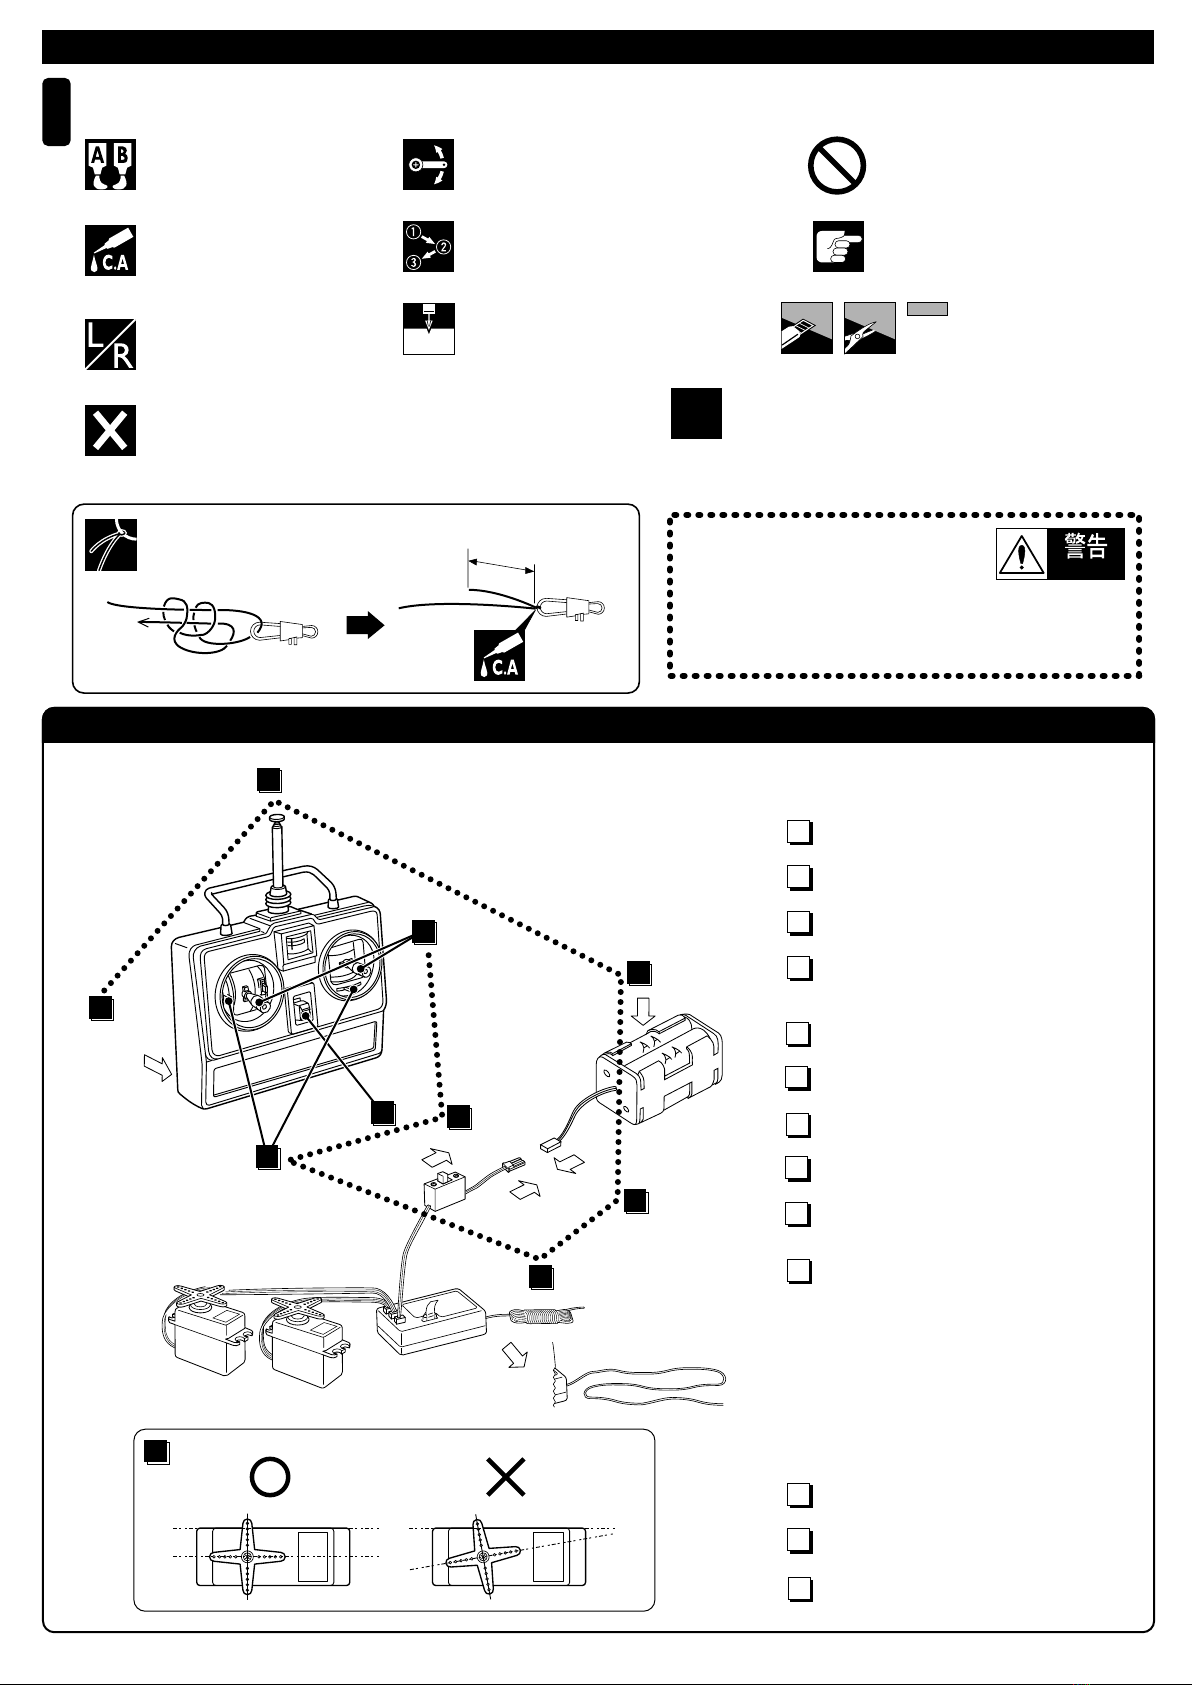
プロポの準備 RADIO PREPARATION
●プロポを下の順番にしたがってセットします。
Set up the radio as per explanations below.
単3乾電池をセットする。
Install the 4 AA-size batteries into the battery box.
1
アンテナをのばす。(送信機)
Extend the antenna of the transmitter.
2
3
4
アンテナをのばす。(受信機)
Unwind the antenna of the receiver.
5
トリムをまん中にセットする。
Center the trims.
6
スイッチを入れる。(送信機)
Switch on the transmitter.
7
スイッチを入れる。(受信機)
Switch on the receiver.
8
スティックを動かしてサーボが
動いているか確認。
Ensure the servos move as per your transmitter inputs.
9
スティックから指を離したとき
サーボホーンが左の図のように
なっているか確認。
When the control sticks on the transmitter are in neutral,
the servo horns must be in neutral as well. (See left)
10
10
8
5
4
3
1
2
START
FINISH
7
6
9
スイッチを切る。(受信機)
Switch off the receiver.
11
スイッチを切る。(送信機)
Switch off the transmitter.
アンテナを縮める。(送信機)
Retract the antenna of the transmitter.
12
13
*なっていない場合は、サーボホーンの
ビスをはずし、サーボからホーンを引き
ぬき、ずらして差し込みなおす。
If the servo horns are not in neutral, unscrew the servo
horns and adjust their neutral position.
単3乾電池をセットする。
Install the 8 AA-size batteries into the transmitter.
単3乾電池をセットした電池ボックスを
つなぐ。
After installing the batteries, connect the battery box.
3
7
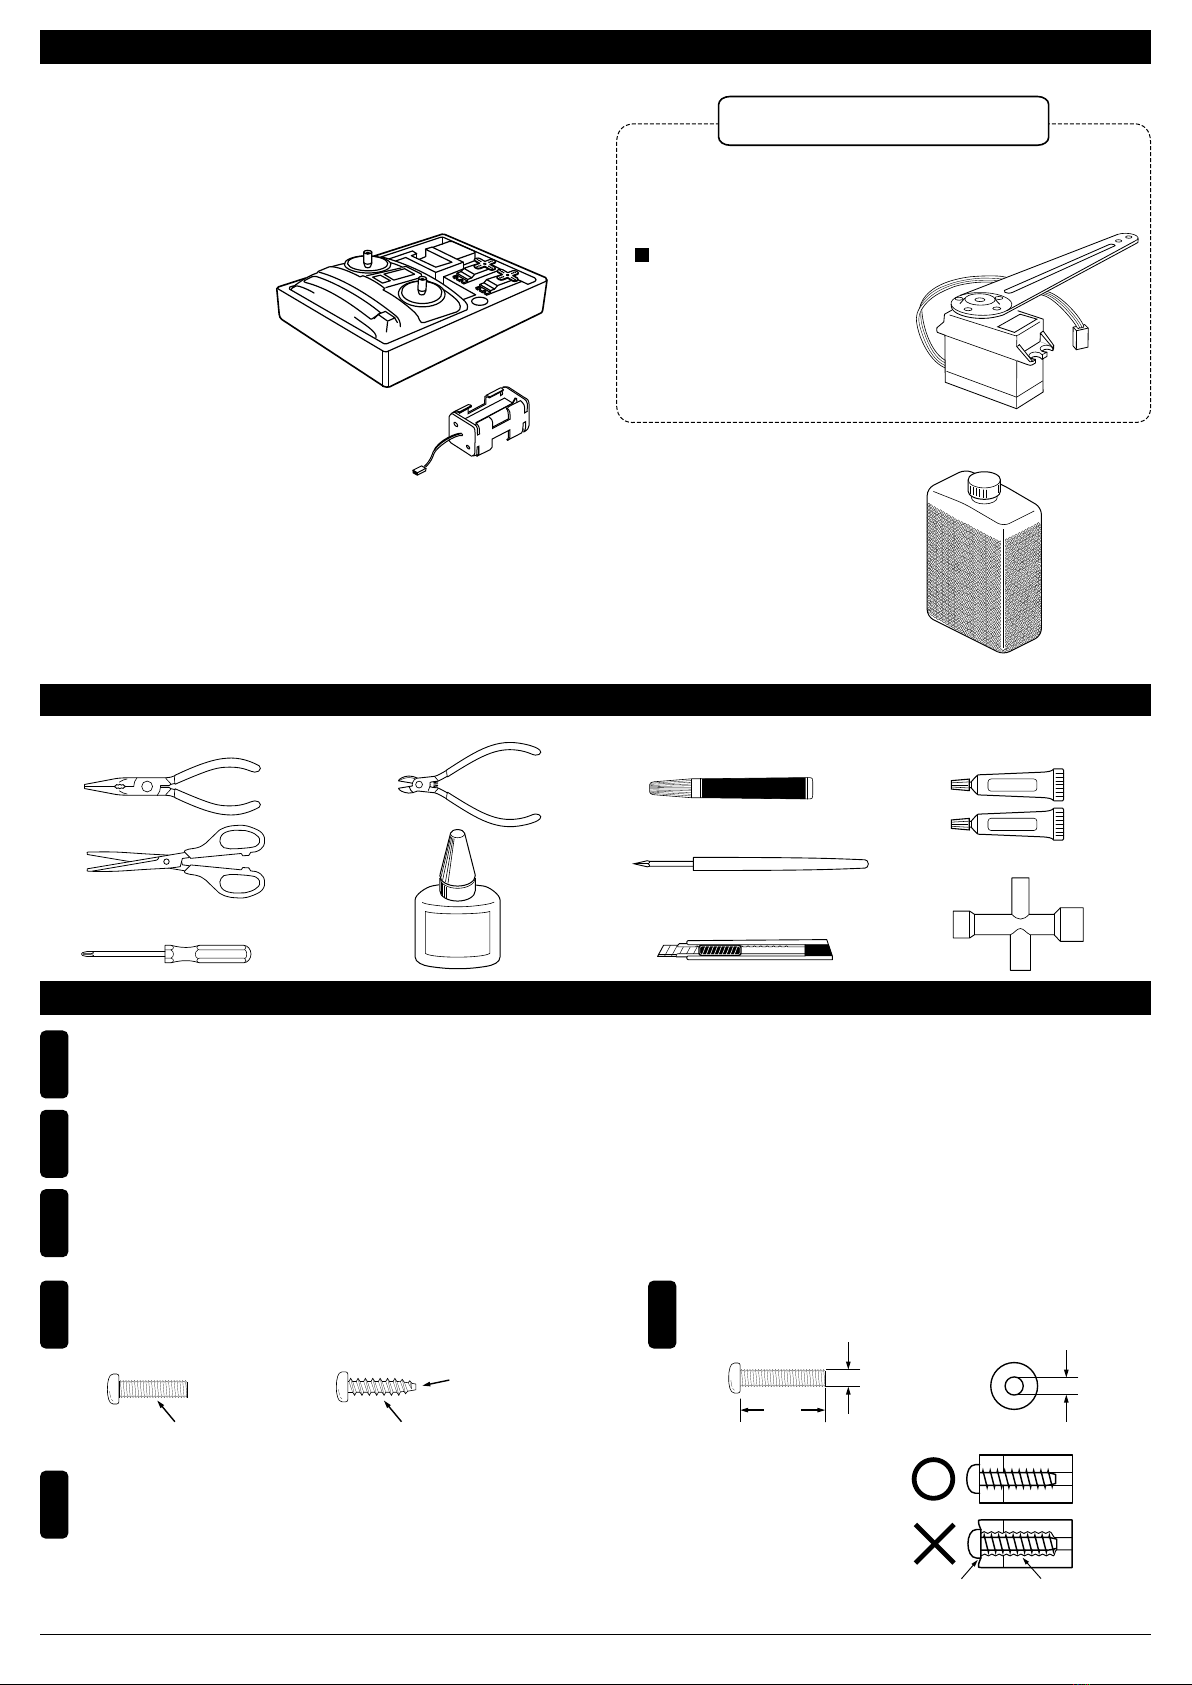
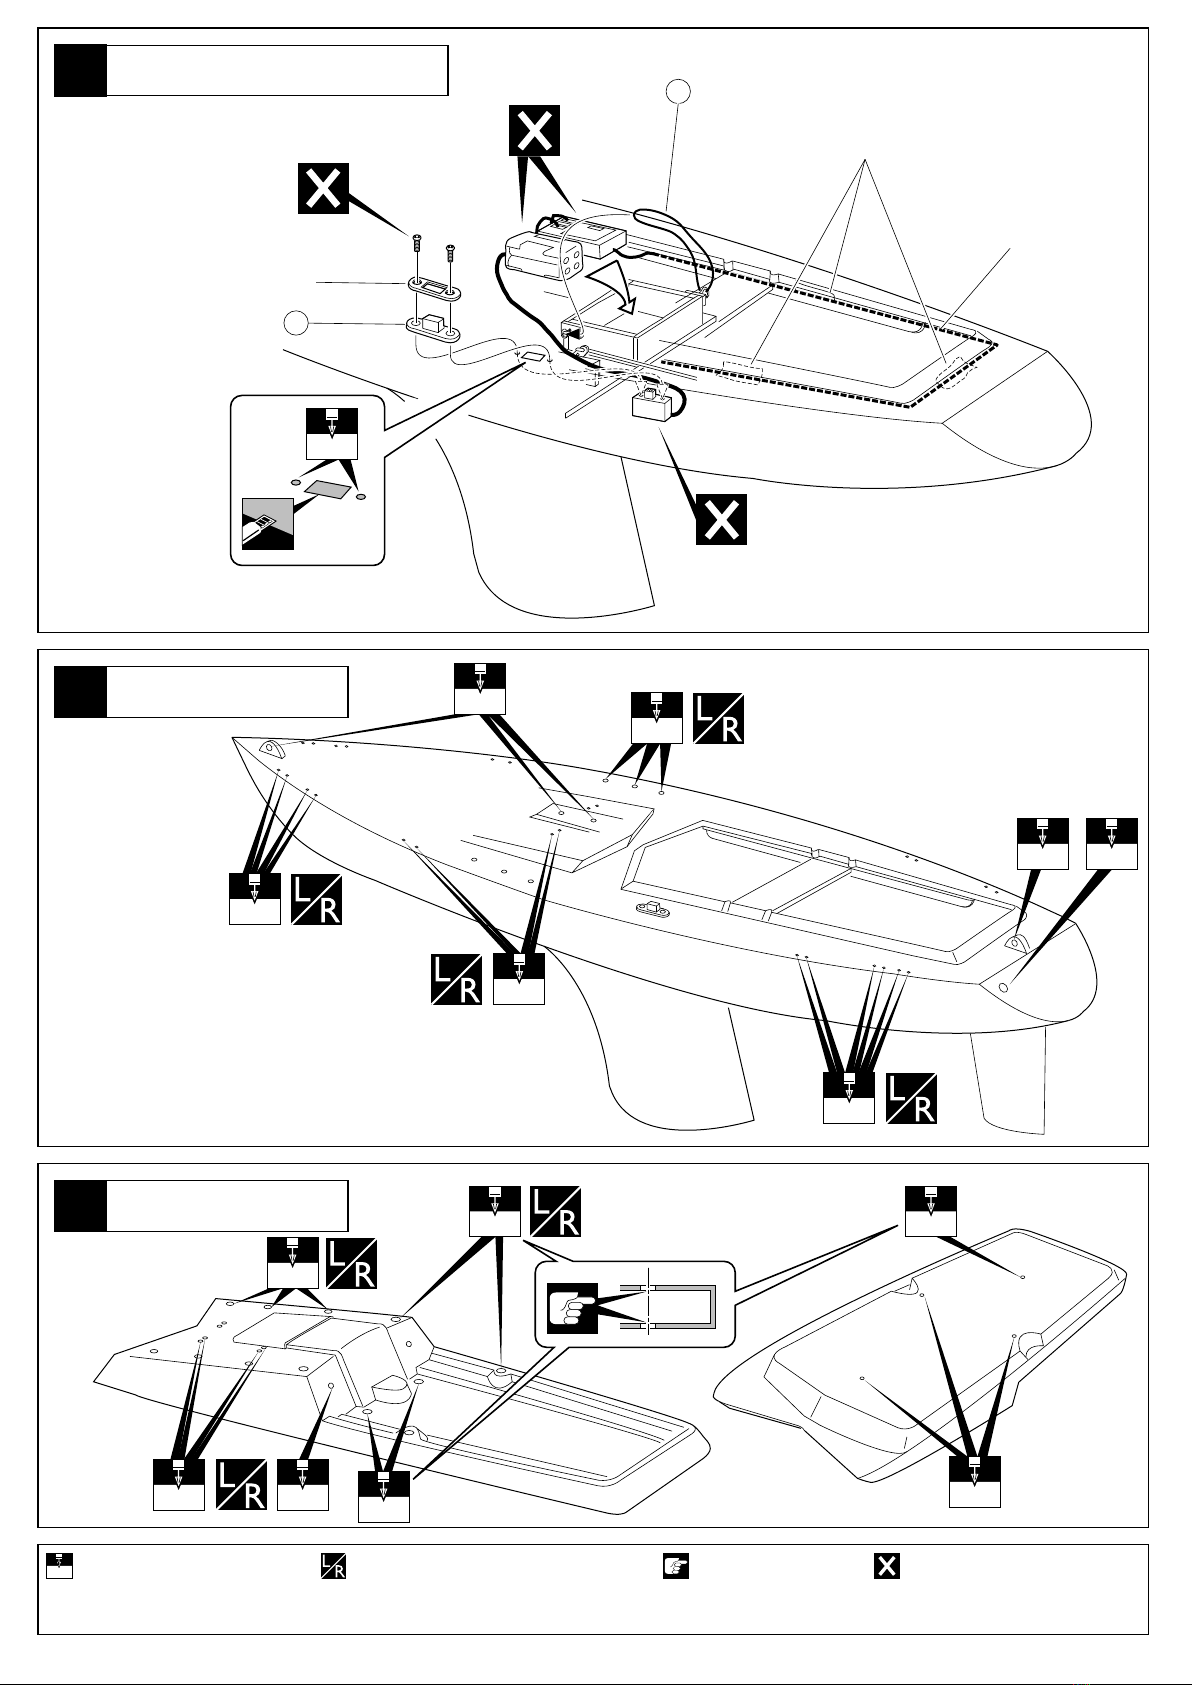
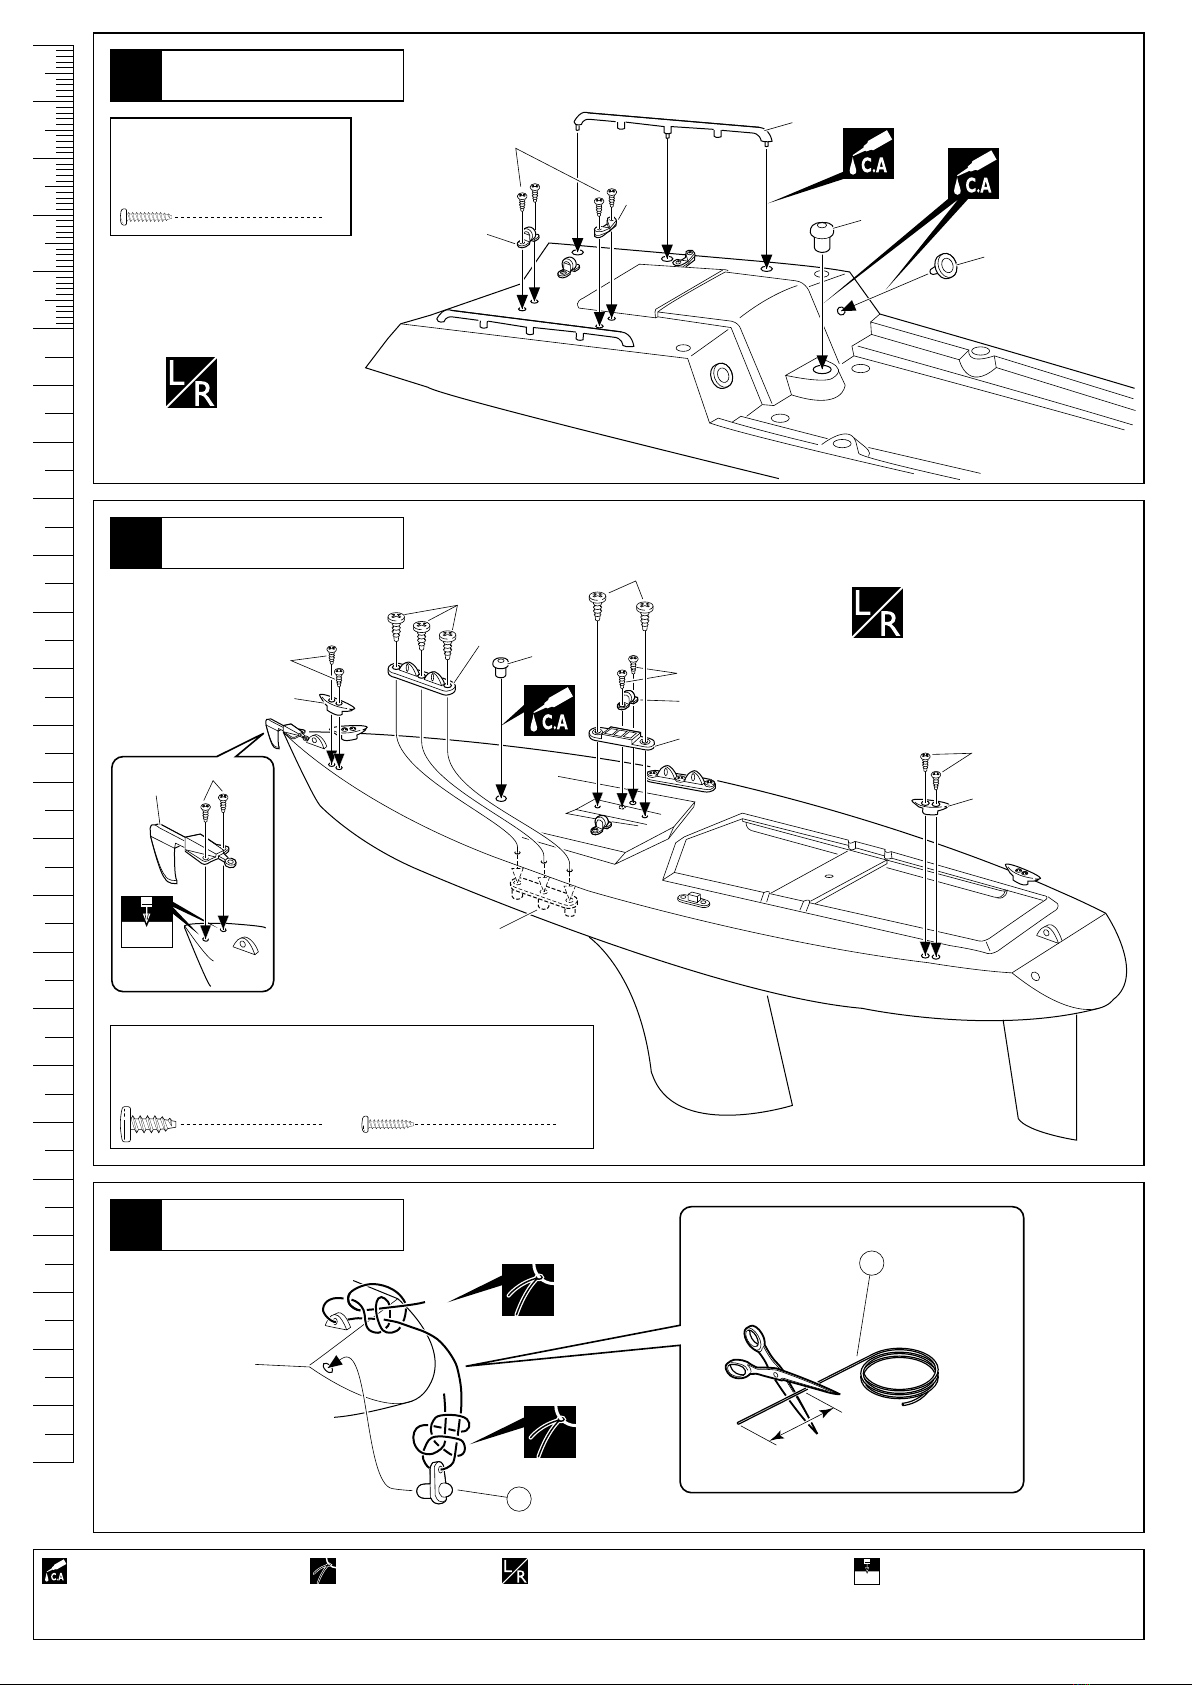
組立て前の注意(2)BEFORE YOU BEGIN (2)
説明書に使われているマーク
Symbols used throughout the instruction manual, comprise:
●
重要な注意事項があるマークです。
必ずお読みください。
Do not overlook this symbol!
Beachten Sie dieses Symbol!
Notez ce symbole!
ÁAviso! Preste atenci—n en este paso.
Warning!
禁止事項(してはいけないこと)。
Do not do that!
Nicht tun! Verboten!
D fense de faire!
No realice esa operaci—n!
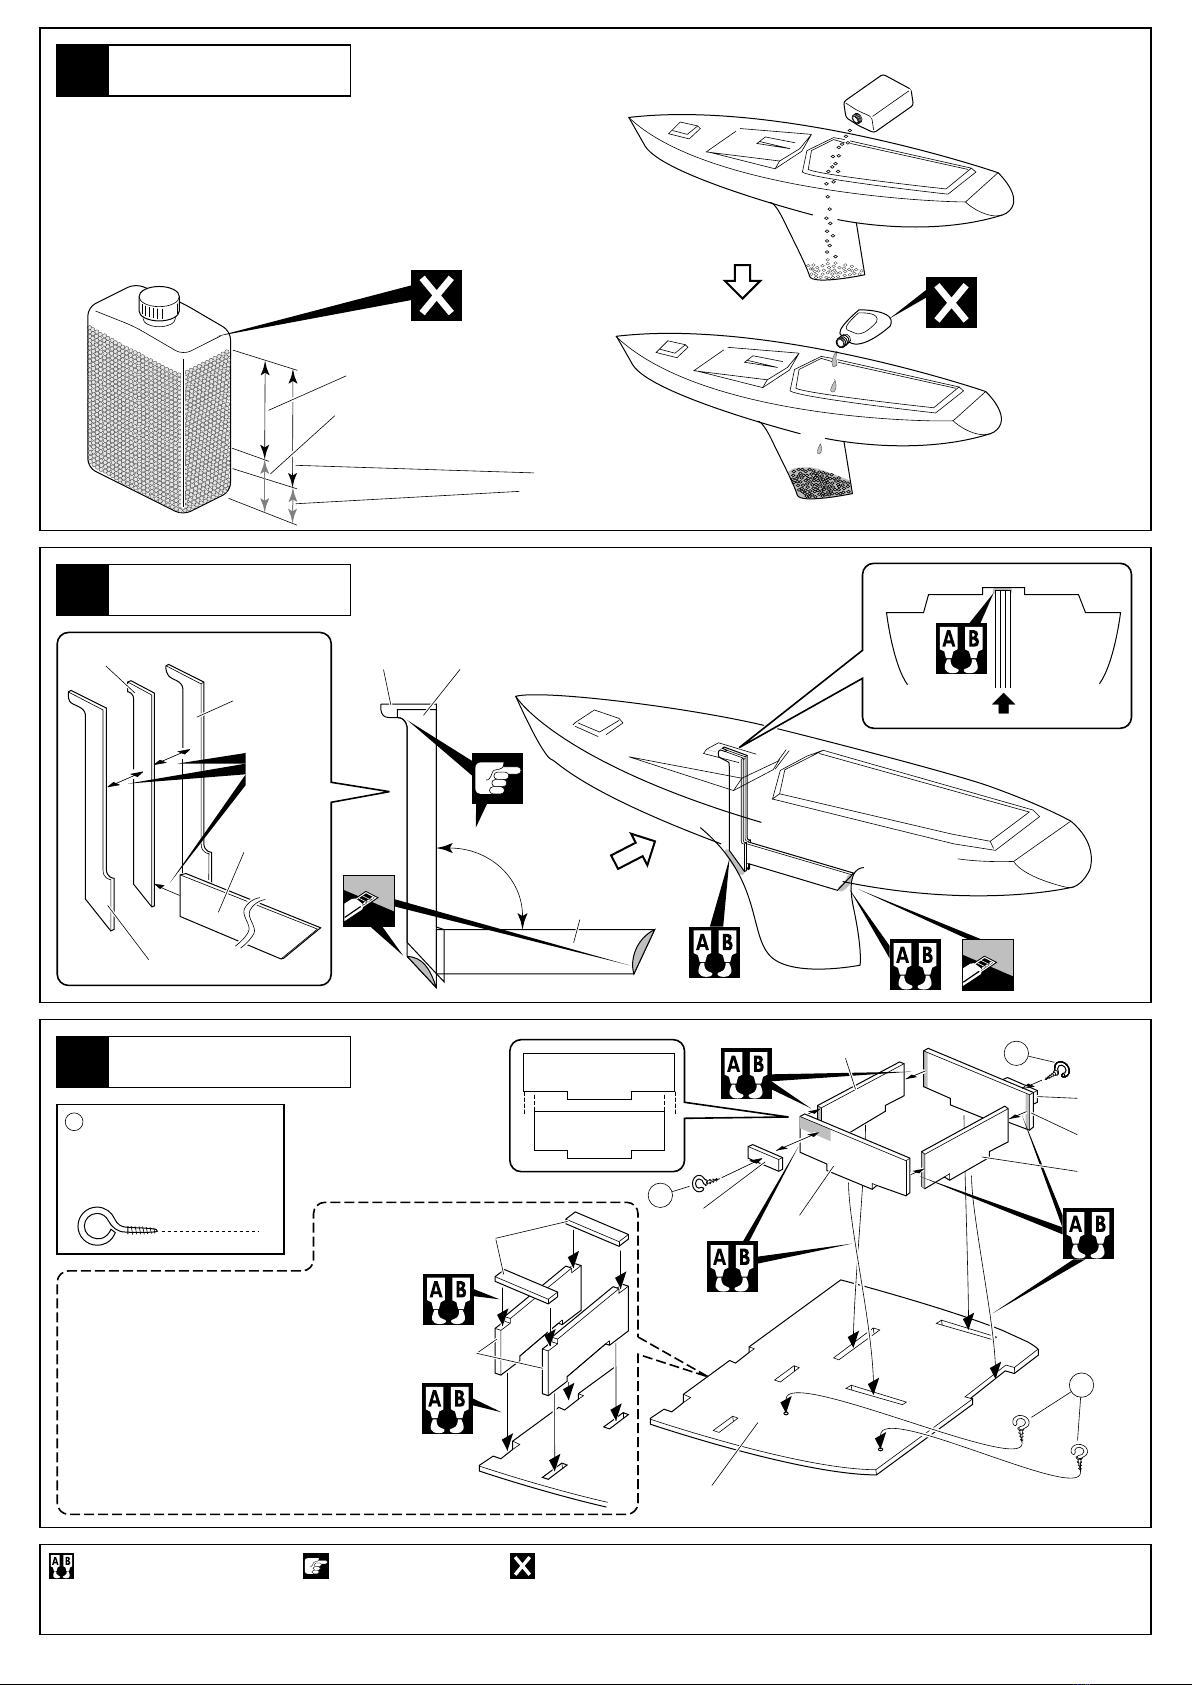
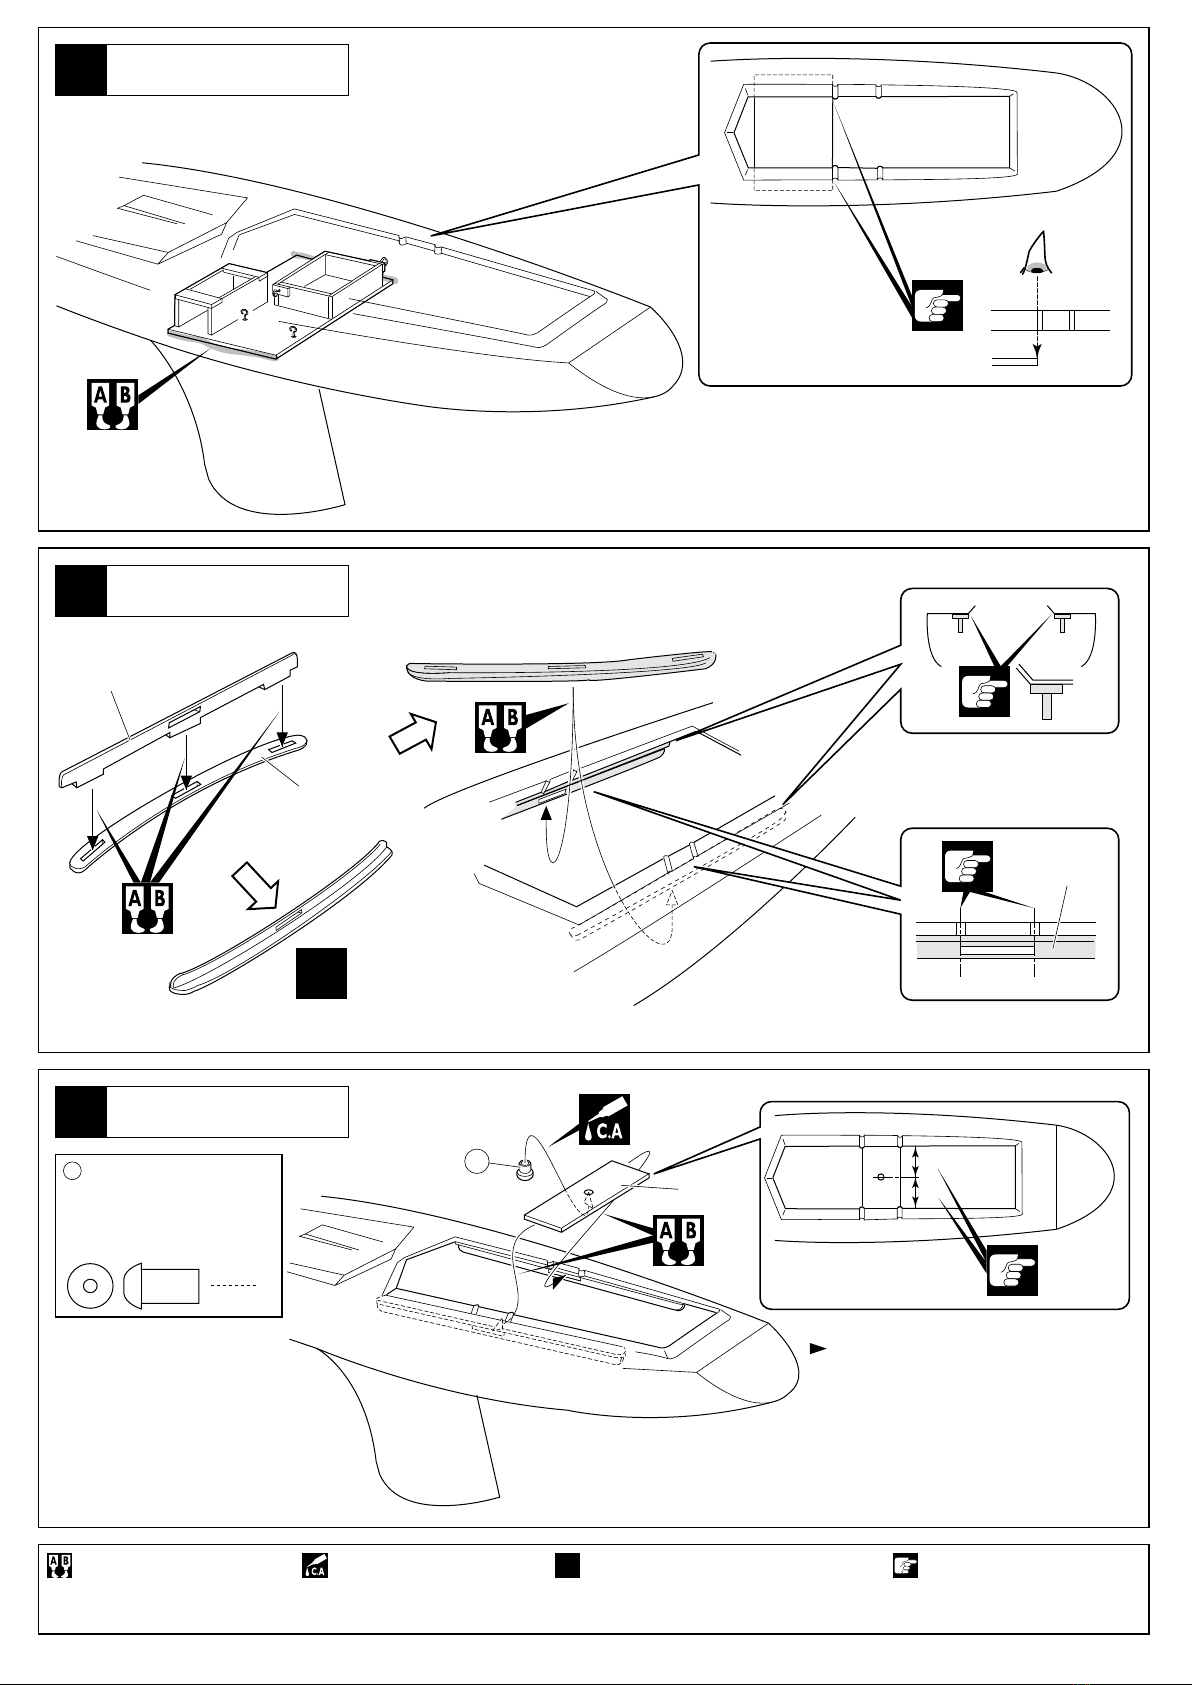
番号の順に組立てる。
Assemble in the specified order.
Bauen Sie die Stufen in der angegebenen Reihenfolge.
Assemblez dans lÕordre indiqu .
Realice el montaje en el orden se–alado.
注意して組立てる所。
Pay close attention here!
Vorsicht! Wichtiger Hinweis!
Attention! Avis important!
Preste atenci—n.
2セット組立てる(例)。
Assemble as many times as indicated (here: twice).
Arbeitsschritt sooft wie angegeben wiederholen (hier: zweimal).
Assemblez autant de fois quÕindiqu (ici: deux fois).
Repita el proceso las veces indicadas.
2mmの穴をあける(例)。
Drill holes with the specified diameter.
Lšcher bohren im angegebenen ¯.
Percez des trous dans le ¯ indiqu .
Perfore agujeros con el di‡metro se–alado.
2mm
可動するように組立てる。
Ensure smooth non-binding movement while assembling.
Das Teil mu§ sich leicht bewegen lassen.
La pi ce doit pouvoir pivoter autour de la vis.
Asegœrese que la pieza se mueve libremente.
コ−ドをむすぶ。
Make a knot.
Machen Sie einen Knoten.
Faites un nÏud.
Realizar un nudo.
30mm
をカットする。
Cut off shaded portion.
Schneiden Sie die schraffierten FlŠchen heraus.
Coupez la partie gris e.
Corte la zona oscurecida.
x2
エポキシ接着剤で接着する。
Apply epoxy glue.
Verwenden Sie 2-Komponentenkleber.
Collez avec de la colle poxy.
Aplique pegamento epoxy.
瞬間接着剤で接着する。
Apply instant glue (CA glue, super glue).
Verwenden Sie Sekundenkleber.
Collez avec de la colle cyanoacrylate.
Aplique pegamento cianoacrilato.
左右同じように組立てる。
Assemble left and right sides the same way.
Beide Seiten auf die gleiche Weise bauen.
Assemblez les deux c™t s de la m me fa on.
Realice en montaje de igual forma para ambos lados.
別購入品
Must be purchased separately!
Teil ist nicht im Bausatz enthalten.
Doit tre achet s parement.
Debe comprarse por separado.