LABORIE Solar Blue User manual


Solar BlueTM
Service & Installation Manual
MMS –Medical Measurement Systems B.V.
Colosseum 25
7521 PV Enschede
Netherlands
Phone: +31 –53 480 37 00
Fax: +31 –53 480 37 01
Internet: www.laborie.com

LABORIE International
6415 Northwest Drive, Unit 11
Mississauga, ON, Canada
L4V 1X1
Tel.: +1 905 612 1170
Fax: +1 905 612 9731
LABORIE USA
400 Avenue D, Suite 10
Williston, Vermont, 05495
Tel.: 1 800 522 6743
Fax: 1 802 878 1122
Email: usmarketing@laborie.com
LABORIE Europe
P.O. Box 580
7500 AN Enschede
The Netherlands
Tel.: +31 53 480 3700
Fax: +31 53 480 3701
Medical Measurement Systems B.V.
Colosseum 25
7521 PV Enschede
Netherlands
www.laborie.com
LABORIE Document Code: 0075-MAN-094-EN-V16.00 Solar Blue Service & Installation Manual
Date of Release: June 25, 2020
MMS is a registered trademark of Medical Measurement Systems B.V., Enschede, the Netherlands

© 2008 –2020 by MMS B.V. 3
Table of Contents
1. Introduction..............................................................................................9
1.1 Solar Blue Measurement System ....................................................9
1.2 Intended Use..................................................................................10
1.3 Safety Information..........................................................................10
1.4 Accessories for the Solar Blue.......................................................11
1.5 Troubleshooting .............................................................................11
1.6 Repairs...........................................................................................11
1.7 Maintenance ..................................................................................11
1.8 Warranty ........................................................................................12
1.9 LABORIE Software Program .........................................................13
1.10 About the Manuals.........................................................................14
1.11 Manual Conventions......................................................................15
2. Solar Blue Measurement System Setup..............................................19
2.1 Introduction ....................................................................................19
2.2 Solar Blue Measurement System Devices ....................................20
2.3 Solar Blue Table Top.....................................................................22
2.4 Solar Blue on Investigation Chair ..................................................23
2.5 Solar Blue on Pole .........................................................................24
2.6 Solar Blue on Pole with Integrated Laptop ....................................25
2.7 Safety Module................................................................................26
2.8 Pressure Transducer Holder..........................................................28
3. Computer & LABORIE Software...........................................................29
3.1 Introduction ....................................................................................29
3.2 Install the LABORIE Software........................................................29
3.3 Install the Solar Blue USB key (if applicable) ................................30
3.4 Register Bluetooth Devices............................................................31
3.5 Hardware Test ...............................................................................33
3.5.1 Introduction ......................................................................33
3.5.2 Hardware test (Bluetooth)................................................34
3.5.3 Hardware test Solar (USB)...............................................35
3.5.4 Get USB information........................................................36
3.5.5 Get system information....................................................37
3.5.6 Download software...........................................................39
3.6 Troubleshooting .............................................................................41
3.6.1 Windows does not start....................................................41
3.6.2 Software serial number....................................................41

4 © 2008 –2020 by MMS B.V.
3.6.3 Computer does not start...................................................41
3.6.4 Solar Blue module does not work ....................................42
3.6.5 No patients in database ...................................................42
3.6.6 No investigation with patient ............................................42
3.6.7 Wrong patient selected ....................................................43
3.6.8 Messages during the investigation...................................43
3.7 Maintenance ..................................................................................44
4. Solar Blue Module .................................................................................47
4.1 Introduction ....................................................................................47
4.2 Installation......................................................................................48
4.2.1 Install the Solar Blue module ...........................................48
4.2.2 Install the pump head.......................................................49
4.2.3 Connect the power adapter..............................................50
4.2.4 USB interface...................................................................51
4.2.5 Control panel....................................................................52
4.2.6 MMS-bus receptacles ......................................................53
4.2.7 Pressure connections.......................................................53
4.2.8 EMG connection...............................................................55
4.2.9 Install the pump tube........................................................56
4.3 Block Diagram................................................................................58
4.4 Hardware Test ...............................................................................59
4.4.1 Introduction ......................................................................59
4.4.2 Pump Test........................................................................60
4.4.3 Pressure test....................................................................62
4.4.4 EMG test ..........................................................................65
4.4.5 Remote control test..........................................................66
4.4.6 Hardware status...............................................................67
4.5 Troubleshooting .............................................................................68
4.5.1 Registering Bluetooth Solar Blue is not possible .............68
4.5.2 Solar Blue module not displayed in HW test program .....69
4.5.3 H2O pump icon is not displayed during investigation.......69
4.5.4 H2O pump is rattling.........................................................69
4.5.5 Pressure channel is not displayed ...................................70
4.5.6 Pressure measurement is not accurate ...........................70
4.5.7 One pressure channel measures incorrectly ...................70
4.5.8 Question marks on pressure channel ..............................71
4.5.9 EMG signal is not available or very low ...........................71
4.5.10 EMG signal is too low or too high.....................................71
4.6 Cleaning and Maintenance............................................................72
© 2008 –2020 by MMS B.V. 5
5. Remote Control......................................................................................75
5.1 Introduction ....................................................................................75
5.2 Install the Battery...........................................................................76
5.3 Hardware Test ...............................................................................78
5.4 Troubleshooting .............................................................................79
5.5 Maintenance ..................................................................................79
5.6 Virtual Remote Control...................................................................79
6. Bluetooth Flowmeter (Mk III).................................................................81
6.1 Introduction ....................................................................................81
6.2 Installation......................................................................................82
6.2.1 Install the Bluetooth flowmeter.........................................82
6.2.2 Status LED.......................................................................85
6.2.3 Protocol settings...............................................................86
6.2.4 Test the Bluetooth flowmeter ...........................................87
6.3 Block Diagram................................................................................88
6.4 Hardware Test ...............................................................................89
6.5 Troubleshooting .............................................................................91
6.5.1 Registering Bluetooth Flowmeter is not available............91
6.5.2 Flowmeter not displayed in HW test program..................92
6.5.3 Flowsensor does not function (respond)..........................92
6.5.4 Generated values are too low..........................................93
6.5.5 Values are not within limits...............................................93
6.6 Cleaning and Maintenance............................................................94
7. Bluetooth Puller (Mk III).........................................................................95
7.1 Introduction ....................................................................................95
7.2 Installation......................................................................................96
7.2.1 Install the Bluetooth puller................................................96
7.2.2 Control panel....................................................................98
7.2.3 Install the batteries.........................................................100
7.2.4 Connect the power adapter............................................101
7.2.5 Protocol settings.............................................................102
7.2.6 Test the Bluetooth puller................................................103
7.3 Block Diagram..............................................................................105
7.4 Hardware Test .............................................................................107
7.5 Trouble shooting..........................................................................109
7.5.1 Registering Bluetooth puller is not possible...................109
7.5.2 Bluetooth puller not displayed in HW test program........109
7.5.3 The puller does not pull..................................................109

6 © 2008 –2020 by MMS B.V.
7.5.4 The slider slips and makes some noise.........................109
7.5.5 The slider makes a rattling/ticking sound.......................110
7.5.6 The Bluetooth puller is not connected............................110
7.5.7 No LED is on..................................................................110
7.5.8 Battery LED is blinking...................................................111
7.5.9 The Bluetooth puller lost connection..............................111
7.5.10 End of slider detected ....................................................111
7.5.11 The puller battery is almost depleted.............................111
7.5.12 The puller battery is depleted.........................................112
7.5.13 No Bluetooth connection and the Bluetooth LED is off..113
7.6 Cleaning and Maintenance..........................................................113
8. Luna Wireless Module.........................................................................115
8.1 Introduction ..................................................................................115
8.2 Safety Information........................................................................115
8.3 Installation....................................................................................117
8.3.1 Install the Luna wireless module....................................117
8.3.2 Install the battery............................................................118
8.3.3 Set the investigation protocol.........................................119
8.3.4 Connect the catheter......................................................119
8.3.5 Connect EMG.................................................................120
8.4 Block Diagram..............................................................................121
8.5 Diagnostic Program .....................................................................121
8.6 Troubleshooting ...........................................................................124
9. Technical Specifications.....................................................................125
9.1 Solar Blue module........................................................................125
9.2 Solar Pole ....................................................................................128
9.3 Safety Module..............................................................................130
9.4 Flowmeter (Mk III)........................................................................130
9.5 Bluetooth Puller (Mk III) ...............................................................132
9.6 Remote Control (RC-1200)..........................................................133
9.7 Luna Wireless Module .................................................................134
9.8 Computer Requirements..............................................................135
Appendix A Safety Information..............................................................139
Appendix B Explanation of Symbols.....................................................157
Appendix C Explanation of Terms.........................................................163

© 2008 –2020 by MMS B.V. 7
Appendix D Electro Magnetic Compatibility.........................................165
Appendix E Solar Blue Safety Barriers.................................................173
Appendix F Software Messages............................................................175
Warranty for Solar Blue System.................................................................185
Index .............................................................................................................189

8 © 2008 –2020 by MMS B.V.

© 2008 –2020 by MMS B.V. 9
1. Introduction
1.1 Solar Blue Measurement System
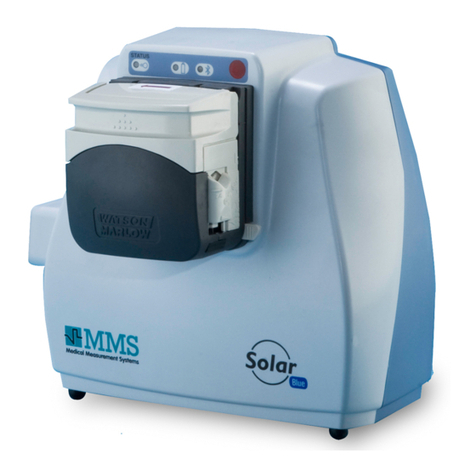
The Solar BlueTM measurement system is developed by Medical Measurement
Systems (MMS) to perform urodynamic investigations in hospitals and private
clinics.
Figure 1.1 Solar Blue
The models for the Solar Blue measurement system are the following:
Solar Blue, table top (LABORIE systems catalogue code U3-1)
Solar Blue, Laptop integrated (LABORIE systems catalogue code U3-3)
The Solar Blue measurement system is a prescription device to be used only
by physicians or individuals who have been trained and authorized by a
physician or by a medical institution, under the supervision of a physician. The
Solar Blue measurement system must be purchased under the supervision of
a physician.
CAUTION
For US only: Federal law restricts this device to sale by
or on the order of a physician.

10 © 2008 –2020 by MMS B.V. Chapter 1
The Solar Blue measurement system is used in combination with a computer
and the LABORIE software program. To run the program, you will need
Windows 7 Professional (32 or 64 bit) or Windows 8 (8.1) Professional (32 or
64 bit) or Windows 10 Professional Edition (64 bit).
1
Hardware and software changes
After receiving new Solar Blue manuals, always keep the old manuals as
supplied with your system. Descriptions and images may be different because
of Solar Blue hardware and software changes.
1.2 Intended Use
The Solar Blue measurement system is intended for urodynamic testing and
anorectal manometry investigations. The Solar Blue system is intended to
assist physicians in executing specific urodynamic and anorectal studies,
analyzing collected data, preparing written reports and archiving patient and
testing information. Designated catheters and accessories are required for
measurement in each specific area.
General indications for use include use for patients with lower urinary tract
voiding or incontinence problems and for patients with anorectal dysfunction.
More specifically for incontinence patients, patients with bladder outlet
obstructions, patients with neurogenic bladder dysfunction and children with
complex voiding / incontinence problems.
Contraindication: urodynamics should not be performed in the setting of a
symptomatic urinary tract infection.
1.3 Safety Information
The Solar Blue Service & Installation Manual is intended for all users who
install, test and maintain the Solar Blue hardware and software. Before
working with the Solar Blue measurement system and its manuals, please take
notice of the safety information as described in Appendix A.
1
Windows 7, Windows 8 and Windows 10 are trademarks of Microsoft Corporation, USA. The
Microsoft Office User Interface is subject to protection under U.S. and international intellectual
property laws and is used by Medical Measurement Systems under license from Microsoft. The
LABORIE Software includes the Fatcow icon pack from www.fatcow.com/free-icons.

© 2008 –2020 by MMS B.V. 11
1.4 Accessories for the Solar Blue
Many different accessories can be used with the Solar Blue measurement
system. For detailed information, LABORIE can supply you with the document
“Declaration of compatibility for MMS accessories” (document code:
0060-DEC-007). Contact your LABORIE representative for information.
1.5 Troubleshooting
Although all Solar Blue measurement systems are tested thoroughly before
they are delivered, there is always a chance that one of the parts becomes
defective. The information in this manual will help you to solve hardware and
software problems with your measurement system. If you suspect that the
problem is caused by a module, you can try to solve it by consulting the
chapter describing the module. If your problem is not described or if you are
not able to solve the problem with the descriptions, please contact your
LABORIE representative.
1.6 Repairs
All repairs, which are not performed by LABORIE are for the responsibility of
the hospital. LABORIE will not give any guarantee or take any responsibility for
any part which has been opened, adjusted or replaced by hospital personnel.
The Solar Blue measurement system may only be opened for any adjustment,
replacement, maintenance or repair by LABORIE qualified personnel.
Before sending LABORIE equipment for repair please contact your LABORIE
representative. Note that all equipment needs to be properly cleaned before
sending for repair.
1.7 Maintenance
LABORIE advises to perform preventive maintenance at least once a year.
With preventive maintenance, a regular check of the complete Solar Blue
measurement system is meant. This can be done by your service department
or you can ask your LABORIE representative. When malfunctions are found

12 © 2008 –2020 by MMS B.V. Chapter 1
during the hardware test procedures, you can find additional information in the
trouble shooting chapters in this manual.
LABORIE advises that cleaning of the whole system is performed on a regular
base, for instance every month. Some parts need more frequent cleaning to
obtain a maximum hygienic system. In this manual, you will find detailed
cleaning instructions.
The Solar Blue system, its components and accessories shall be disposed at
the end of their expected service life in a manner that meets the environmental
regulations appropriate to the local authorities having jurisdiction.
1.8 Warranty
At the end of this manual you will find warranty information. Additional
warranty information is described below.
Flowsensor
In case of a flowsensor malfunction, the customer must ship the flowsensor for
repair in the special flowsensor box as supplied with your system.
Figure 1.2 Flowsensor box
Warranty stops when the flowsensor is transported in a different box. When
your flowsensor box is damaged, please contact your LABORIE representative
to send you a new box.
Solar Blue module
Please make sure that when the Solar Blue module needs to be shipped:
It is sufficiently protected during transport, preferably in the original Solar
Blue sandwich-foil box.
LABORIE will not be liable for any damage during this transport.

© 2008 –2020 by MMS B.V. 13
1.9 LABORIE Software Program
The LABORIE software program is provided on USB or DVD and should be
installed on the computer to make the complete system function. For an
overview of the software messages which require an action to resolve, see
Appendix F.
The program contains four parts:
Database program. When you start the program, you will enter the
database in which all available patient information, investigations, reports
and memos are stored. Selection of a patient will give easy access to all
information for that patient.
Measurement program. This program is started from the database. The
software guides the user through the investigation procedure and saves the
measured data under the relevant patient name.
Analysis program. This program is started from the database. Graphs and
parameters can be displayed and printed as investigation reports.
Hardware test (diagnostic) program. This program is started from the
database to maintain the Solar Blue measurement system.

14 © 2008 –2020 by MMS B.V. Chapter 1
Hardware test (diagnostics) program
Measurement program
LABORIE database program
Analysis program
Figure 1.3 LABORIE software program
1.10 About the Manuals
The Solar Blue Service & Installation Manual is intended for all technical users
who install, test and maintain the Solar Blue hardware and software.
This manual provides you with detailed information about:
the Solar Blue measurement system setup,
the installation of software and hardware,
trouble shooting,
the hardware test (diagnostic) program,
preventive maintenance and cleaning instructions,
the technical specifications of the Solar Blue measurement system.
Installation of the LABORIE software with Windows is described in a separate
document (Document Code: 0075-MAN-092-EN). The installation of the Solar
Blue network/HIS option can be found in the Network/HIS/MO manual
(Document Code: 0075-MAN-085-EN).

© 2008 –2020 by MMS B.V. 15
Details about investigations and the software program can be found in the
Solar Blue User’s Manual (Document Code: 0075-MAN-093-EN).
The assembly instructions on the Solar pole with integrated laptop can also be
found in a separate document (document code: 0075-MAN-099).
1.11 Manual Conventions
In this manual, we use some conventions for readability of the manual. This
paragraph gives a description of the most important ones:
Use of bullets
Numbering
Headings
The use of the words Click, Press and Choose
Warnings, precautions and notes
Use of bullets
Bullets are used in a list.
: A round bullet is used for an item of a list.
: A square bullet is used for a step of a procedure.
: This bullet is used for a step in the trouble shooting procedure.
Numbering
You will find the numbering of the pages in the footer: on the odd pages on the
right side, on the even pages on the left side. The pages are numbered
continuously.
The numbering of the figures match the chapter number. Figure 3.1 is the first
figure of chapter 3. Figure 3.2 is the second figure of this chapter.
Headings
This manual contains three levels of headings: the headings of the chapters
(numbered 1, 2, etc.), the headings of the paragraphs (numbered 1.1, 1.2 etc.)
and the headings of the subparagraphs (numbered 1.1.1, 1.1.2 etc.).
The headings within a subparagraph are just bold without numbering.

16 © 2008 –2020 by MMS B.V. Chapter 1
Click, choose and press
In this manual, we distinguish the use of the software (clicking buttons and
choosing a menu item) and the use of the keys on your keyboard.
When you have to click a button you will see the button on the left and the
screen that appears on the right (e.g. the Help button on the previous page).
The name of the button is printed bold: e.g. click the Print report button.
Figure 1.4 Screen
Choose Report > Print report means that you must click Report on the
menu-bar and choose Print report.
Press a button means pressing the button on the remote control, e.g. the Start
investigation button .
Press a key means pressing the key on the keyboard, e.g. the Shift function
key.
Warnings, precautions and notes
In this manual, we use the following symbols to draw your attention to
important information.
WARNING
A warning is a statement that alerts the user to the
possibility of injury, death or other serious adverse
reactions associated with the use or misuse of the device.
Screen
Button

© 2008 –2020 by MMS B.V. 17
CAUTION
A caution is a statement that alerts the user to the
possibility of a problem with the device associated with
its use or misuse. Such malfunctions include device
malfunction, device failure, damage to the device or
damage to other property.
NOTE
The note sign appears when it is important to read the
information.
Feedback on the manual
LABORIE welcomes your opinion and ideas to improve our manuals. Please
send your questions and remarks to our Training & Education department:

18 © 2008 –2020 by MMS B.V. Chapter 1

© 2008 –2020 by MMS B.V. 19
2. Solar Blue Measurement System Setup
2.1 Introduction
The Solar Blue measurement system has been designed to carry out routine
urodynamic investigations quickly, easily and conveniently.
With the wireless set up, the Solar Blue module can be mounted on the Solar
pole (Ø38mm) (wireless pole setup) or put on a table (wireless table-top
setup). For both situations, the laptop/PC and printer can be put on a table.
The Solar Blue module communicates per wireless Bluetooth connection with
the computer (laptop or PC with BT dongle).
The Solar Blue module is powered by a standard delivered power supply. No
safety module is needed if the printer and computer are positioned outside the
patient vicinity. Take note of the system setup safety regulations (f.e. IEC
60601-1).
In this chapter, you will find an overview of the four Solar Blue measurement
system setups and some installation instructions:
Solar Blue table-top
Solar Blue investigation chair
Solar Blue on Solar pole (Ø38mm)
Solar Blue on Solar pole (Ø38mm) with integrated laptop
The assembly instructions for the Solar Blue module on the Solar pole
(Ø38mm) can be found in a separate document (Document Code: 0075-MAN-
099). Use this instruction also when the Solar Blue on Solar pole (Ø38mm)
setup is used (wireless pole setup).
Table of contents
Other LABORIE Medical Equipment manuals

LABORIE
LABORIE NXT Pro User manual

LABORIE
LABORIE Urocap III User manual

LABORIE
LABORIE Nexam Pro WPU-L4 User manual

LABORIE
LABORIE UROCAP IV User manual

LABORIE
LABORIE NXT Series User manual

LABORIE
LABORIE MMS Solar Blue User manual

LABORIE
LABORIE ROM Plus User manual

LABORIE
LABORIE NXT Go User manual

LABORIE
LABORIE NXT Go User manual

LABORIE
LABORIE NXT Evo User manual
Popular Medical Equipment manuals by other brands

Atos Medical
Atos Medical CareTips Provox LaryButton How to use

Merit Medical
Merit Medical Q50X Instructions for use

NRS Healthcare
NRS Healthcare F20421 User instructions

Miller
Miller Weld-Mask 2 manual

Fluke Biomedical
Fluke Biomedical ProSim 8 Series user manual

Stryker
Stryker M-1 Series Operation manual