3
Door clearance:
25-35+side plate
ASSEMBLY (This manual explains assembly of folding door system.)
PREPARATION AND INSTALLATION
1
HANGING THE DOOR
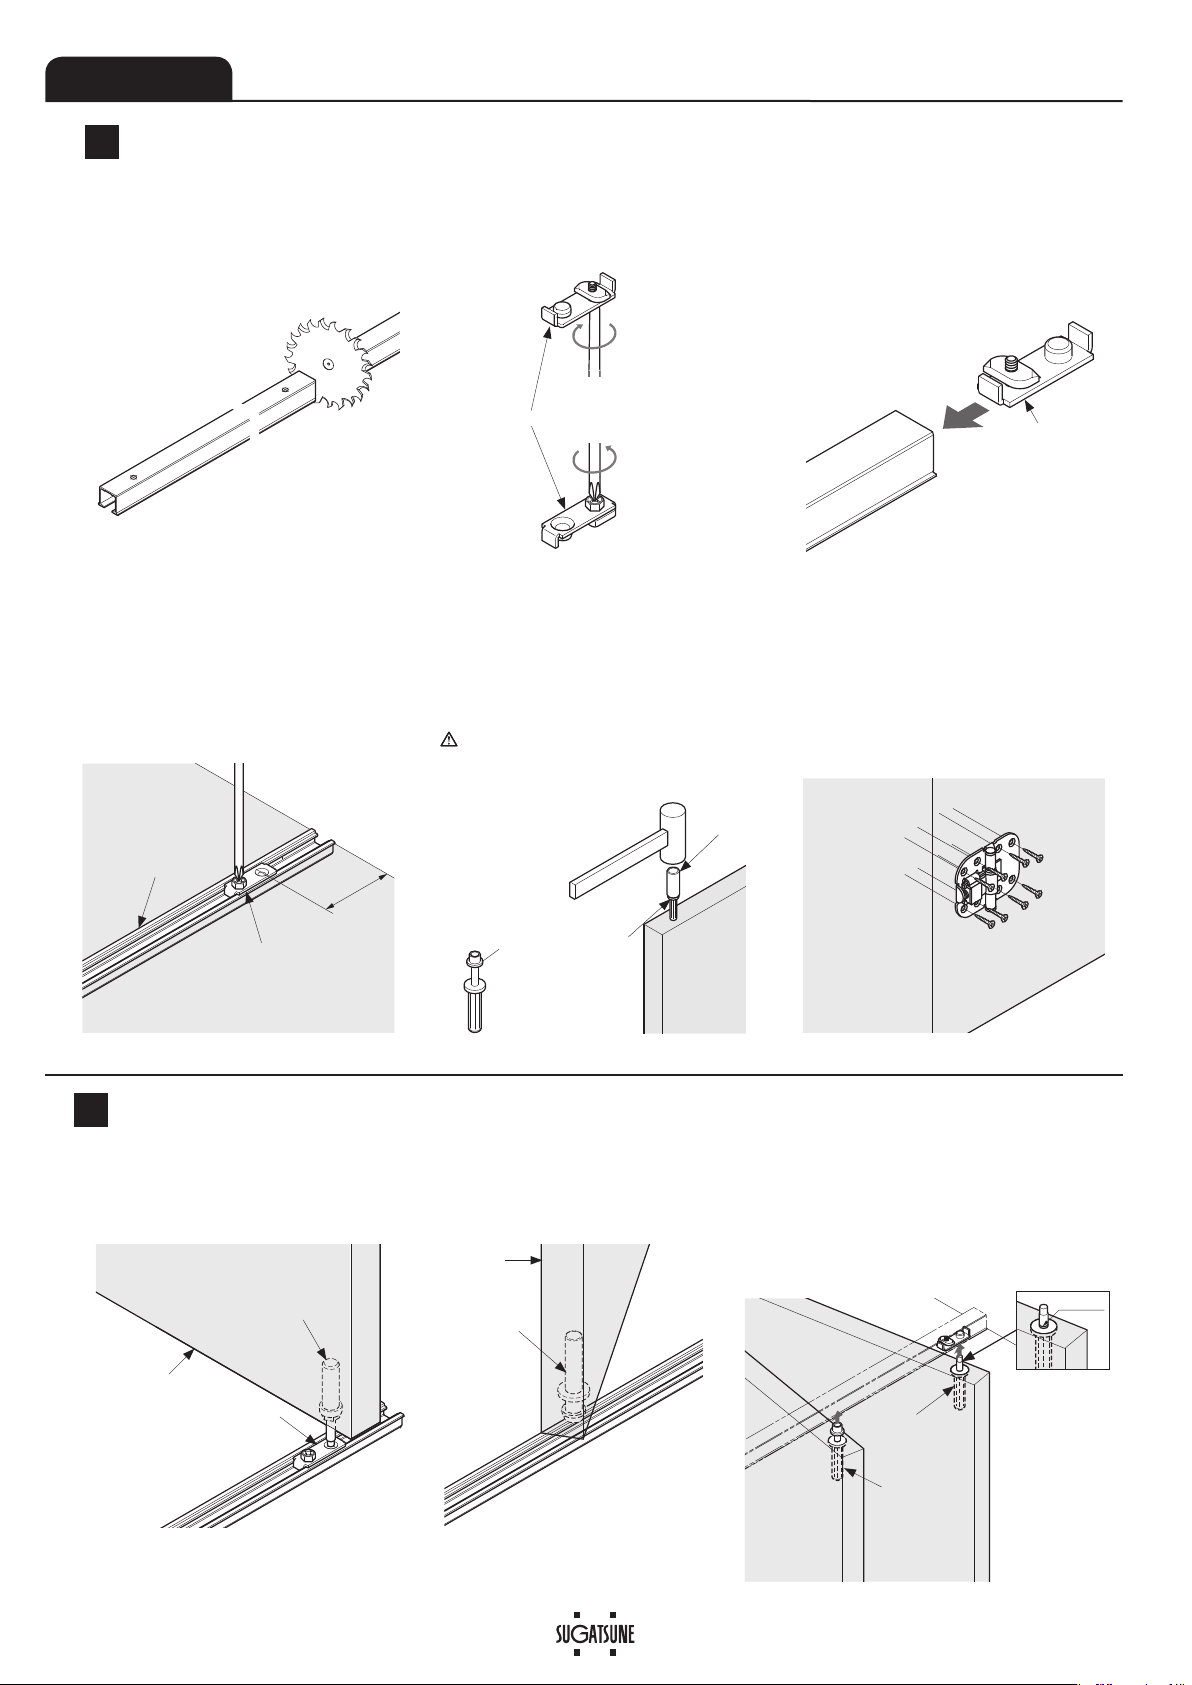
2
1. Cutting the rail
Cut the rail applying a reinforcer to prevent
defotmation of cut section.
2. Preparation before mounting parts
Loosen fix screws on upper and lower
Pivot brackets.
3. Assembly of parts
Taking care for parts direction, insert Pivot
bracket(upper). Temporarily tighten the
screw, mount the rail without dropping
down mounted parts.
Pivot bracket
(Upper)
5.
Striking in upper pivot and bottom pin and guide pin
Using a Pivot insert Jig, strike in the upper pivot
to upper part of Door B. Strike in the Bottom pin
to lower part of Door B.
Strike-in guide pin to the holes of upper section
and lower section of the Door A.
Carefully install to prevent breakage of plastic
part.
4. Installing Pivot bracket(bottom)
Taking care for installing direction, insert Pivot
bracket. Mount lower guide rail. Fix Pivot bracket
to correct position.
〔Door B〕
Upper pivot
Bottom pin
〔Door A〕
Guide pin
Pivot insert Jig
6. Installing center hinge
Aligning two doors, fix center hinge with attached
screws. Center of the hinge should be positioned at
approximately 150mm from top of door as well as
bottom of door. Please note that both hinges face
same direction.
Remained hinge should be installed at middle of
upper and lower hinges.
Door fixing
side
Pivot bracket, upper and lower
Guide rail
Pivot bracket
(bottom)
Guide pin
Roller unit(White)
1. Hanging door (Lower section of doors)
Place the end of lower pivot shaft to the hole of Pivot bracket (Door B), as shown. And, insert top
of guide pin (Door A) to the guide rail groove.
Pivot bracket
(bottom)
Door B
Door A
Bottom pin
2. Hanging door (door top)
Pressing the pin of the Upper pivot on Door B insert it in the
hole of Pivot bracket. Fit the guide pin on Door A into the
rail.
Check if the red line on the pivot is hidden or not.
If it is visible, rotate the pivot on the bottom pin to raise the
door.
Guide pin
Guide pin
Upper pivot
Redline